

As published in the IPCI Book.
The following article describes a procedure we use in our shop to repair a broken tongue made of ebony. When this procedure is successfully completed, the grafted tongue will be as strong as the original and the repair will be virtually invisible. This procedure is not appropriate for tongues made of ivory or tortoiseshell. The first step is to make a cutter that is the same size as the inside dimensions of the ferrule. This cutter is used to prepare the frog to inlay the butt end of the graft. Since the cutter must match the individual ferrule, a new cutter is required for each repair. In the case illustrated here, the ferrule has a uniform arc and a constant radius, which is rare. For this ferrule a one-cut template made with the cutter is used to fit the new tongue. A more elaborate template is needed to fit a ferrule with an irregular curve. Replacing a broken tongue is an exacting and tricky procedure that should be carried out only by qualified restorers.
MATERIALS AND TOOLS
- vernier calipers
- non-stretching packing tape
- a knife
- assorted files
- an O-1 steel drill rod (see “Note 1.” at the end of the article)
- a hacksaw
- a lathe with a milling attachment
- a radius cutter
- a permanent marker
- a half-diameter 60-degree dovetail cutter
- a blow torch
- oil to quench the cutter (see “Note 2.”)
- an 8000-grit Japanese waterstone
- a milling machine with a milling vise
- counterforms for the frog flanks
- a dial indicator
- a straightedge
- a piece of ebony for the template, approximately 4 x 15 x 50 mm
- a plane
- a piece of ebony for the tongue (see “Note 3.”)
- epoxy resin glue
- a rubber band
- a clamp
PRELIMINARY STEPS
Take and record a complete set of measurements, carefully noting:
- the width of the rails right behind the ferrule
- the height, weigh, and length of the frog
- the inside width and height of the ferrule
- the thickness of the silver
Photograph the original frog, paying particular attention to details such as missing chips, distortion, cracks, and wear

Cover the entire frog with a layer of packing tape to protect the fragile edges of the repair area and to prevent damage from excess glue. Carefully trim the tape with knife so it will not get in the way during the repair (see “Note 4.”). Remove any remnants of the old tongue with a file.
MAKING THE CUTTER
Prepare a blank by cutting the O-1 dril rod to length (approximately 5.5 to 6.5 cm) with the hacksaw. Turn one end of the blank to a diameter that will fit the collet of the milling machine. Reverse the blank in the chuck so that the jaws grip the newly machined shank.
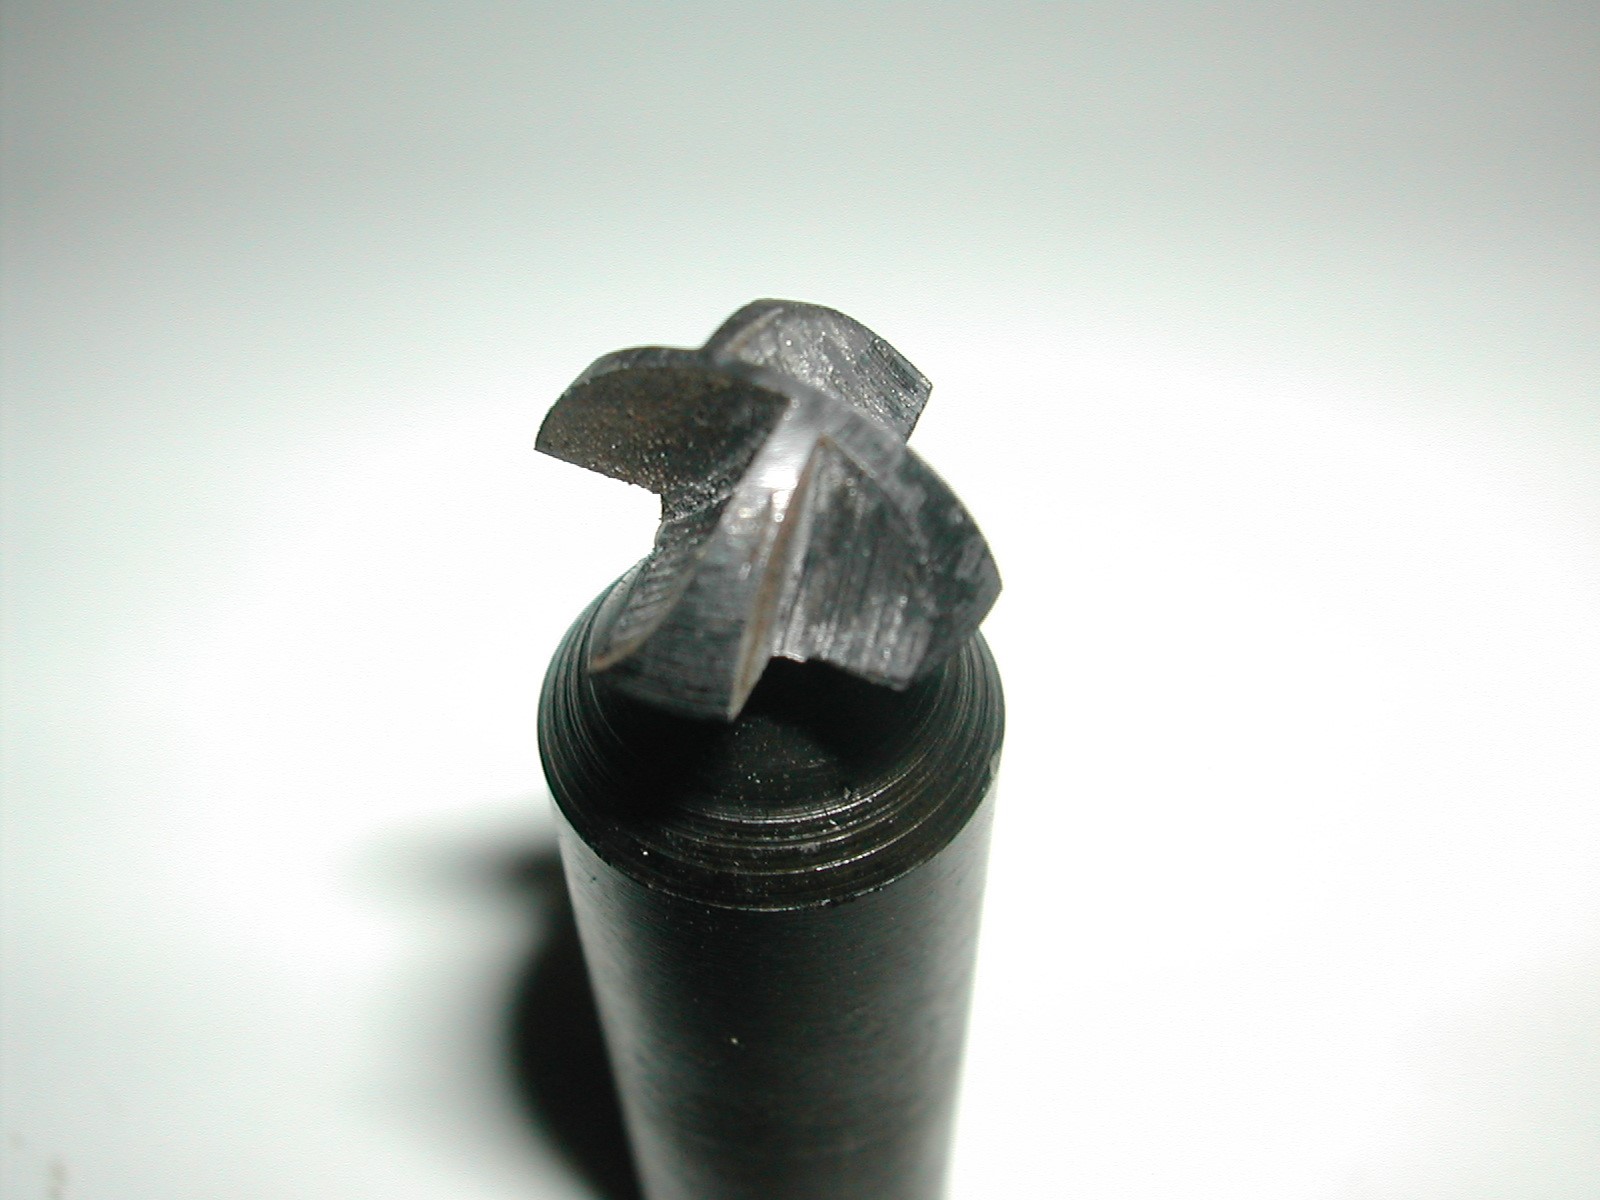
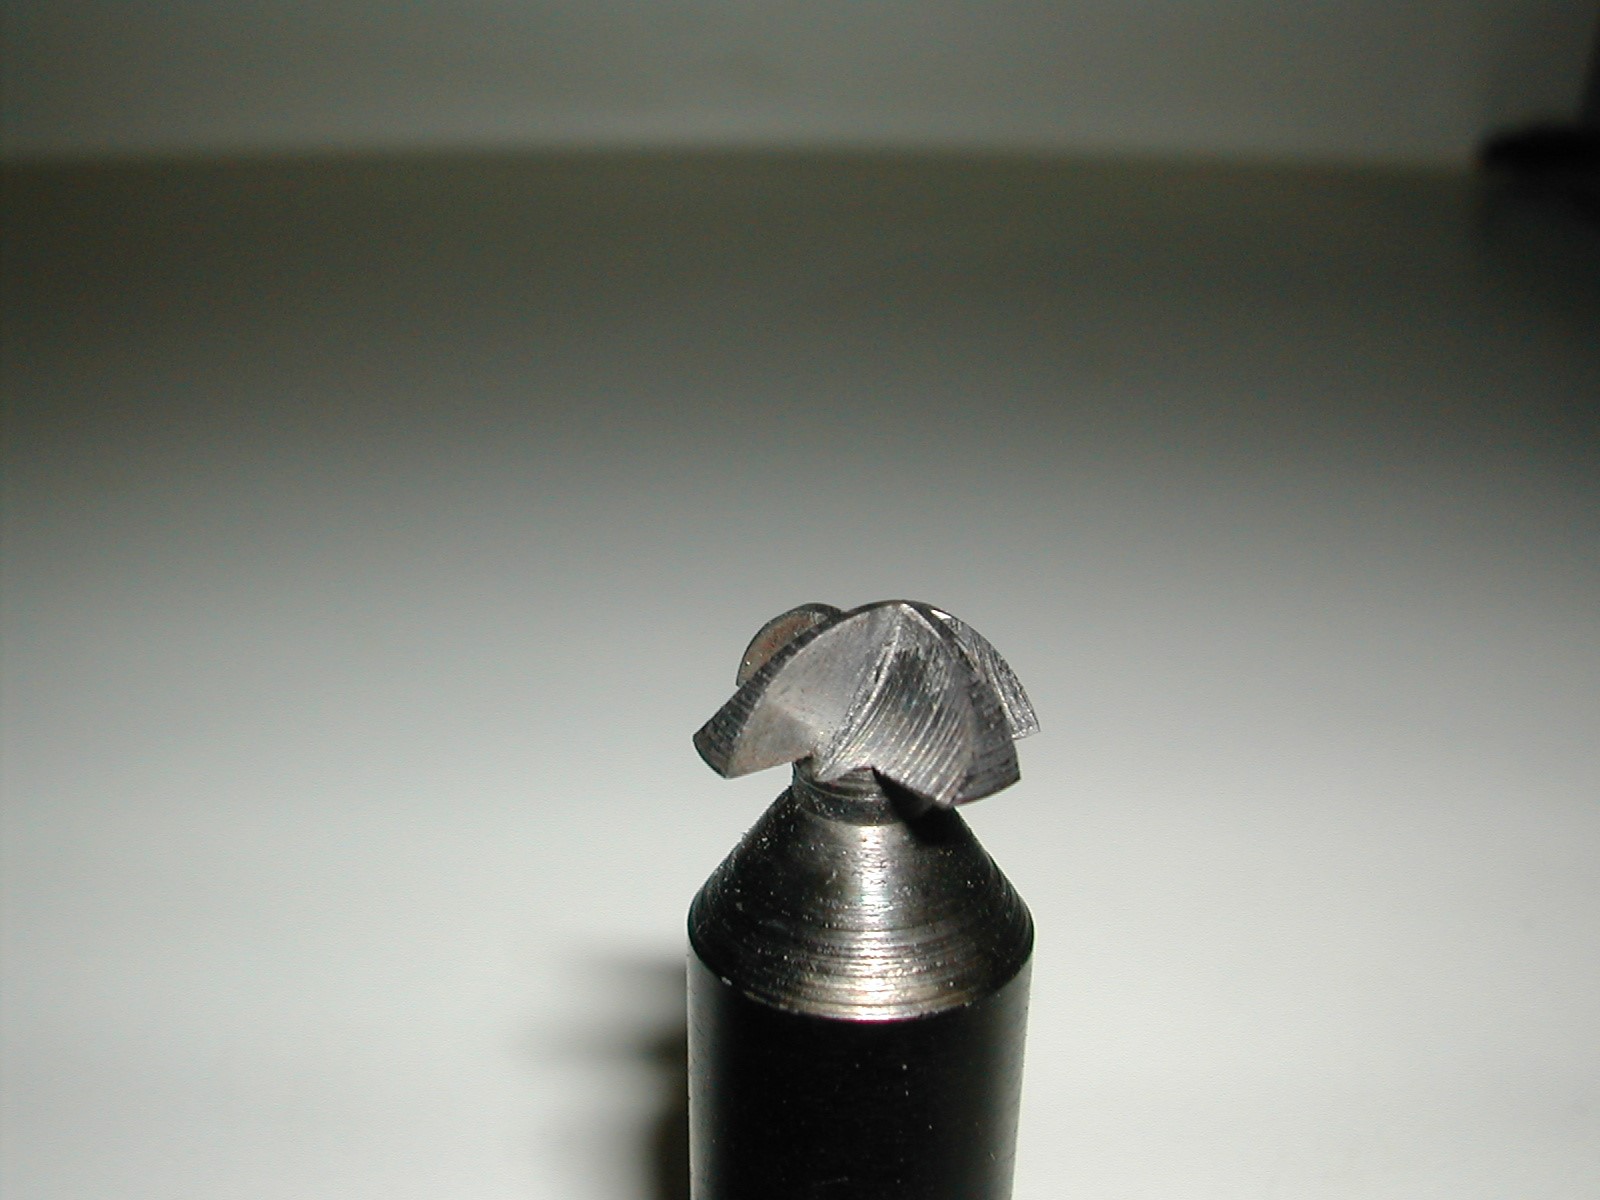
Shape the neck and the head of the cutter. The neck should be smaller than the pearl-slide channel. The head must match the inside width and height of the ferrule; add 0.1 mm to allow some leeway to fit the tongue and ferrule together
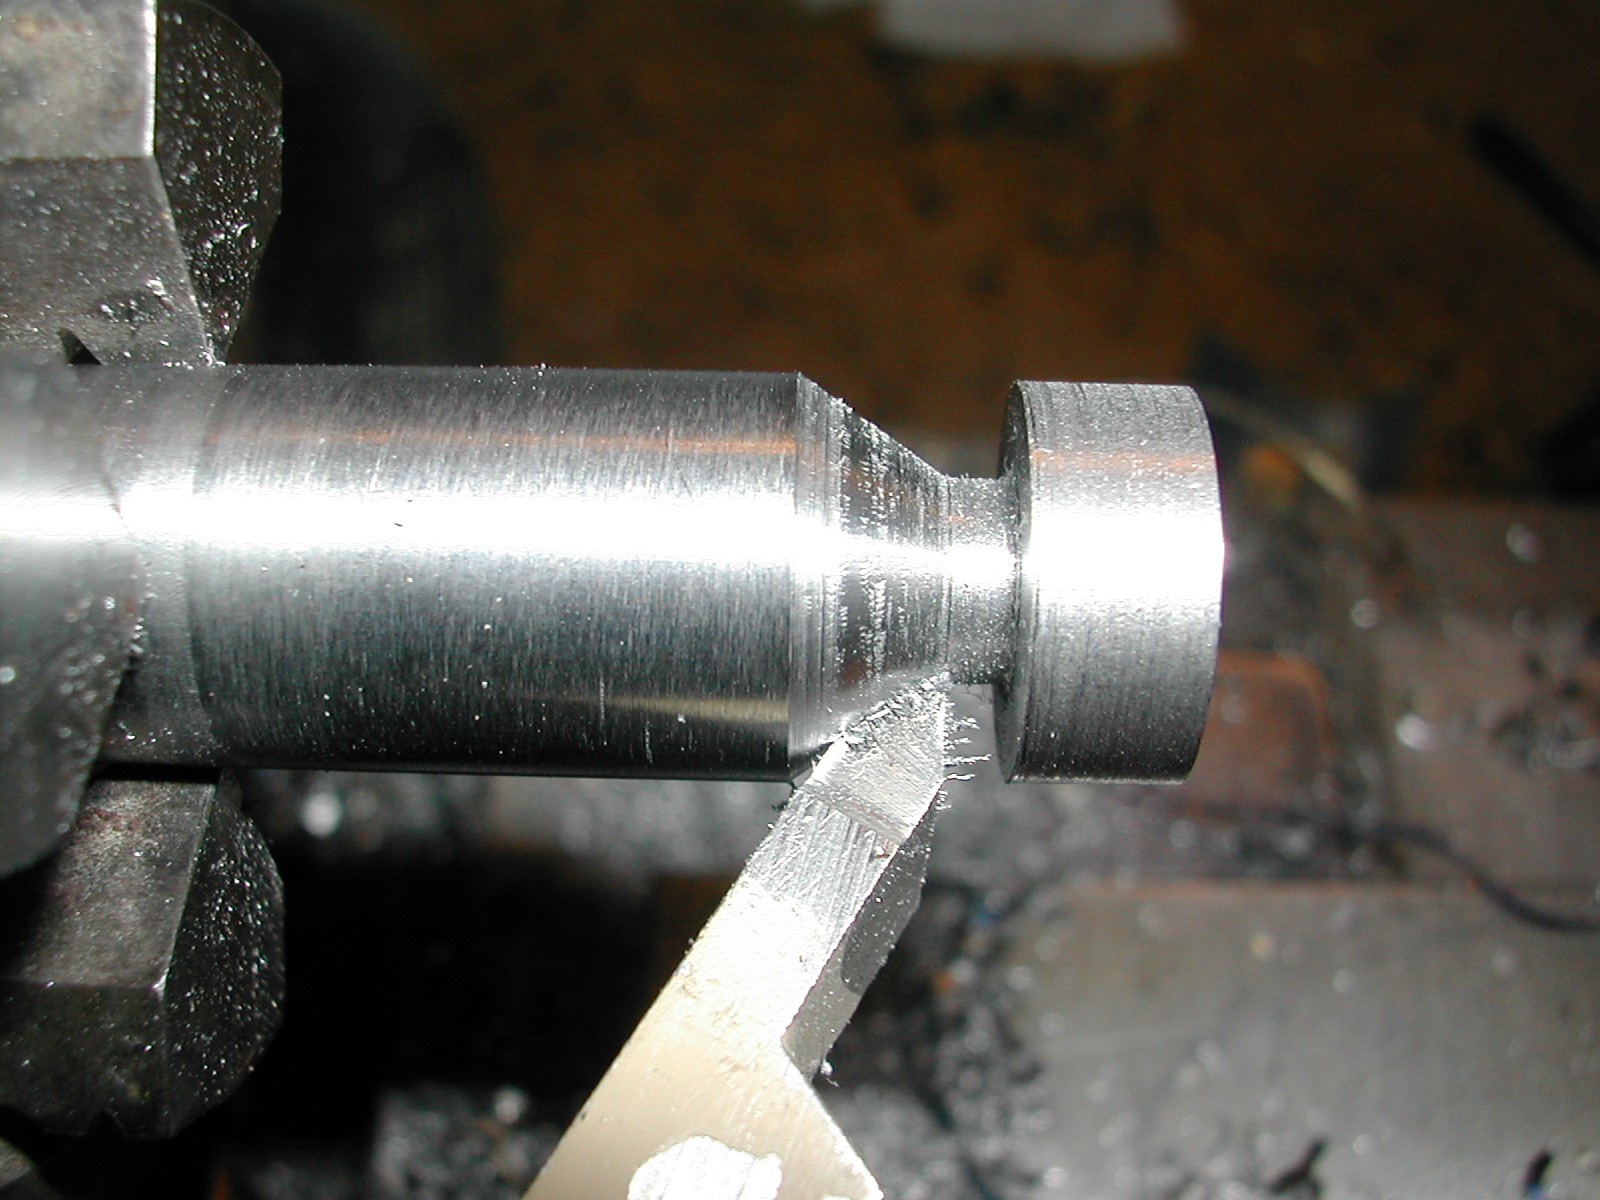
If the ferrule has a standard-size radius the head can be finished with the radius cutter. For a ferrule that does not have a uniform radius, mark the inside height and width of the ferrule on the blank with a permanent marker and finish the shaping with files; take care not to remove the last traces of the marker. Use the ferrule as a guide by holding it under the blank and comparing it to the work in progress.
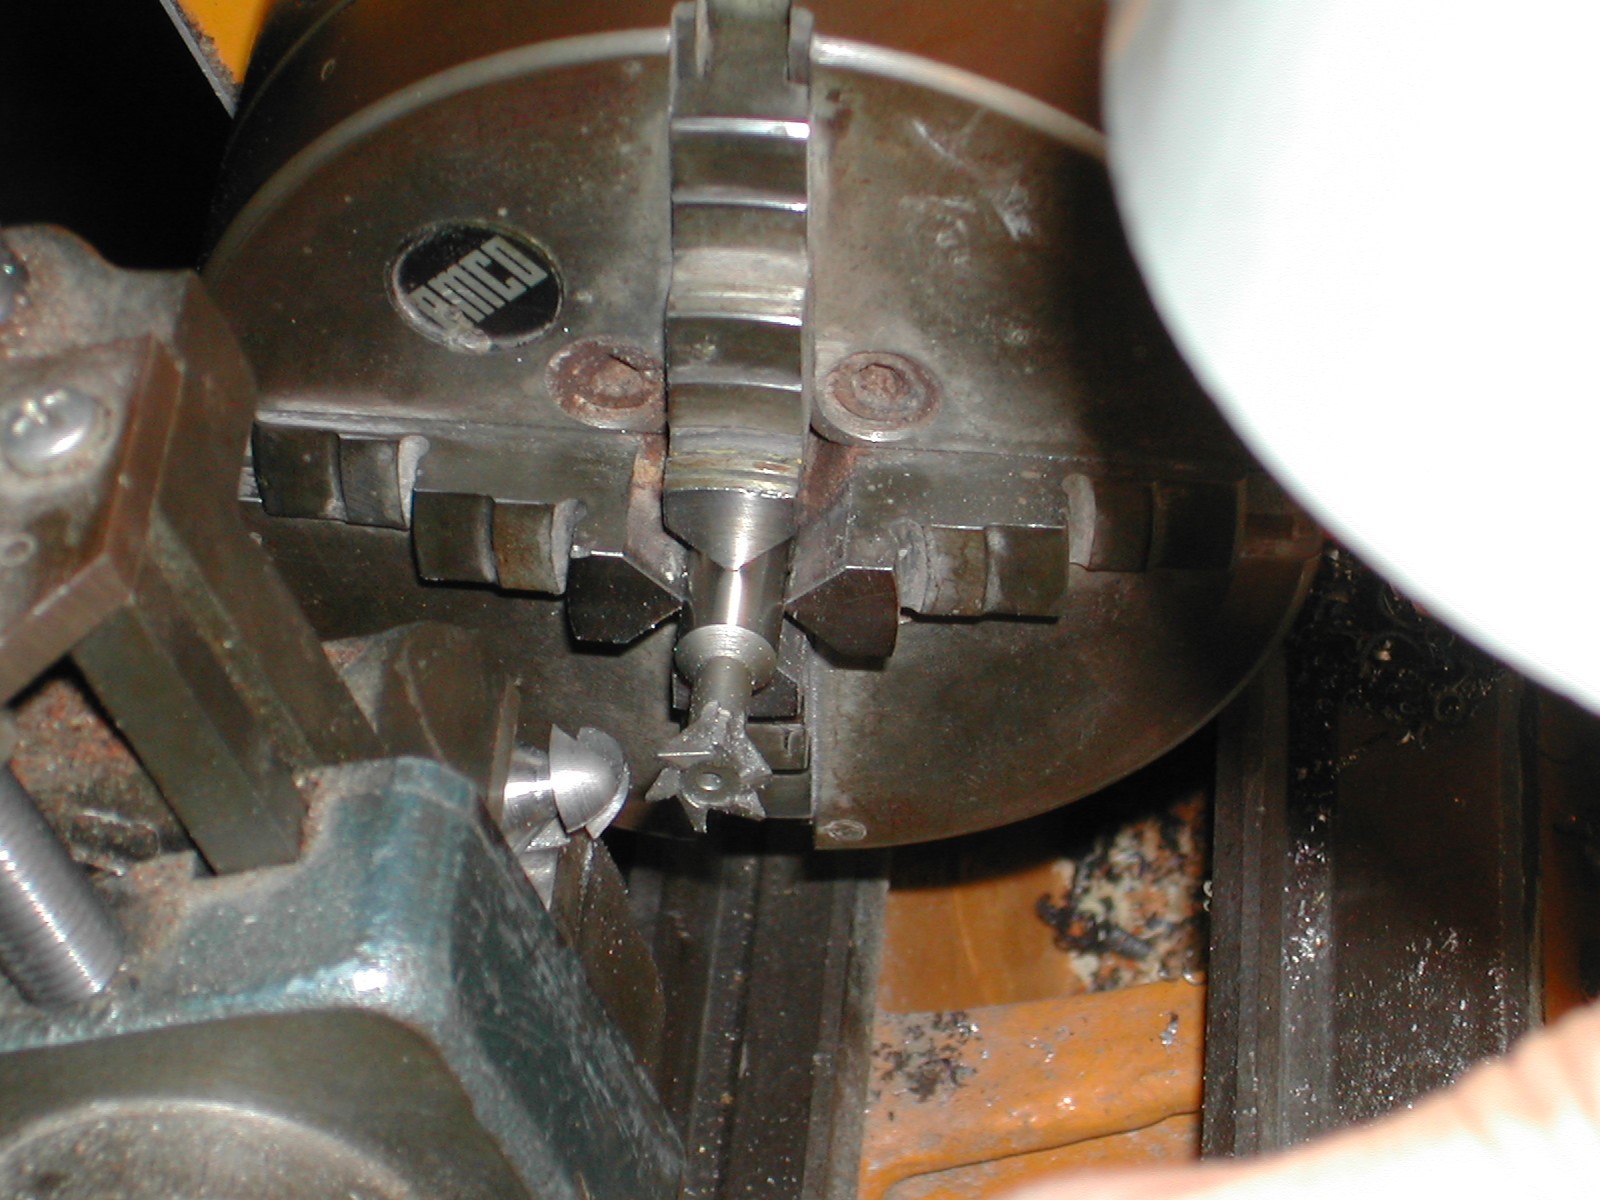
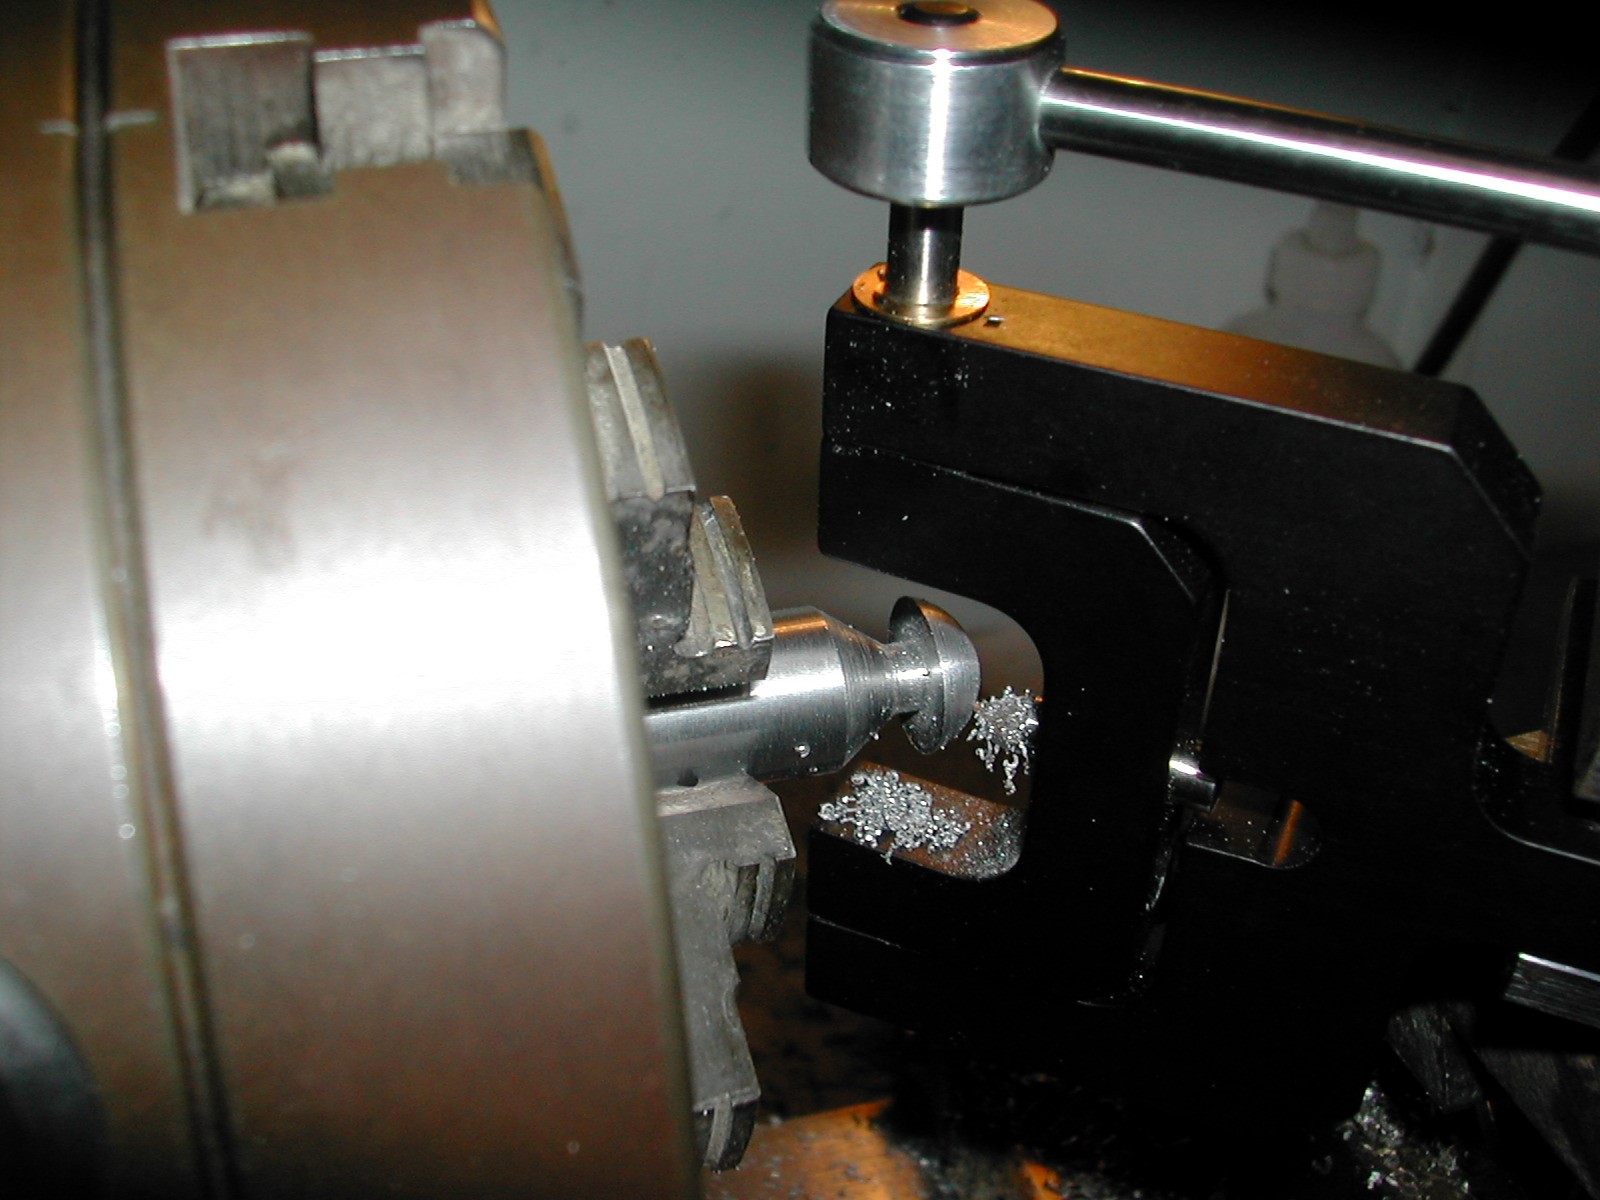
The next step is to cut the blades into the blank. Mount the dovetail cutter in the lathe and the blank in a milling attachment on the lathe compound. Use the cross slide to slowly feed the blank into the dovetail cutter to the appropriate depth. Lower the milling attachment to the appropriate height and slowly move the carriage away from the chuck to create a cutting surface on the blank.
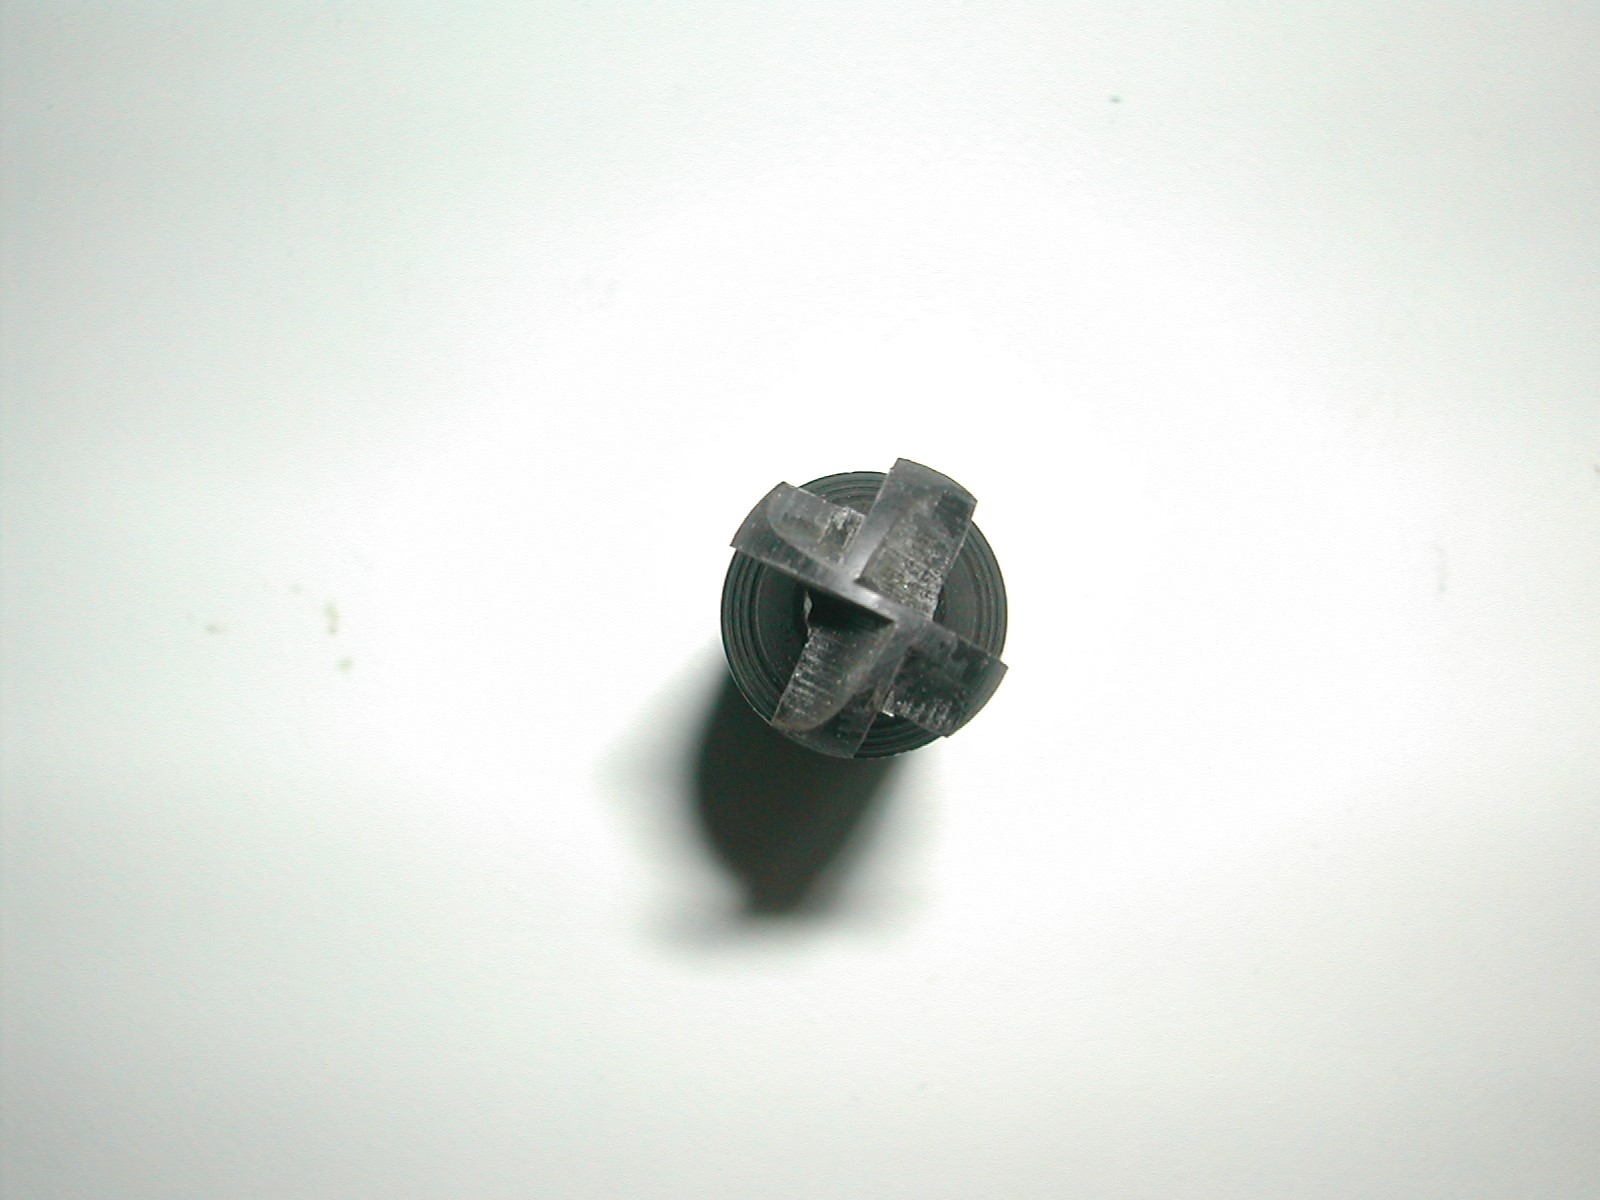
Rotate the blank on the milling attachment to form each of the four blades of the head in the same manner.
Use the blow torch to heat the cutting head to a temperature of 790 degrees to 815 degrees Celsius (a light cherry red).
Quench the piece in oil. Hone the blades with the Japanese waterstone.
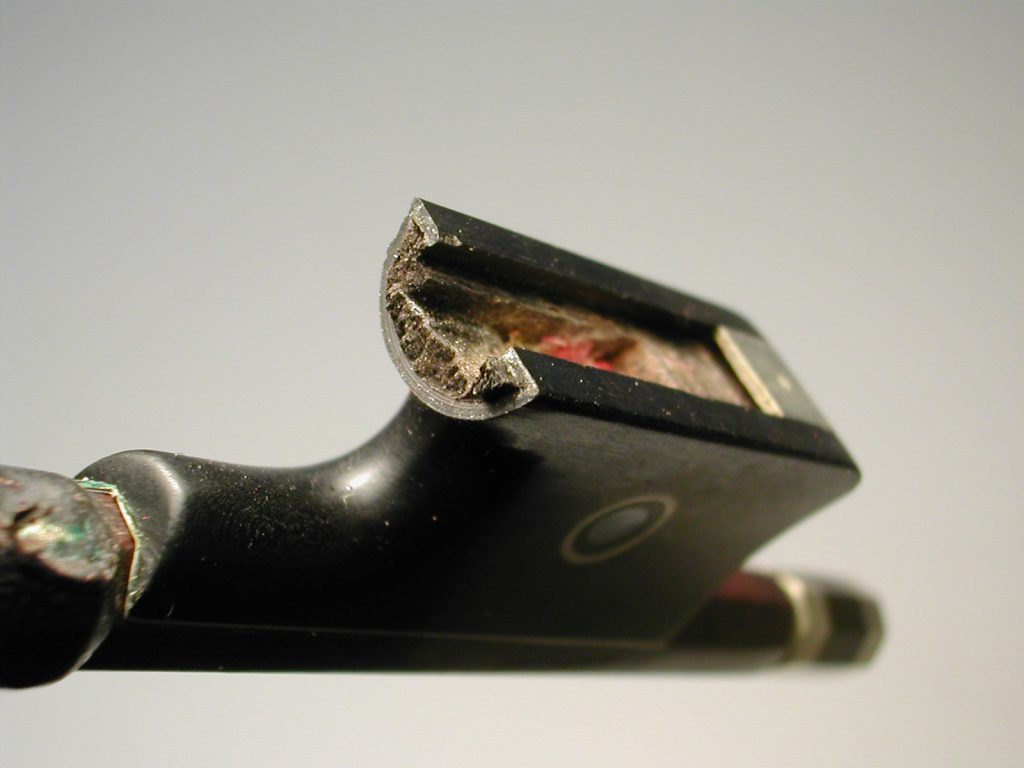
PREPARING THE FROG
The cutter will be used to remove some of the original ebony fom the fog in order to inlay the butt end of the tongue graft.
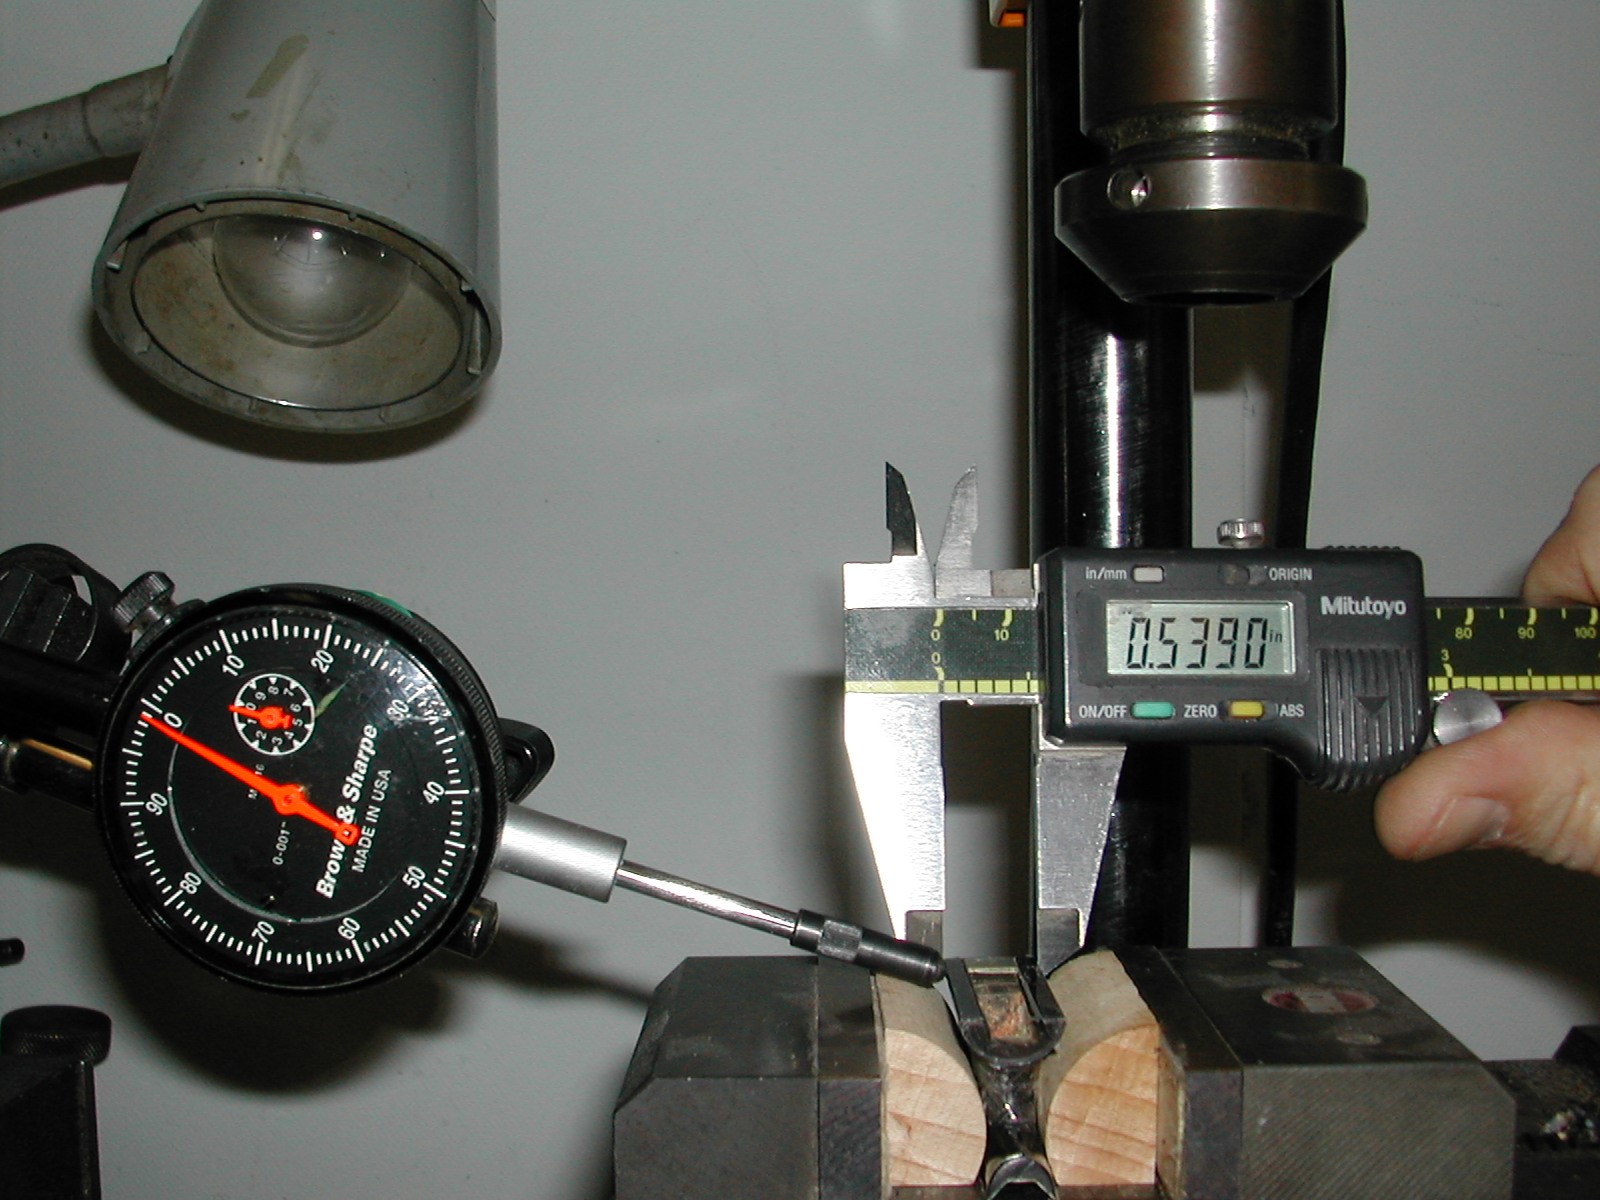
Place the frog into the milling vise, flank it with counterforms, and clamp. It is important that the cutter and the frog are properly aligned, using the dial indicator on the top and outside edges of the two rails. Place the dial indicator on one of the rails and move the cross slide in or out: note the amount of deflection shown on the dial.
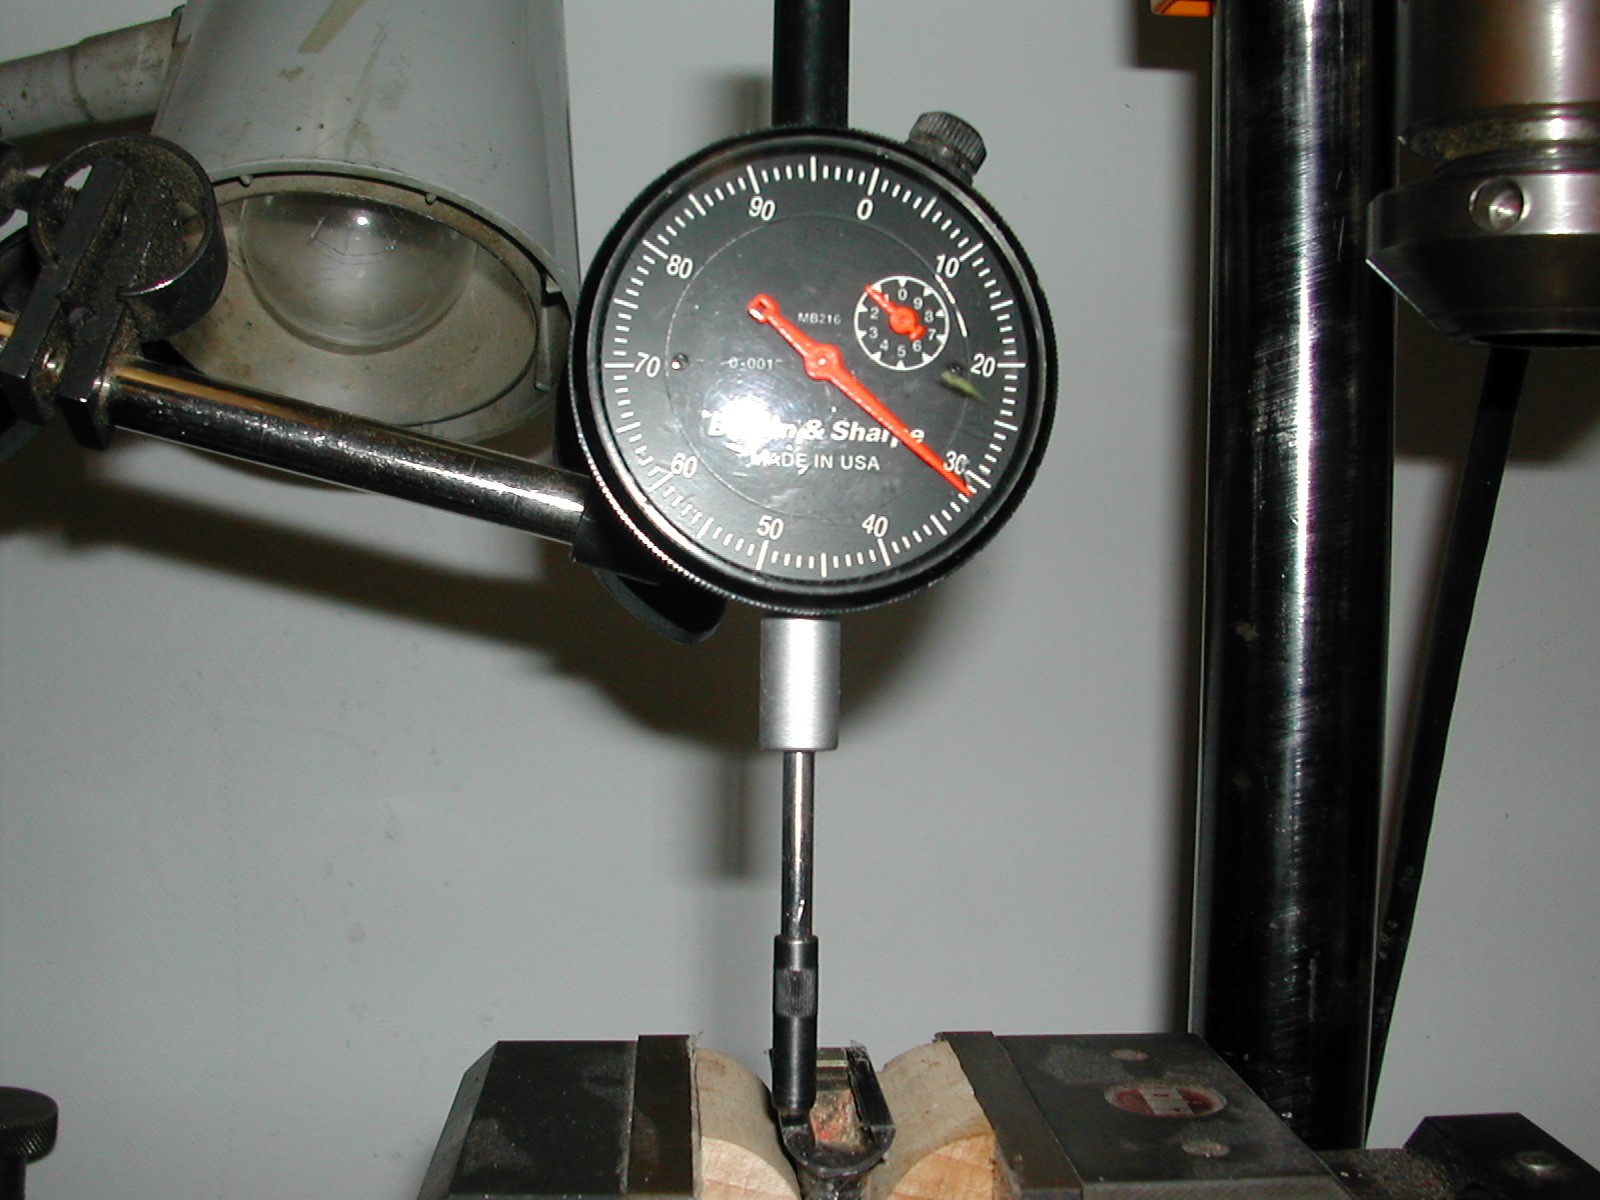
Repeat this process on the other rail, and then on the outer edges with the help of the vernier calipers.
Reposition the frog as needed. Repeat this process until the top of the rails shows no deflection, indicating that the top surface is level. The deflection of the outside edges should remain as equal as possible – indicating that the long axis of the frog is parallel to the movement of the cross slide. This precise positioning will ensure that the cutter goes straight down the centre of the frog and runs parallel to the top of the rails.
When the frog is correctly positioned in the vise, insert the cutter into the milling head and centre the cutter on the frog. Adjust the cutter so that the top – that is, the flat part of the head toward the shaft – is at the same level as the rails. To check the adjustment, lay the straightedge on the rails from back to front: it should rest on the top of the cutter.
Adjust the cutter downward according to the silver thickness measurement taken earlier. Allow for the fact that on older bows the ferrules sit slightly proud of the rail surface.

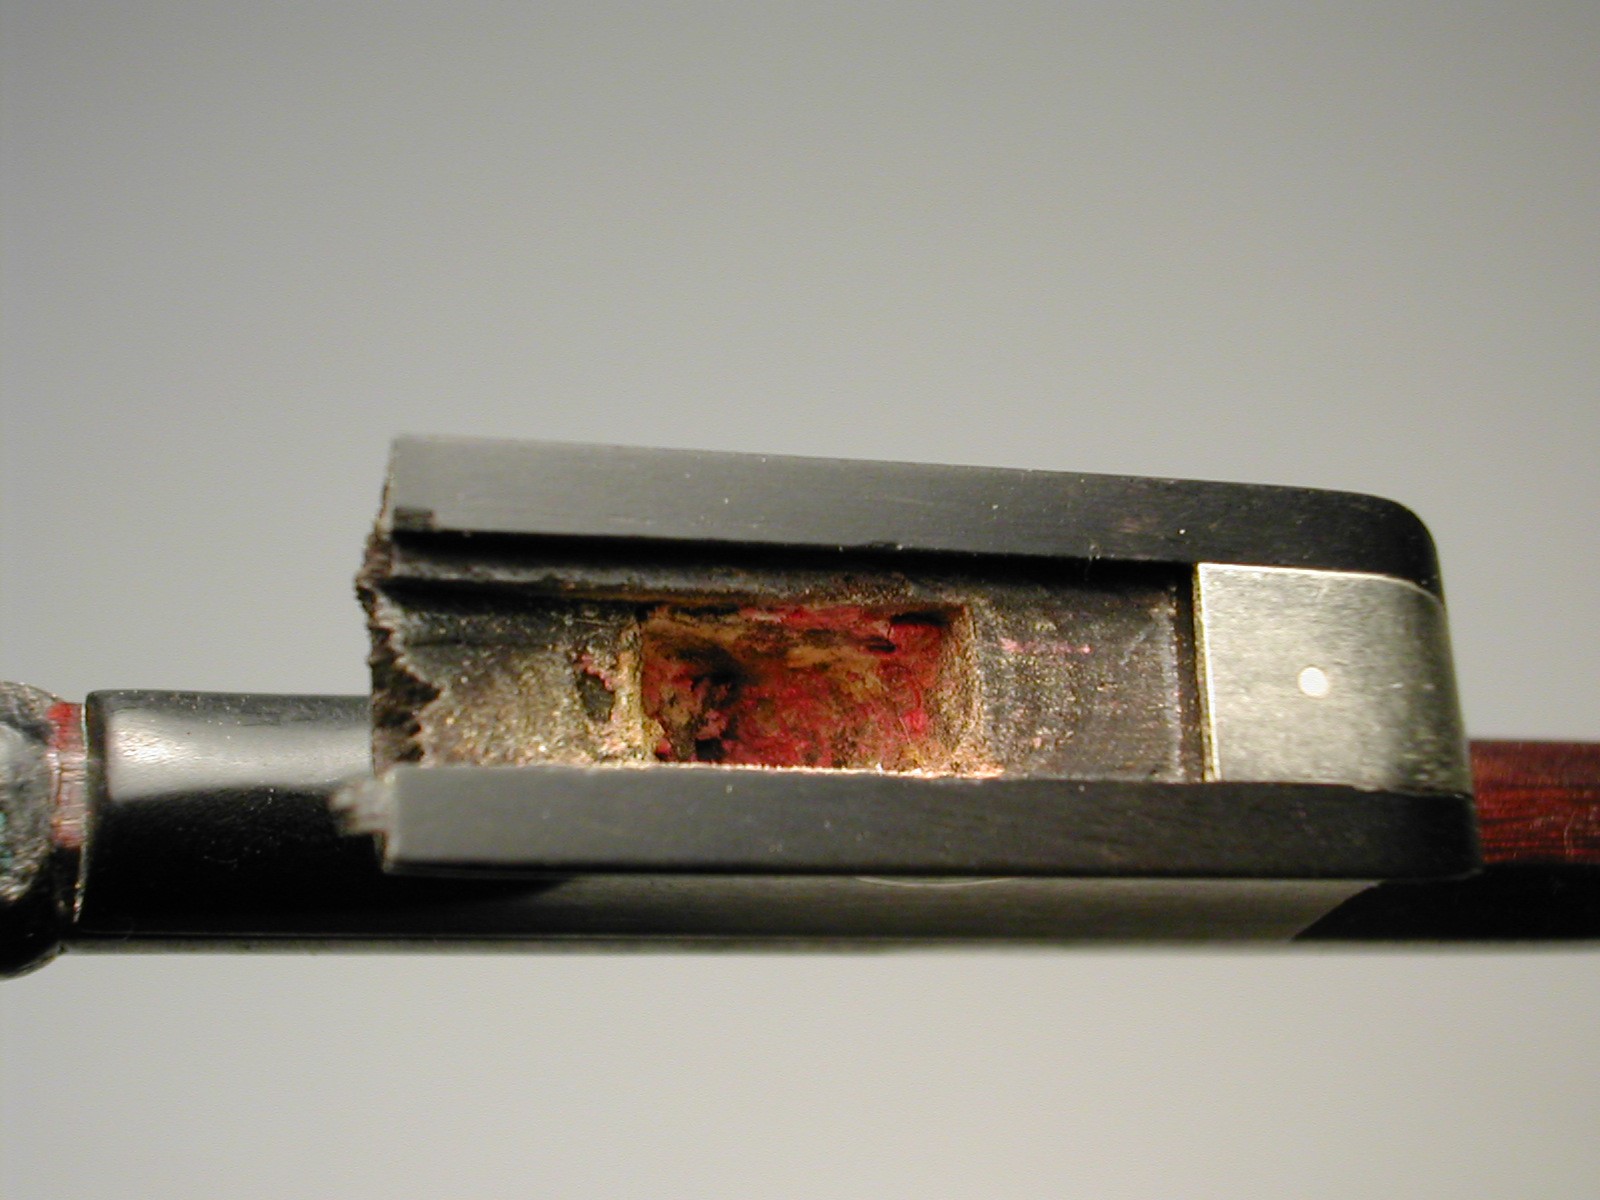
The next step is to cut a ferrule-shaped groove into the frog. Back the cutter away from the frog and set the mill speed to about 800 rpm. Turn on the mill and begin the cut. Use the cross slide to slowly move the cutter into the frog; take care to avoid head build-up.
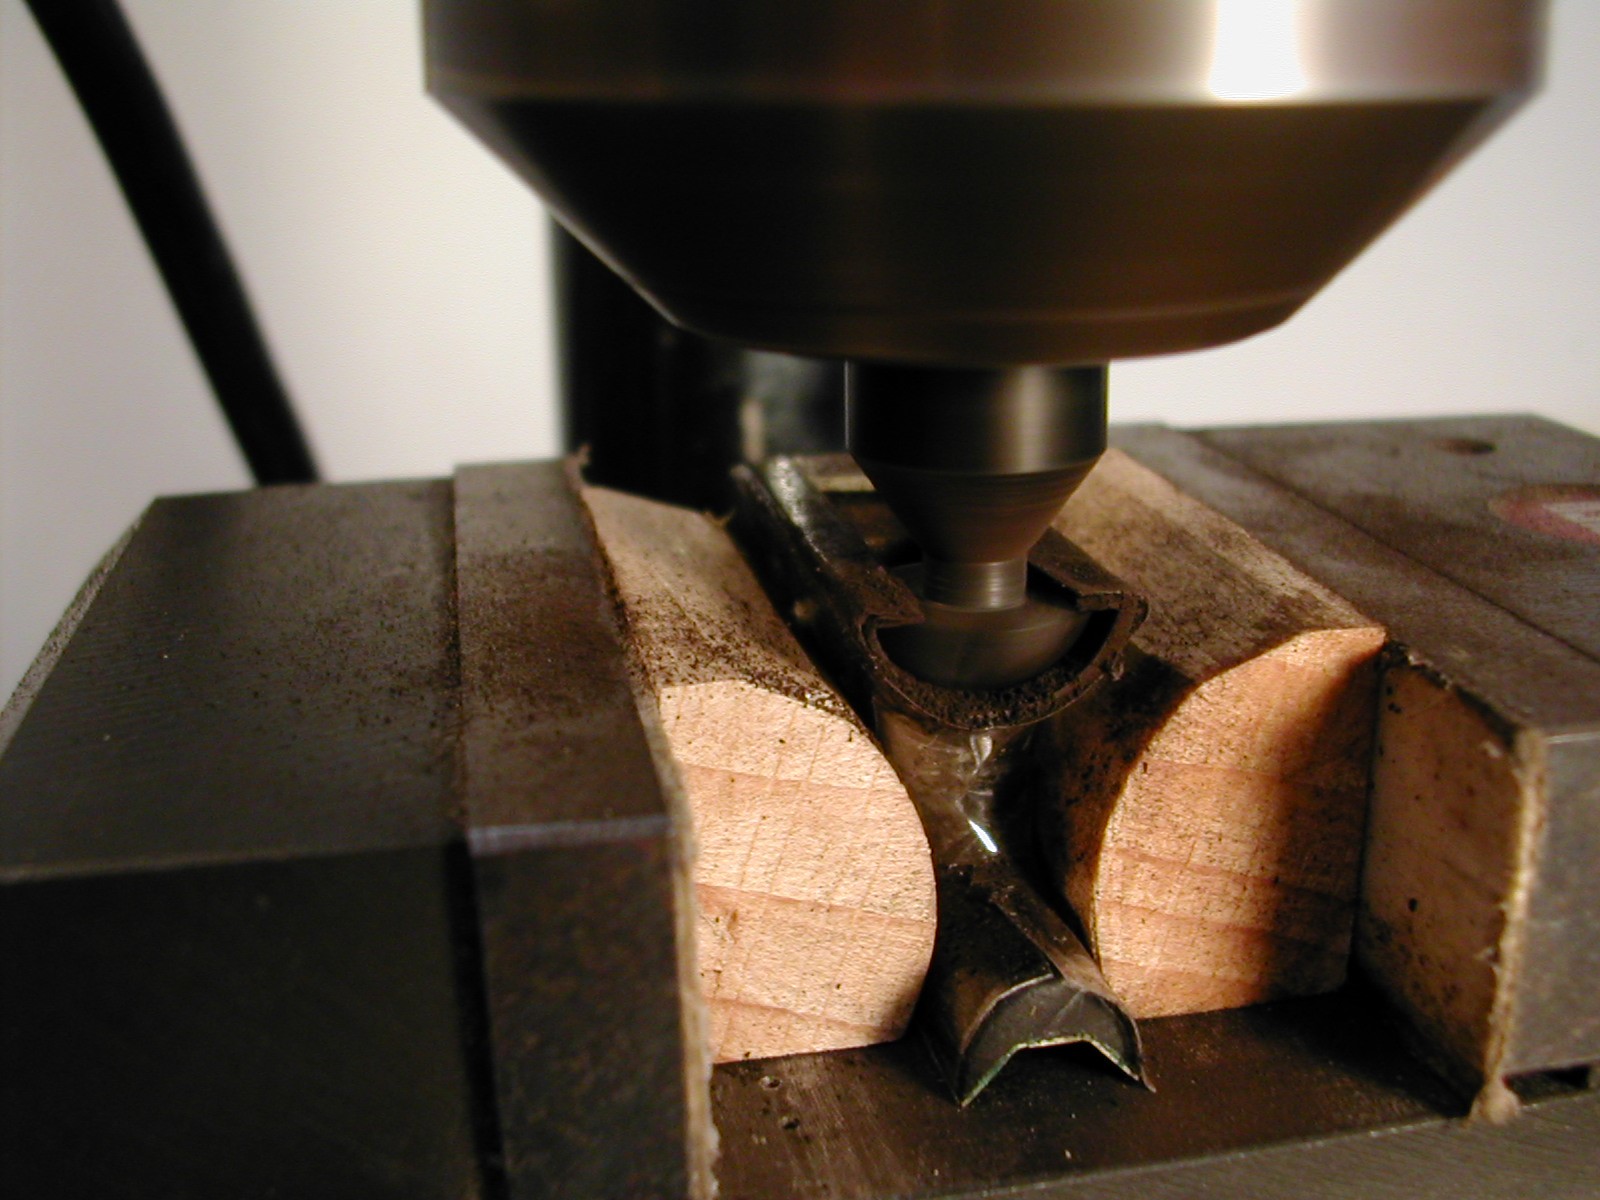
The goal is to mill until the cutter touches the back of the mortise.
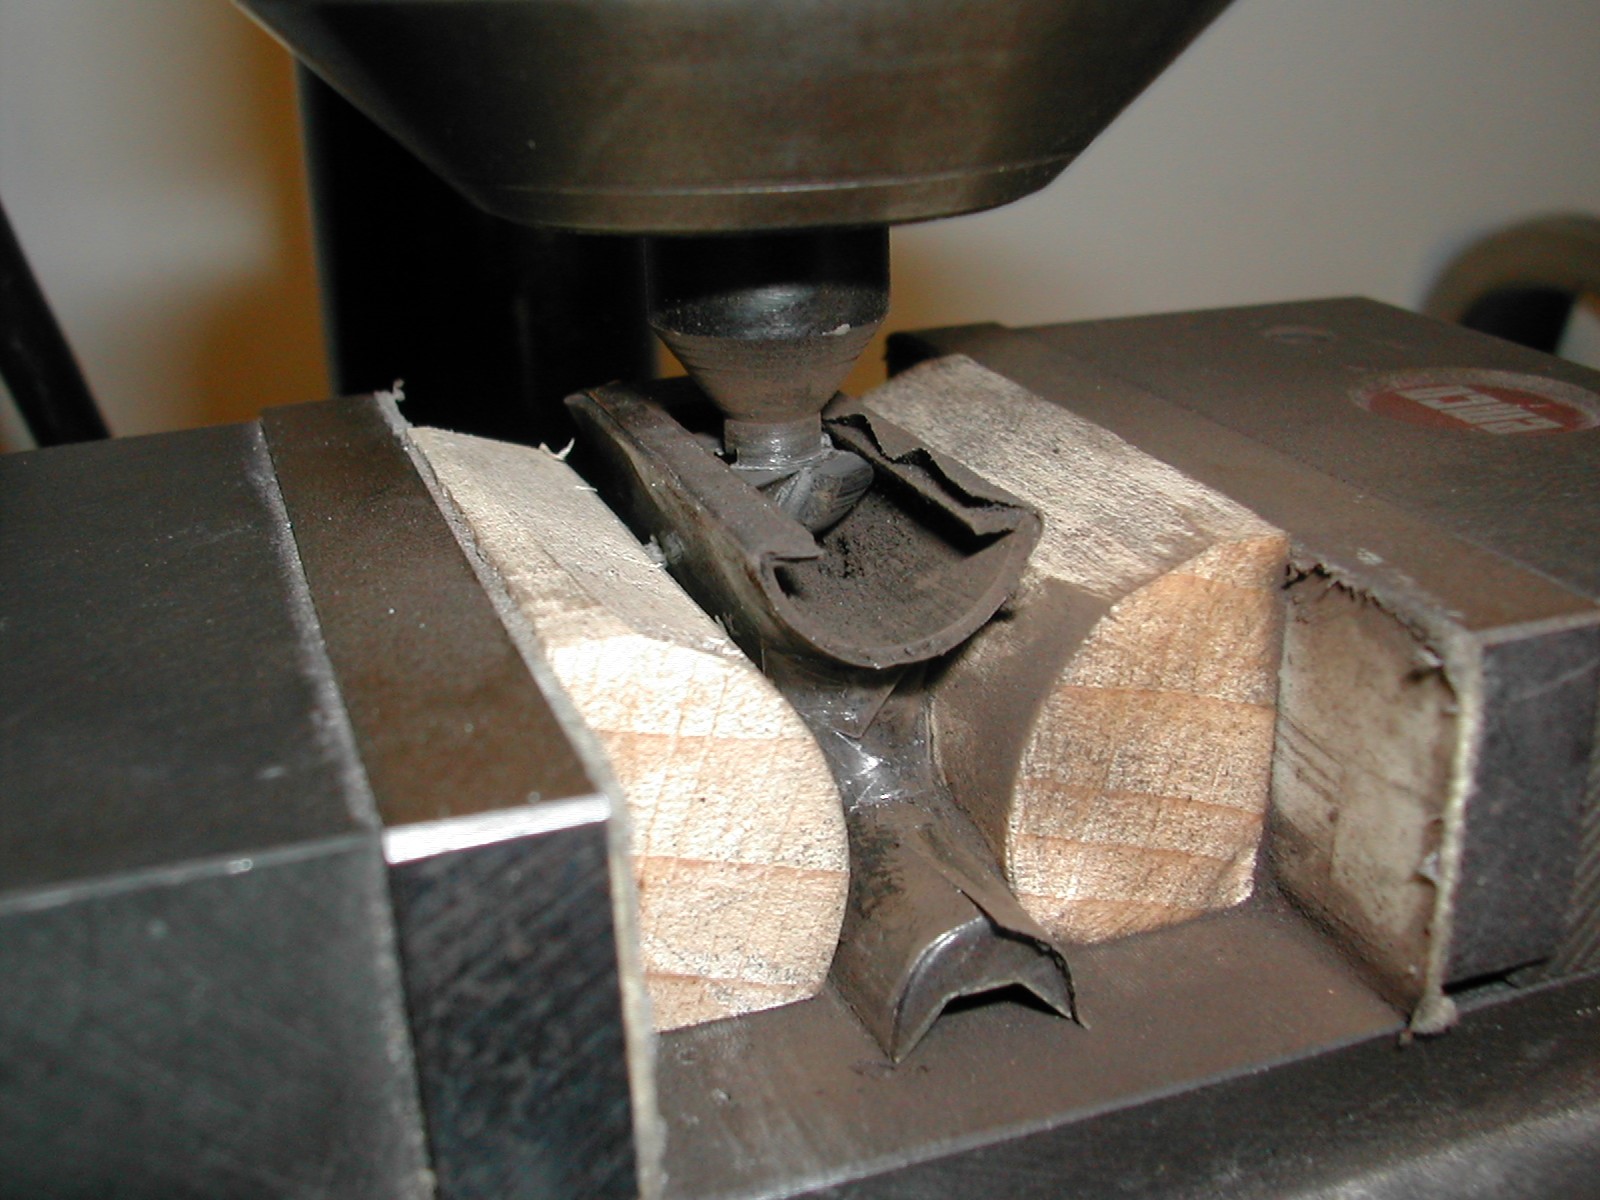
Note that as the cutter goes in, the rails will tend to spring out, loosening the tape. This is normal.
When the recess for the graft is complete, remove the frog from the vise. Keep the cutter in the milling machine to make the template that will be used to fit the new tongue.
MAKING THE TEMPLATE & FITTING THE NEW TONGUE
Cut a notch in the ebony template piece for the neck of the cutter to pass through. Place the ebony in the vise and run the cutter through it. The cut in the template will mirror the cut made into the frog.
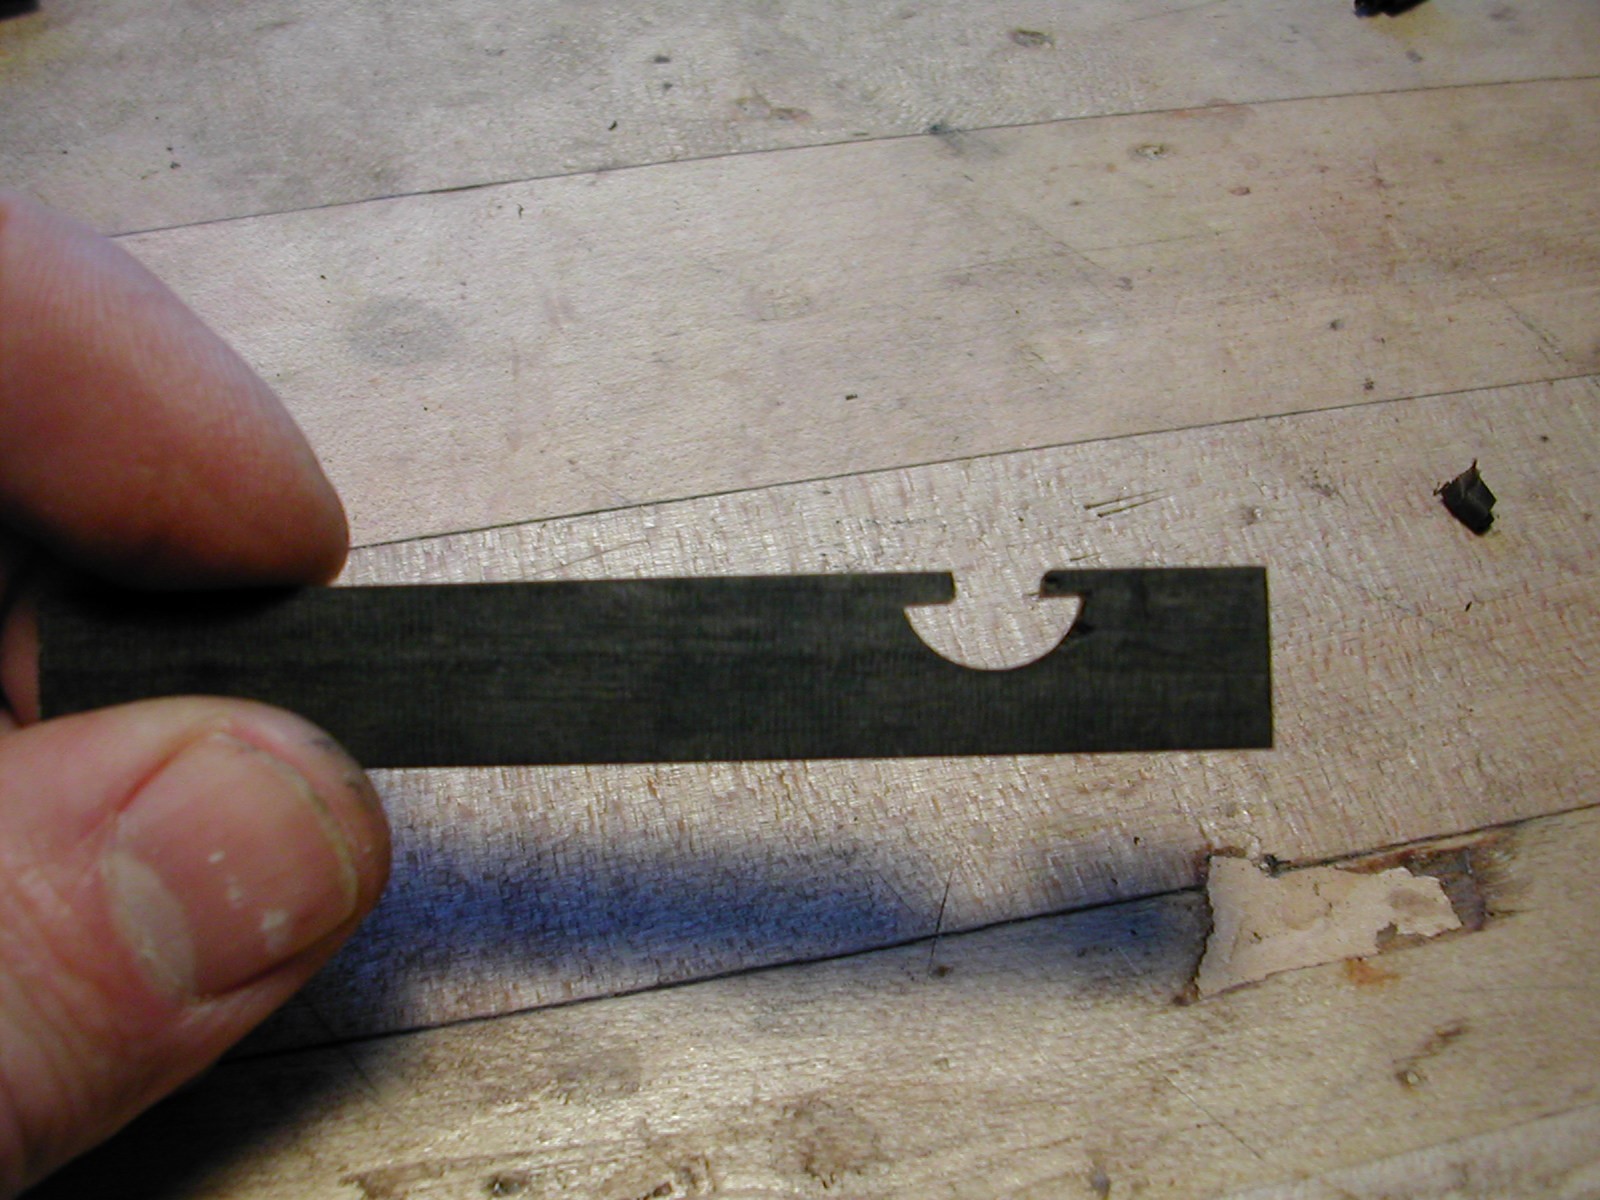
The rounded part of the ferrule may or may not be a perfect semicircle.
If the rounded part of the ferrule has a uniform radius, as is the case here, this one-cut template can be used to fit the tongue.
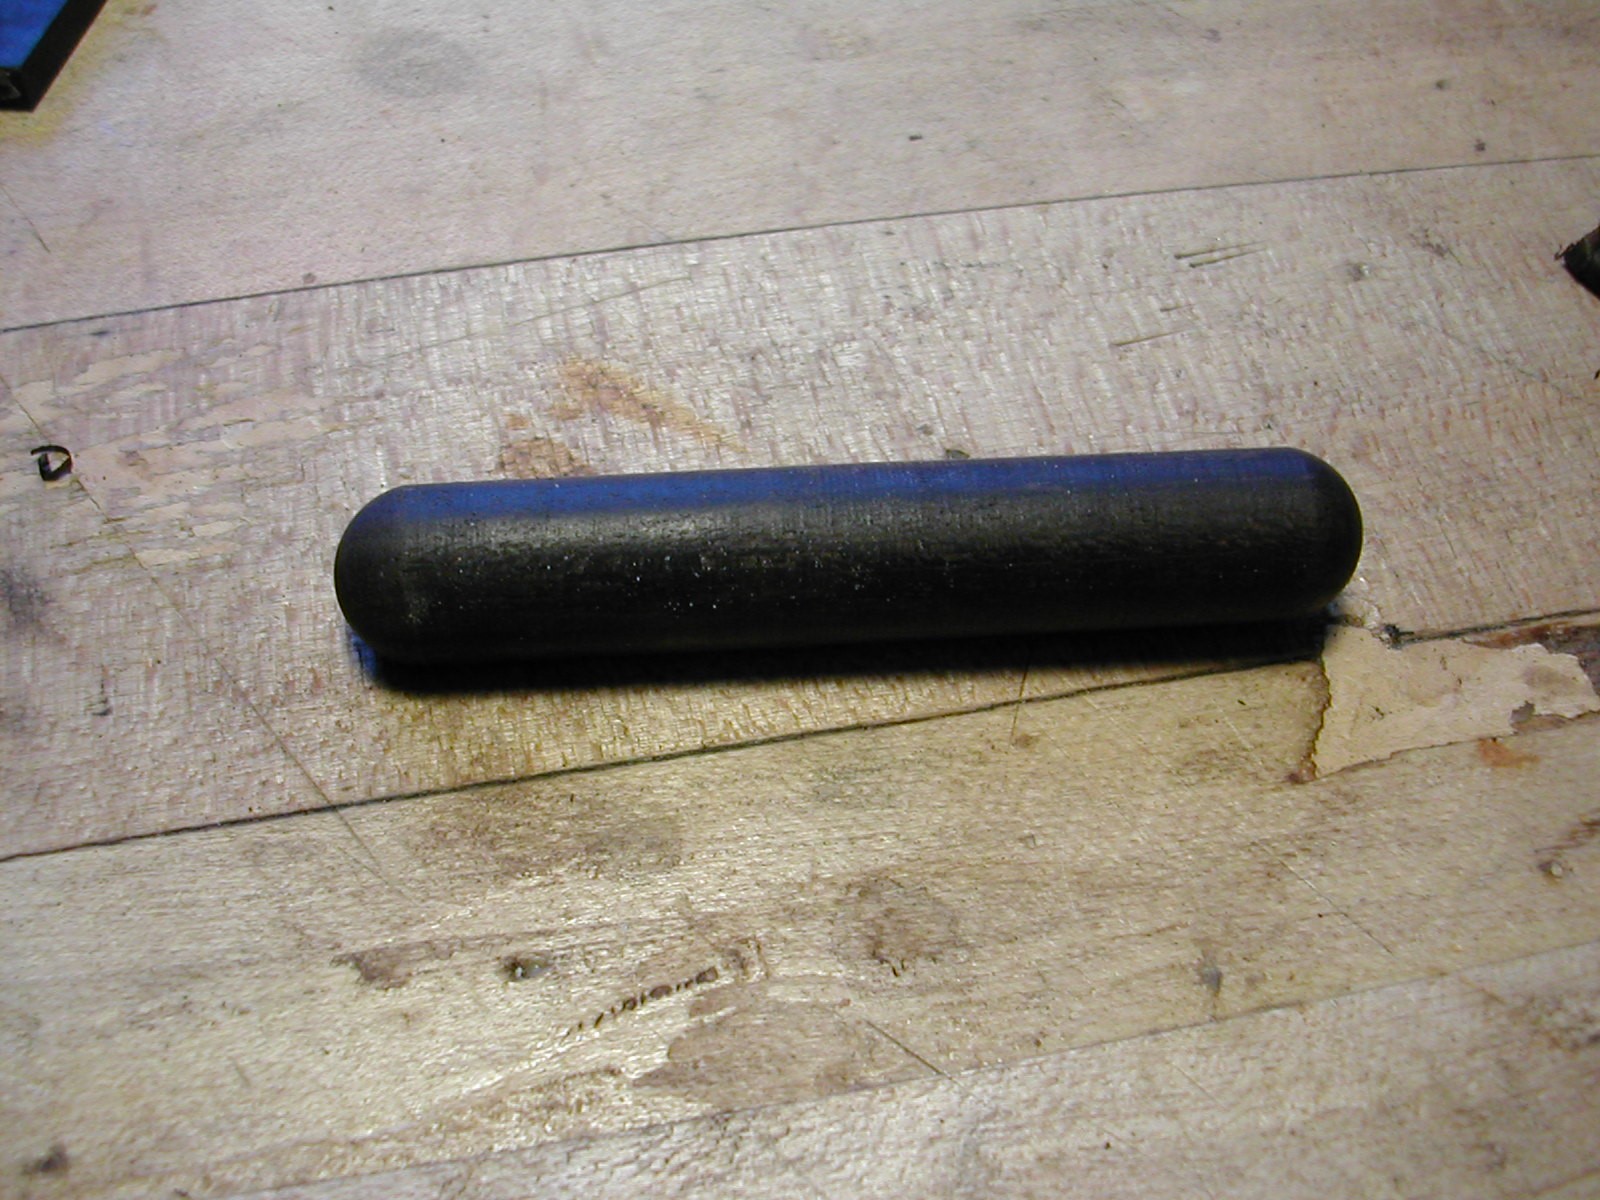
To make the tongue, turn the other piece of ebony on the lathe to a dowel of the correct diameter to match the cutter head. Cut the round at the butt end with the radius cutter.
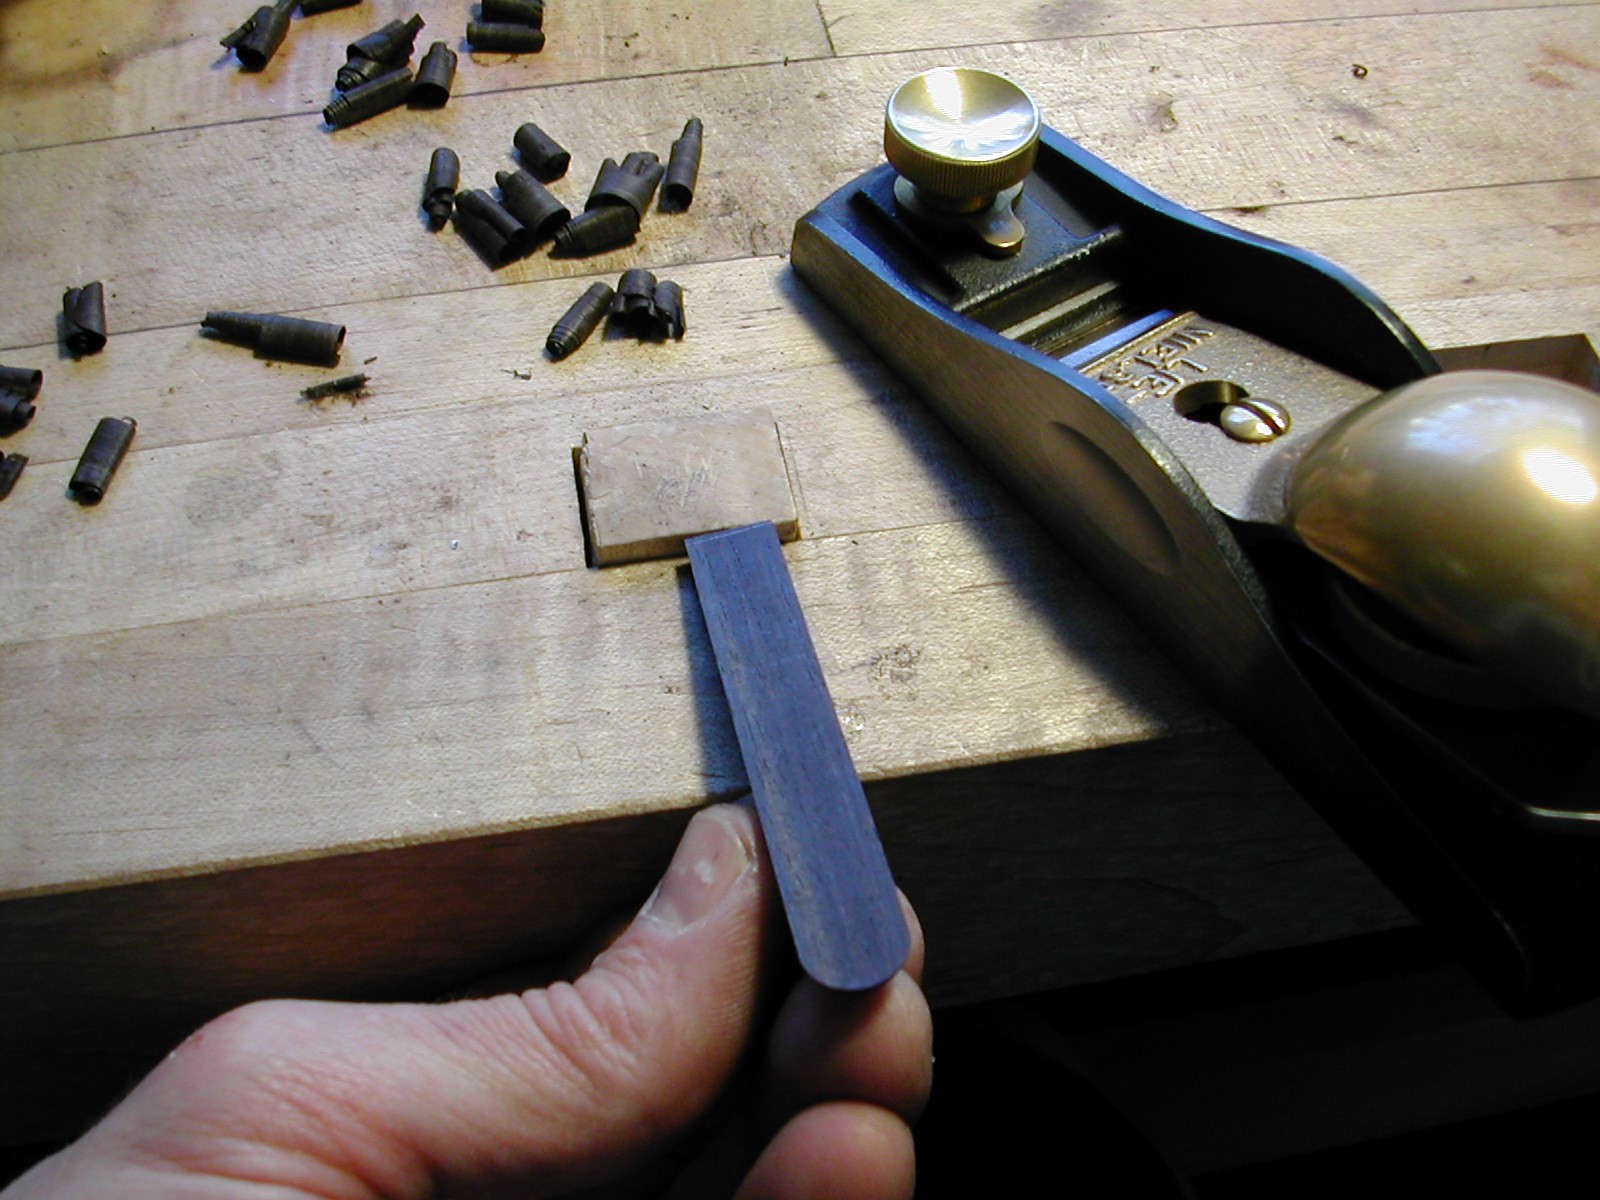
Use the template to gauge how much of the tongue blank must be planed away.
If the rounded part of the ferrule is not a perfect semicircle, a three-cut template will be needed: the first cut outlines the cut made into the frog, as above; a second cut outlines half of this cut; a third cut outlines the rounded portion of the ferrule up to the flat portion.

To make the tongue, plane the piece of ebony to a thickness that matches the height of the cutter head. (The cutter head matches the inside height of the ferrule plus 0.01 mm). Plane the sides so that the width of the blank is equal to the diameter of the cutter plus 0.01 mm.
Trim the ebony tongue blank to match the irregular curve of the ferrule. Refer to the template to gauge how much to plane away. Using the outline of the round portion of the ferrule as a guide, plane a series of even, parallel chamfers into the tongue blank. Blend smaller and smaller chamfers until the tongue fits through the outline of the cut made into the frog. Finally, use the half-cut template to fit the butt end of the tongue.
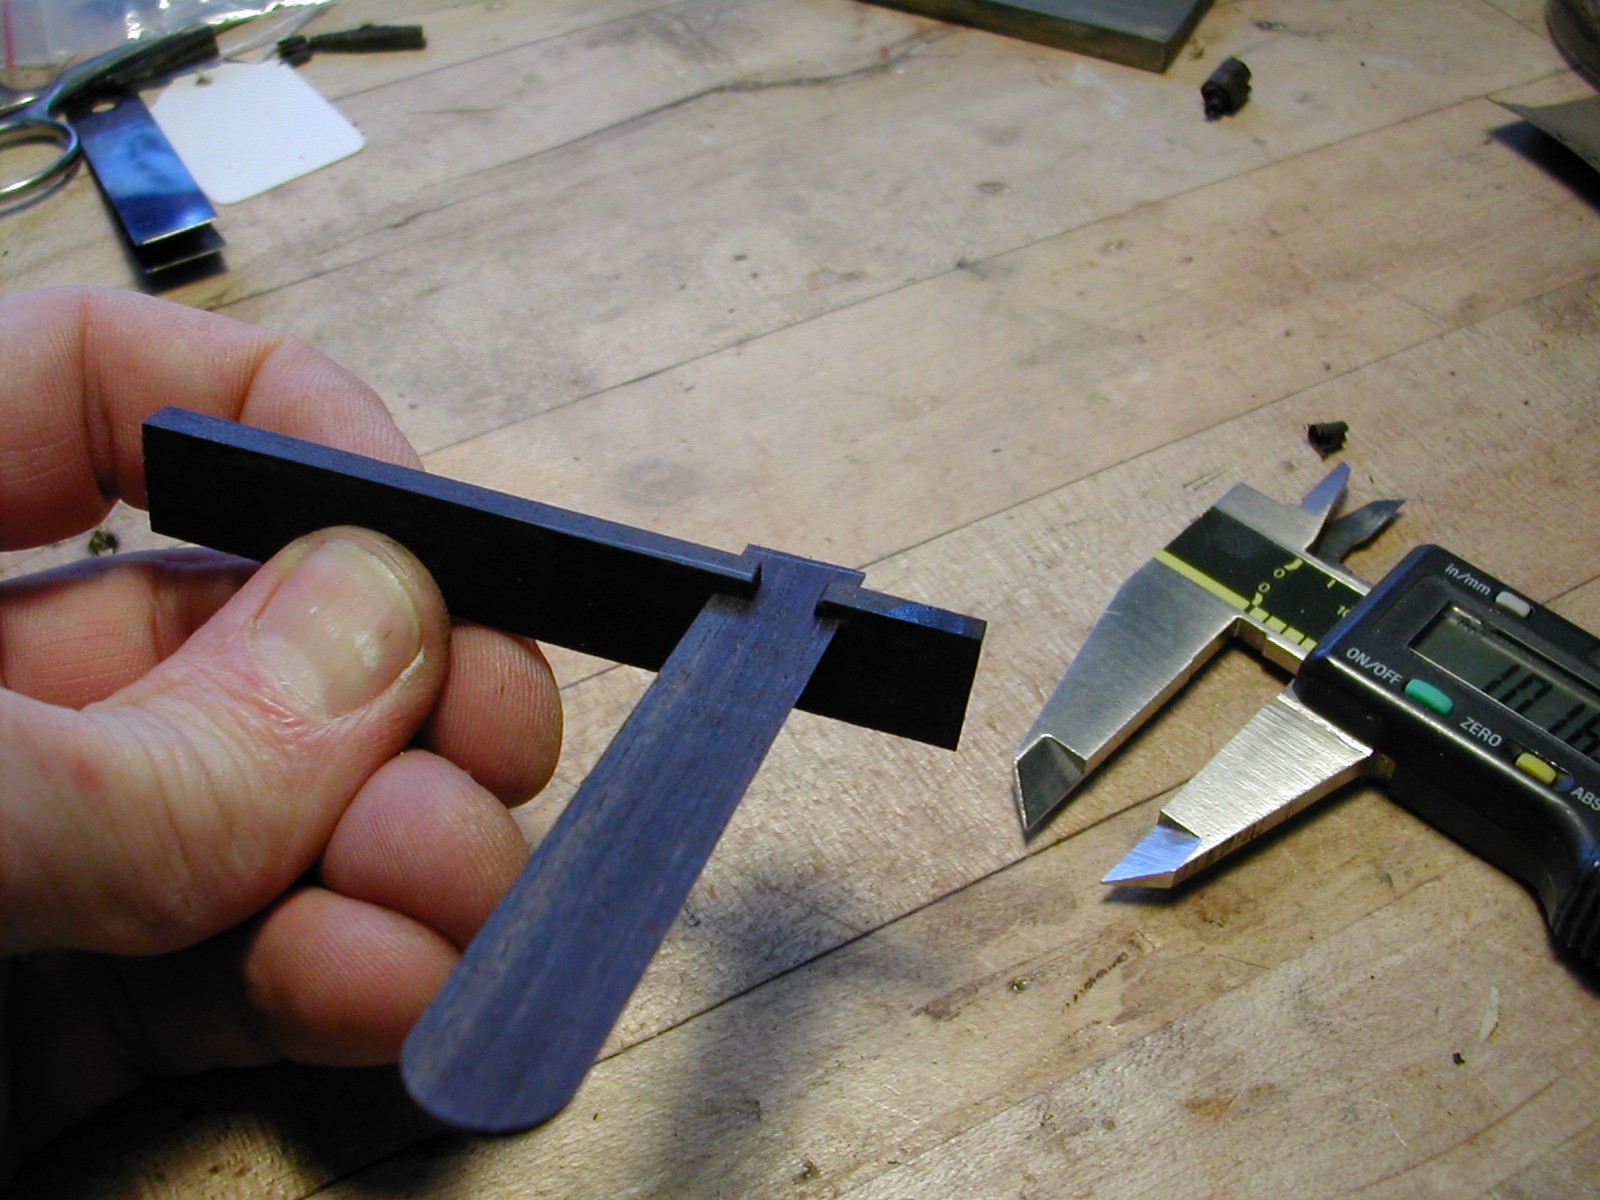
In either case, the graft mus match the shape of the mating part of the frog perfectly.
From left to right: stages of adjusting the graft to perfectly match the shape of the frog.

GLUING THE NEW TONGUE & FINISHING
Make a rounded gluing counterform that matches the underslide of the frog and a flat counterform for the rail side. Since the flat counterform will be used to wrap the new tongue area, it must be long enough to protrude beyond the frog.
Dry-fit the graft to the frog and make any necessary final adjustments. When the fit is satisfactory, mix the epoxy resin glue according to the manufacturer’s instructions, and glue the graft in place.
Clamp the frog and wrap the rubber band around the tongue and flat counterform to apply pressure to the graft area.
Once the glue has cured, remove the tape. Shape the tongue. Fit the slide and ferrule as usual.
NOTES
The work pictured in the photographs for this article was performed by Tom Goering. An earlier version of this article was published as “Replacing a Broken Tongue on a Violin Bow Frog,” VSA Papers 21, 1 (Summer 2007):174-84
1. This drill rod will be used to make the cutter. It should be as close as practical to the size of the cutter; O-1 is an oil-hardening, non-shrinking, general-purpose tool steel available from industrial suppliers.
2. Motor oil can be used.
3. The ebony selected for the tongue should match the rest of the original frog as closely as possible and be split from well-seasoned wood.
4. A cast cannot be used here. A cast that is rigid enough to hold the flanks during milling would trap too much head.