
Bow, Techniques
How to replace an eyelet
Apr
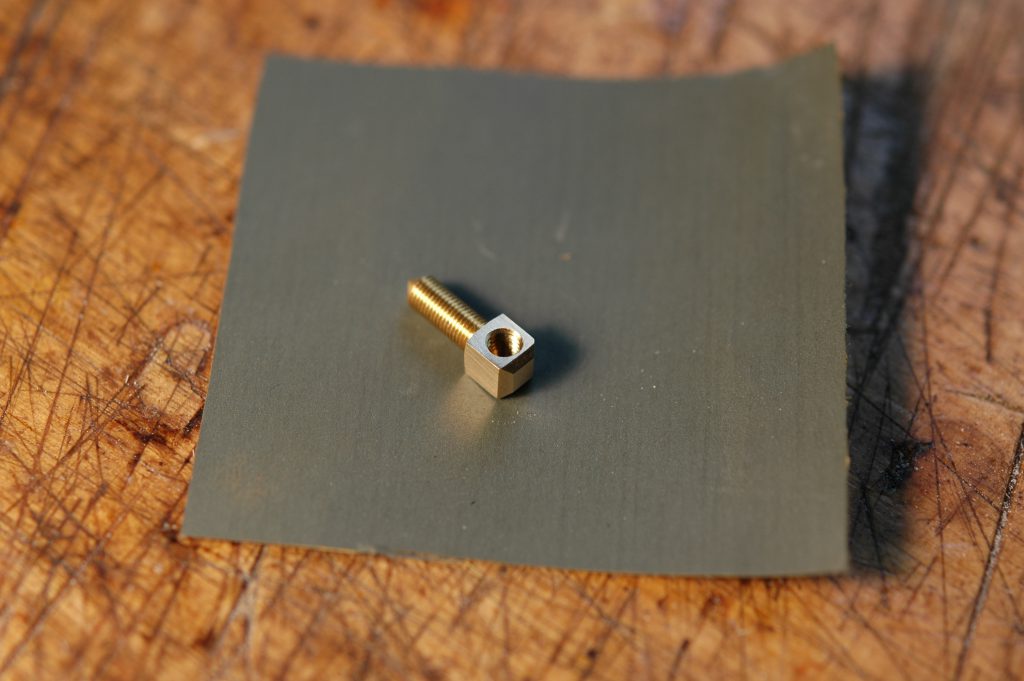
An eyelet is the threaded brass piece in your frog that allows your bow to be tightened and loosened with a turn of the button. When a bow is unable to be tightened, it could be caused by a number of factors and a stripped eyelet is definitely on the list of usual suspects. In order to get a proper diagnosis, take your bow to a professional bow rehairer/restorer/maker.
To test if an eyelet is stripped, can you pull the screw out of the bow without turning it? If so, it’s stripped. If you’re still unsure, unscrew the button all the way and remove it from the stick while supporting the frog and stick. Carefully remove the frog from the stick as well. Take a look at the eyelet. Can you see threads that have worn all the way through the eyelet? Does the eyelet look smooth inside the tapped hole? Now try and put the screw into the eyelet and remove it. Does it slip through at any point? If any of these answers were ‘yes’ then you probably need a new eyelet.
Materials
New eyelets of various sizes, threading, and pre-drilled blanks
Parallel Pliers
4 cut flattening file
Very fine steel wool (00)
Cyanoacrylate Adhesive
Dry bar of soap
Talc powder
Taps of various sizes
Common thread sizes[1]
Violin, viola, and cello:
Imperial: 5-32, 5-36, 5-40
Metric: M3x0.5, M3x0.6, M3x0.7, M3x0.75
Bass:
Imperial: 6-36
Metric: M4x0.7
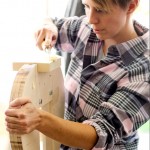
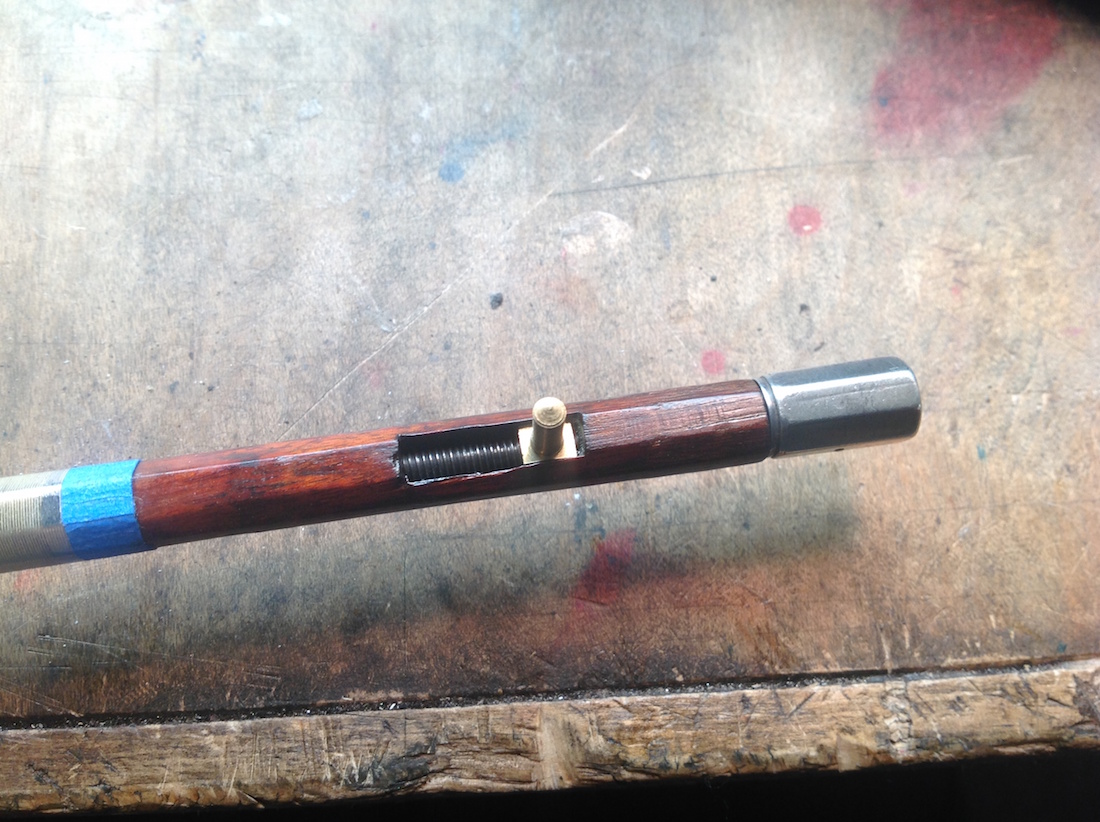
Remove existing eyelet
Holding the sides of the frog close to the underslide, use parallel pliers to grab the ends of the eyelet and carefully unscrew the eyelet from the frog. Be sure that neither the pliers, nor the eyelet are going to hit the underslide as you unscrew it! Scratching the underslide is not allowed☺!
Note: Please never remove or tighten an eyelet with the screw of the bow. I’ve seen many players do this and there is a good chance that doing so will mar the underslide.
Picking out a replacement eyelet
Match the length of the eyelet head to the original, unless the previous eyelet is the incorrect size. In general, the heads of violin and viola eyelets are between 4-5mm long, cellos are 5-6mm, and basses are 7-8mm. In general, the longer the eyelet, the longer the life of the eyelet. Using calipers to measure the diameter of the original eyelet shank that screws into the frog; you will need to find a replacement eyelet with this same dimension.
Now that you’ve narrowed down the pile of eyelets, match the original screw to a new eyelet. There are many different sizes and threads on screws, so test out differently-threaded eyelets to find one that matches the existing screw without play. If you can’t find an eyelet with matching threads, you might have to tap a blank eyelet.
Note: It’s good to collect variously sized taps since there are many differently threaded screws out there. See ‘Common thread sizes.’
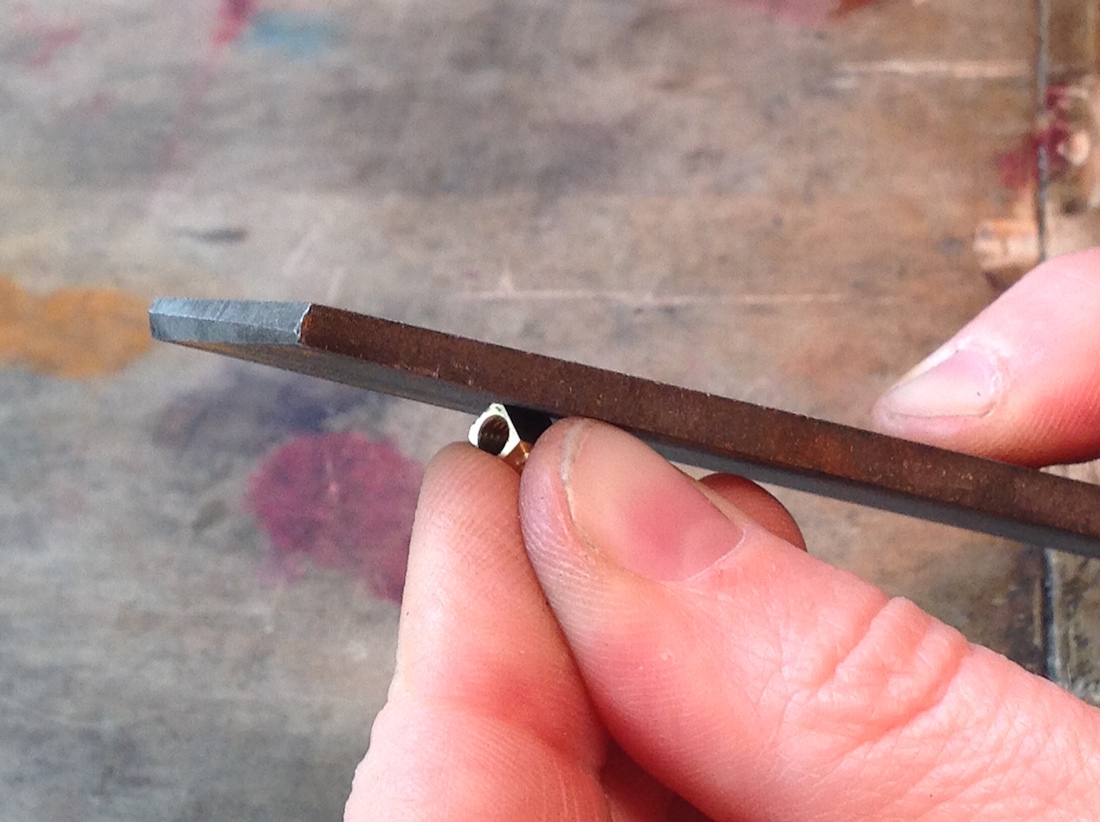
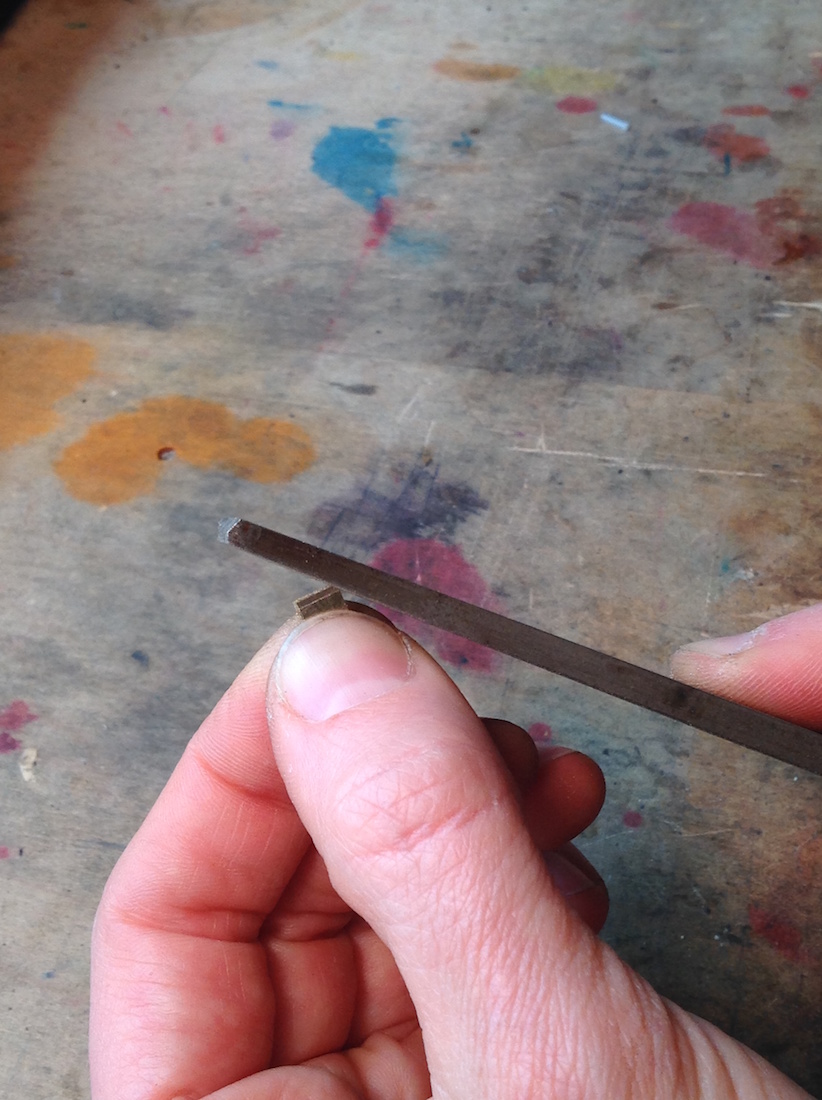
Shaping the eyelet
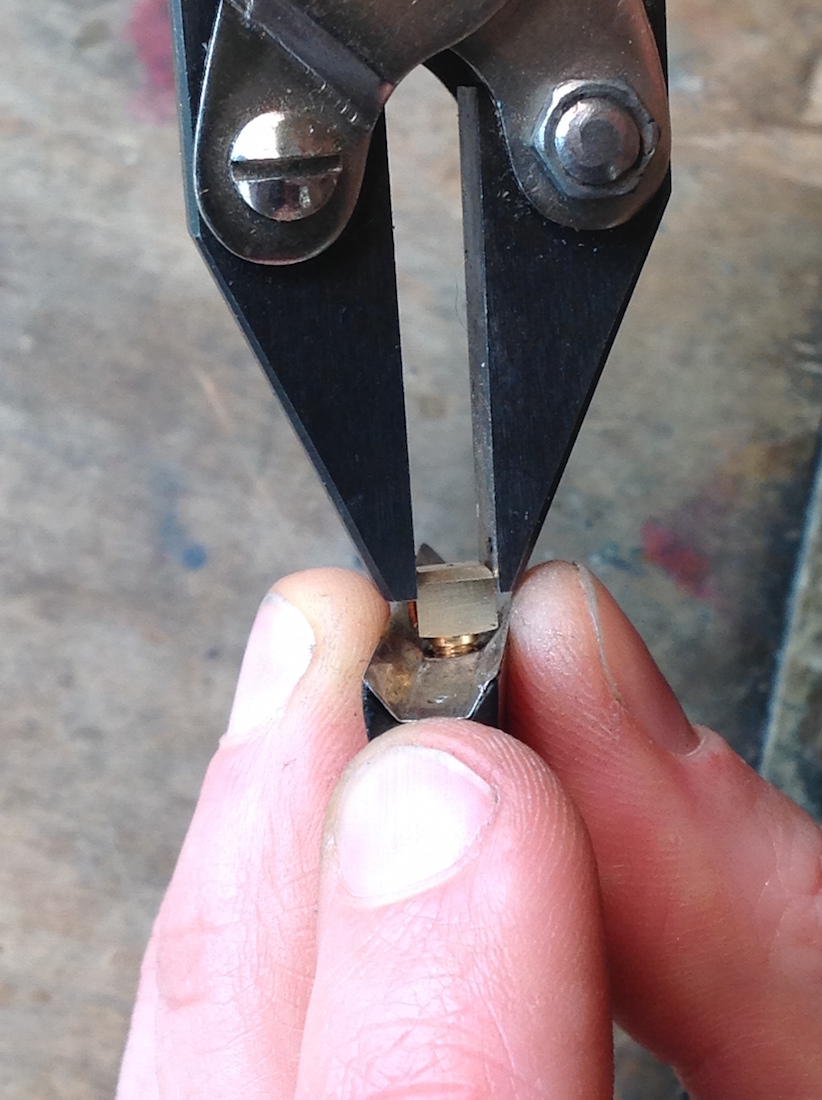
Take the stick with the mortise facing up and put the eyelet, head-first, into the mortise so the shank of the eyelet is sticking up out of the mortise. Don’t force it into the mortise!!! This is dangerous, and we’ve seen sticks that have been broken by someone forcing an oversized eyelet into a mortise. Sometimes the head of a new eyelet is much wider than will fit into the mortise. In this case you will have to file the sides of the head down evenly on both sides until it will fit easily into the entire mortise.

Then put the screw into the bow, and see if it can easily go into the eyelet when eyelet is in the front of the mortise. It is normal that a new eyelet might have too tall of a head which prevents it from aligning with the depth of the screw. In this case, evenly file down the head of the eyelet to lower it into the mortise until you can thread the eyelet on the screw and thread it from the front to the back of mortise easily.
Note: Never file the eyelet while it is in the frog!
It is important to get the eyelet to work throughout the entire mortise easily before putting it back in the frog. (See Troubleshooting and Possible Solutions #1)

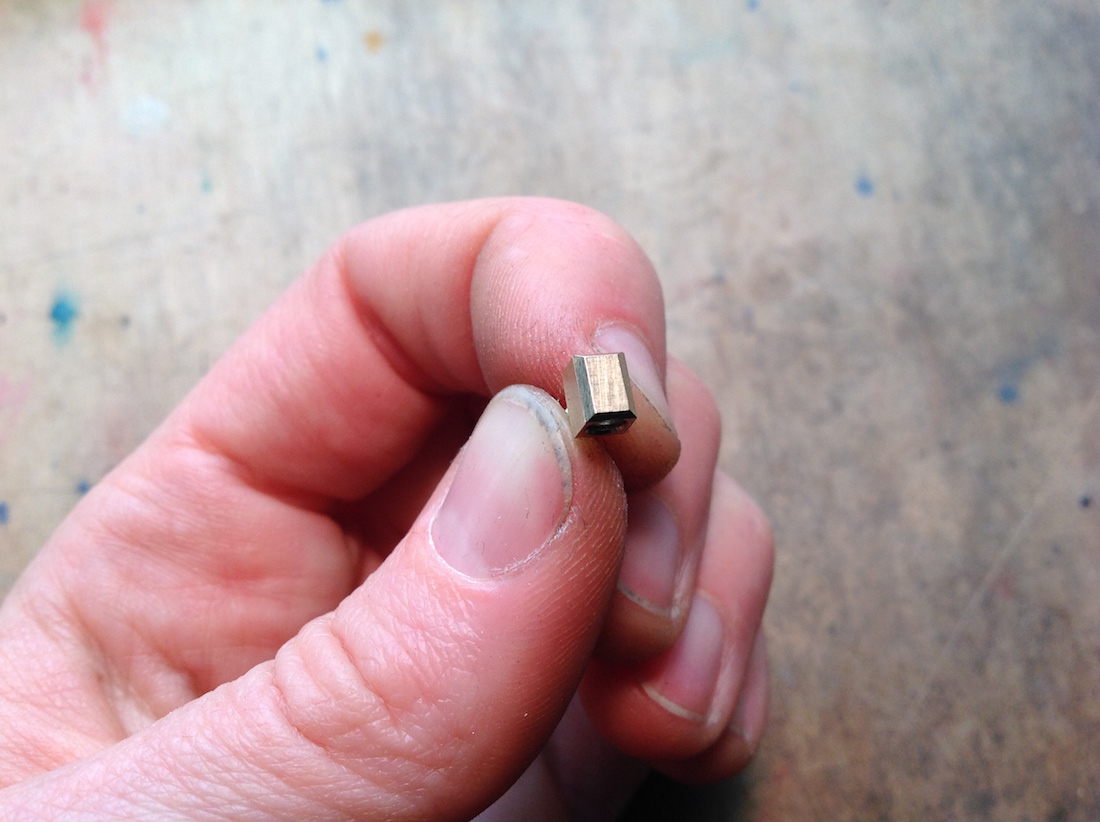
For our own little aesthetic egos, we put a few finishing touches on the eyelet so we can recognize our eyelets on future re-hairs. With a fine file we finish the sides and top of the eyelet, and put little even chamfers on the top, so it looks like a little rooftop. Then use some very fine steel wool to finish the surface of the head of the eyelet.
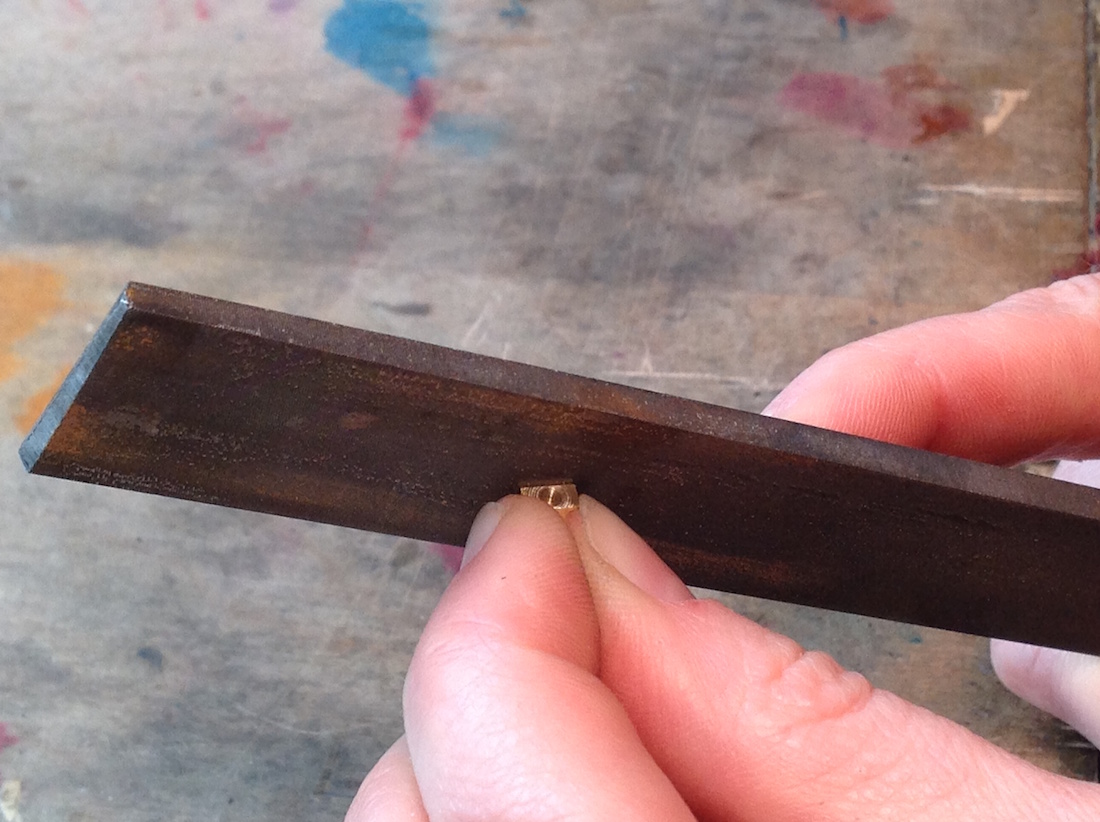
Threading the new eyelet into the frog
Using a similar technique to remove the eyelet, we will install the new eyelet. Grab the ends of the eyelet with parallel pliers (you don’t want to mar your nicely finished eyelet sides) and with your hand, hold the frog close to the underslide so your fingers can help protect the underslide in case your pliers slip.
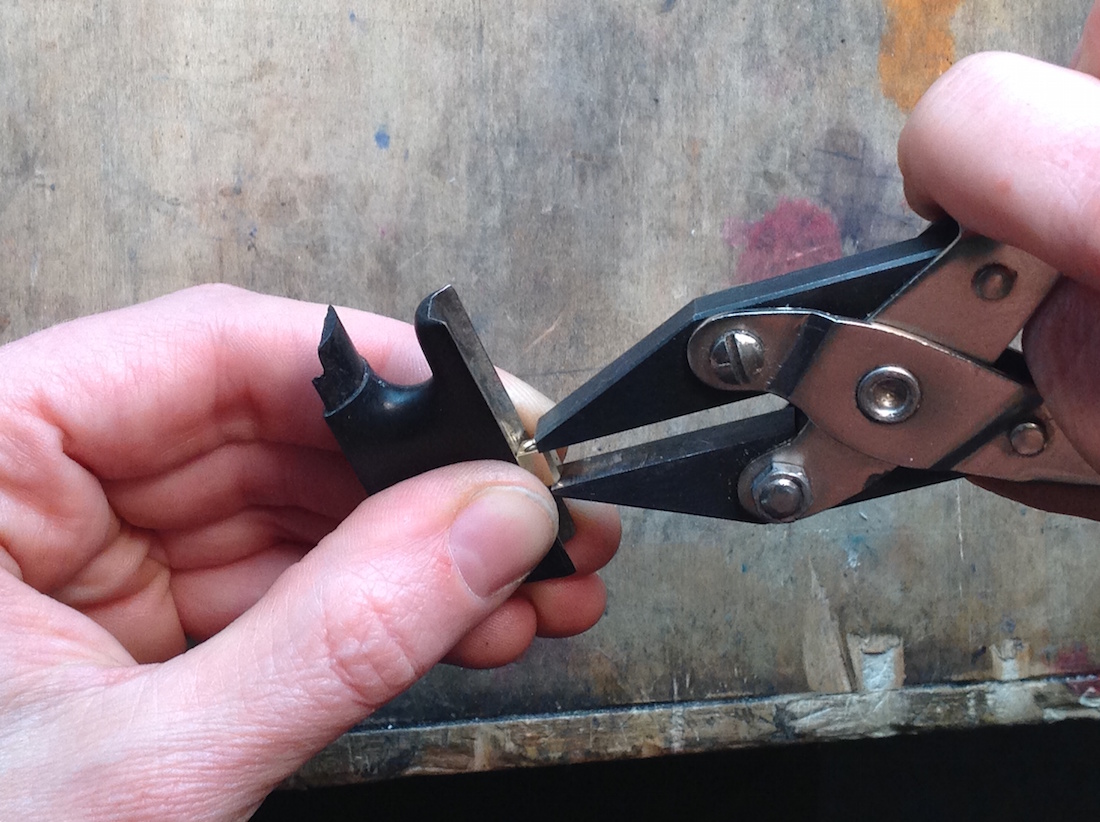
Start threading the new eyelet into the existing hole. If the shank of the new eyelet is a little bigger than the original or has difficulty threading into the frog, file a notch into the threaded shank to give it a little cutting-action when threading it into the frog.Thread it down while paying close attention that neither the eyelet, nor your pliers ever touch the underslide.
Also look at the angle of the eyelet in relation to the underslide. It should be perpendicular to the inside facet of the underslide. If this angle is off or if the eyelet is too loose, you might have to bush this hole and re-drill it. (See troubleshooting #2 and #3)
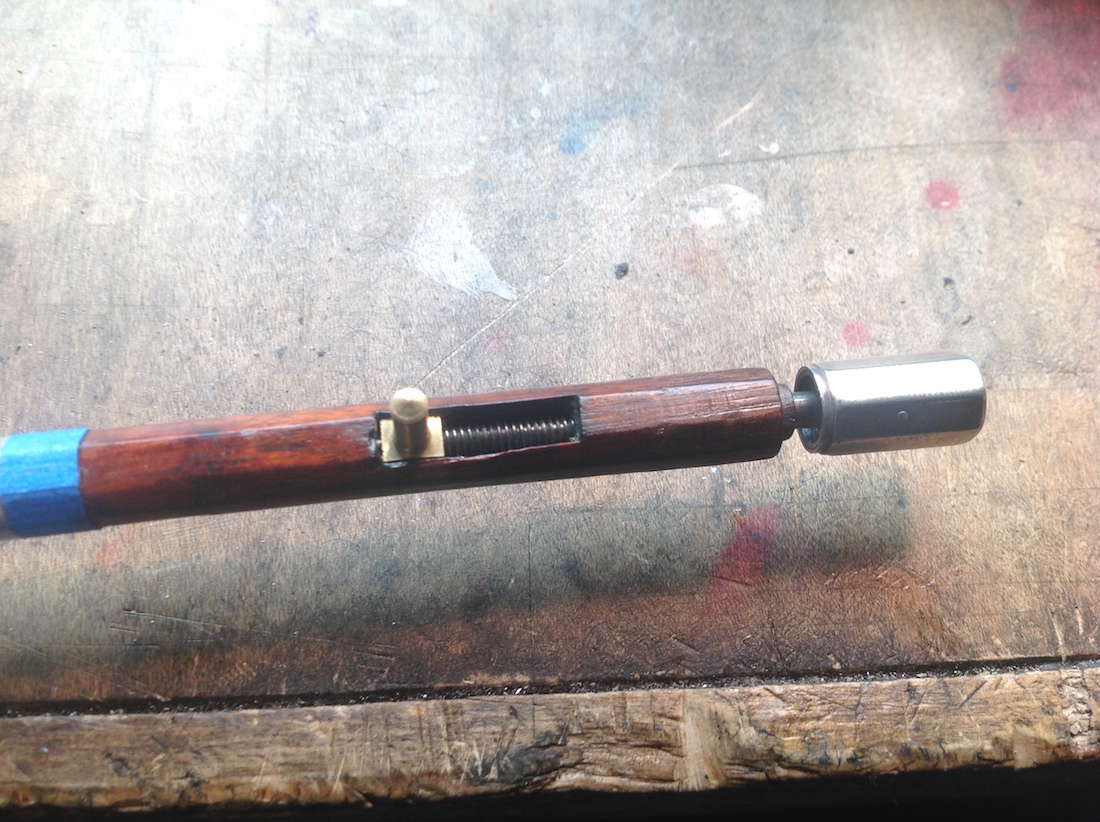
Finishing the depth of the eyelet
To figure out how deep to thread the eyelet into the frog, put the frog with the new eyelet on the stick and see if it’s sitting flush against the stick. If it is standing off the stick or rocking front to back, or side to side on the bevels of the stick, then you know the eyelet must be threaded deeper into the frog. If it is flush, try threading the screw through the eyelet. If it is threading but very difficult to turn, you should try backing the eyelet out 1/2 turn, and trying again. The ultimate goal here is to have the frog sit flush against the stick, without the frog rocking in any direction and be able to thread the screw in fairly easily and have the frog move from the front of the mortise all the way to the back with relative ease. Lubricate the stick where the underslide sits with talc powder, and lubricate the screw and the nipple with dry soap. This will aide in getting the fit tight enough while allowing for ease while tightening the bow. Be aware that this goal is not always possible, and some frogs’ underslides don’t fit on their sticks very well even with an appropriately tight eyelet.
Troubleshooting and possible solutions
1. When trying to get the new eyelet to smoothly travel down the mortise by tightening the screw, is the eyelet getting stuck mid-mortise?
Perhaps more material must be removed from the head or the sides of the eyelet. Look carefully at the mortise, do you notice any places that the eyelet was rubbing? Do any of the walls of the mortise change from front to back? Sometimes the mortise is deeper in the front and it gets shallower as the eyelet moves to the back, in this case file a little more off the head of the eyelet.
Having trouble getting the depth of the new eyelet correct?
2. Is it bottoming out in the frog and not moving up or down when you turn it? You might have to file off the tip of the threaded shank on the eyelet so that it won’t bottom out as quickly, or perhaps you might want to use a foret to re-drill the hole in the frog to go all the way through to the mortise.
3. Is the shank-hole in the frog stripped? If the new eyelet is just slightly loose when threading into the frog, we use just a little thin CA on a toothpick and swab it in the hole. Let it dry and try putting the eyelet in again. Often times this reduces the diameter of the hole just enough to really secure that the eyelet is threading properly. If this doesn’t work, you might need a bigger-shank on your eyelet, or the shank-hole in the frog might need to be bushed.
Other issues
4. When adjusting the fit of the eyelet on the bow, do you find that the eyelet is too loose but if you turn the eyelet ½ turn tighter then the bow is too tight?
Try turning the eyelet another ½ turn tighter.
a. If it seems to fit better now, then your eyelet is not square to the frog, and this might have caused the previous eyelet to wear quickly. Examine the eyelet in the frog, and if it is at an angle, then you might need to bush the eyelet hole and re-drill a square hole.
b. If it doesn’t help and just makes it way too tight, then back it out ½ turn while gently pulling out with your pliers to possibly loosen the fit. Try re-lubricating the stick and the screw and see if it will work. If it is still too tight, remove the eyelet and thread it into the hole again while pushing down slightly with your pliers. This poses a dangerous situation if your pliers were to slip, so make sure your fingers are in place to protect the underslide and proceed with caution. Pushing it down, might just off-set the threads enough to help you find the ‘sweet-spot’ when setting the depth of the eyelet for the perfect fit.
Notes
1. All of the ‘Common Thread Size’ measurements are taken from: Mohr, Rodney D. “Eyelet Replacement.” The Conservation, Restoration, and Repair of Stringed Instruments and Their Bows. Vol. 3. Montreal, London: IPCI-Canada, Archetype Publications, 2010. Print. BACK TO POST