Instrument, Techniques
Carving A Violin Bridge

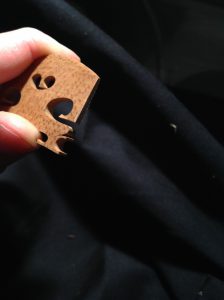
Carving a violin bridge is hard, but it’s also fun. I love doing it. This is one of the more artistic tasks a violin restorer does on a daily basis, and doing it well is a great challenge. It’s also something that takes much repetition to progress. The more bridges you carve, the better you can get. I find it endlessly interesting to look at other people’s bridges and especially from a group of people who follow the same concept. Everyone shows their own hand in each bridge despite following the same example.
Materials and tools
Bridge Blank of your choosing (We only use Aubert De-Luxe)
Bridge Knife or Knives
Block Plane
1 in Long Handled Chisel
Small Scraper
Machinest Square
Long Flexible Ruler
150 mm Ruler
Sharp Pencil
Lay-out stickers
Graphite Pencil Soft
String Groove Files
High Quality Digital Calipers
Sand Paper File
Clip Board With 220, 320, & 600 grit Sandpaper
Horsetail, preferably processed
Synthetic apron
Earth Tone Pigment Raw Sienna, Burnt Umber
Large Square of Super 70’s Shag carpet (the groovier the better)
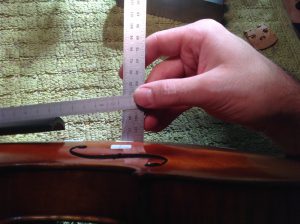
Gauge for Measuring sound post and bass bar placement
Bridge Crown Template and Matching Fingerboard Template
3 mm bow chisel
Laying Out Bridge Placement
In my opinion this step is just as important as getting the strings heights correct. If the bridge foot does not overhang the bass bar correctly the violin can sound “off” or false. At our shop we lay out the bridge on the “acoustical center of the instrument” meaning that bridge placement is determined by finding the actual center of the instrument which may or may not be the center seam of the top. It’s also important to find center by measuring from the inside line of the purfling. Measuring to the outside edge could be inaccurate on older instruments that have a significant amount of wear on the outside edge.
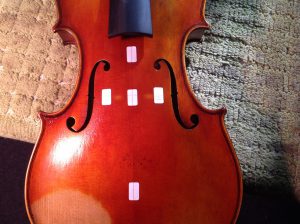
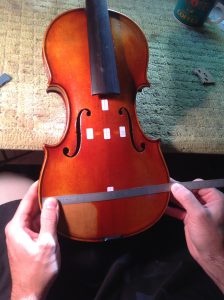
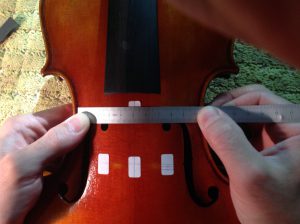
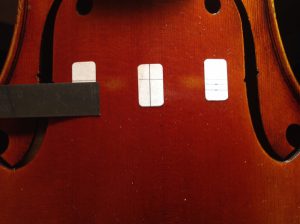
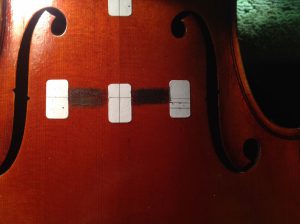
Start with placing a layout sticker on the widest point of the lower bout and measuring the width between the inside of the purfling, dividing it by two, and making a mark on the layout sticker for the half way point. Turn the ruler over and measure the center point from the other side of the of the lower bout and make another mark on the layout sticker. On an instrument where the arch is uneven or deformed this number can be different and so you will take an average of the two marks when drawing a center line. On this violin the measurements are basically the same side to side.
Do the same operation for the thinnest point of the c-bouts. Then add another layout sticker for the center between the f-holes centered on the notches. Then draw the acoustical center line by connecting the center marks on all three layout stickers.
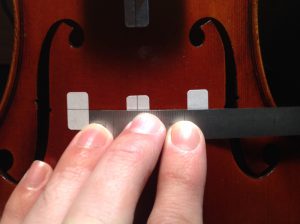
Using a sound post finding gauge or flexible ruler, find the bass bar placement and place the layout sticker 1.5 mm outside the bass bar.
Then measure from the bass side layout sticker to the center line, multiply by two and place a layout sticker on the treble side at that measurement. This will give you the correct size of bridge needed to overhang the bass bar. On this violin it is 41.5 mm.
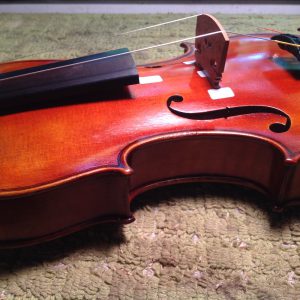
In a perfect world every full size violin would have a 41.5 mm – 42 mm bridge that overhangs the bass bar exactly 1.5 mm, but violins are generally far from perfect. Often you have to make some compromises and lean the bridge to match the angle of the neck and still overhang the bass bar while sitting on the acoustical center of the instrument. On this violin the bridge is sitting where it should be and lining up with the neck.
Thickening the Bridge
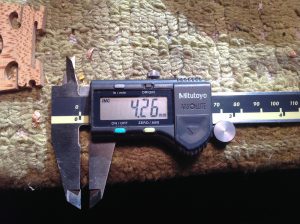
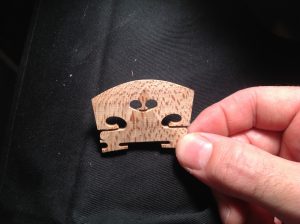
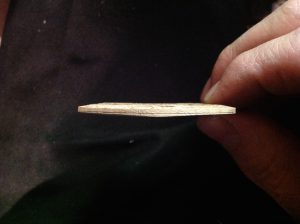
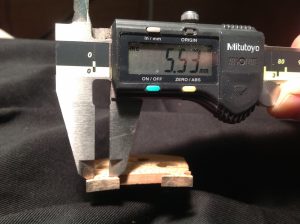
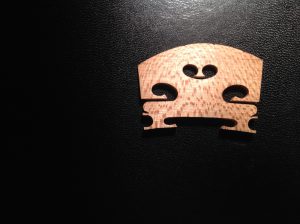
Don’t forget to thickness the feet of the bridge before you start fitting the feet. The finished thickness of the feet is 4.2 mm and I like to leave myself 0.06 mm extra for sanding. It’s also important to establish which side of the bridge will be the front and which side will be the back of the bridge. To establish this you have look at the medullary rays and the direction they lay on the bridge. You want the medullary rays to be pointing up to the string meeting the vector force. We only use Aubert De-Luxe bridge blanks where the stamp is on the back of the bridge, and the unstamped side is the front which lines up the rays.
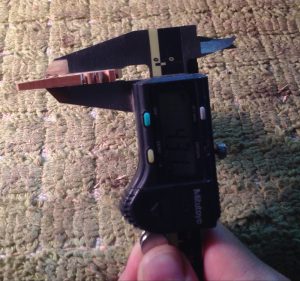
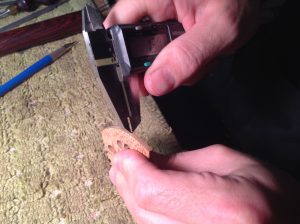
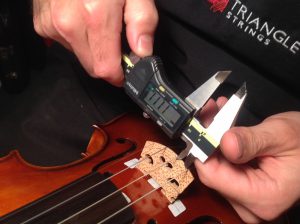
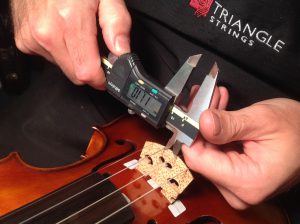
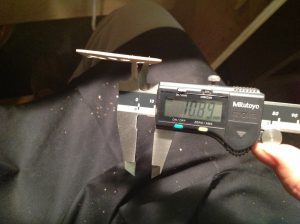
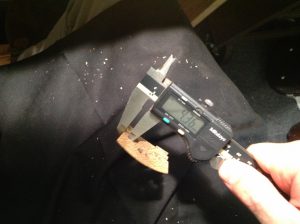
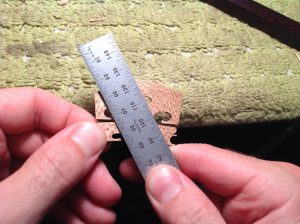
First mark out the thickness of the feet on the bottom of the bridge with your digital calipers and fill the line in with pencil.
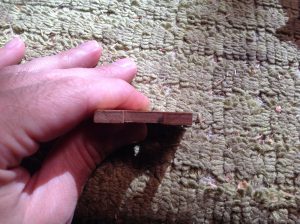
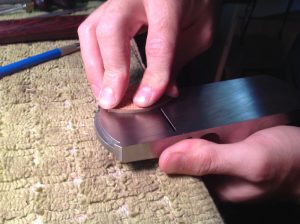
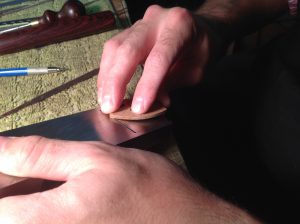
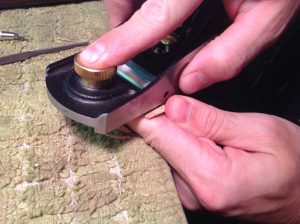
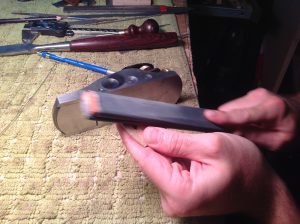
I feel like I have the most control pulling the bridge across the plane while holding it upside down.
When planing the blank it’s important to plane the front of the bridge at an acute angle compared to the back of the bridge instead of parallel. This will help remove unnecessary mass and help with the arch of the bridge later.
Fitting The Feet
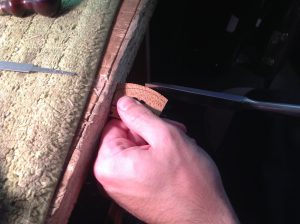
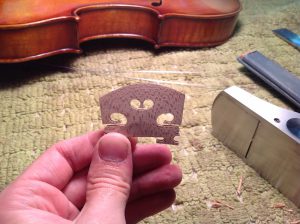
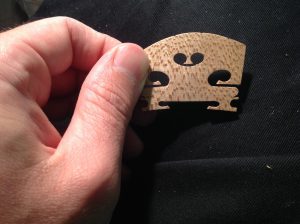
Before you start fitting the feet you need to get a visual image of how much of the feet you are removing. If you remove too much mass the feet will be skinny and the bridge will have too much forehead. If you leave the feet too heavy you will have to carve too much out of the top of the feet which in my opinion looks especially undesirable, and you won’t have enough forehead on the bridge. Understanding how much to remove comes with experience, but as a guide I always measure the neck projection before removing mass to know where I want to end up. I like using a 1″ long-handled chisel for removing most of the foot mass and for the fine fitting as well.
On a violin with a 27.5 mm projection my bridge feet end up around 1.4-1.3 mm thick.
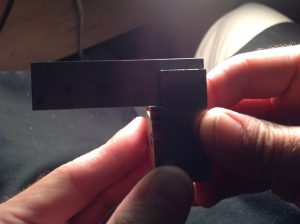
With a mental image of how much wood I need to remove from the feet I like to aggressively remove excess wood from the feet right out of the gate to save time. I also use a square on the back of the bridge to help with the angle of the bridge. The square is helpful, but not every violin bridge can be square. What it all comes down to is using your eye to decide the angle of the bridge. The back of the bridge should look like it’s 90 degrees from the top of the instrument, and you can use a square to help you get started, but it might not end up exactly square. The important part is that it looks like the correct angle when the strings are on.
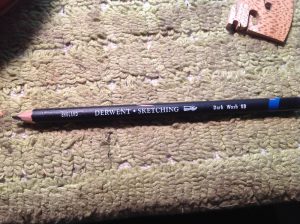
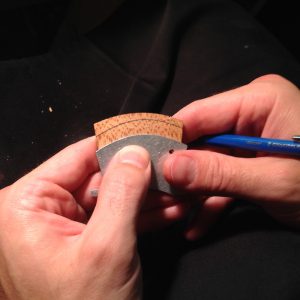
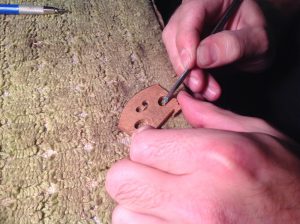
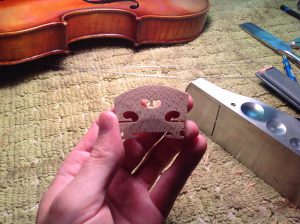
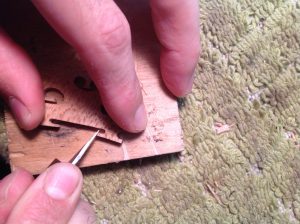
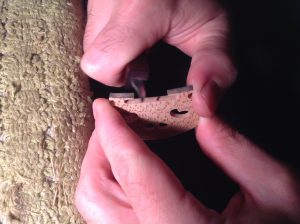
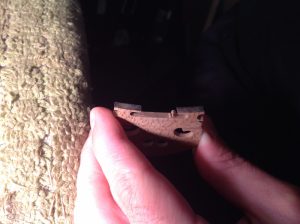
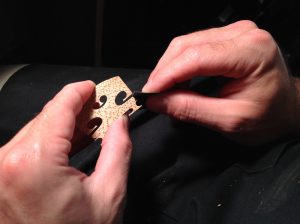
After removing some unnecessary mass it’s time to apply an indicator to show where the bridge is fitting to the top. I have tried wax pencil, carbon paper, and people have come up with all kinds of things to “chalk” a bridge in. I have even heard of people using red lipstick. I prefer the graphite pencil like the one pictured above. It’s very soft, easy to see, and easy to remove. I however refrain from using it when there are old cracks present and the graphite can work it’s way into the crack. I spend a great deal of my time minimizing the appearance of cracks, and working graphite into a crack would be the opposite of that. In those situations it’s best to find some other means of fitting the bridge feet. It’s also important to remember that before fitting the bridge feet that there must be a well fit sound post in the instrument. If there is no post or the post is too short it can affect the way the feet fit.
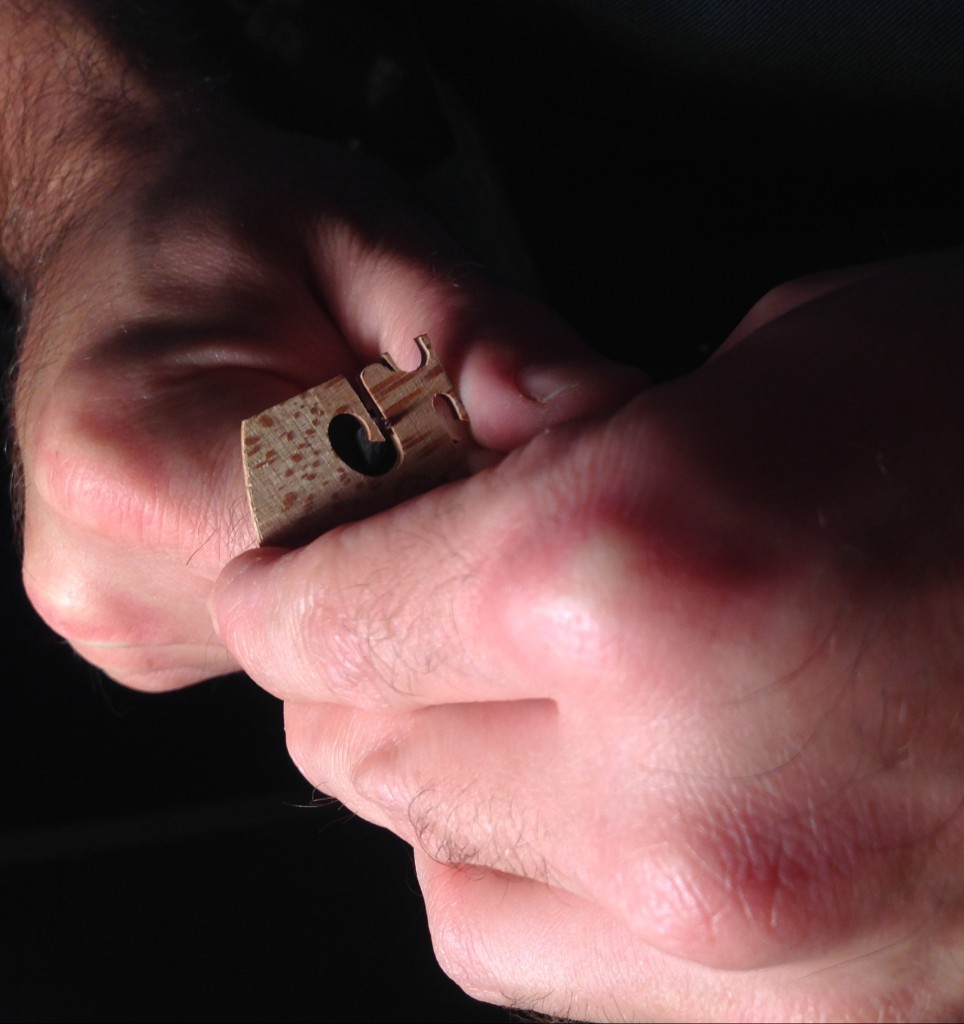
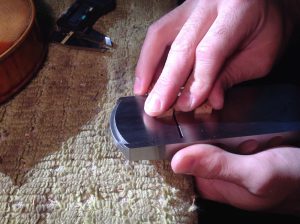
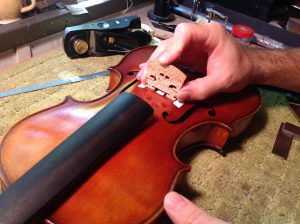
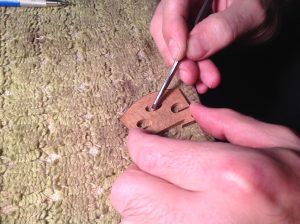
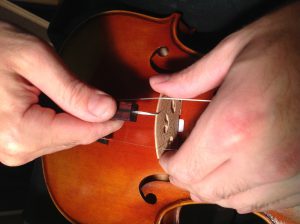
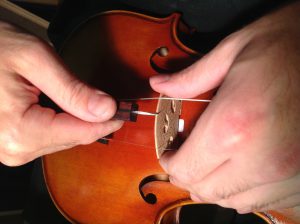
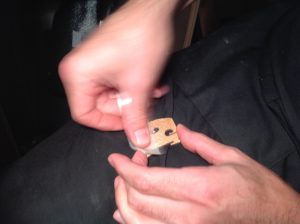
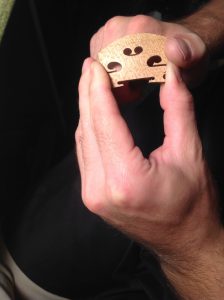
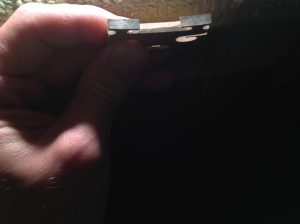
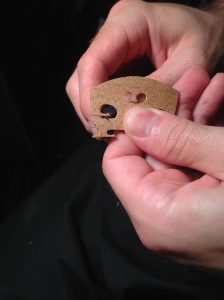
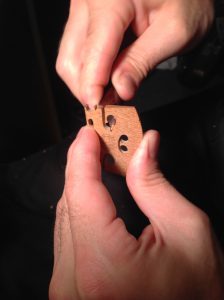
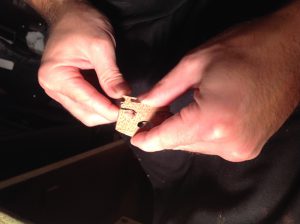
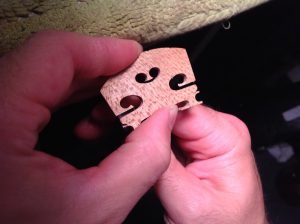
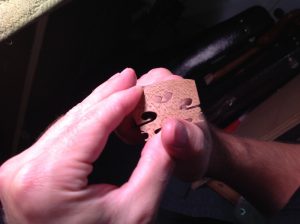
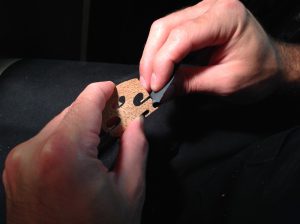
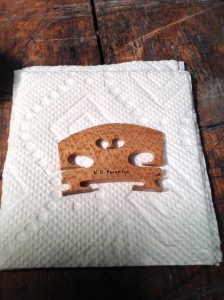
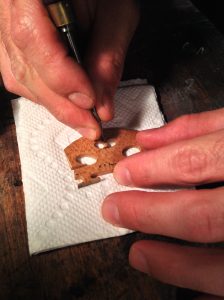
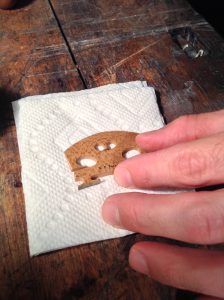
To get a reading from the graphite hold the bridge like the picture above, and firmly against the top, barely move it back and forth. It’s important to remember that the graphite can lie to you. I also lick the bottom on the bridge feet to help with the graphite transfer. What you are feeling and seeing from the fit is just as or more important than what the graphite is telling you. The graphite is just there to speed things along.
There are a few important ground rules to keep in mind when fitting bridge feet.
- Don’t make the bridge feet hollow. The feet should fit everywhere. It may seem like you are saving yourself time, but in the end it isn’t worth it.
- The feet cannot rock. If you tilt the bridge forward and back towards the top block and the end block the feet should gap evenly. Another good trick to see if there is any rock in the feet is putting string tension on the bridge. If under string tension the feet fit unevenly it’s because one side is not fitting at the same angle as the other side.
- Make it pretty. If everything else is in place, but there is just a small hairline gap that only you notice; get rid of it!
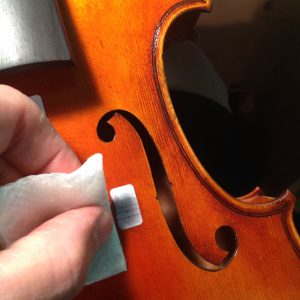
When the feet are to 1.3-1.4 mm thick without gaps, and no rock, I remove the graphite to make sure it’s not throwing my eye off. Mineral spirits on a paper towel seem to be the best noninvasive solution for this.
Establishing String Heights
I have done this several different ways over the years, but this method seems to work best for me. First, I mark out the string spacing on top of the bridge which is 34mm from the center of each string. I eyeball the spacing from edge to edge, but I do it very carefully.
From those marks, I use my saddle files to file the string grove the the E and G string only. Don’t worry, we’ll do the other two later.
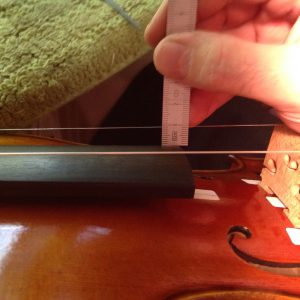
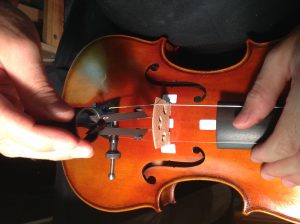
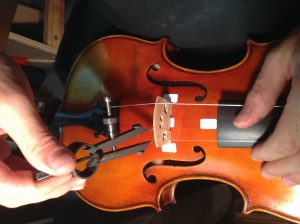
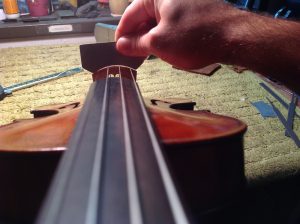
Put the bridge in place and bring the E and G strings up to a reasonable tension. Bringing them up to pitch is not necessary at this point, but you do need some tension to get an accurate reading. Measure the string height on the E and G string, and subtract the current string height from the finished string height. Which is 3.5mm for the E, and 5.5mm for the G.
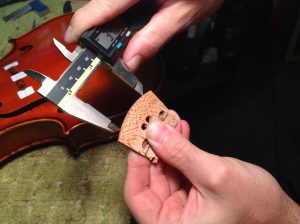
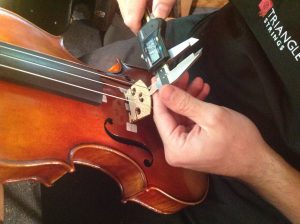
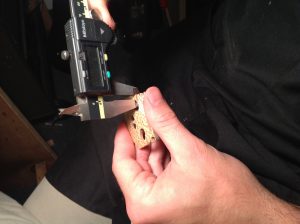
Mark out the difference on the bridge with digital calipers.
Line the bridge crown template up with the two marks, and draw a thin line with a sharp pencil.
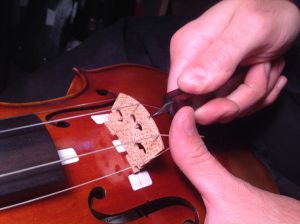
From here I like to use my 1″chisel to cut to this line, but not below it. Then clean it up with a file. Place the bridge back on the violin and put some tension on the strings, but once again not all the way up to pitch. If you measured correctly you should still be high. Repeat the whole operation again until you have the finished heights for the E and G strings. If this is the first time you are getting string heights this way I would recommend leaving things just slightly over until you get comfortable with this method. In my experience the string heights will still be slightly high under full string tension.
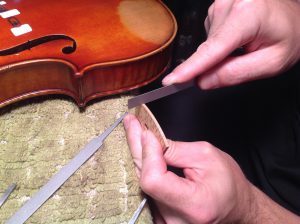
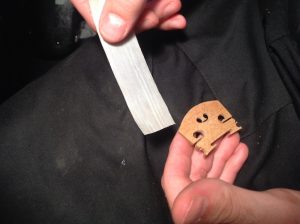
After bringing the E and G heights down a second time, I relieve the back of the bridge. I like to pull the back of the bridge into the plane blade just like I thickness the feet. The relief should start just above the bottom of the heart and should gap evenly 0.5-0.75 mm on a flat surface.
Arching the Bridge and Finishing the String Heights
Before finishing the string heights completely, I like to arch the bridge. The mass on the front of the bridge can slightly change the string height in my experience.
Mark the thickness of the bridge form the back of the bridge to 1.3 mm with your digital calipers. I like to darken the line with a sharp pencil lead so I can see it better.
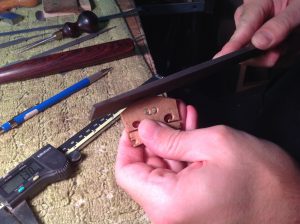
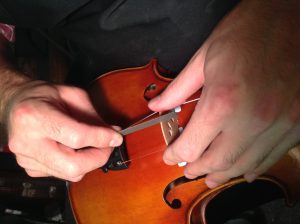
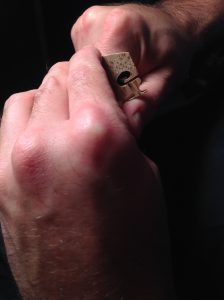
Feed the top of the bridge into the block plane just like the picture above demonstrates. Do the same to the each side of the bridge.
The finished product should be a triangular pattern pointing the center of the top of the bridge, and the middle of the heart. It should also go down below the knee cap of the bridge. You want to make this as even as possible.
After getting the triangle cut the edges off of the tonsils and wings of the bridge so they don’t catch or tear out on the next step.
To arch the top of the bridge I hold the bridge in my left hand and plane with your right. Start with the top of the bridge above the heart, but not finishing it all of the way. Then blend the rest of the bridge out toward the edge leaving a round spine in the center of the bridge. I also like to think of the arch of the bridge from top to bottom to be linked together in three different ideas. From the bottom I like the bridge to dip down, then for there to be a very round belly below the heart, then a round but straighter section around the heart, finishing into a flat portion toward the crown of the bridge. The finished concept of the bridge in my mind is an arch with flat edges that blends into a center arch with a low and fat belly. I’m looking for as much mass in the center of the bridge, and blending out to a flatter straight blade toward the arms of the bridge.
From here I like to use a sand paper file to further blend the face in the same manner that I used the plane. The low light shadow form my bench lamp is a great guide to remove any bumps on the face of the bridge. With all of that unnecessary mass removed for the bridge we can finally finalize the string heights.
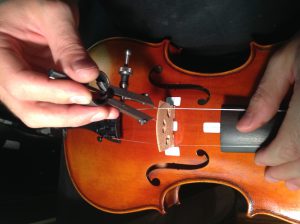
Stand the bridge back up on the violin and bring the strings back up to partial tension. Walk a divider in between the E and G string until the dividers touch the inside edge of both strings. Leave a distinct mark with the dividers in the center of the top without causing any damage to the top of the bridge.
To make the slots for the center two strings I gently mark the top of the bridge with a knife and use my 0.6mm file to make the string grooves. It’s important not to make these grooves too deep! They just need to be deep enough to hold the string in place under string tension.
After making the slots for the strings, measure in between each string with your digital calipers the see how close the string spacing is. Finished, they should be equally spaced between each string.
Before finishing the string spacing you also need to check the crown of the bridge with a fingerboard template. Unless otherwise directed by the customer I like to see this particular template sitting evenly on all the strings without rocking. If I did my job right with my bridge crown template there should be an even rock in-between the A and D Strings. It takes only a small swipe with the file to make a noticeable change when adjusting the rock with the template. I also like to bring string heights down with the template along with the string spacing at the same time. When bringing down the string height the spacing can change. Don’t do the same work twice!
To move the string spacing around make a small controlled knife cut on the side of the string slot in the direction you want to move the string, and then make a small cut on the inside of the grove to trim it. You don’t need to cut the string groove deeper just to the same depth. Don’t try to move things around with a file! Cutting in with a knife will allow you to move things without making things deeper and ruining the string heights.
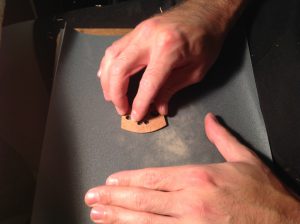
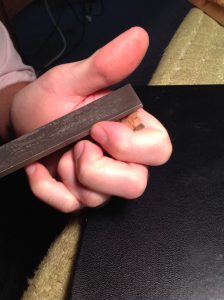
Now that you have the string heights and string spacing dialed in you can finish the surface of the bridge before carving. I make a point to do all the shaping with the block plane and sandpaper file so I can leave this step just for leaving a finished surface. Anything flat will do, but I prefer to use a clip board that hold the sand paper in place. Hold the bridge and sand in circular motions focusing of certain areas and then moving on to the next section. Make sure you don’t sand too much on a particular surface and make the bridge too thin. Remember most of the shaping is done, and this is just about refining things. Don’t go too thin! Sand through a series of grits 220, 320 and 600 grit sandpaper. I end up spending more time on the 320 and 600 than the 220 and remove very little mass while doing so. On the 600 grit sandpaper I use a considerable amount of speed and pressure to get the finish that I’m looking for. After sanding I take processed horsetail and use it perpendicular to the grain to finally finish things off. I know it seems excessive and honestly some of my friends make fun of me sanding the bridge to death, but I do have a reason for it. The end result is a very burnished and shiny look that I see on old violin bridges that have been used for many years. The patina fits in with an old violin, and often looks more like the bridge that I replaced. It also ends up being really stinking’ shiny and it makes me happy. I have a video of an old bridge to show you the finished result that I’m going for.
Carving the Bridge
This is the fun part, and it can also be the frustrating part. Fitting the feet and establishing the string heights is a functional and technical procedure where your success can literally be measured. With bridge carving I find with each week, month, and year I see something new that I didn’t see before. Whether it’s a concept or just the ability to see a few more bumps in a line that I thought looked great last week, it always seems my eyes are just one step ahead of my hands. Sometimes it’s frustrating, but it’s more important to focus on the bridge in your hand that the one I carved yesterday. I do, however, try to take pictures of my bridges over time so I can see how the style progresses, and so I can see what I need to improve on.
The Right Tool for the Job.
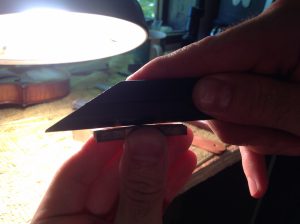
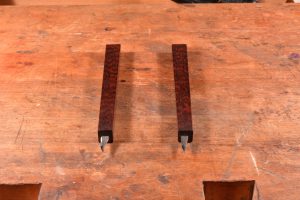
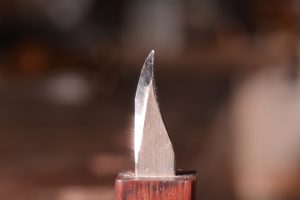
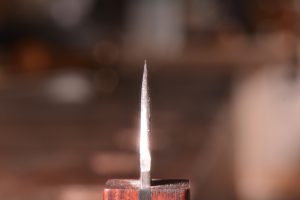
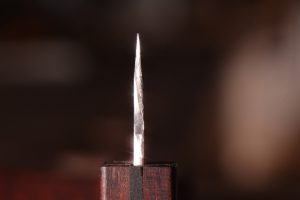
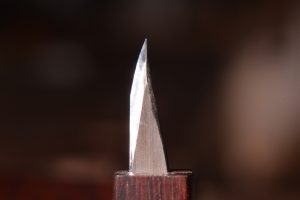
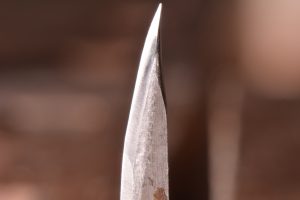
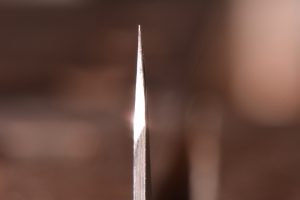
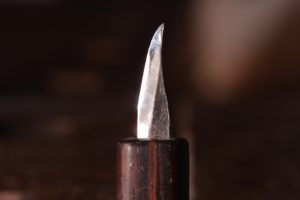
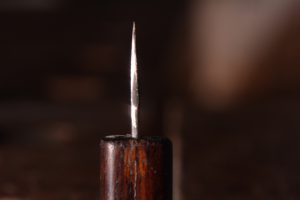
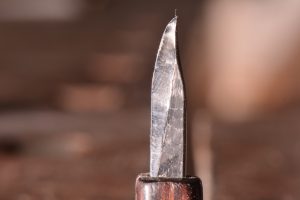
Most people I know use straight and skinny bridge knives for bridge carving. I started with a straight bridge knife and have moved onto a knife with a curved or sabered blade and haven’t looked back. I actually have several that I use for different tasks on the bridge. Some are low angle, some are high angle, some are straighter, some have more of a curve. Just like everyone’s bridge looks just a little different, everyone’s knife looks just a little different too. I have gone back and messed with the shapes on mine several times, and I’m sure I will again. Here are some examples of different knives that some of us use in the shop for bridge carving.
The curved or sabered blade cuts the inside or middle of the bridge slightly hollow leaving the outside lines undisturbed and cleaner. It’s also important to note that all of the knives have the back rounded. This is crucial. It keeps the back of the knife from digging into the bridge when carving, and when done right it can help dictate the radius of the circle you are cutting on certain places on the bridge. The angle, curve, thickness, and the relief curve on the back of the knife all function together to naturally make a particular radius. Some of my knives make a larger circle, and some make a smaller circle. This way I can tailor each knife to the style of the bridge.
Really……Two Knives……Really?
I know most people don’t do it, but as far as I’m concerned the more the merrier. If one gets dull you can just pick up the next one and touch up the line with a sharp tool.
Where am I even going with this?
I think it’s important to have a clear concept before you even pick up the knife. Find a bridge you like and burn it’s image into your brain. After it’s burnt into your brain look at it some more. I love coming back from vacation and looking at our example bridge with fresh eyes. There is always something new to think about. I also like the idea of drawing bridges. If you can draw it you can carve it.
With our style there are a few concepts that have helped me move towards a more consistent bridge. We like to think of things in circles, and each line is a tighter radius flowing into a larger radius. If you look around the room I think you will start to notice that most things that are pleasing the eye follow this concept. With our kidneys I like to think of two circles, one in the waist of the bridge that’s smaller and the other circle on the outside of the kidney becoming a larger circle, and both of them are connected by lines holding them together. In my opinion it resembles a fan belt on a car engine. Two pulleys, one large and one small, connected by a fan belt.
Every maker, shop, and person has their own concept for a violin bridge style. I know for a fact that someone out there simply won’t like the style of my bridge, and that’s fine. Style comes from what influences you, the concept of your set up, and the proportions that the bridge demands to execute the concept. In this business I have noticed that with two luthiers you will find a bare minimum of four opinions. The most important thing to me is choosing a concept and executing it cleanly and consistently.
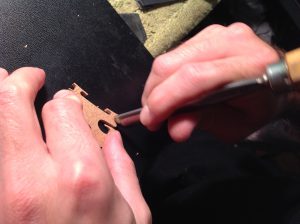
Before carving, trim the feet back to an angle, I like to use my knife for this. I start with chamfers to make sure the angle is correct and then cut all the way through to the other side.
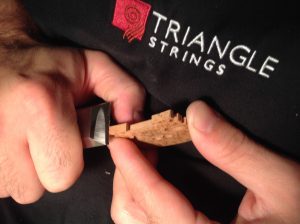
After cutting back the angle of the feet start the curve on the feet and make sure the thickness of the feet are the same. Don’t go all the way to the finished thickness so you have some room to play with as the carving moves forward. Start working on the ankles. I always make sure to work on both sides of the bridge at the same time by doing one motion or step on one side, then repeating it on the other. This will help keep things consistent. Here is a video so you can see the motion I’m doing to help establish the shape. I also often cut against the grain and turn around and cut with the grain to clean it up. This is tricky and requires a sharp knife that has the correct angle, but I also find that it helps form the shapes that I’m looking for and keeps them more consistent on both sides.
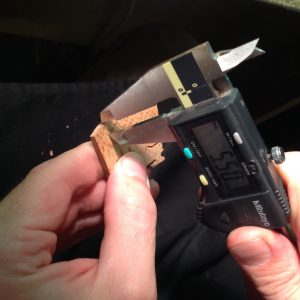
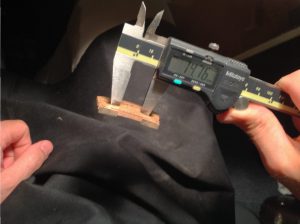
Digital calipers are my savior in bridge carving. They keep me honest, and help to train my eyes. The finished number that I’m looking for in a bridge ankle is 4.2-4.0mm. I always start carving the inside of the ankle first and leave the ankle 4.5mm thick. This allows me to remove less from the outside of the ankle to better position it over the bass bar.
After I have the ankles carved to a shape and thicknesses to 4.5mm start to blend the lower arch of the bridge into the ankle. It’s easy to get carried away with this and I find it’s best to be conservative. The end result that I’m looking for is a very slight curve blending into a tight circle in the ankle, and blending it into a larger radius in the feet. I also blend both lines on the front and back of the bridge separately leaving a ridge in the middle, then I remove the ridge and make it slightly hollow with my knife.
Bring the outside of the ankles to the final number of the bridge to 4.2mm. At this point I have often fallen into a trap trying to make everything absolutely perfect. You don’t need to completely finish this now. Just leave a clean consistent Idea that you can go back over later and clean it all up with the rest of the bridge.
Now open up the part of the bridge under the arms and above the ankles. Having a knife that has a low profile and doesn’t round over the bottom of the arms is helpful here. I like for this line to end up very straight. Try not to remove too much wood. I don’t like the Idea of having a number for this I just try to make it look right.
Now I start to bring in the waist on the bridge. Just like the ankles I like to cut against the grain and immediately turn around and cut with the grain. Going in both directions helps keep things more consistent. This circle will be slightly smaller than the circle on the outside of the kidney and will be nestled a little lower.
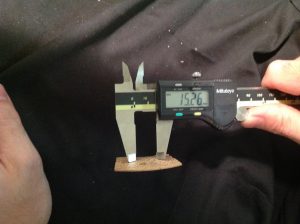
The finished number here 14.75-15mm. This number is a little smaller in than some other people’s bridges, and we are looking for some extra flexibility for a player to get the string moving and vibrating for our 6.5mm sound post. Each bridge blank had a different stiffness and you have to flex it to decide how far to take in the waist. On this bridge it ended up being 14.76.
Something that will help keep the kidneys consistent is measuring the size and thickness. First measure the outside arm thickness for a reference, sometimes they will be a few tenths of a millimeter off. Keep this in mind when measuring the size of the kidneys. Then measure the distance between the kidneys on the inside of the bridge, and start removing wood from the waist. I actually count how many cuts I make on the waist and replicate the same amount of cuts on the other side. I then remeasure the size of the kidney. This will help keep you from bringing the waist too far in on one side of the bridge when compared to the other.
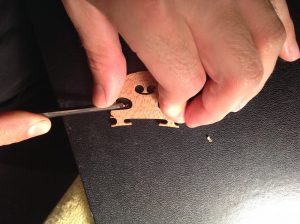
Before I carve the outside of the kidneys I bevel the arms to a fine point with a small chisel.
Then trim the arms back. It’s really easy to chip or blow out these delicate little arms so a light touch is necessary. I start by making a back cut on the bottom of the arm and trimming down to it. It’s hard to tell someone how far to trim these back. It’s all about the flavor of the day. On some bridges I really like to see them short and on others I really like to see them long. It’s all about making everything work together. The most important part to me is to see the arm flare up at the end. The further you trim it back the smaller the flare of the arm. Sometimes this can look nice, especially if it matches what’s going on with the feet.
Now it’s time to bevel the arms. They should match the angle of the feet. Once again be careful! Things want to chip out. Really this part of the bridge owns you and don’t you dare think you own it. You got to dance for it.
With the arms trimmed and beveled, you can begin to finish the outside circles of the kidneys. Whatever you do it’s important to do the same on the other side. This circle is larger than the circle in the waist. After the outside circle is established you can begin to blend the two circles together. It’s harder than it sounds. Remember to stop and hollow out the middle of the cut with your curved bridge knife. This will be crucial for making things look fresh and clean.
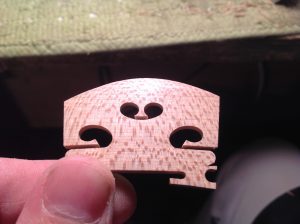
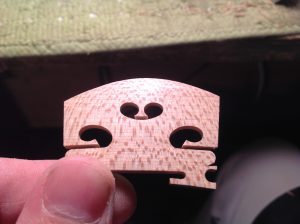
I save the heart for last. The Aubert bridge blanks come with two humps on either side of the heart, my job here is to remove them and continue a smooth line to either side. Try not to do too much here if you can help it.
Now is the perfect time to start looking hard at everything and figure out how to make it all work together. Clean lines and transitions up, clean up the feet and ankles, and put some love into it. I really think the difference between a good bridge and a better bridge happens in this moment. You can measure everything to death (and I do) but it all comes down to what your eyes see.
There is a little annoying bump at the end of the kneecap on the bridge. I like to see the kneecap nice and round sandpaper seems to do the job for me. There is also a little bump underneath the kneecap, and I like to sneak a thin piece of sandpaper in there too.
Then I chamfer the tonsils on the heart. I like to see them come to a point.
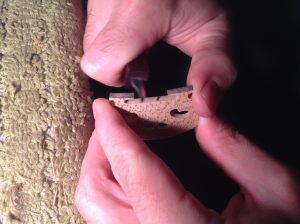
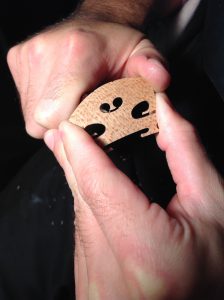
I prefer to do the champers on the side of the bridge with a one file. It’s important to keep the file steady for a constant cut. I also lean the file slightly to the bottom of the cut to make it slightly larger. It’s also important to use my finger as a stop so I don’t mar-up the bridge with the file.
I don’t even know what to call this part of the process, but this is how I do it. I guess you could call it a ‘comma’ below the knee and I use a shallow gouge for this.
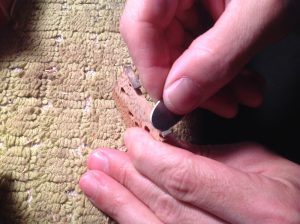
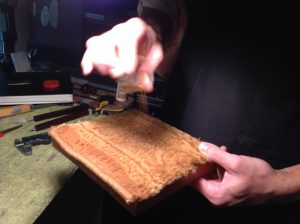
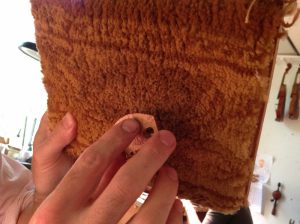
Things have come together, and you have chased every bump down until you’re cross eyed. It’s time to color the bridge. This is a mixture of mostly raw sienna and a little burnt umber. I’m adding a healthy dose to the carpet wich isn’t necessary every time.
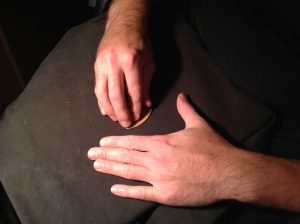
To get the color to transfer, dab the bridge with gumption against the carpet upside down. Rub it in. Make sure the get both sides. Don’t breathe the pigment in.
The last little finishing touch to the surface of the bridge is this old synthetic fabric shop apron. Whatever it is, it’s not cotton. It seems to work perfectly by adding a patina to the bridge making it look shiny and old. Here is a video showing the burnishing and final result.
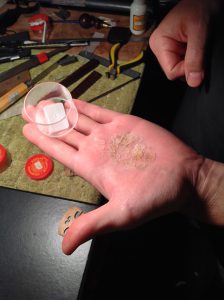
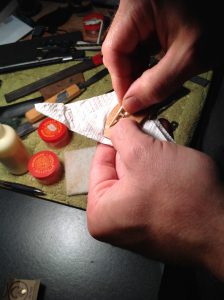
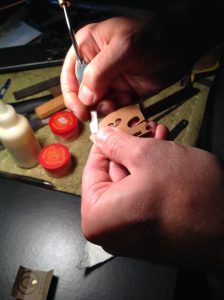
I try to pick out the thinnest parchment possible. Each time I pour my stock out in my hand and pick through all of them until one feels pliable and thin. When I pick one out I moisten it with water before applying it.
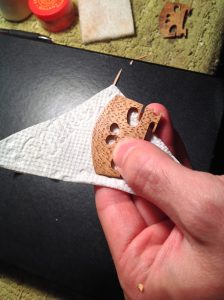
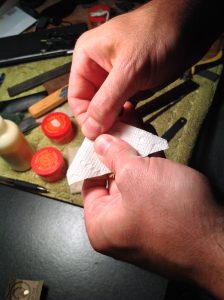
When applying the parchment I get a paper towel and hold it firmly behind the bridge and sneak a parchment on the back side of the bridge without glue, lined up the way I want it. Our parchments are precut and have a textured side and a smooth side; the textured side should be the glued side, facing down.
Fold the parchment over the top of the bridge and hold the other side firmly in place for a second, allowing it to set in place.
Flip the bridge over on the back side.
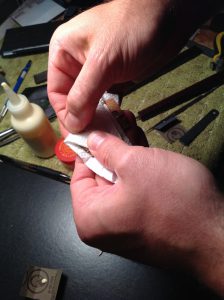
Fold the paper towel over and pry up the parchment on the back side of the bridge while holding the paper towel and the parchment firmly on the front of the bridge. Apply some aliphatic resin conservatively to the parchment. Just a little will do it.
Fold it over again.
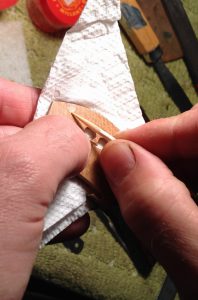
Repeat the same process on the front of the bridge. If there is any excess glue just swipe it away with the toothpick.
Fold it back into place and hold it firmly
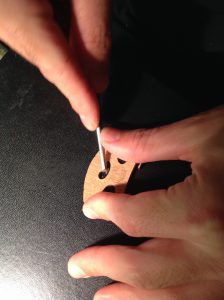
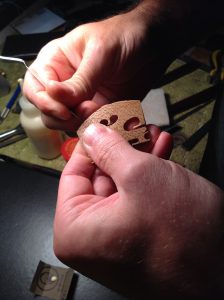
I like to stick something thin into the string grove to help settle the parchment on the bridge. Often this brings the ends of the parchment and I pat them back down.
I also like to pat down the parchment one more time.
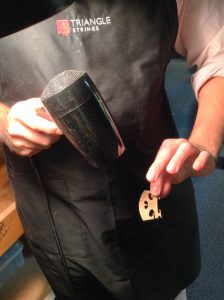
You can let it air dry for 15min, but I almost always hit it with a blow dryer. Blow dry both sides for 10-15 seconds, or until it’s just too hot to touch.
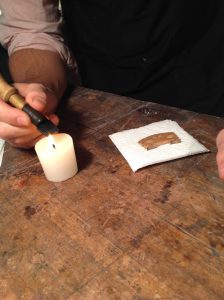
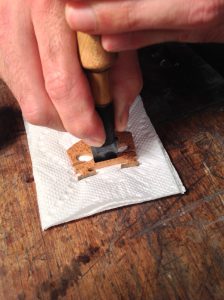
After you have poured your heart and soul into the bridge this is your shining opportunity to stamp the bridge ever so slightly crooked. I’m never completely satisfied with the the angle and placement of the stamp, and I’ve found from personal experience that it’s never a good idea to go back over what you have already stamped. I have had to look at my crooked stamps with endearment. Just like everything else we do, to more you do it, the better you get. I always clean the stamp before stamping the bridge, and soot from a candle seems to give the stamp the perfect color that I’m looking for.
When stamping, I come in at a slight angle instead of 90 degrees to the bridge then roll the stamp into 90 degrees. Then I rock the stamp from side to side, then roll the stamp towards the bridge feet. I don’t need much pressure on the stamp to get a nice transfer.
After stamping the bridge each person in our shop has a location on the bridge where you leave a dot so you can identify who carved the bridge down the road.
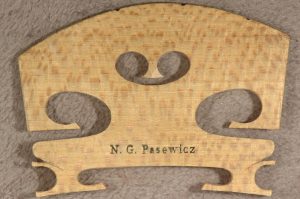
Here is a close up of the finished product.
