
Bow, Techniques
Repairing a Broken Bow with a Headspline

Jul

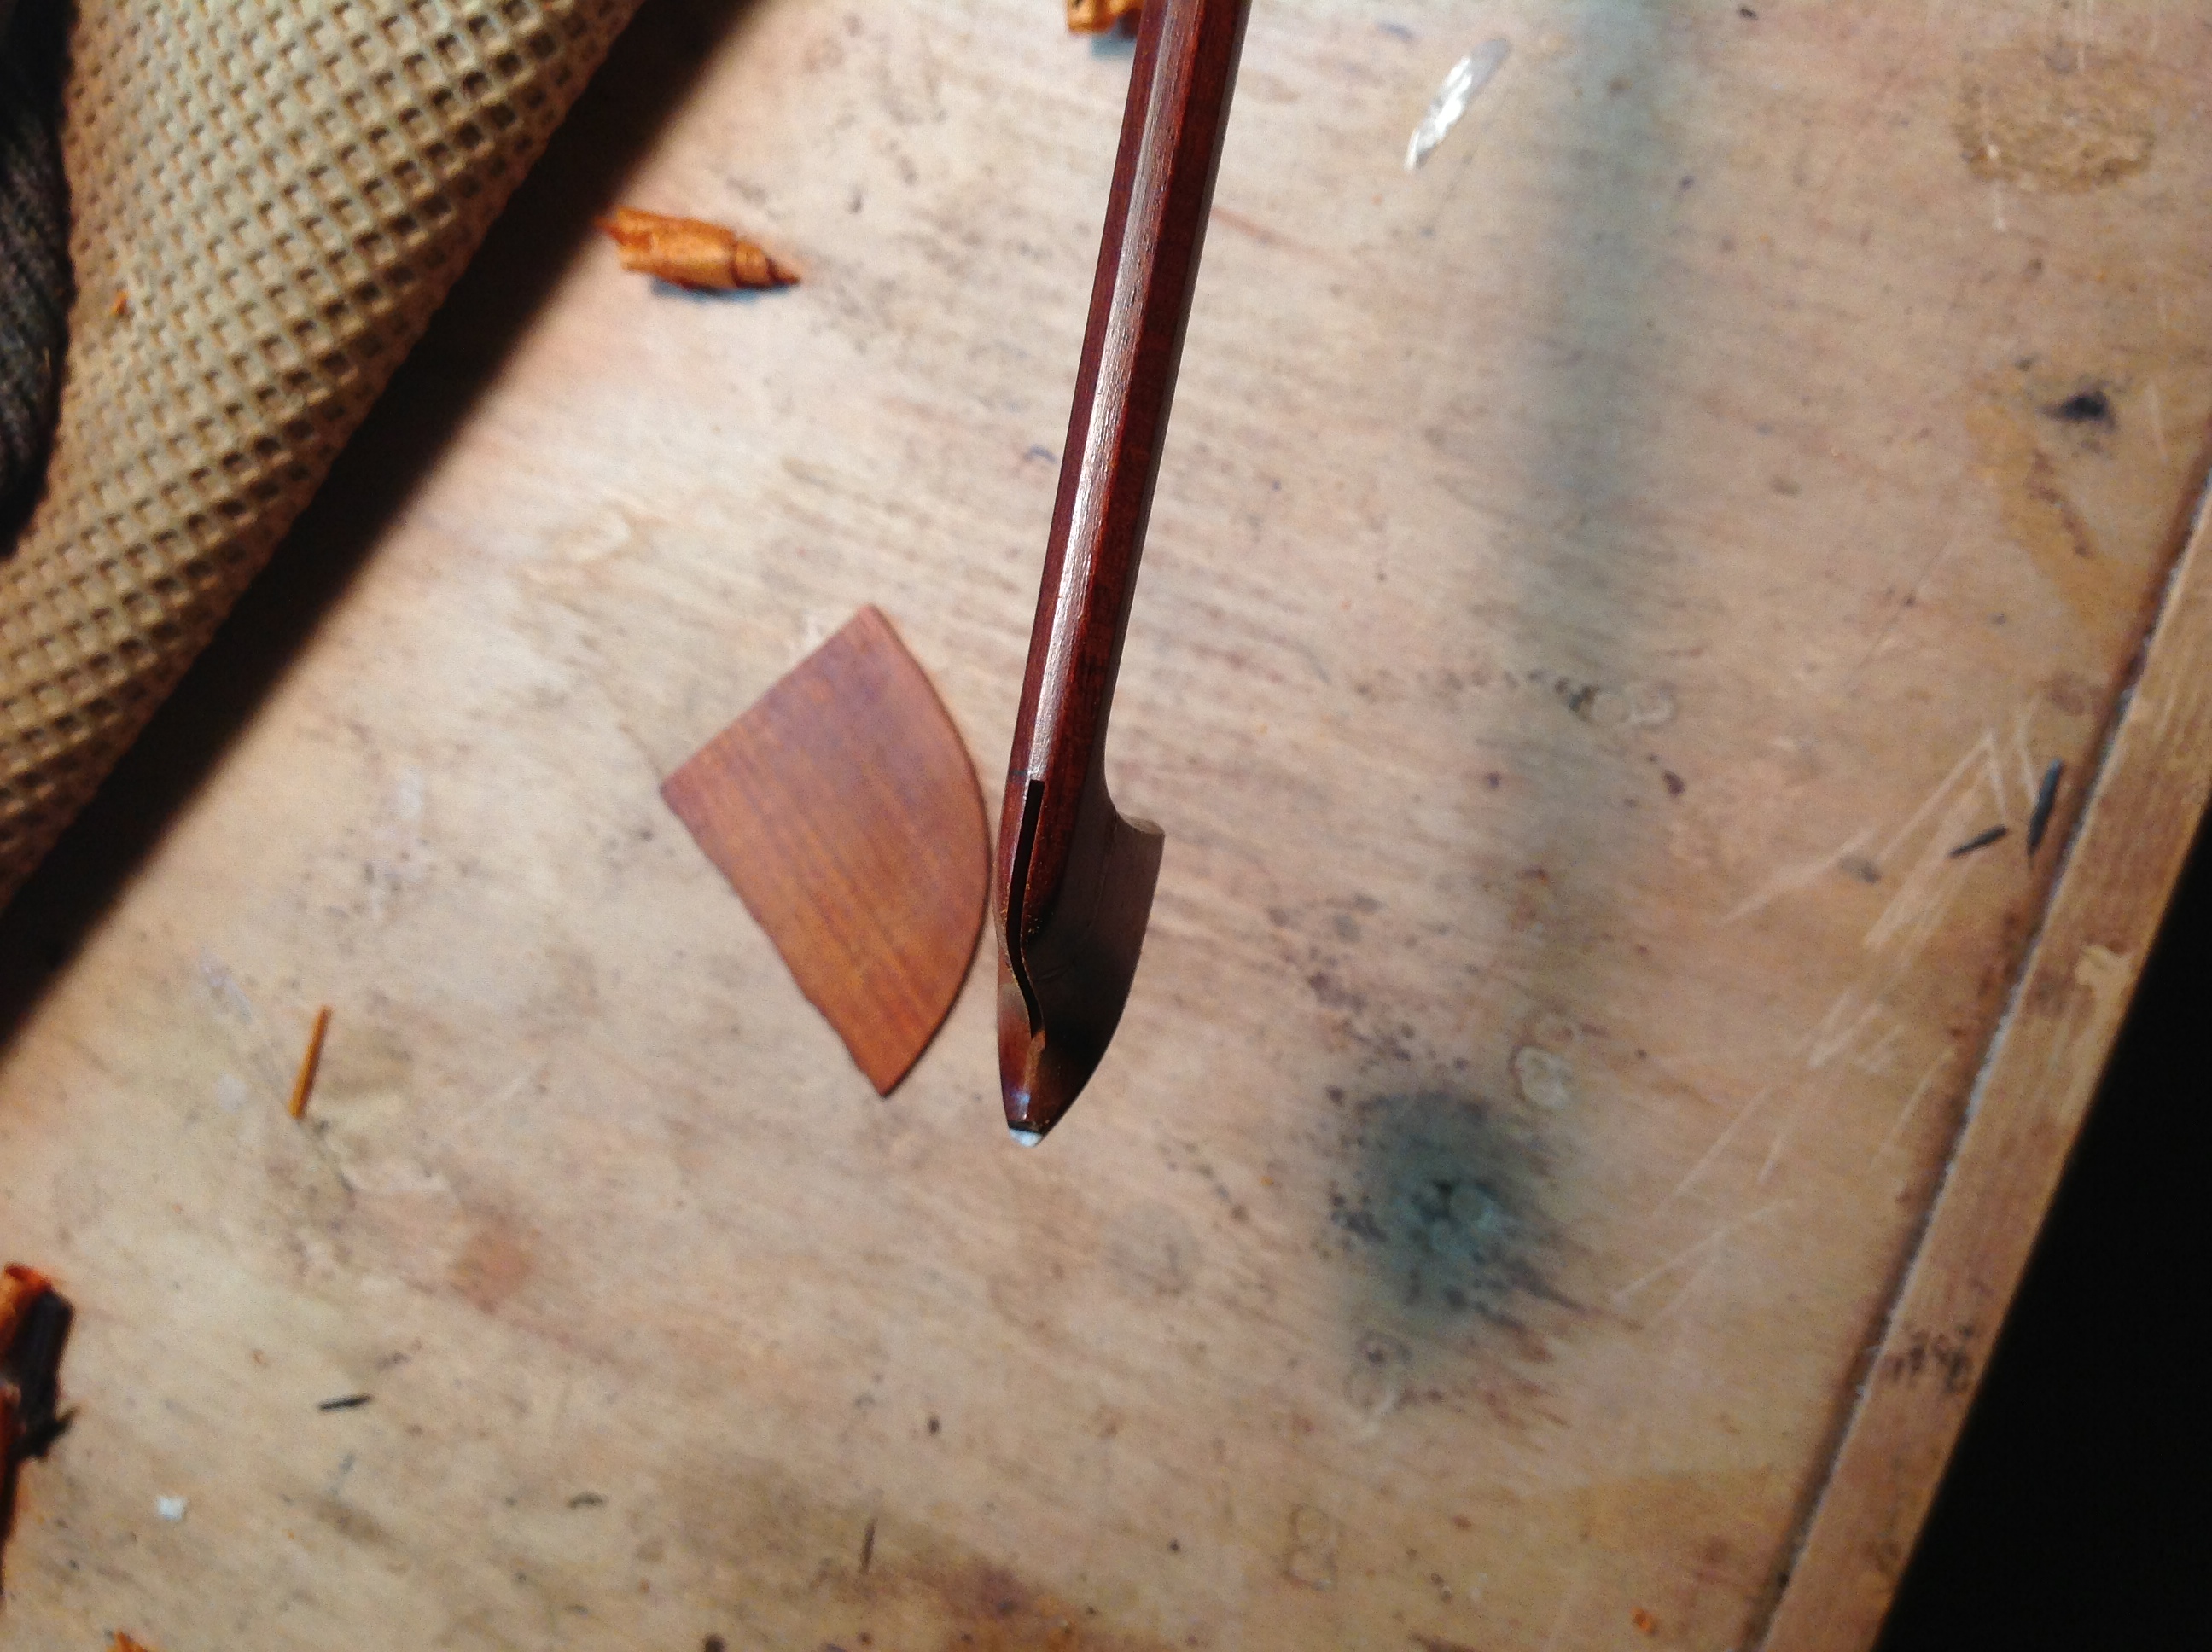
A headspline is a common way to repair a bow that has been irreversibly broken at the tip. Once the bow is glued back together, a piece of pernambuco is inserted crossgrain to help support the glue joint from coming apart.
Tools and Materials
Thin Cyanoacrylate Adhesive
Toothpick sharpened into a paddle
Mini straightedge
Lathe
Mandrel
Saw 2x.035×1/2″ 110 teeth
Jig for holding bow in lathe
Gasket
Slice of pernambuco for spline
Baking soda
Piece of plastic ziplock bag
Buddy
Sharp knives
Jeweler’s saw
Fine files
Chunk of soap
Piece of plexiglass with curf of saw cut in it as a jig for lining up saw to bow
If in a workshop with a separate machine room and other workers – a sign to put on the door so that people don’t come busting in.
Potassium permanganate
Nylon brush and water
600 grit sandpaper
Mineral spirits
Razor edge straight edge
Digital calipers
Alcohol
Prepping the bow for a spline
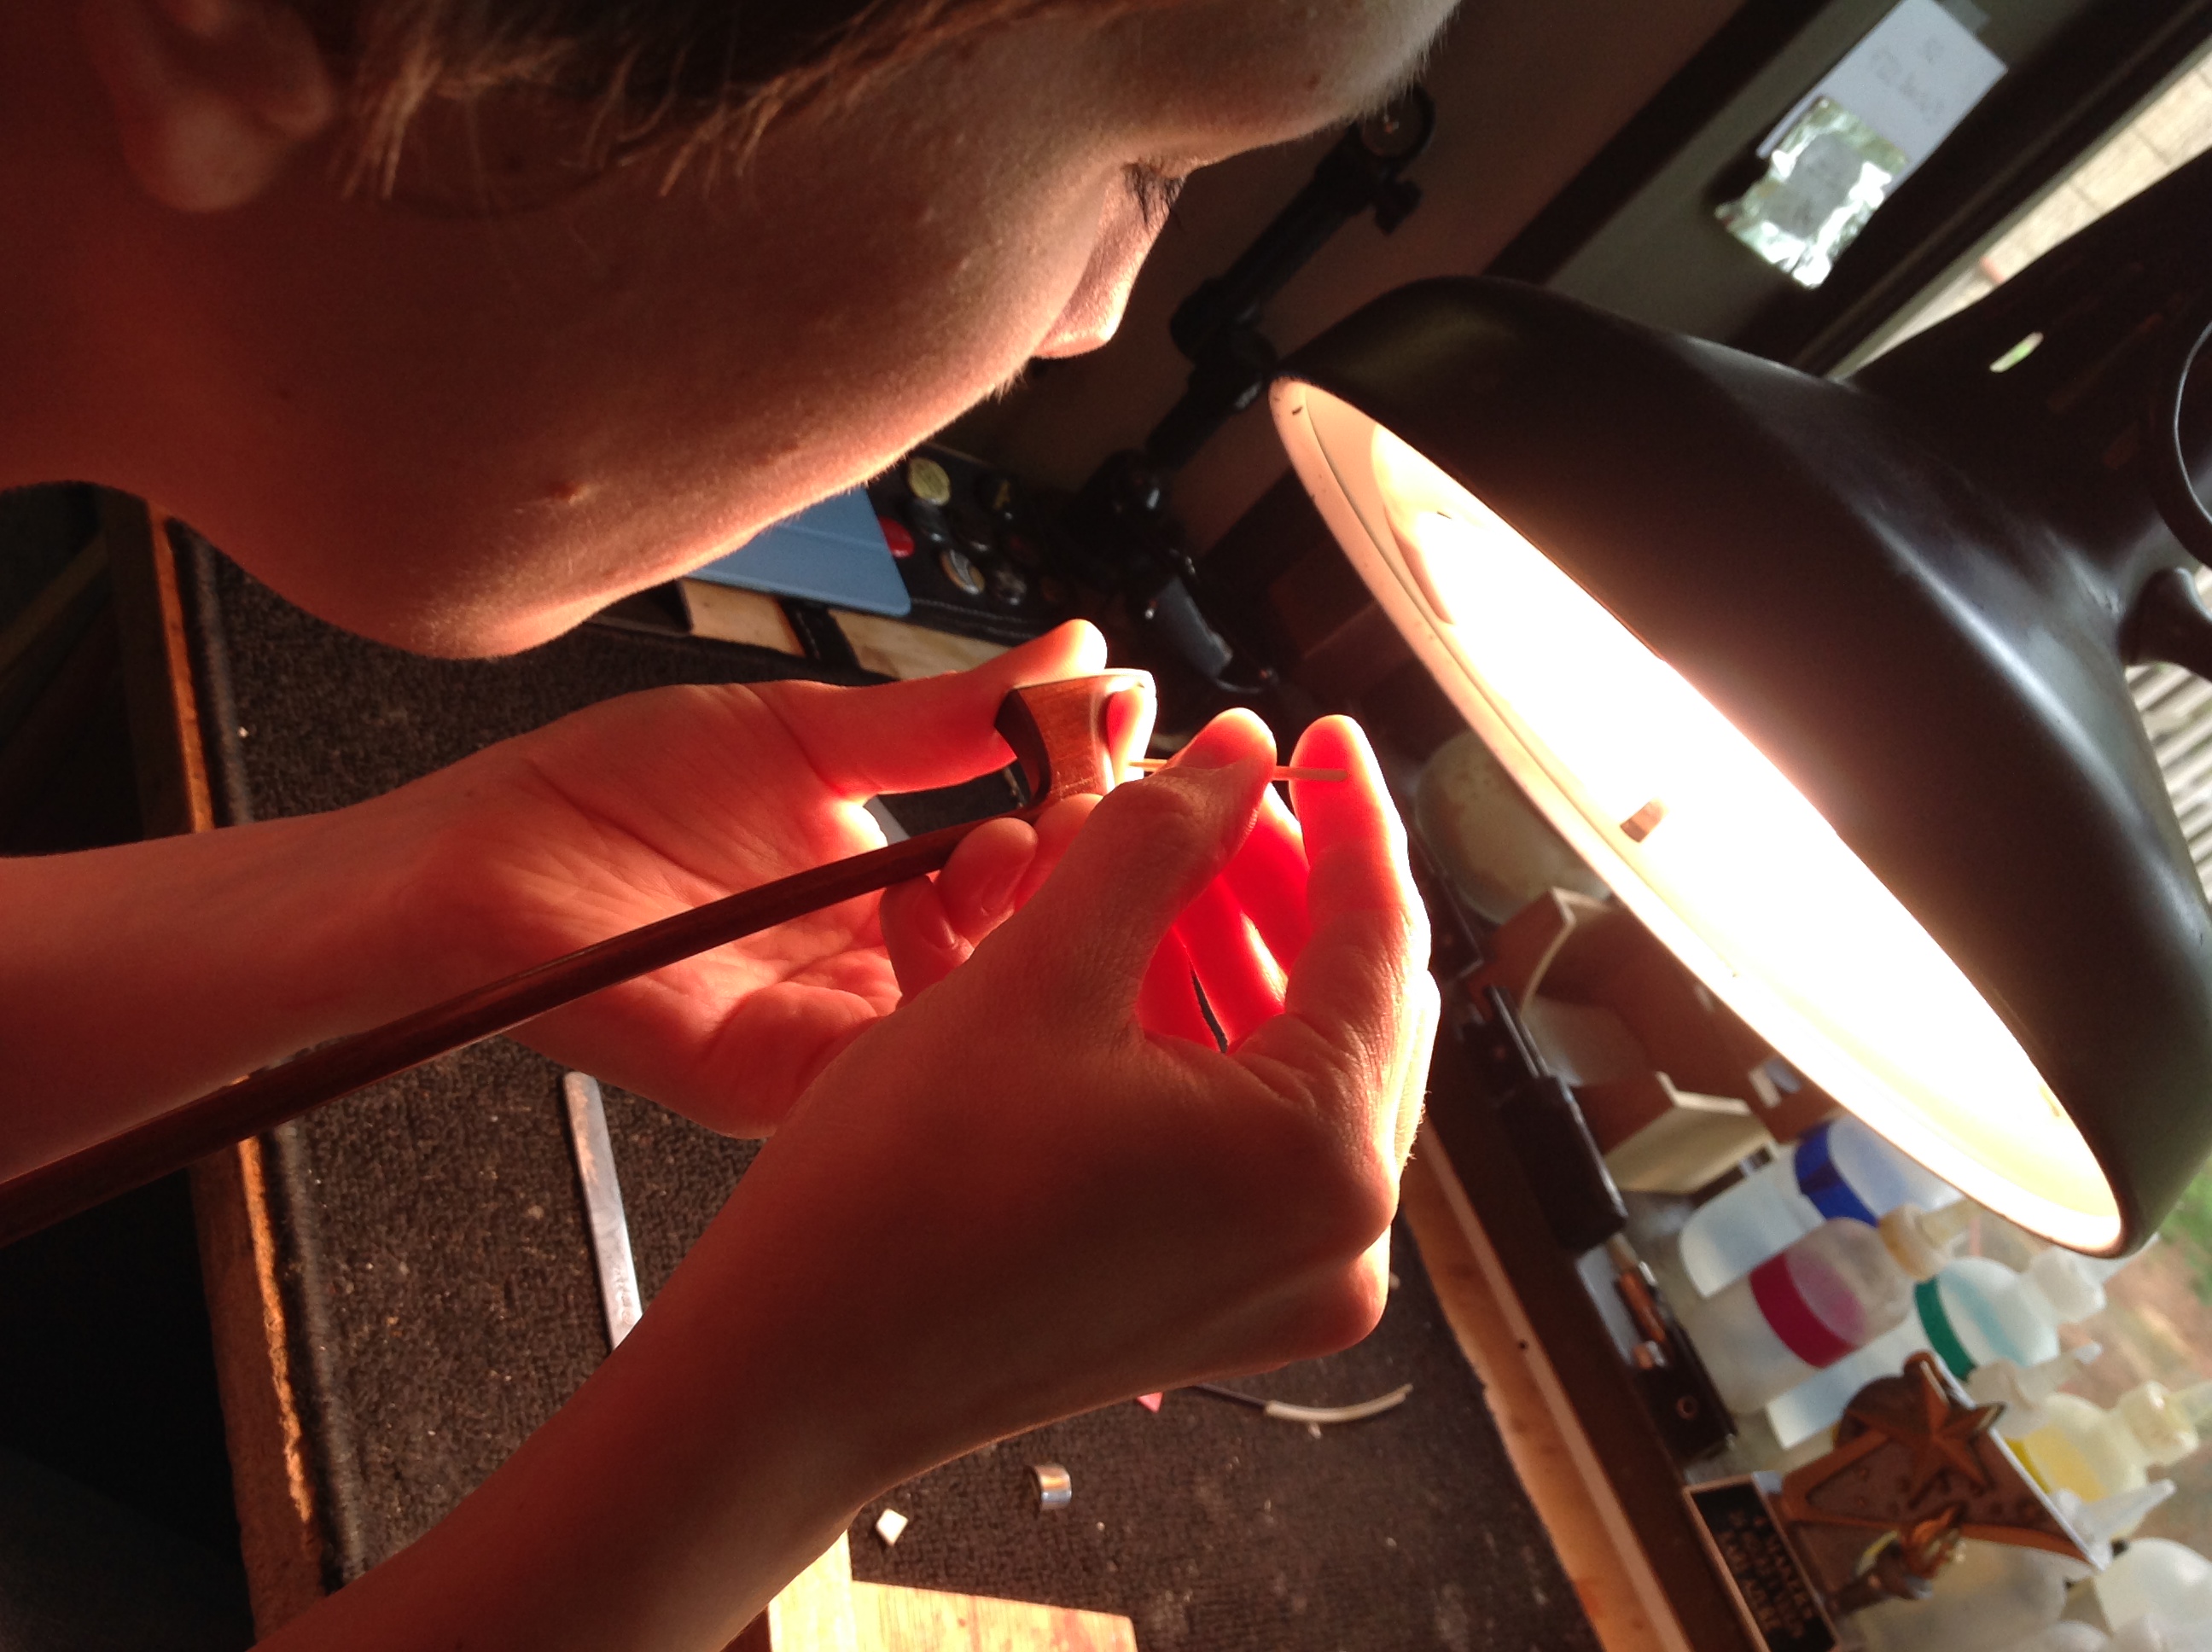
Wash your hands!
Take photos of the bow. Take notes of characteristics of front spine. Does it wander? Is it rounded or super aggressive and sharp? How does it interact with the top surface (round/octagon)?
Prepare the bow for work: remove hair and clean.

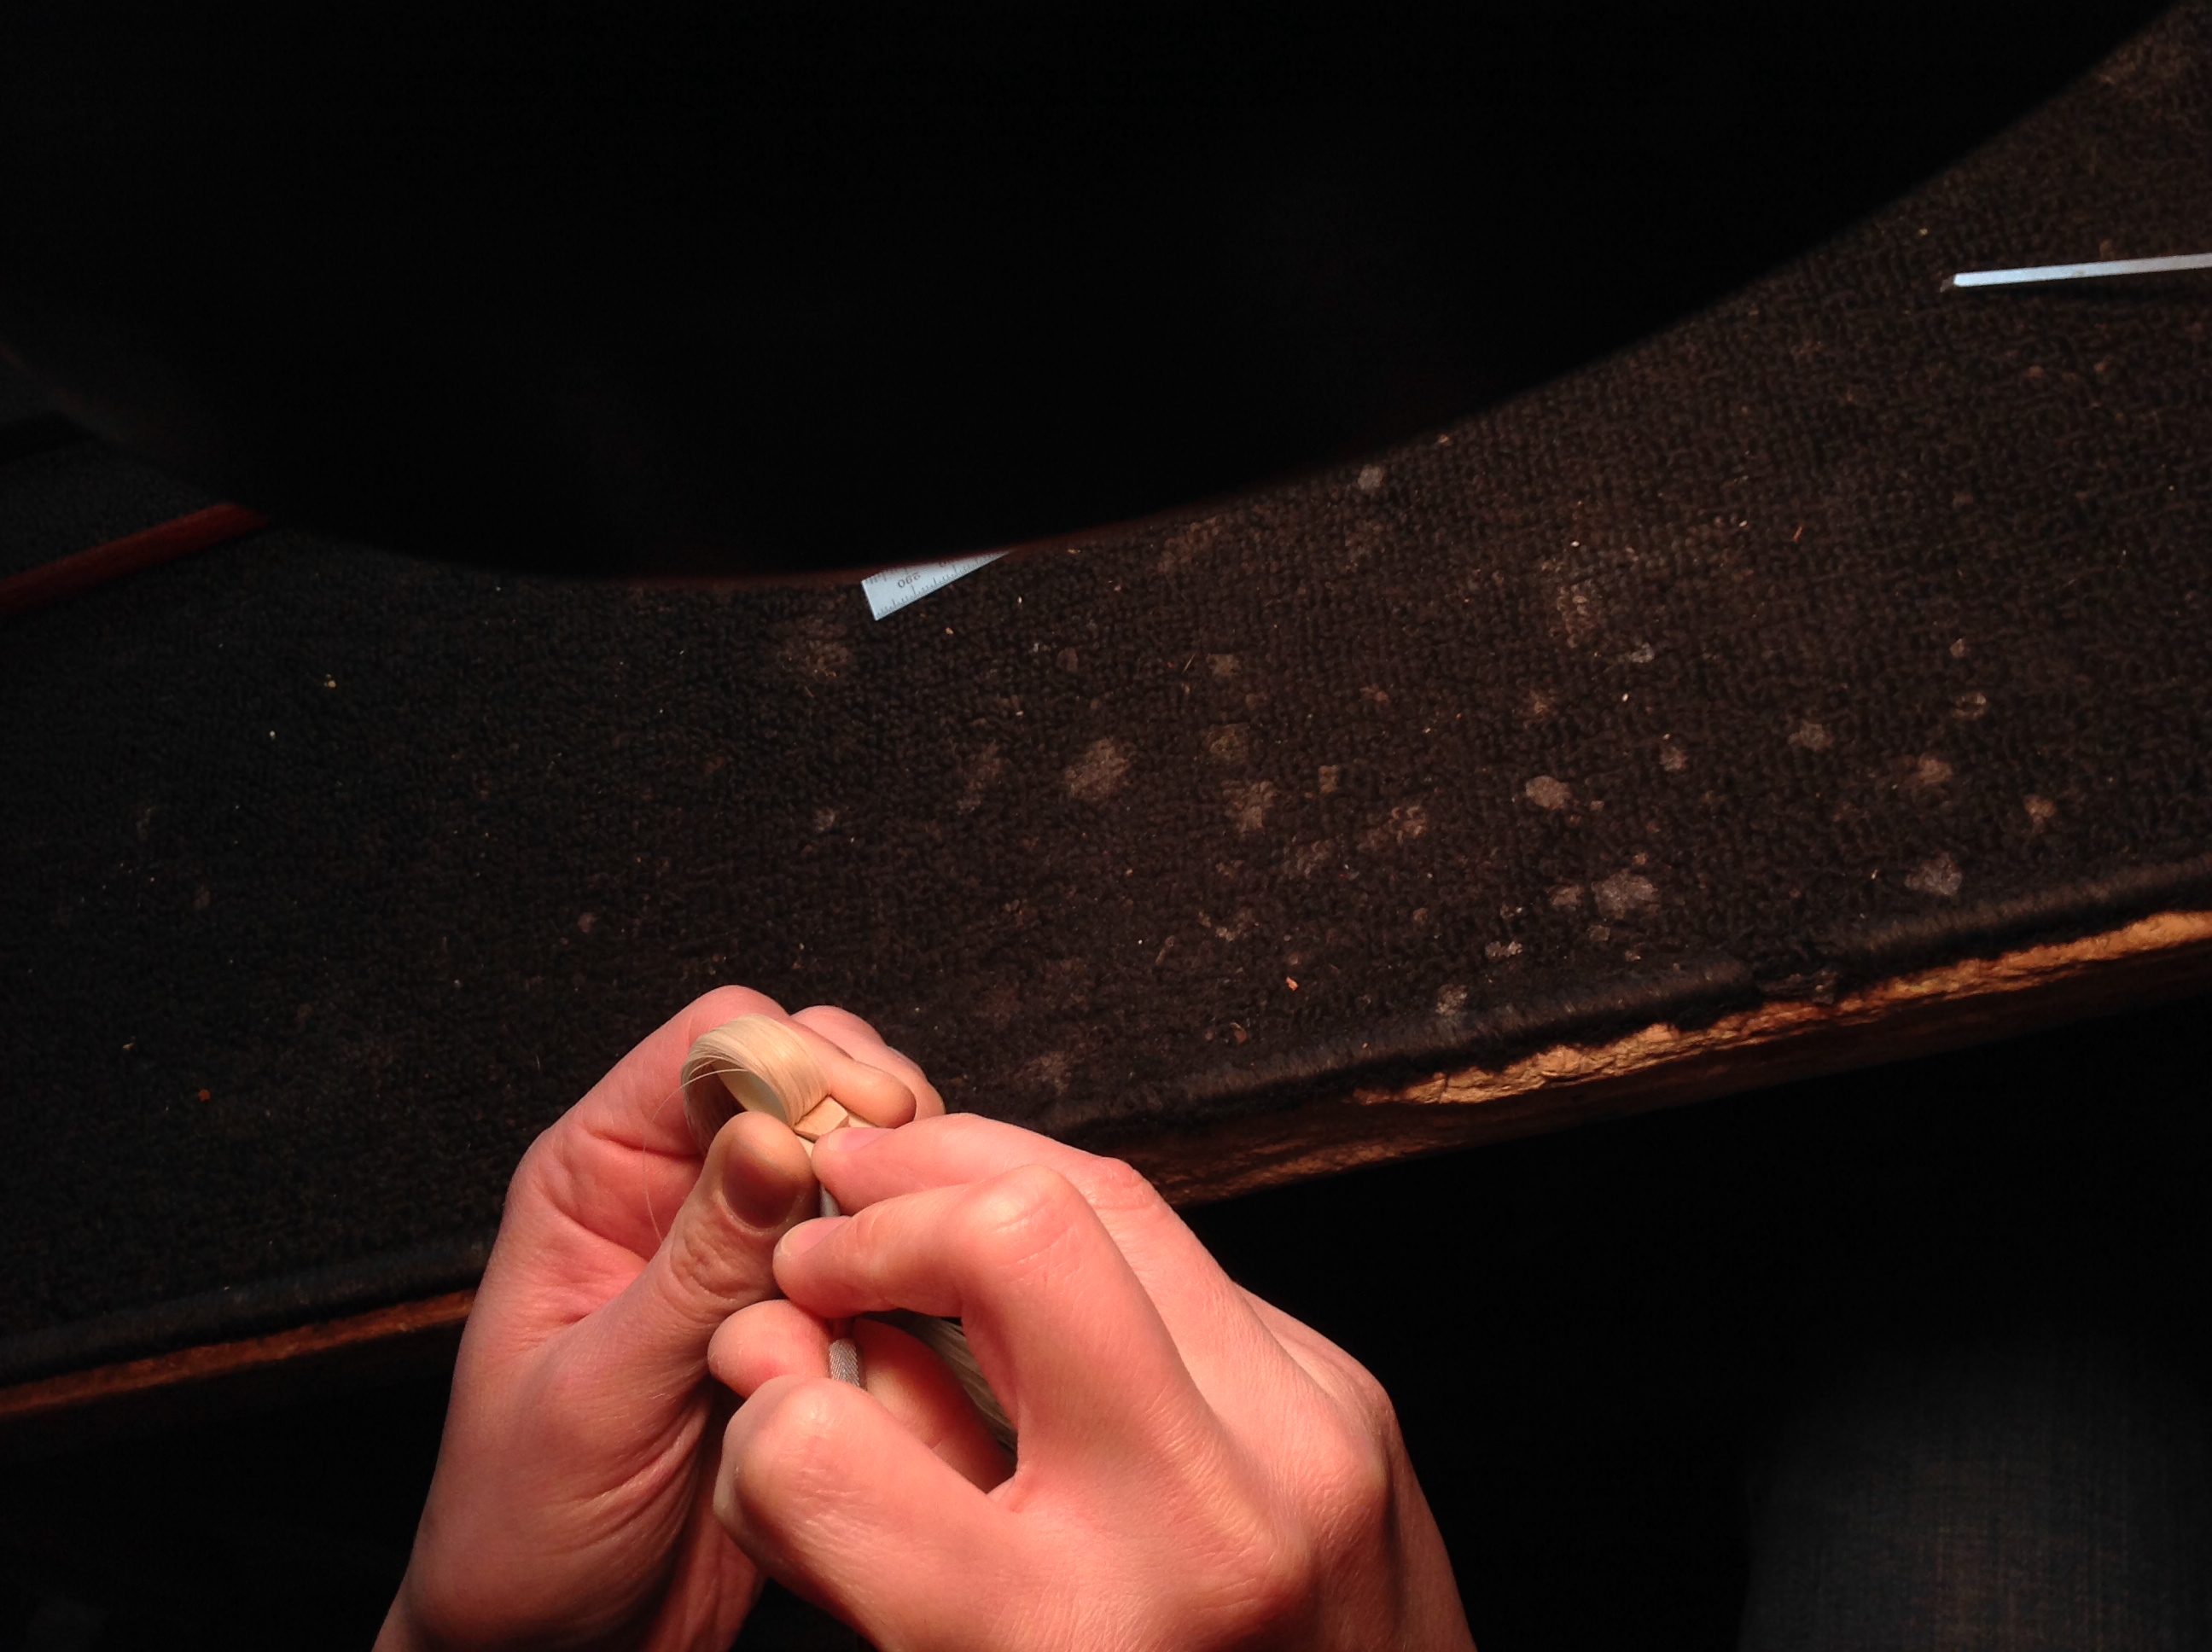
Clean the stick with alcohol – be careful not to lose any wood around the rough edges of the crack.
If the head has been glued before: clean out the old glue. The glue will have swollen up the wood and the head won’t want to go anywhere else.
Try to line head up and check with a straightedge.
Be aware that the head and the stick might be at different humidification levels (especially if head has been stashed in a plastic bag for safe delivery to the shop) and they will not line up properly if the humidity is not the same.
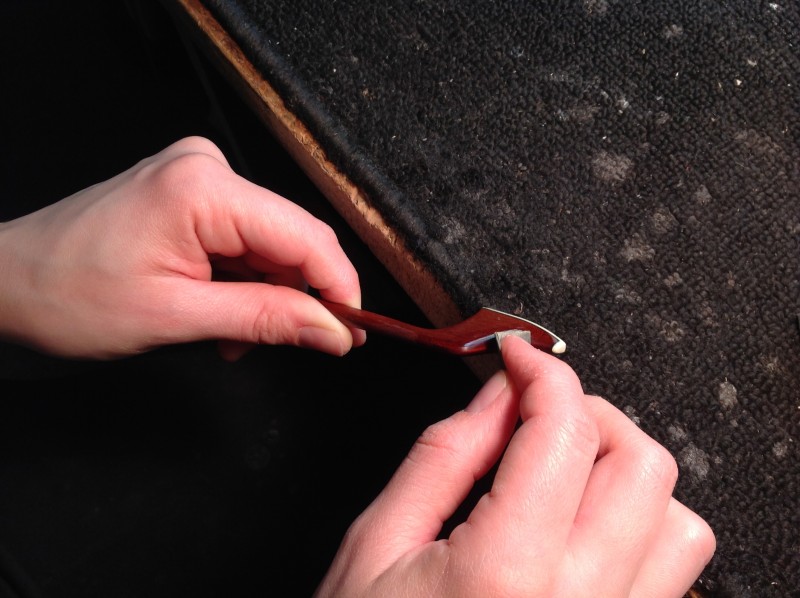
Sharpen a toothpick into a paddle
Use a fresh bottle of thin Cyanoacrylate Adhesive (CA).
Using the toothpick paddle, put a drop of CA onto the crack on just one spot and make sure head is still aligned. Finish gluing the rest of the seam.
Don’t soap the head yet- it is too likely that soap will get in the crack.
Tape a note over the door handle to the machine room warning people that there is a headspline in progress.
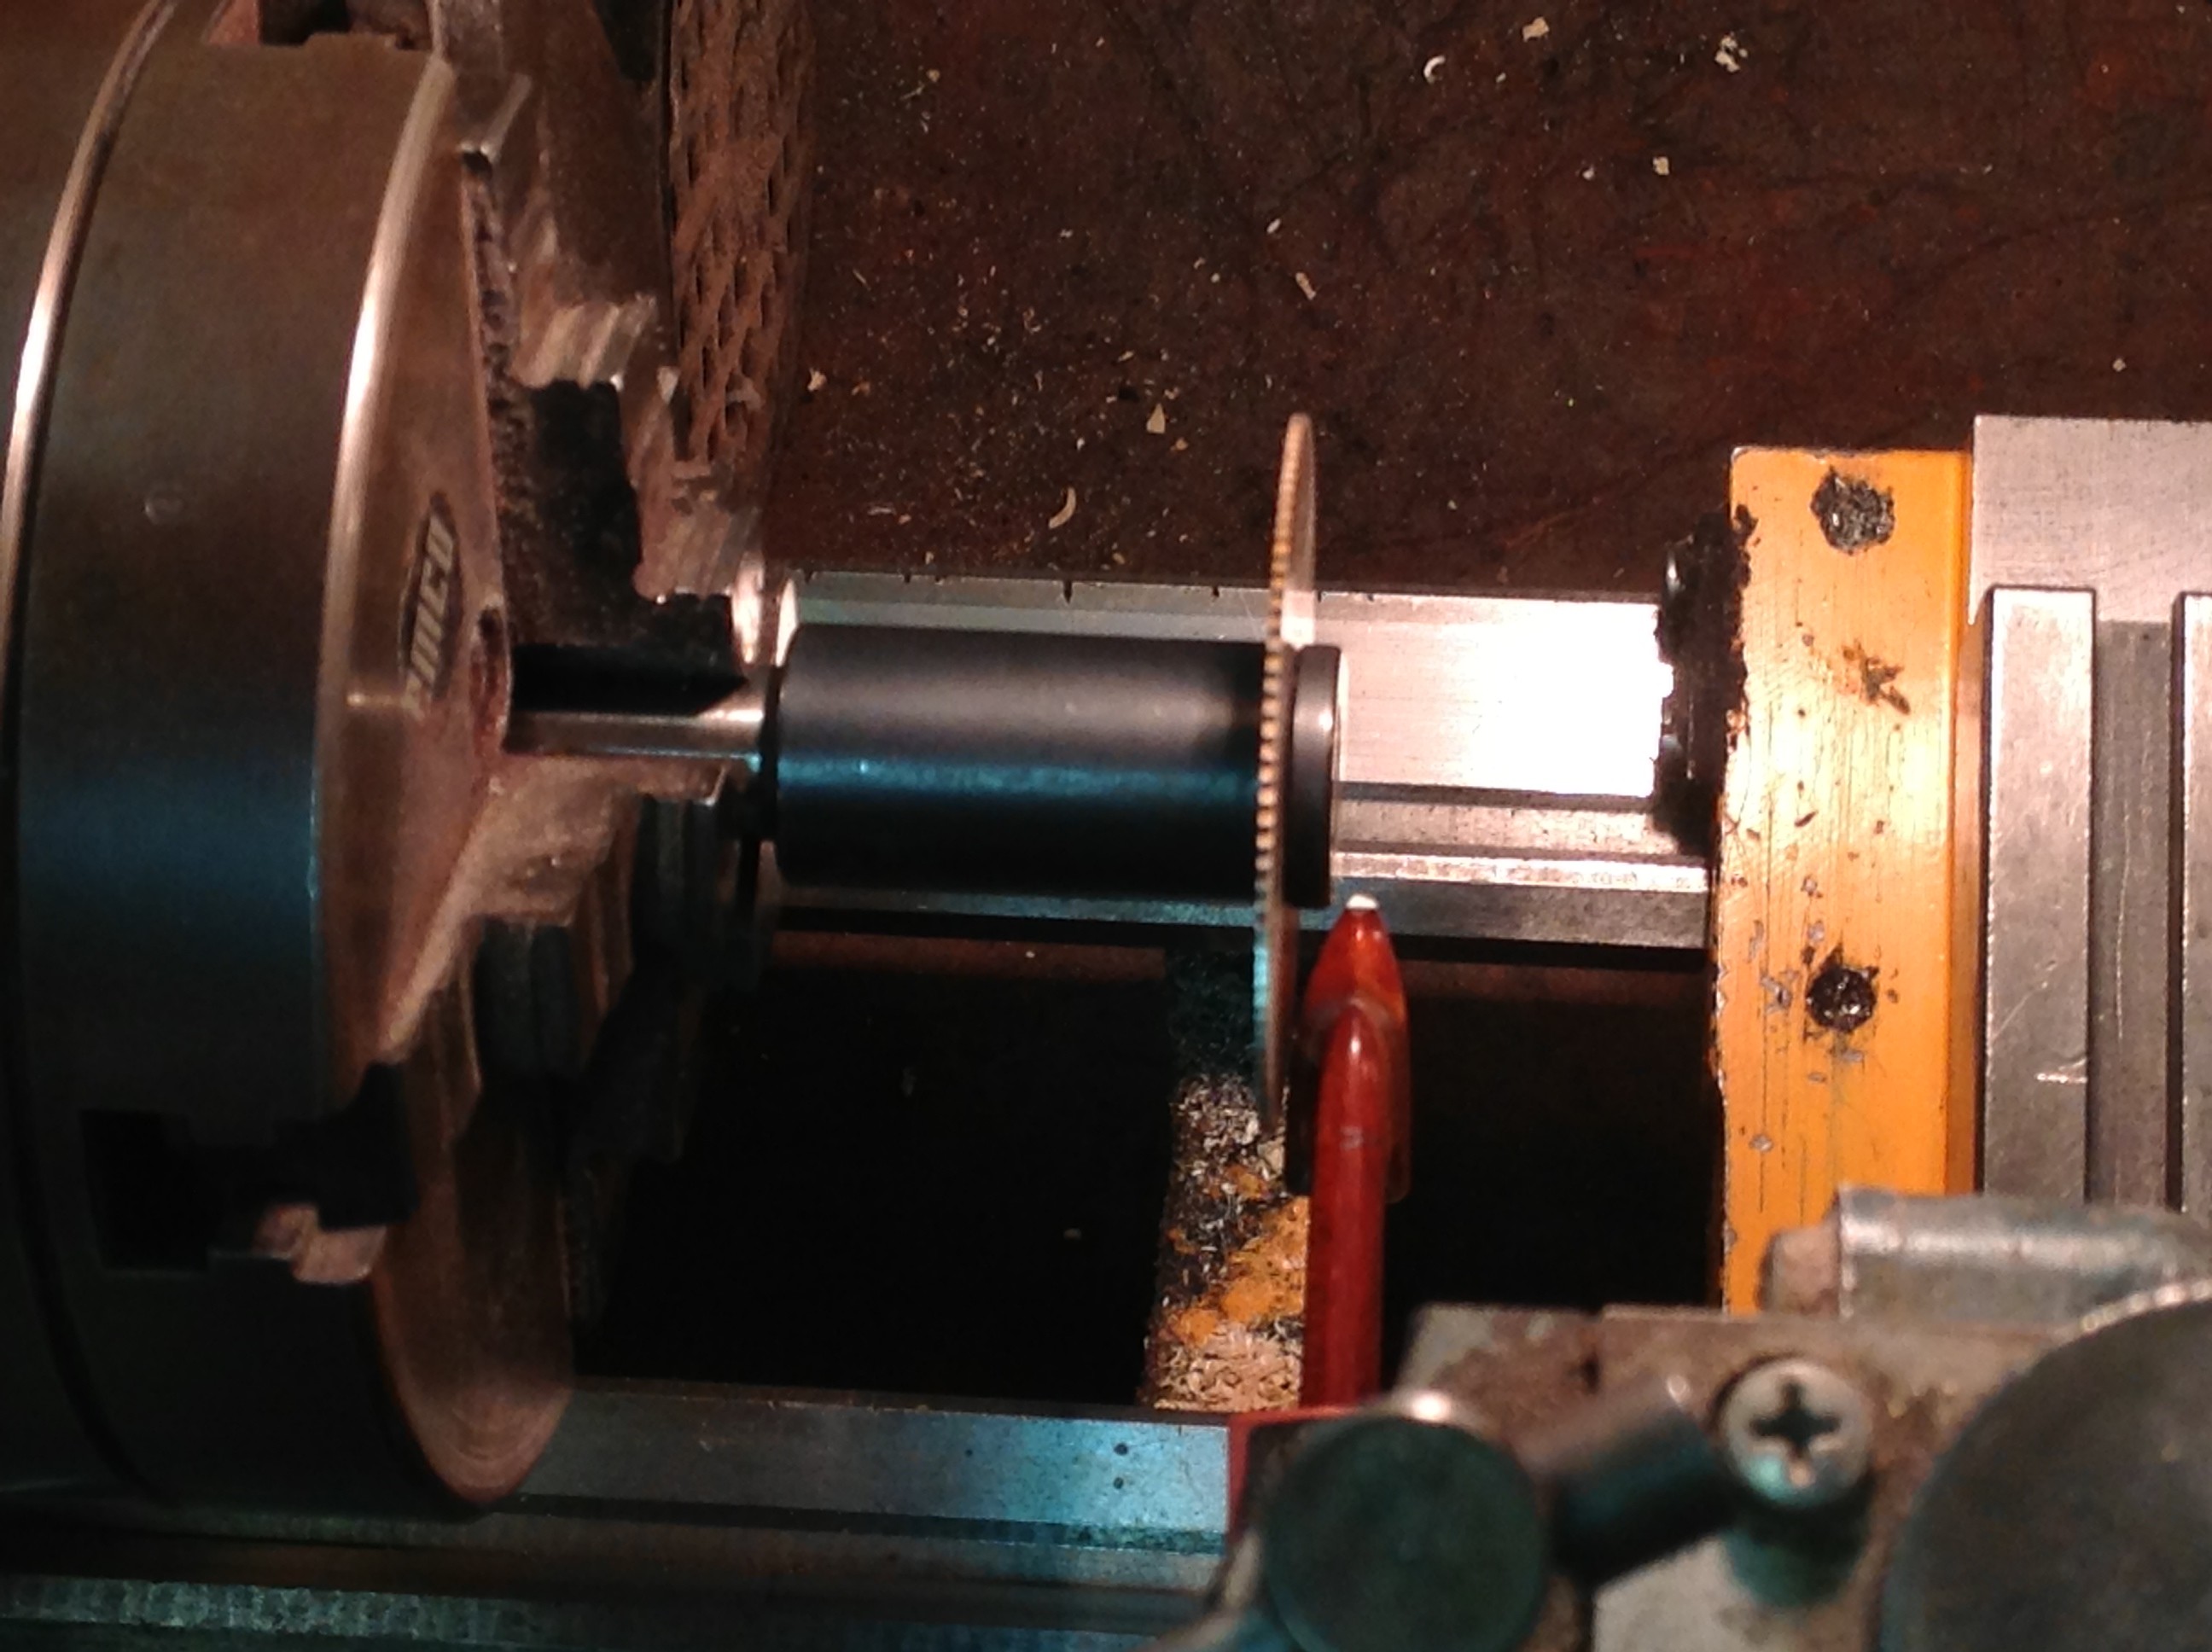
Set up for cutting
Set up the mandrel that fits the .035″ saw
Make sure teeth are set up so that it cuts down through the head.
Line the jig with rubber gasket material to not crush or dent the stick
Place the stick in the jaws of your jig so that the head of the the stick extends as little as possible. Depending on the jig, there might be a little recess that the stick will settle into nicely when clamped in so it will not move as much.
Make sure your hands are clean before you start cutting. You do not want to get grease in the cut.
Line up stick so it is approximately straight to saw blade. Lightly tighten all the bolts on the carriage so that the bow won’t rotate.
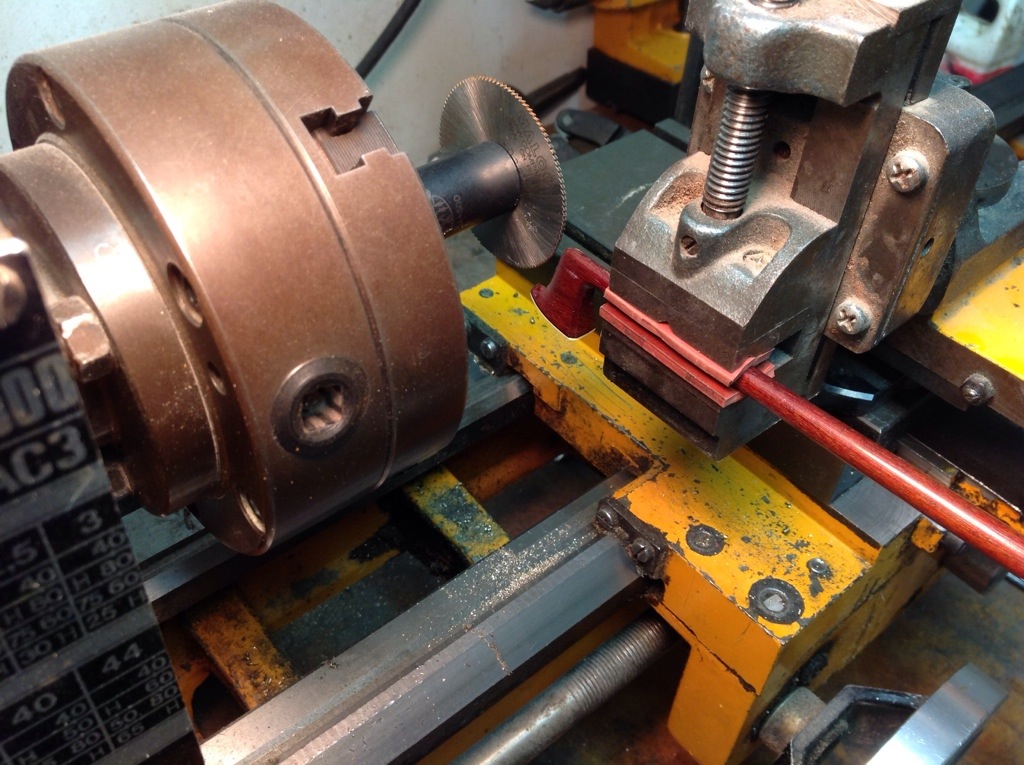
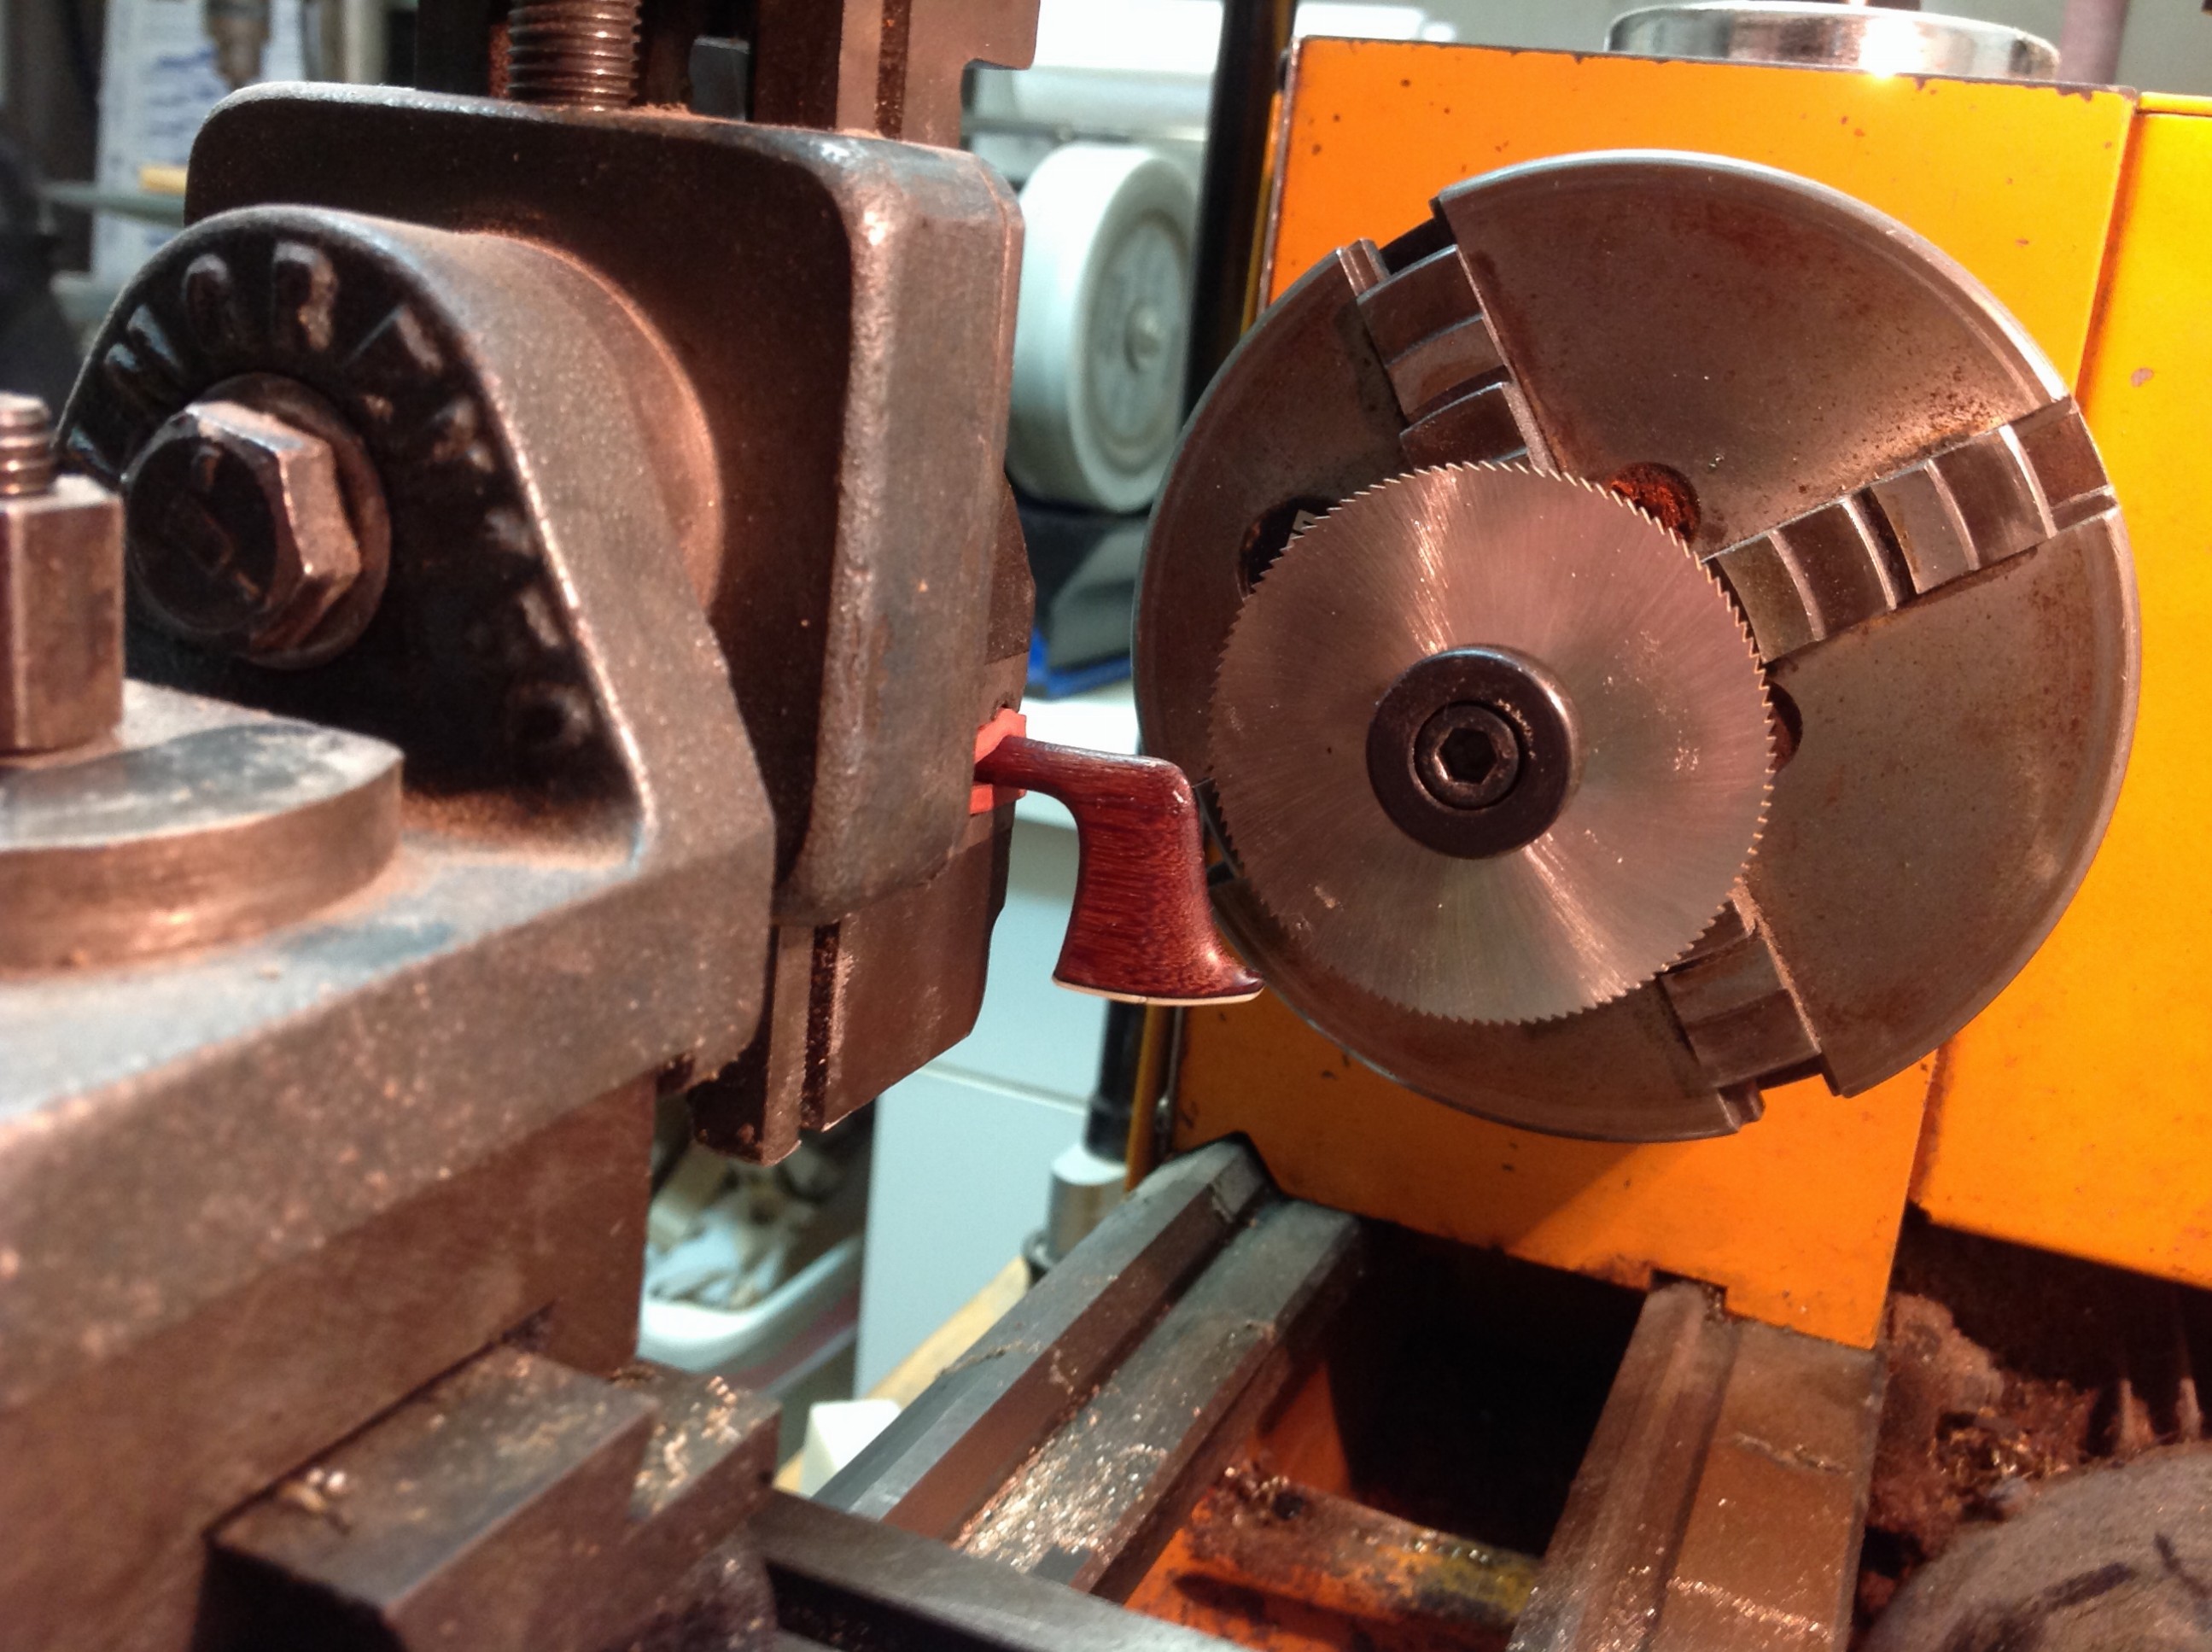
Move the head of the bow next to the saw blade and align the jig to check the height of the head to the cutter. Ideally, we do not cut through the tip. Sometimes a crack is low enough that we have to cut through the tip and replace it after the headspline, and if that is the case, use the tip of a knife to break off the tip.
Check the depth of the potential saw cut.
The saw should never cut past the back of the head.
A lot of the bow’s flexibility and response is in that area. Using the saw blade as a reference, mark on the top of the stick with a pencil or piece of chalk where the saw should stop.
Bring the jig back to line the head up with the saw.
Sight down the saw blade to align the tilt of the head and use the saw as a visual reference. From above the head, look for even amounts of chamfer on each side of the stick. Loosen a bolt or two depending on how loose the system is and gently knock the carriage in the desired rotation to get the bow lined up. Tighten and loosen as necessary.
Put plexiglass over the saw blade and run it up the front of the head and over stick. Use the plexiglass as a tool to check the overall direction of the cut further down the stick. Look for the curf to highlight the front spine of the head and to bisect the stick further back evenly.
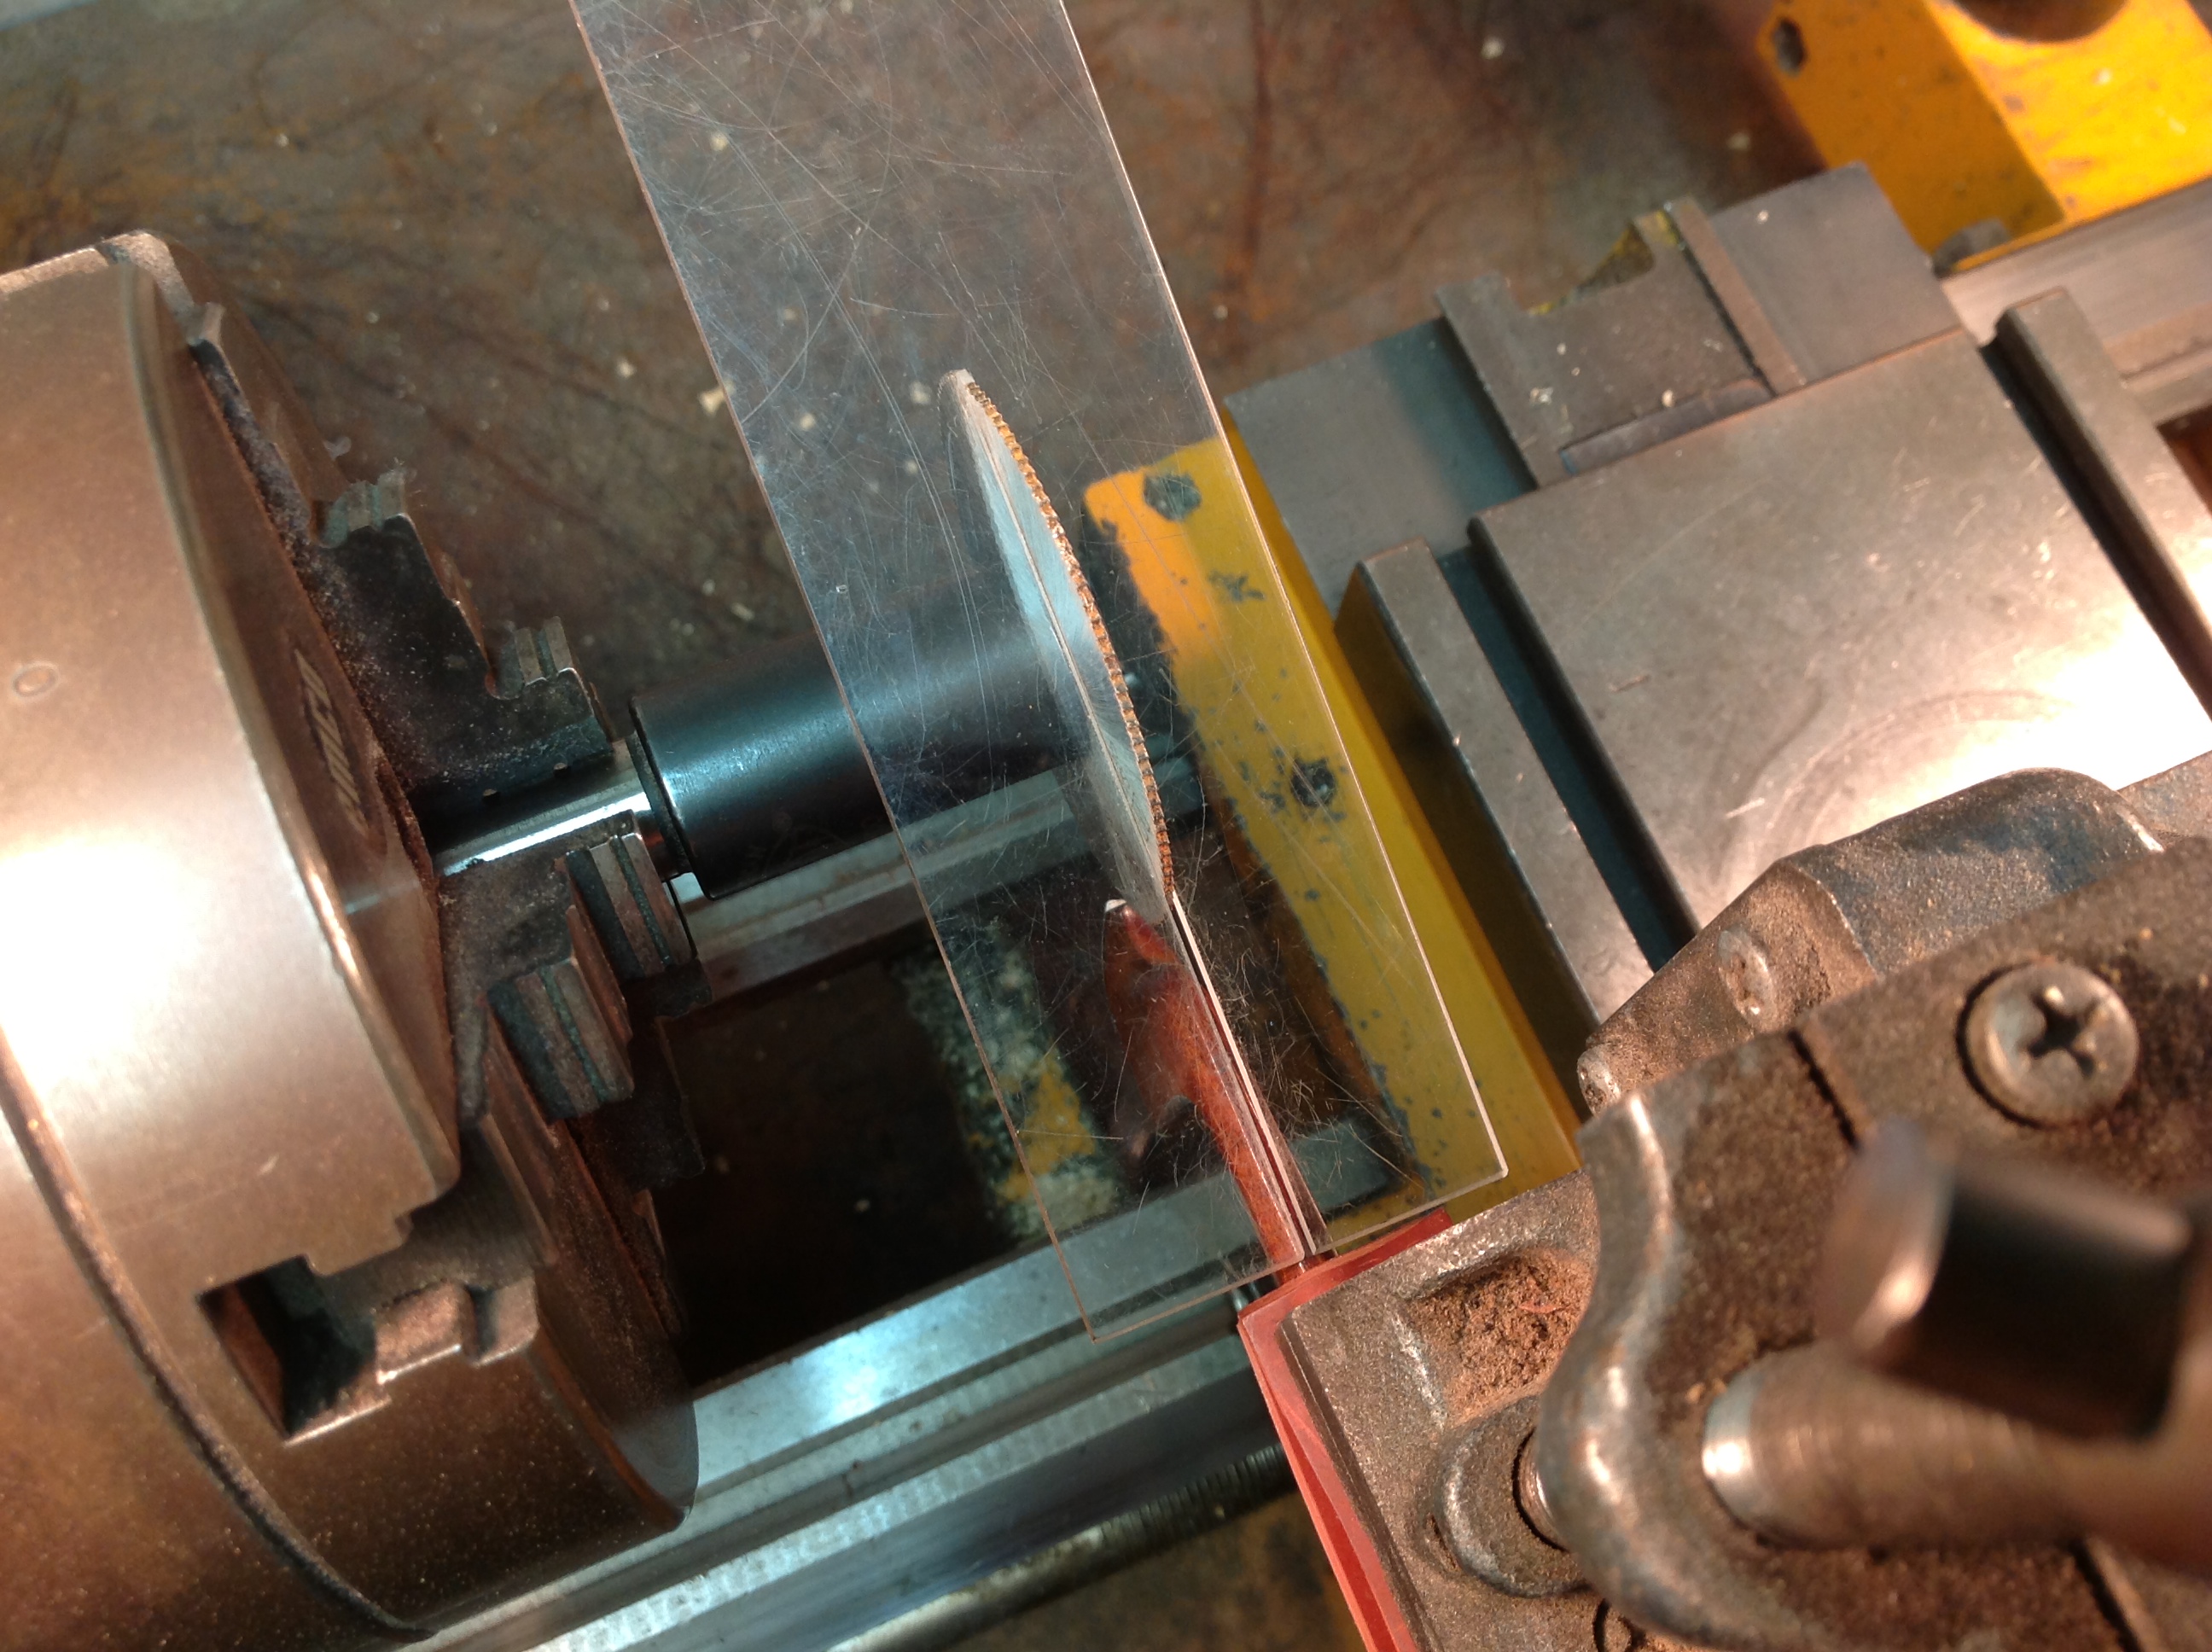
Also, use the main carriage of the lathe to check that the stick is parallel to the lathe.
Use whatever you can to make sure the spline will be cut square into the bow and even to the stick. If there is going to be a little more cut on one side or another, it is ok to remove slightly more original wood from the finger side of the bow.

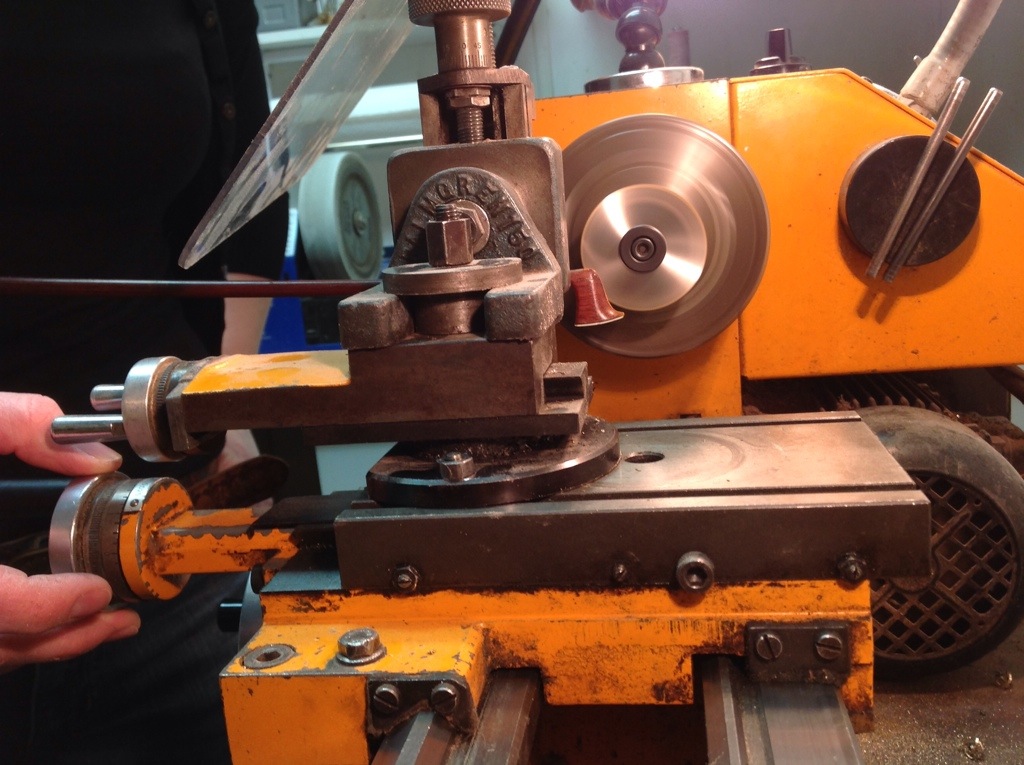
Once everything is lined up, lock down all bolts.
Give your eyes a break and have someone check the alignment before any cuts are made.
Line up precisely in all angles before cutting.
Check speed of lathe: about 600 rotations per minute
Once you’re sure you want to proceed, do a couple of jumping jacks if you’re nervous.
Turn on the lathe and check the direction of rotation, it should be cutting downward through head.
Use larger middle dial to push bow into blade. Sometimes you can pull the bow up into the blade so I always save the last millimeter in case I want to bring the bow up into the saw.
Once cutting, do not adjust anything. Just turn off the lathe and ask for help if needed.
Also, turn off the lathe to check the temperature of the head. The glue will fail if it gets too hot.
Stop the cutter and back the bow out of the saw when finished. Bring the cutter back to the bench to reference for replacement spline material dimensions.
Fitting new wood
Wash your hands.
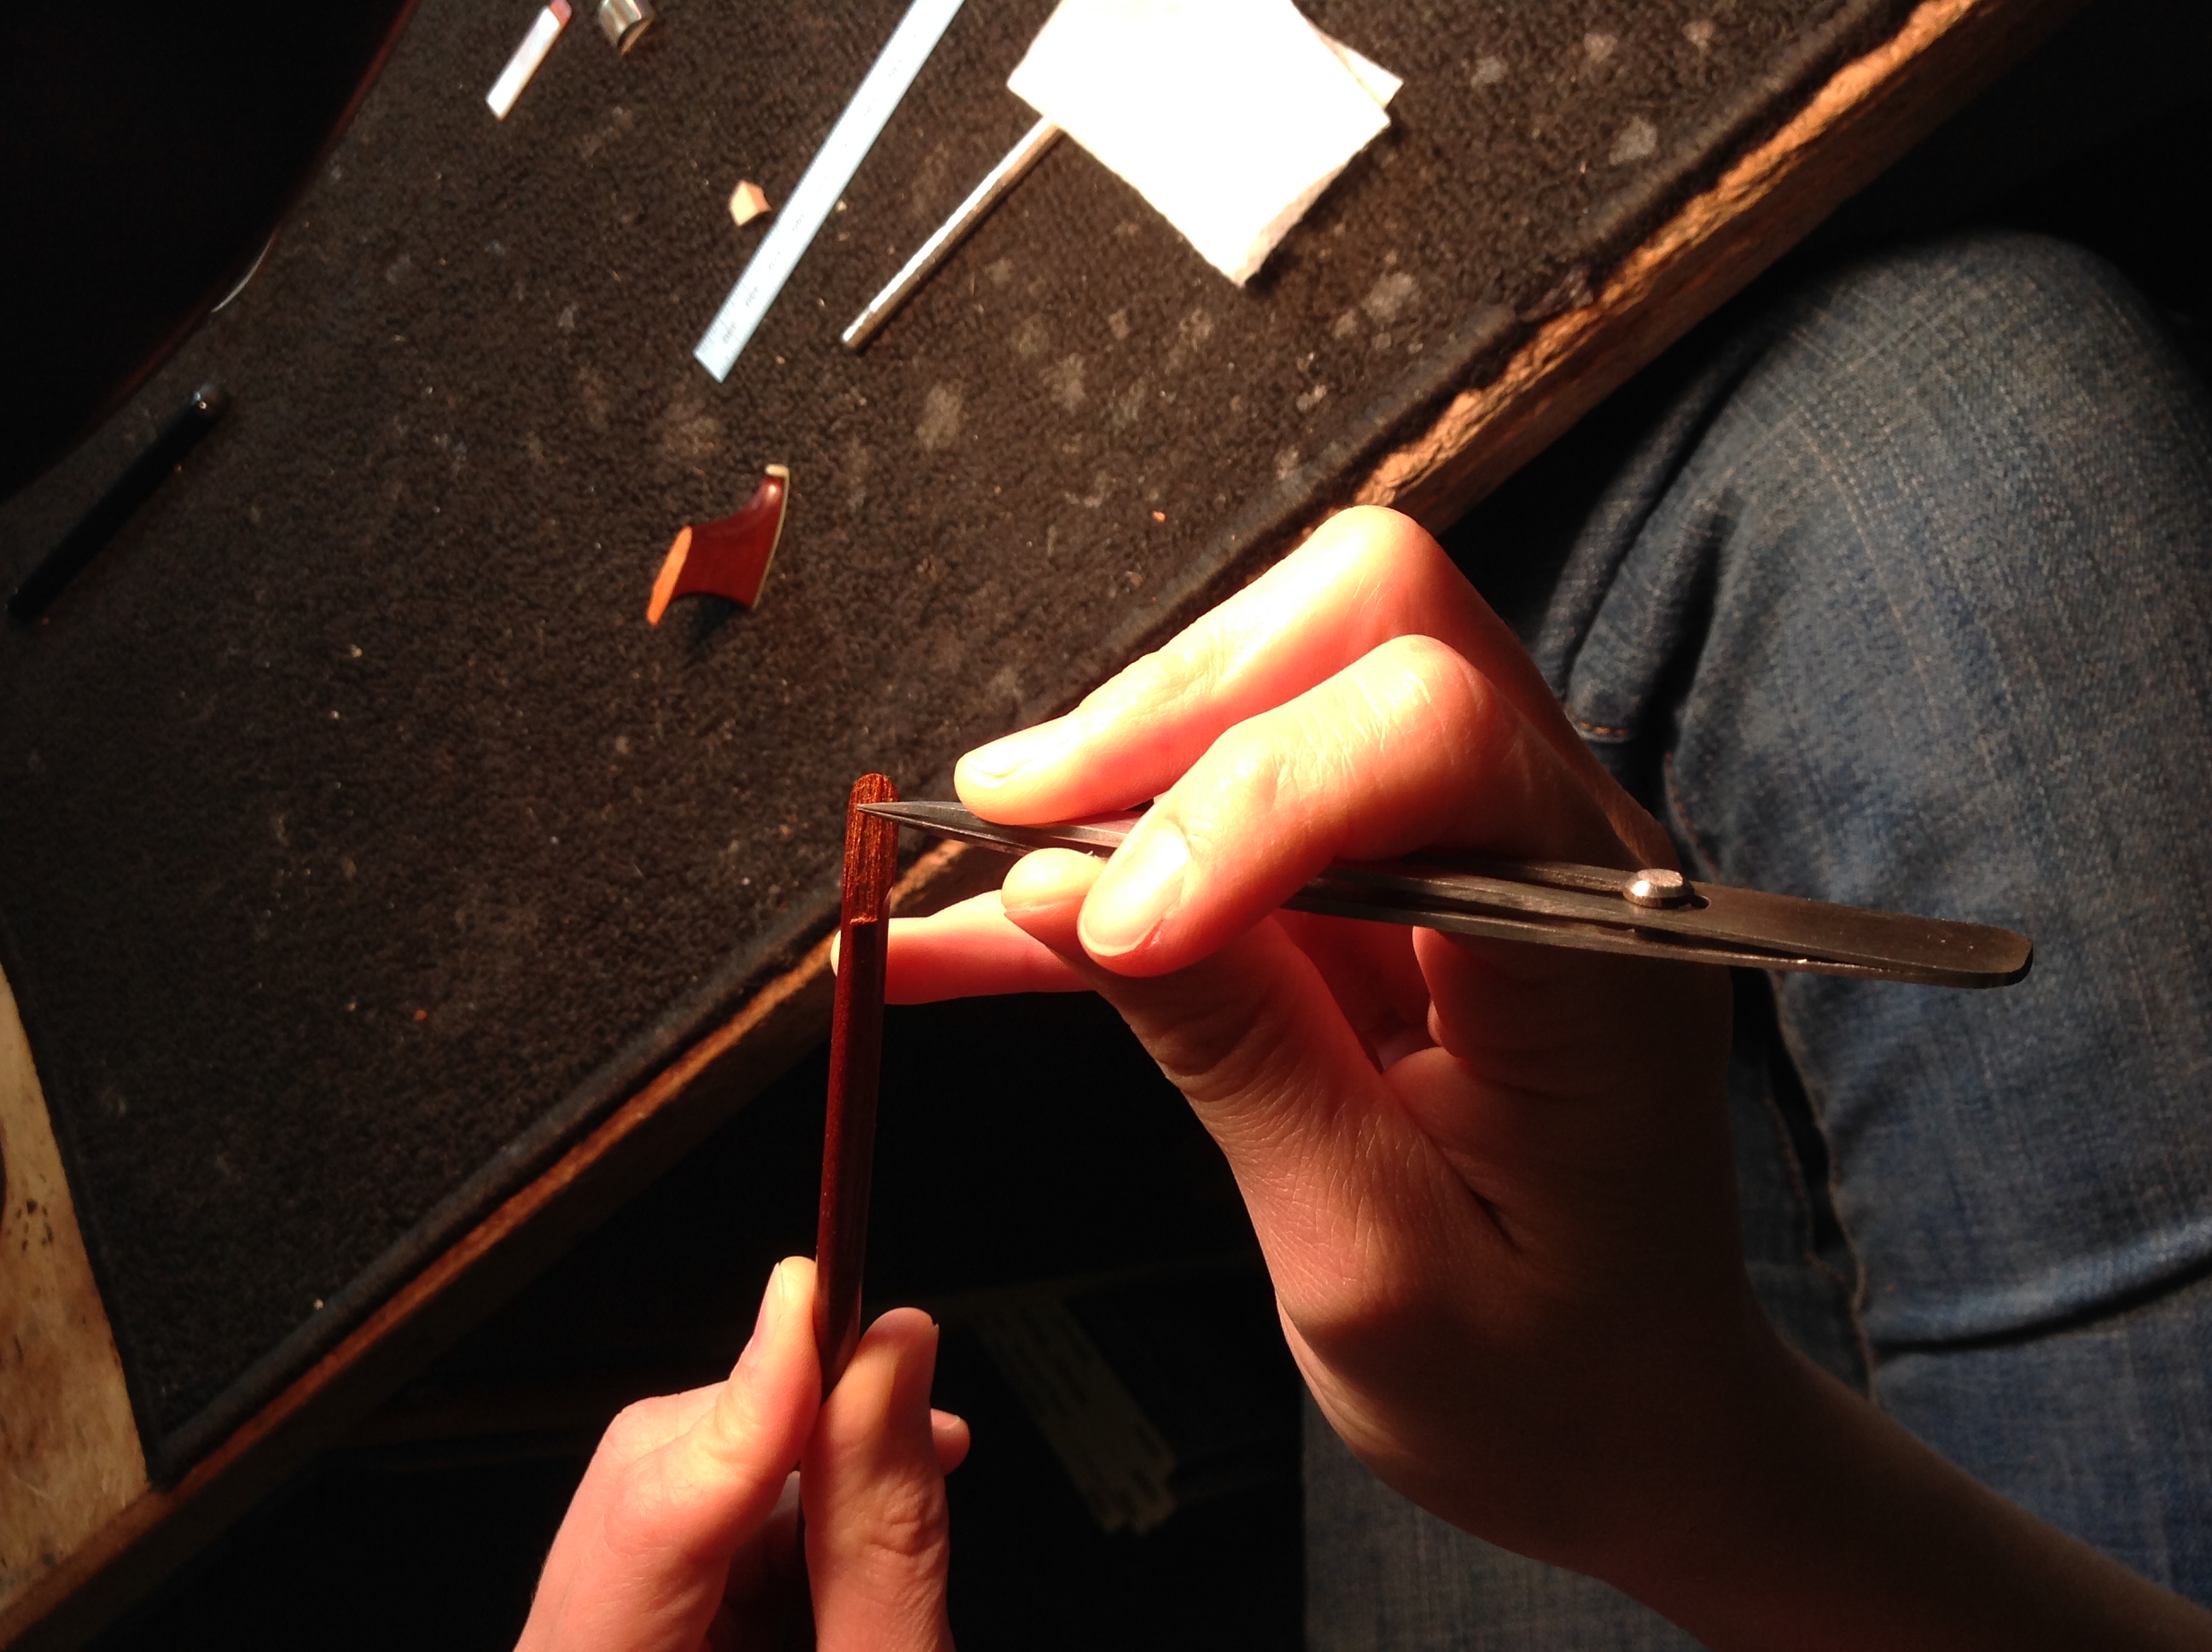
Saw out a piece out a square piece of pernambuco about 30 mm tall/wide and 1.5 mm thick (works for most bows – bass might need to be bigger).
Plane off the saw marks. (I have a little chunk of Ebony about .8mm thick glued to my bench as a stop for this purpose.)

Bring the thickness to .86 with a plane or file or whatever starts to fit in the slot snugly. The grain of the spline should run perpendicular to the grain of the bow.
Mark on the pernambuco piece the round of the sawblade – making sure the grain will be perpendicular when inserted.
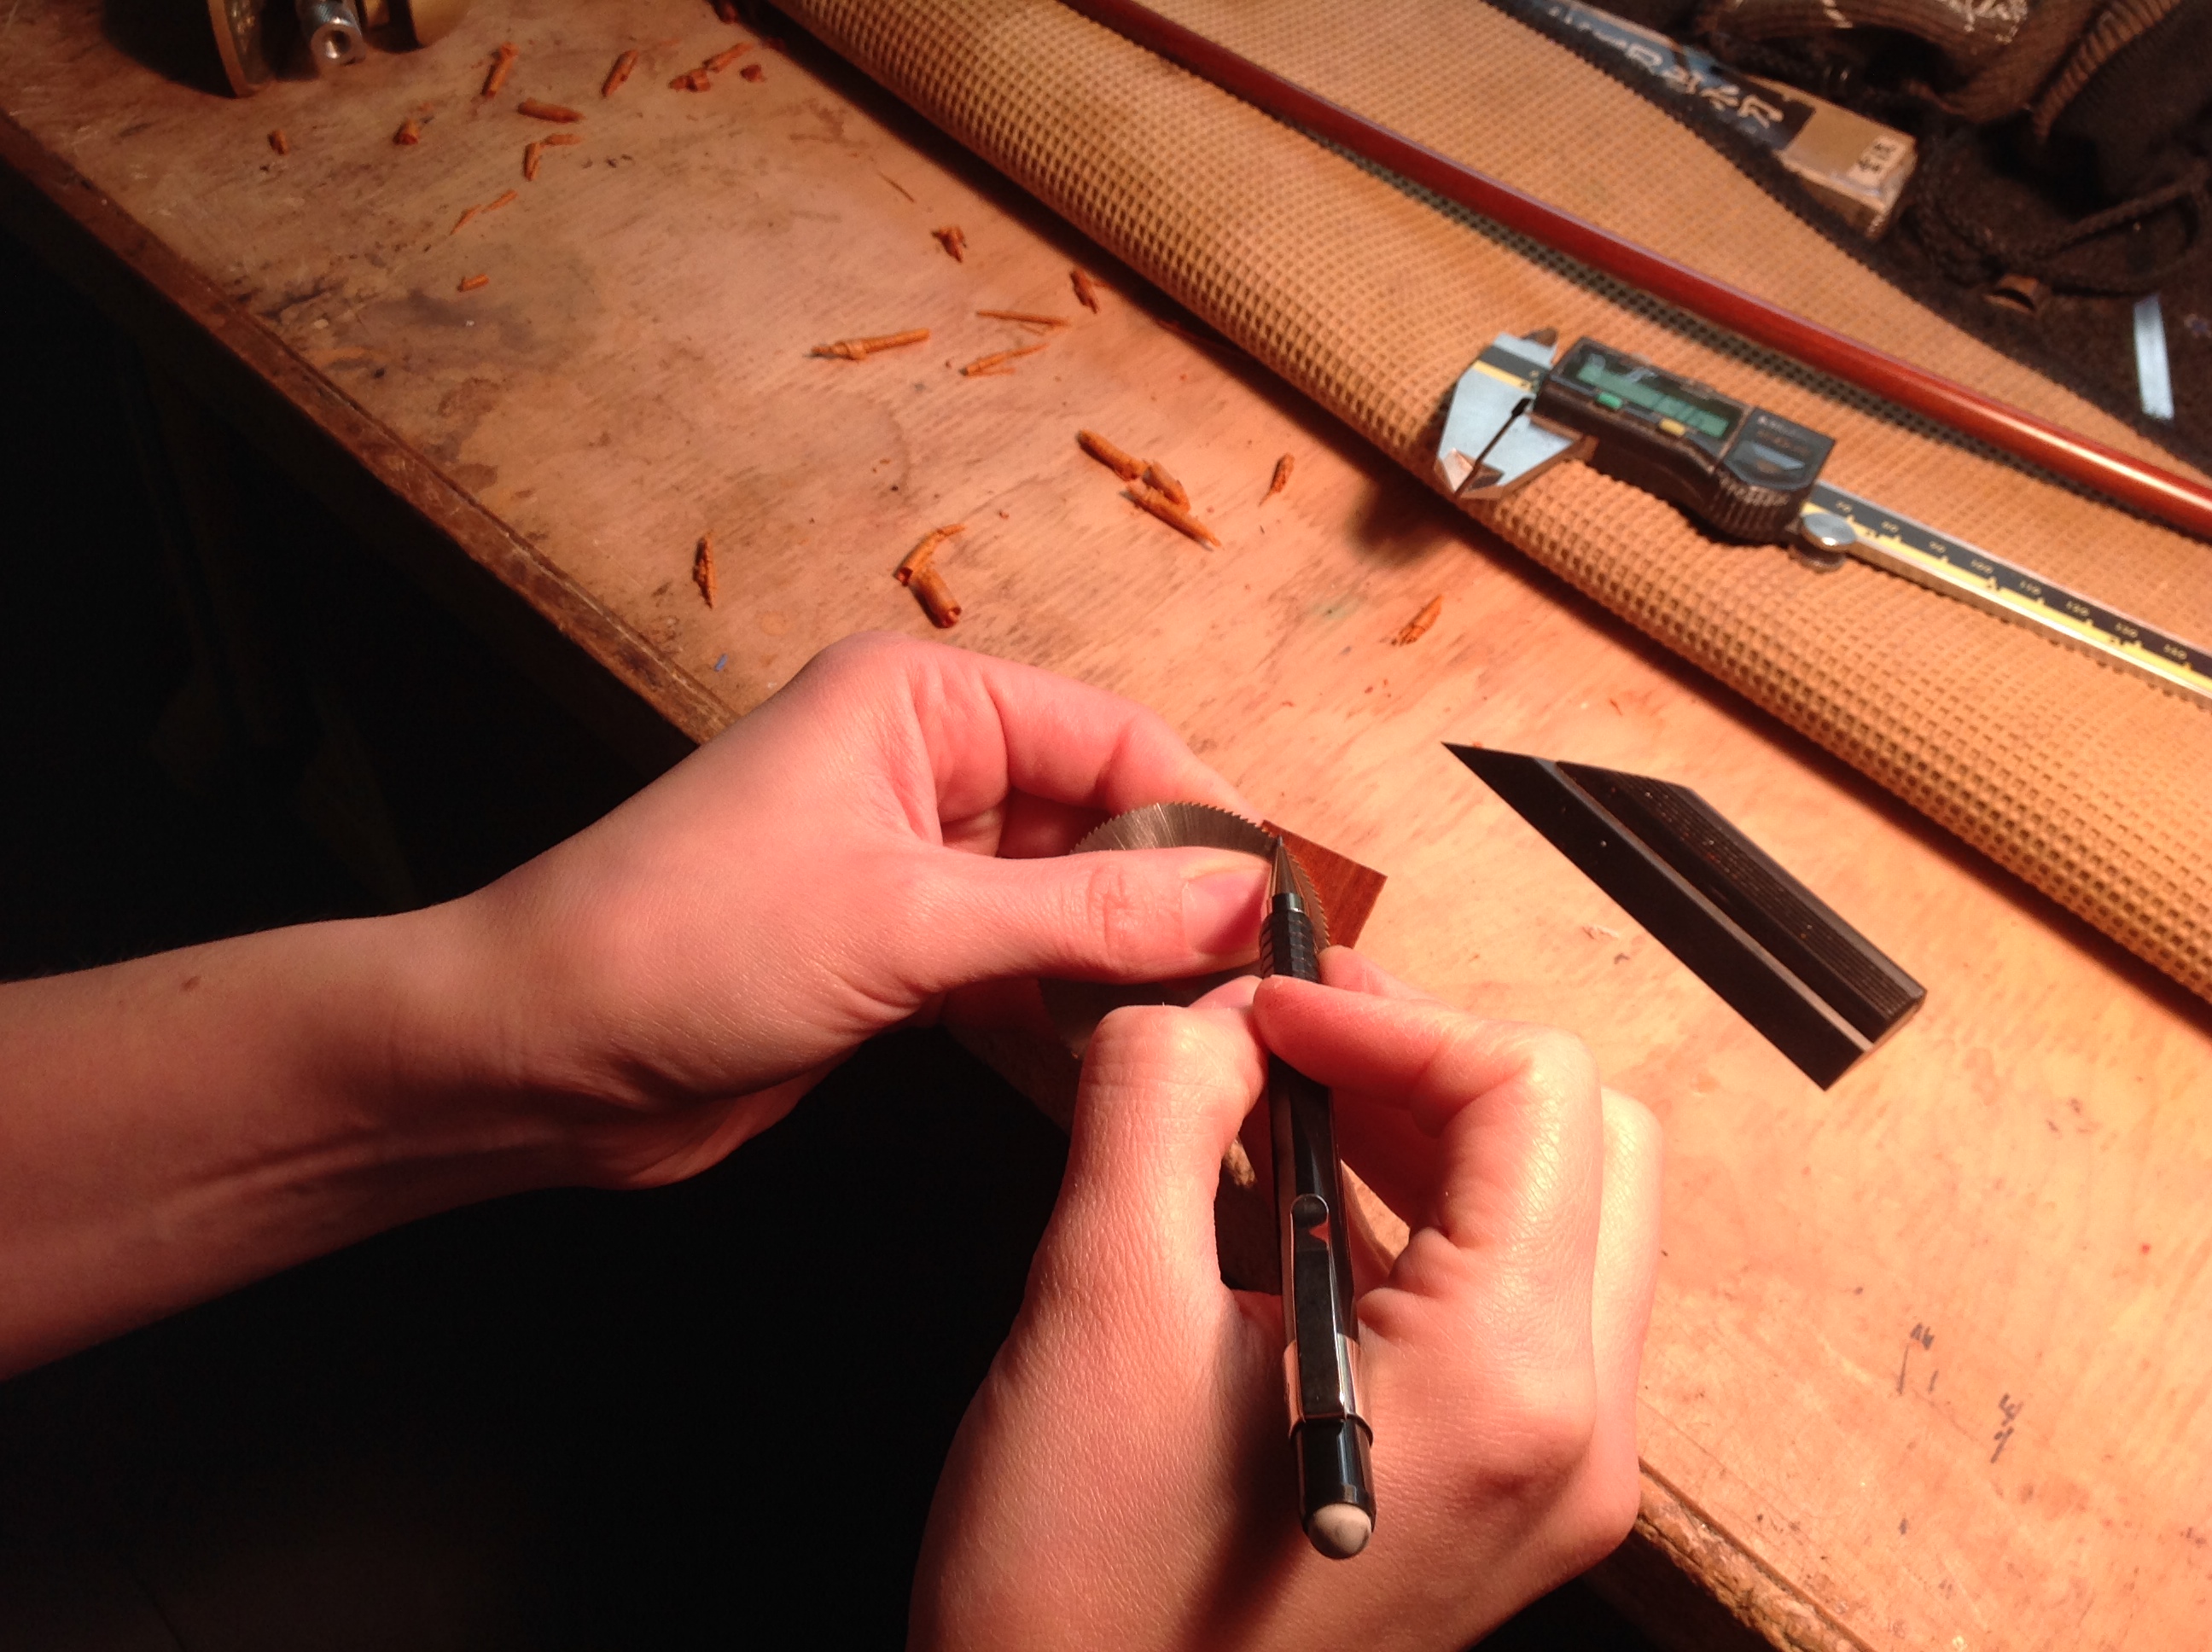
Saw off excess with a jeweler’s saw – be aware of how the wood might split – you might have to start over with the piece if it splits too small.
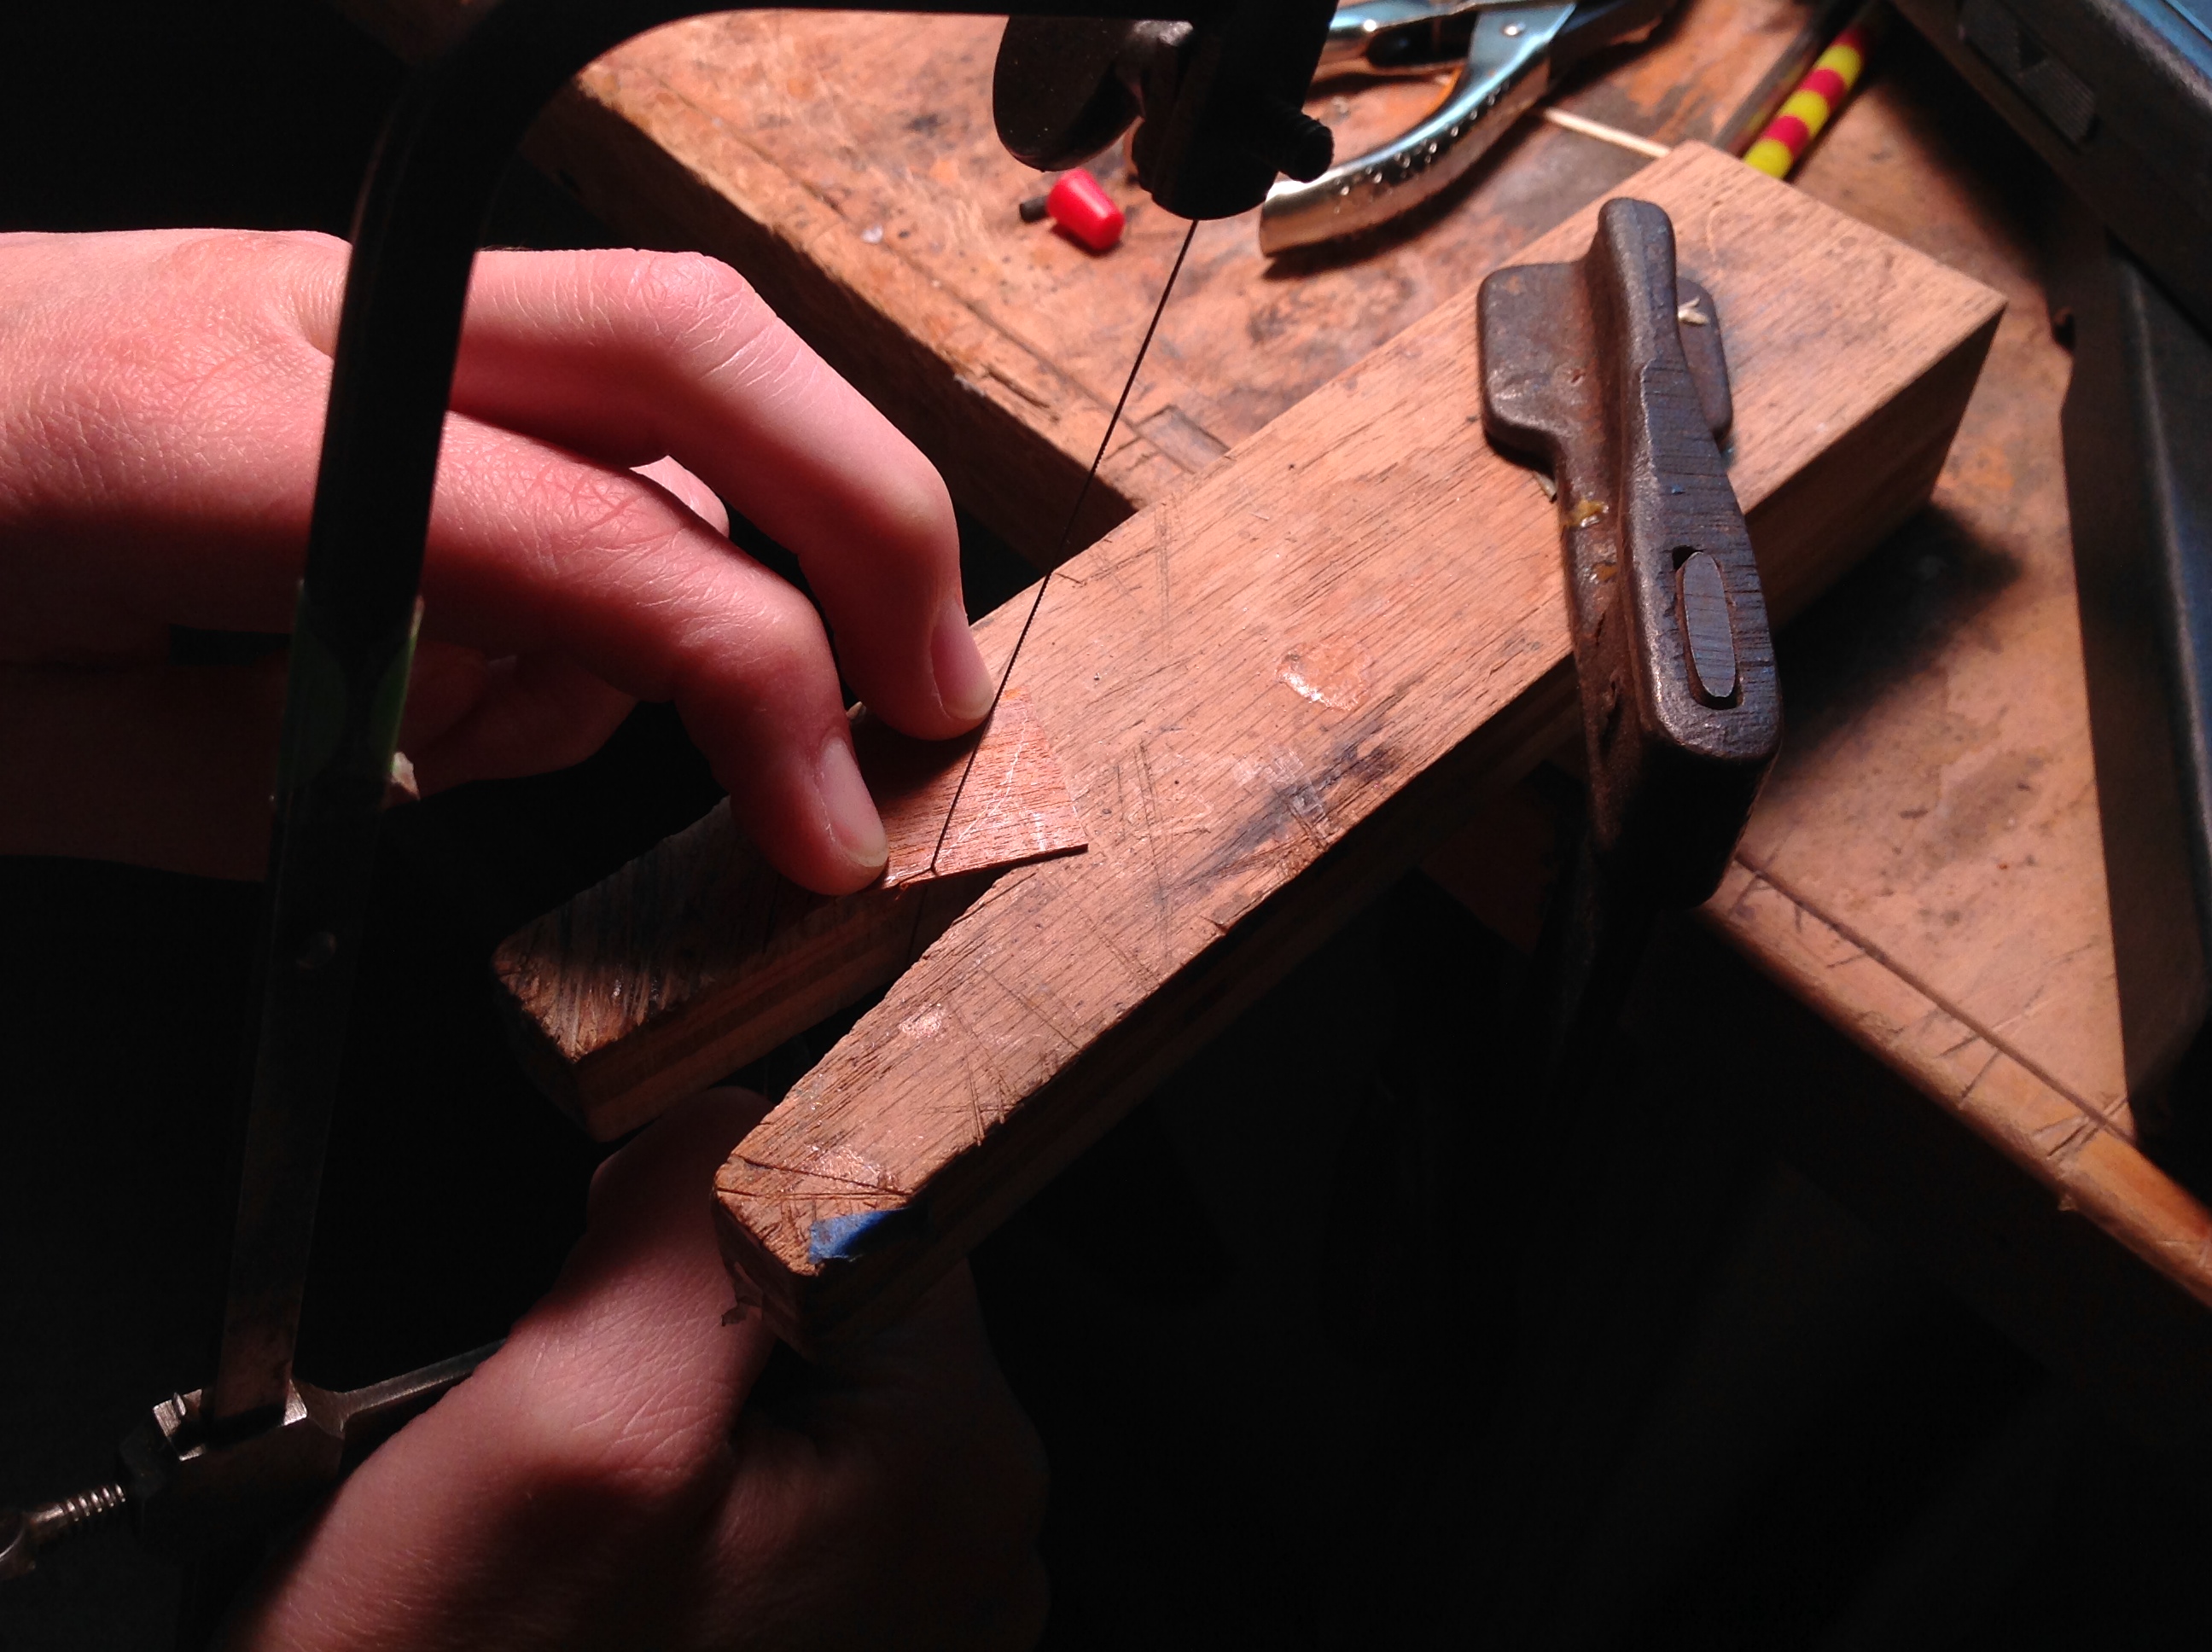
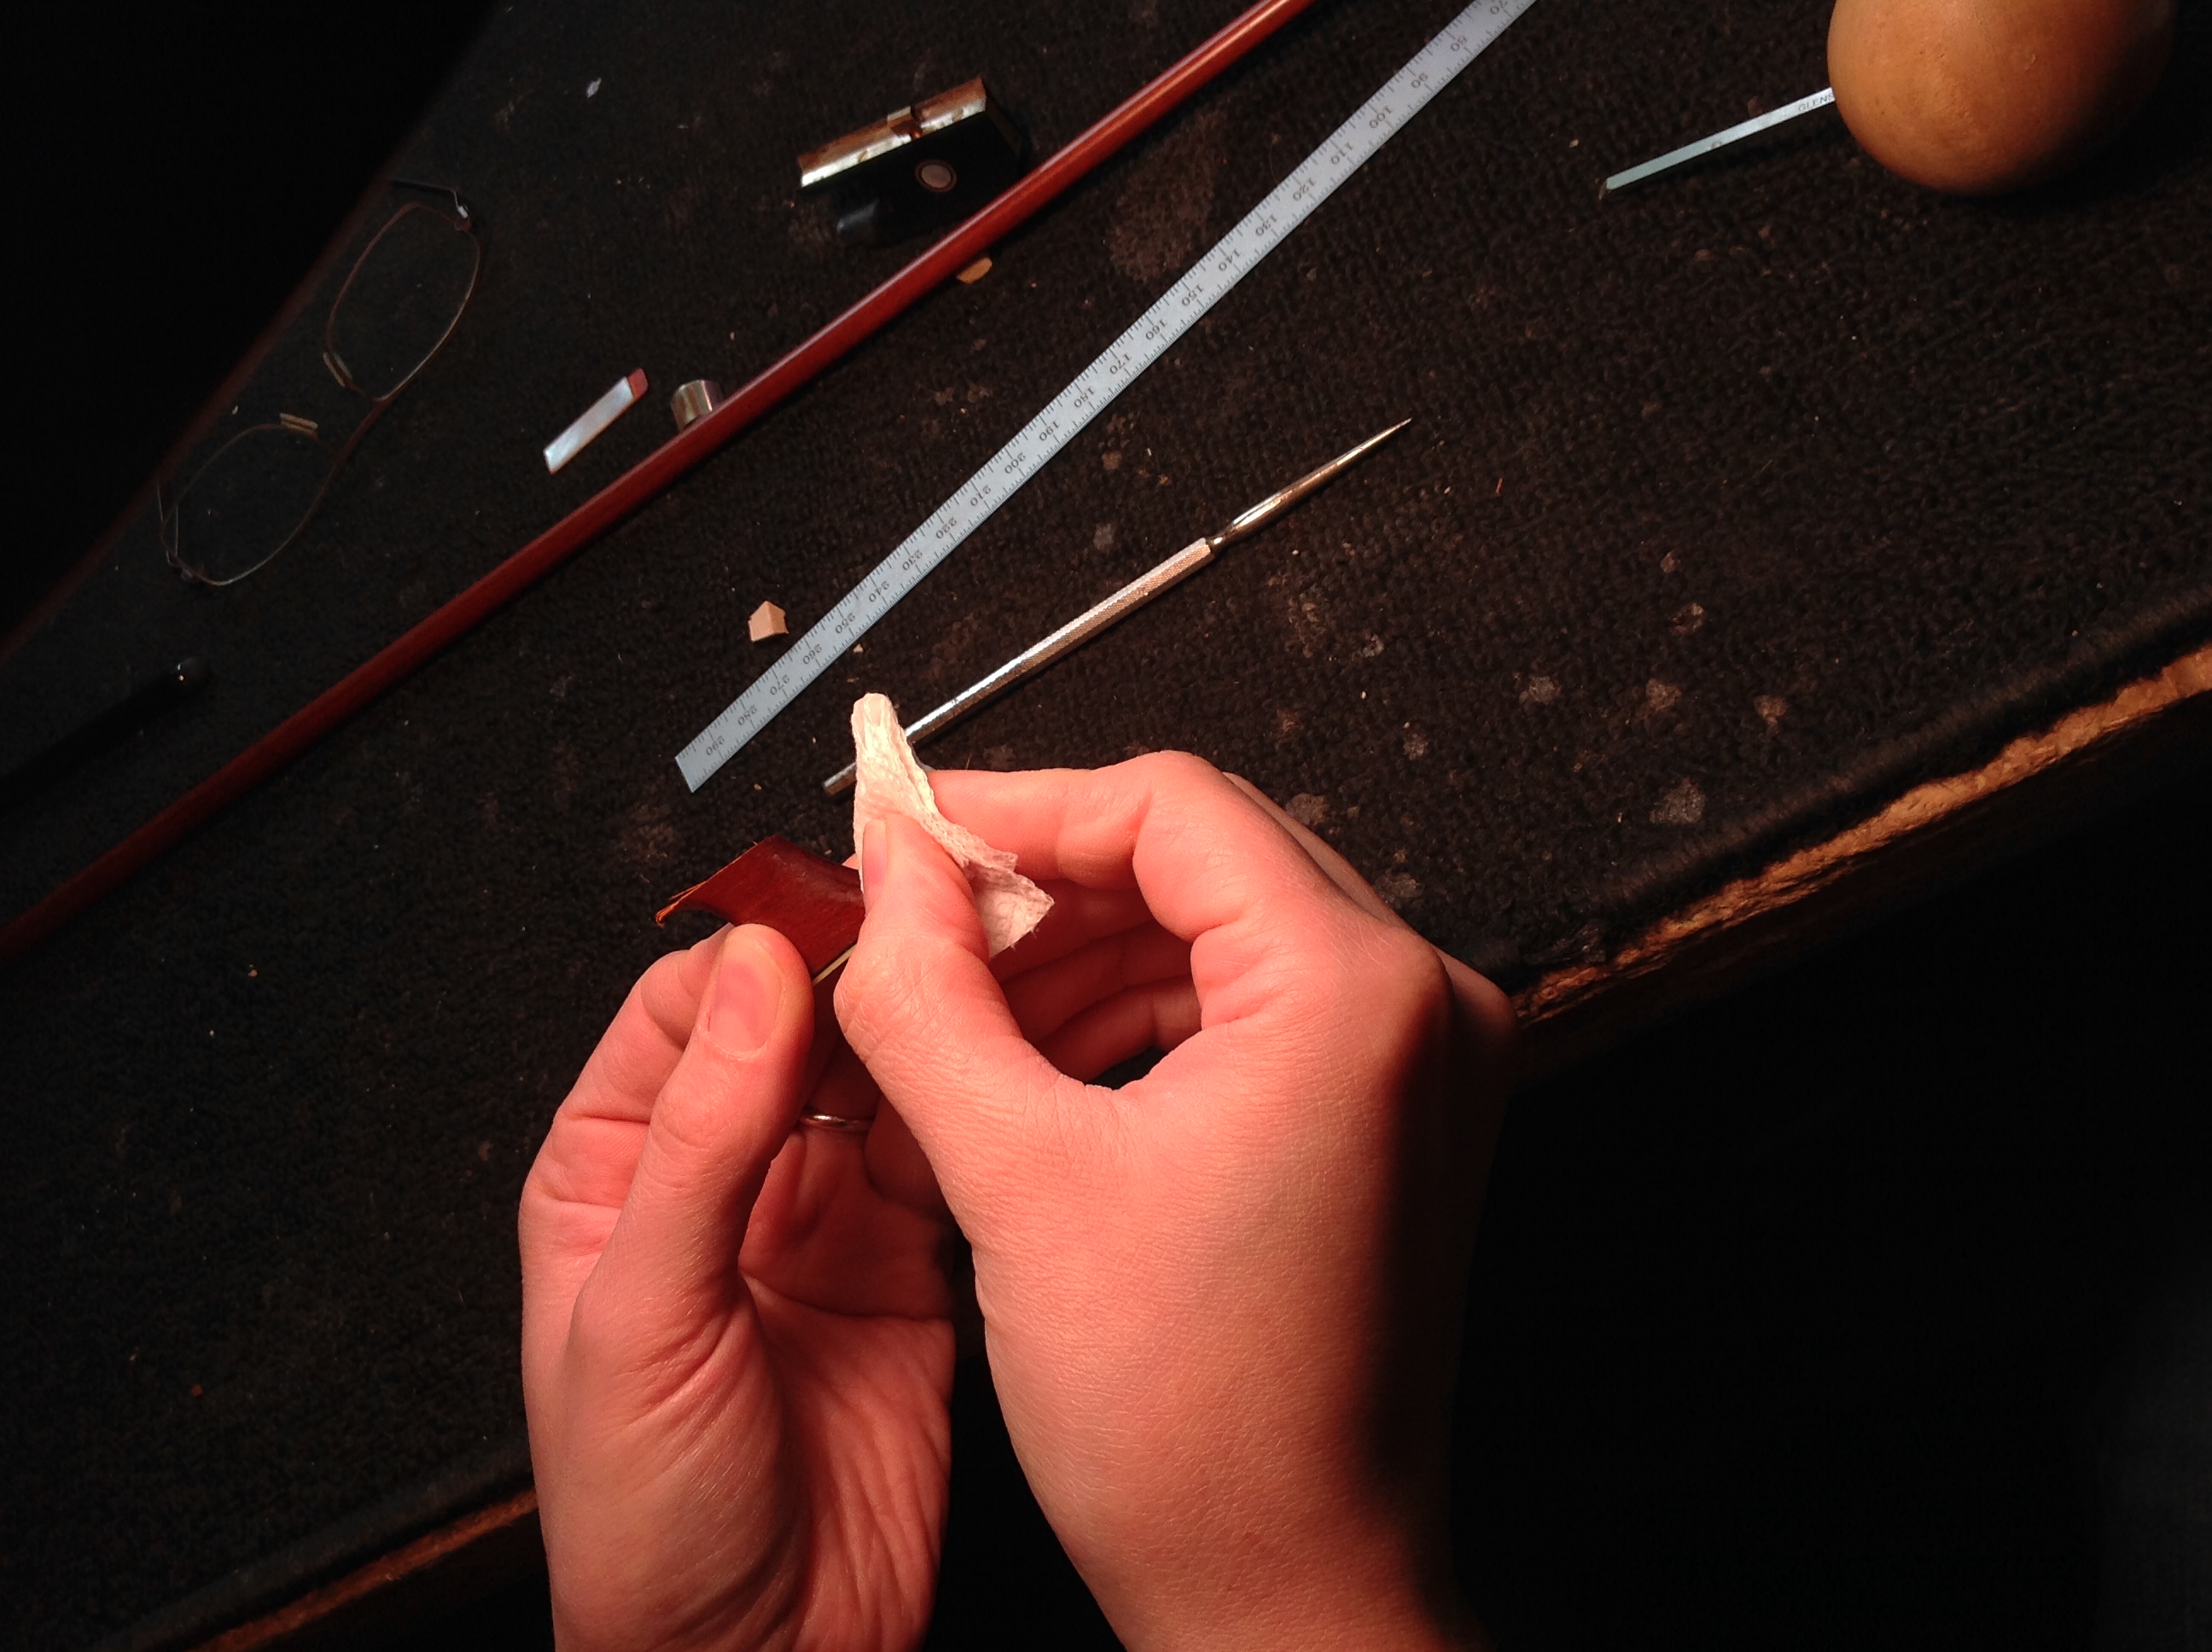
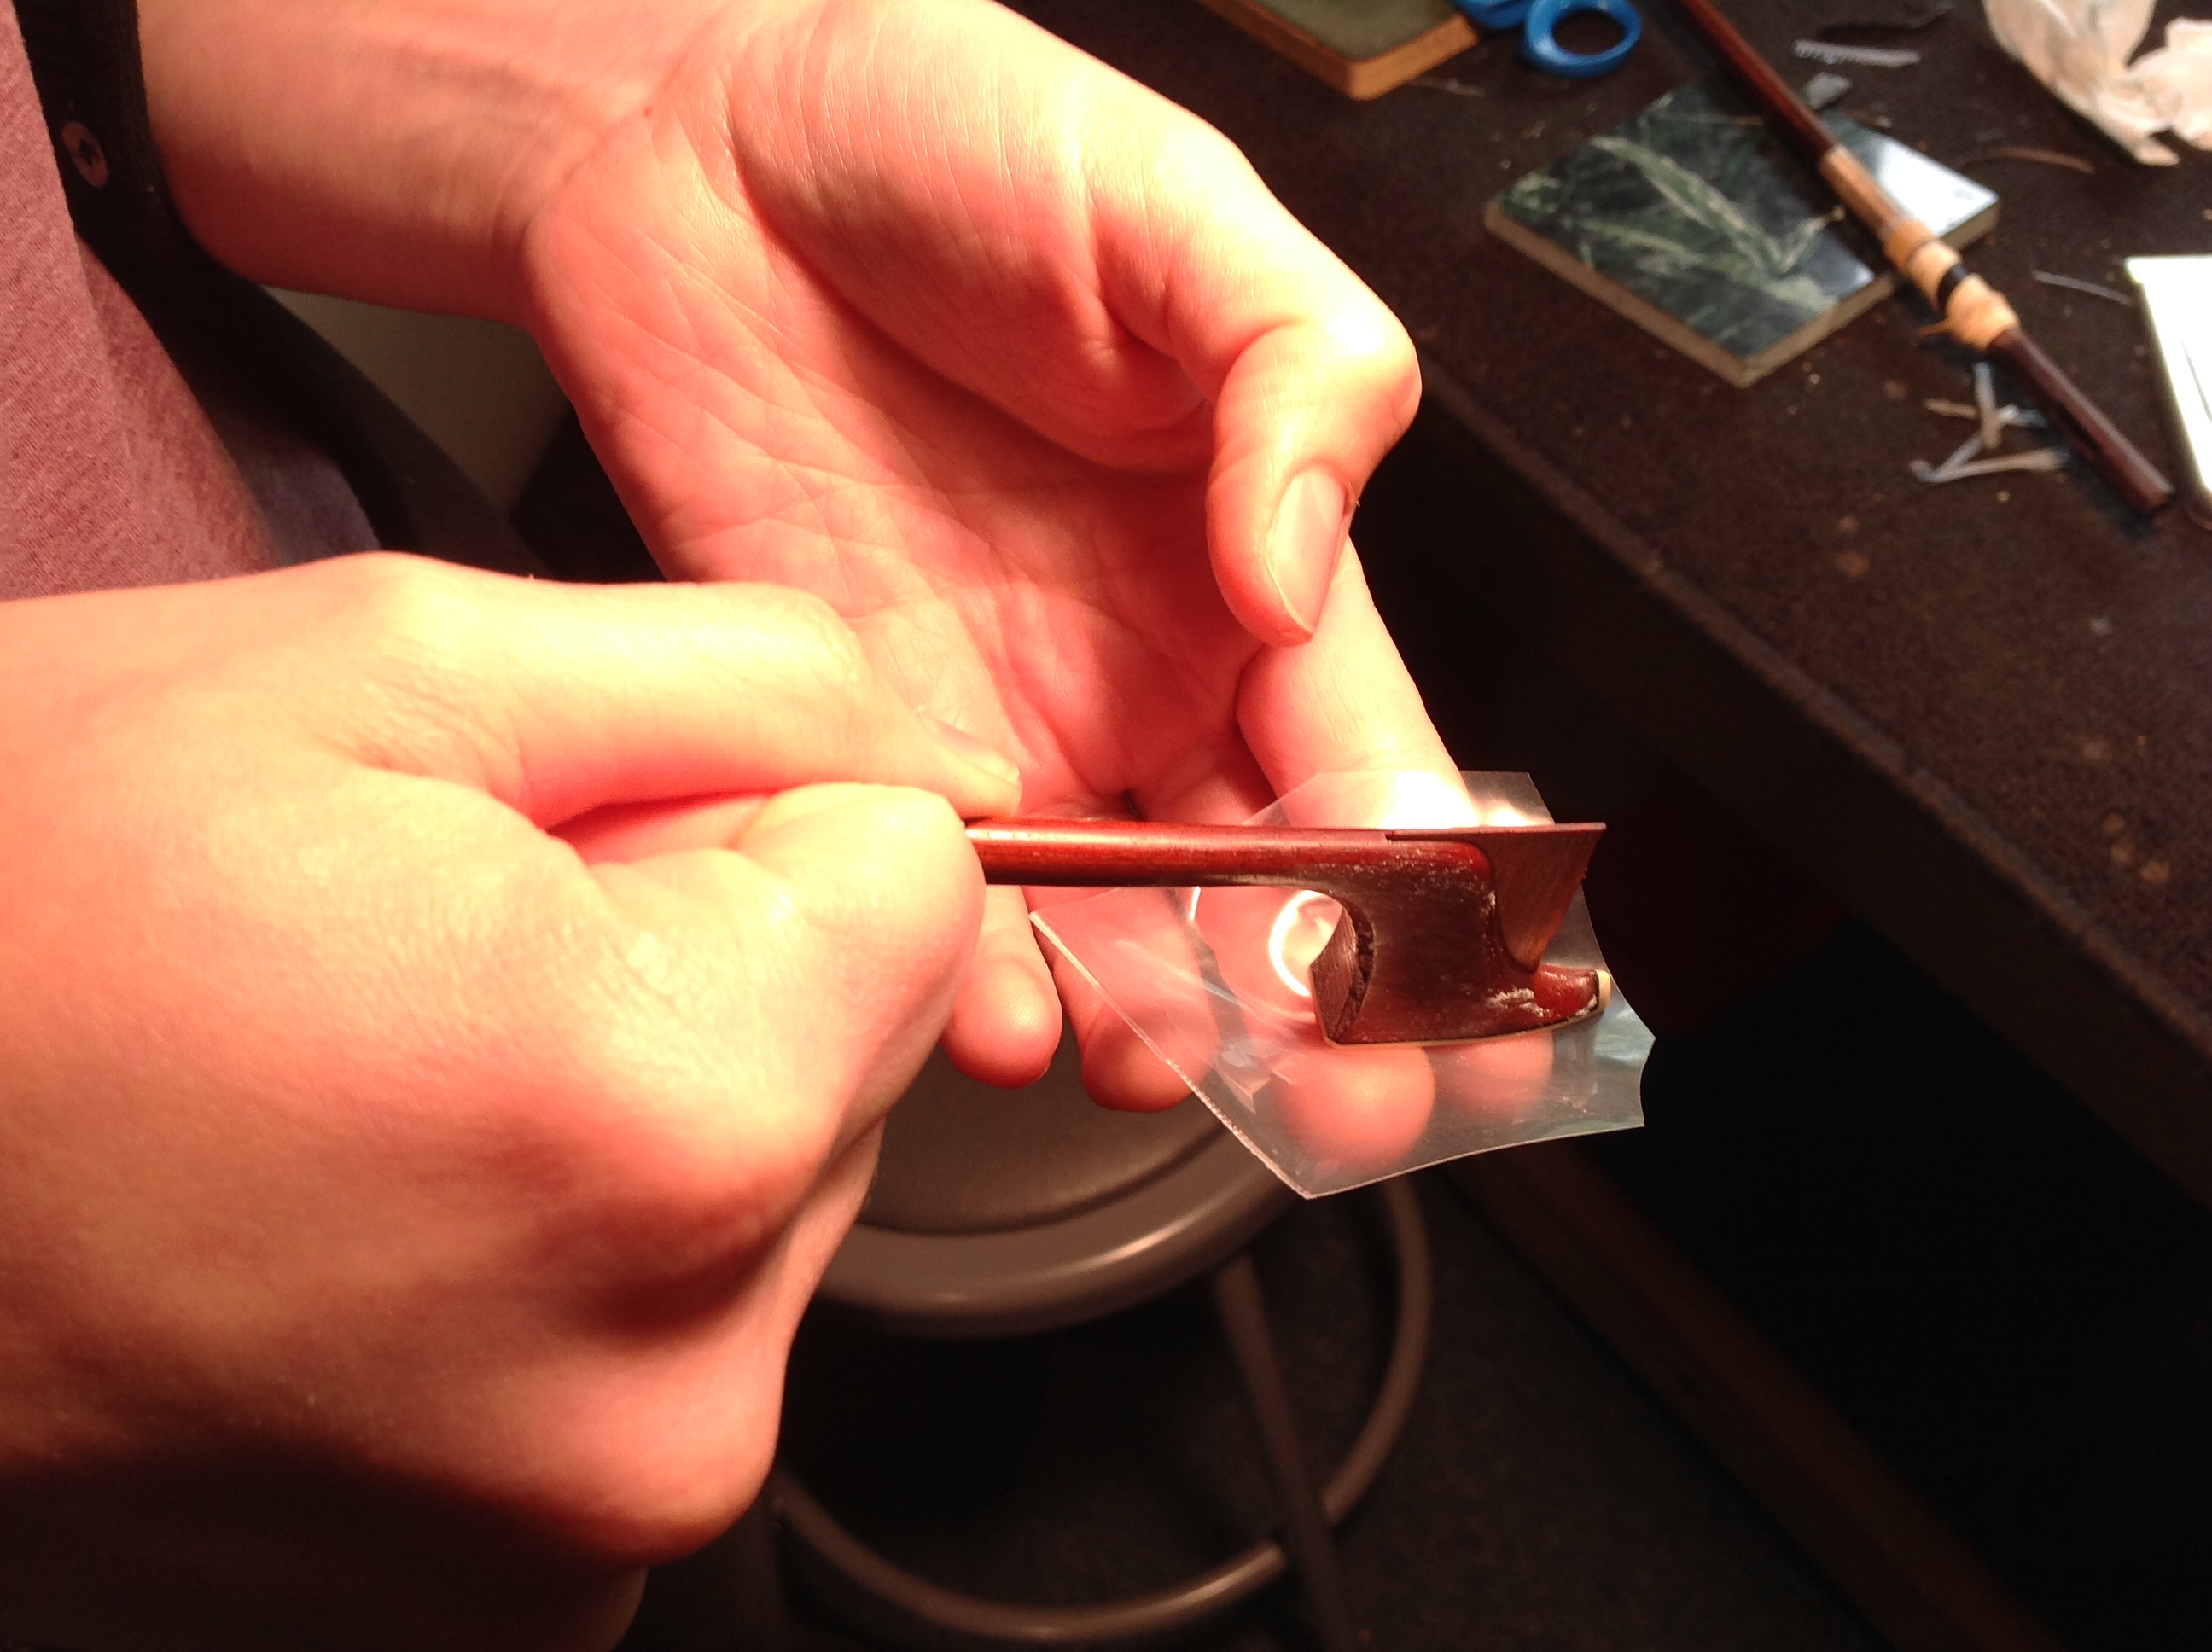
File to fit while checking for flatness with a razor straight edge and evenness with digital calipers. If it is uneven it could look bad and be a weak joint.
File the round surface square to itself and fit it in the bow. Look for rocking and remove any high points. It should fit perfectly.
When fit well, leave the spline in and, with a pencil, mark the head outline onto the spline wood with an extra 1.5 mm excess.
*Be super aware of grain orientation before cutting away excess.*
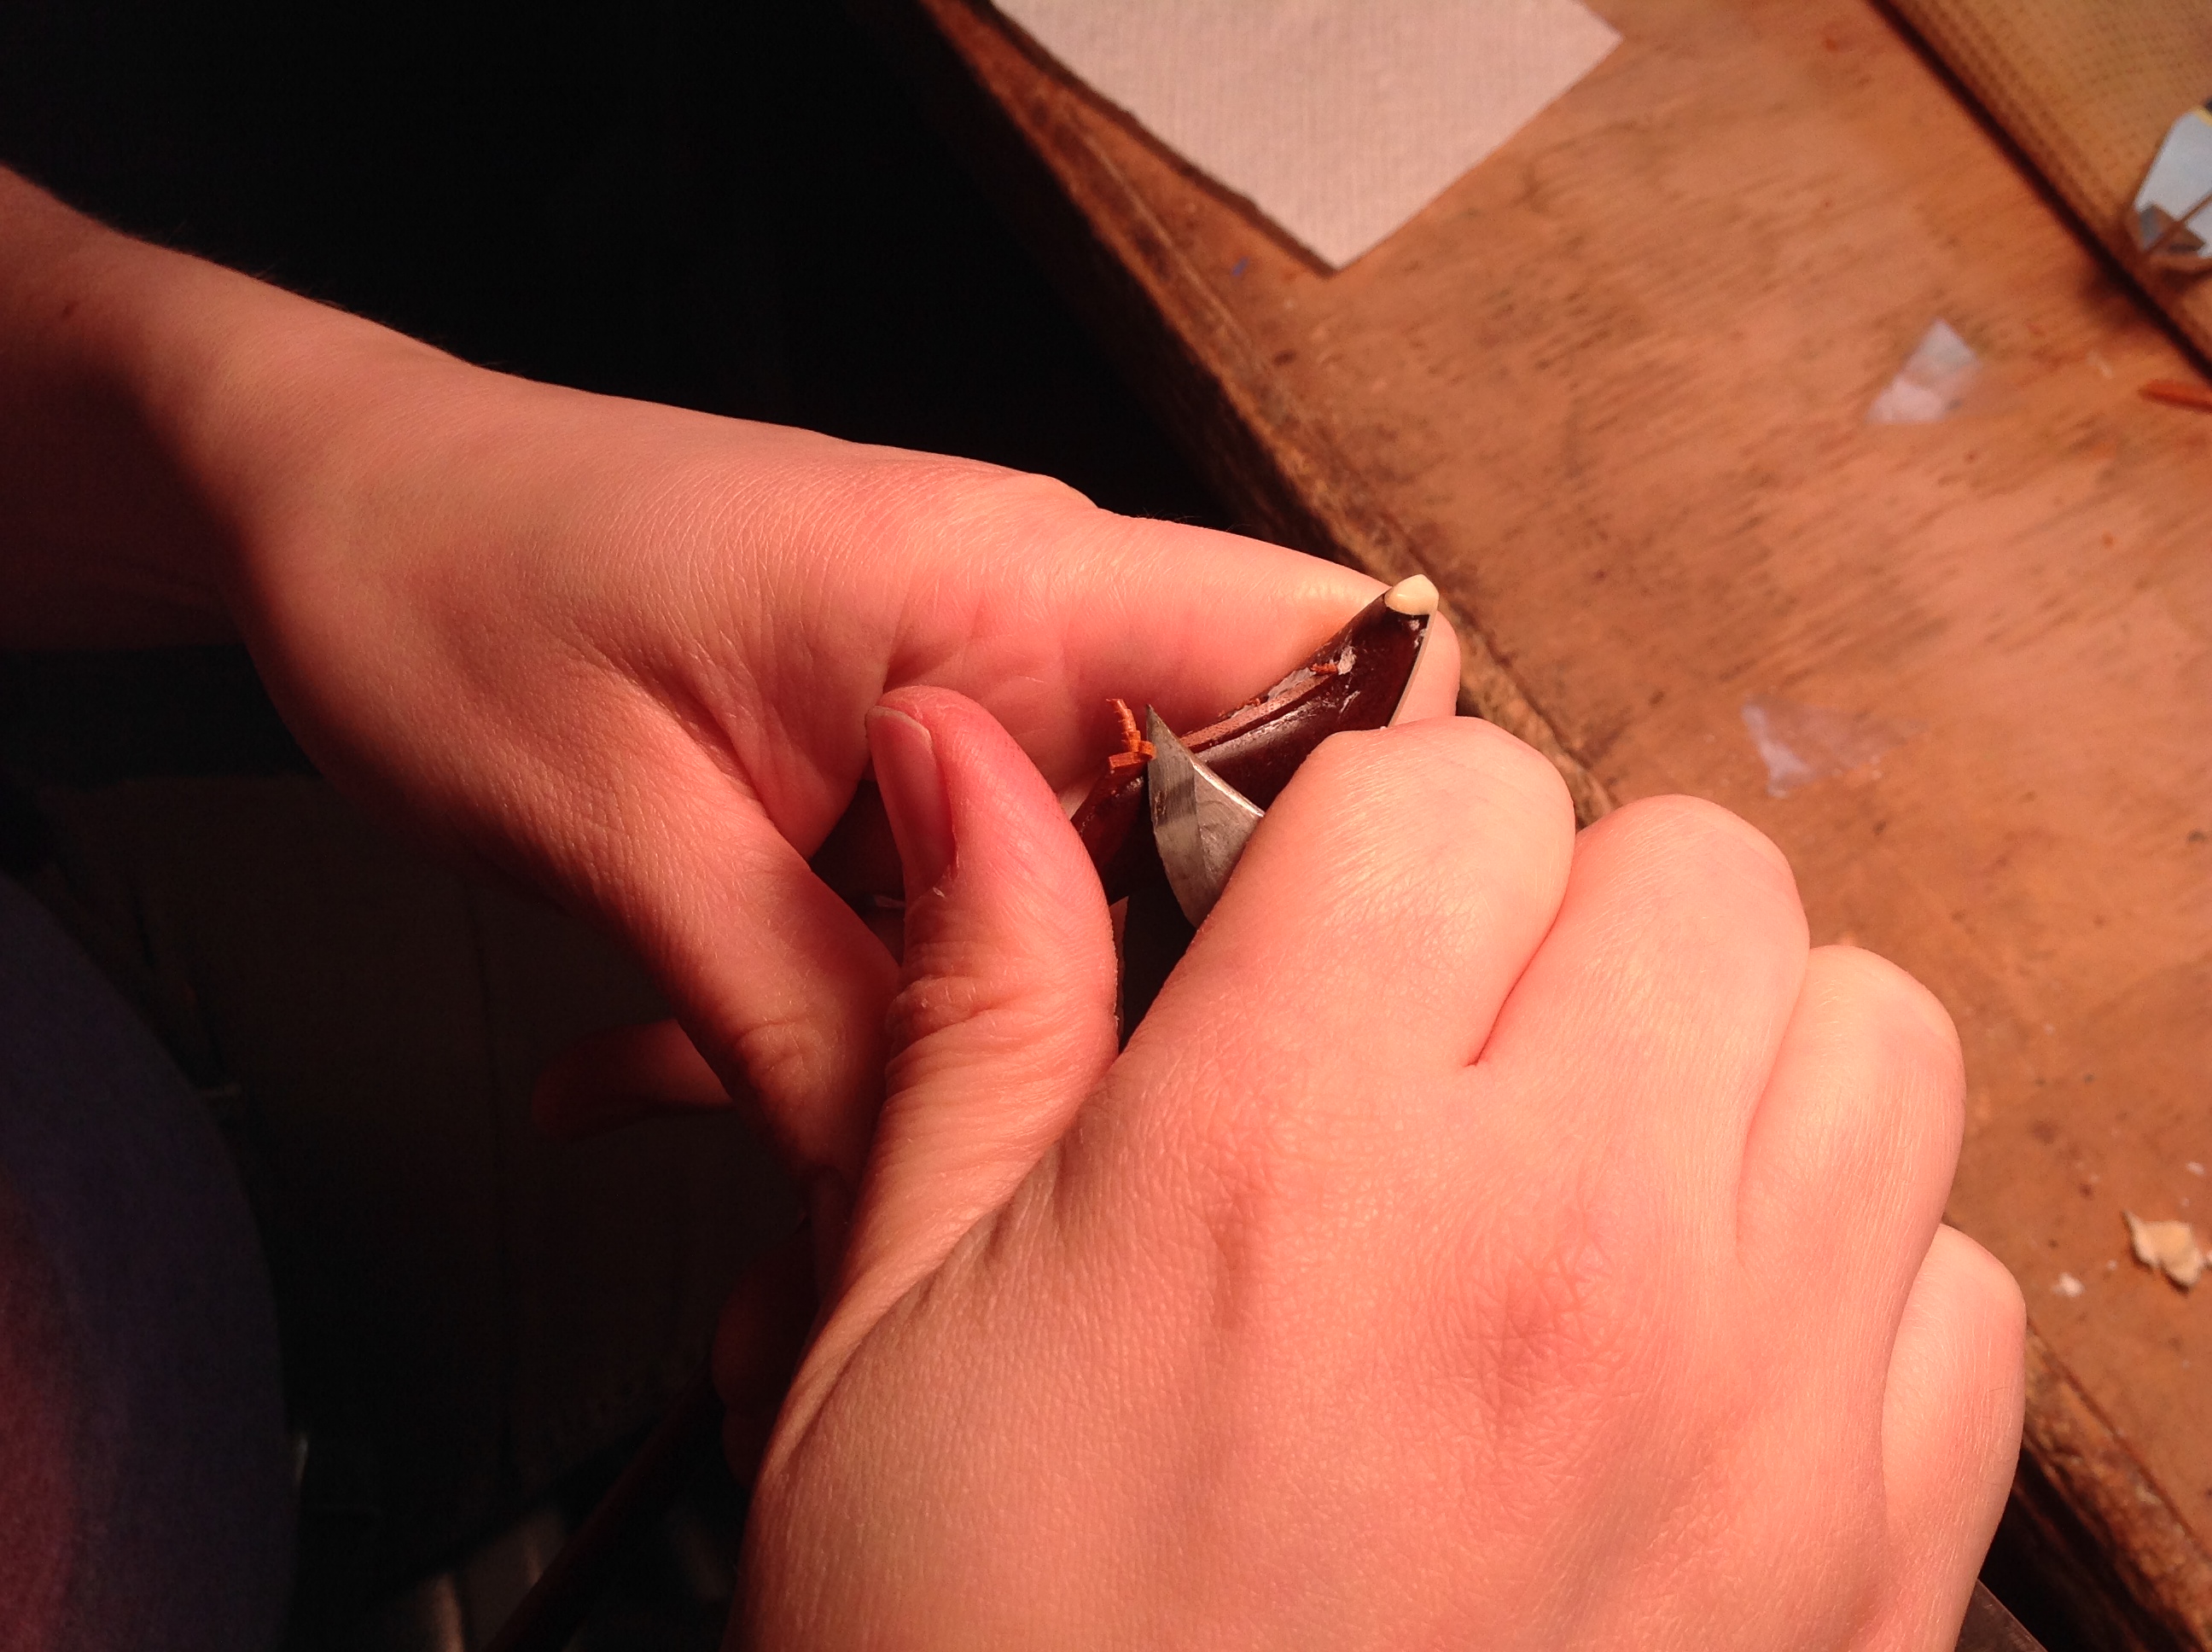
Use jeweler’s saw again with a fine blade to trim off excess. If it breaks now, you really will have to start a new piece.
Score the spline wood with a knife in hash marks of 45° to the grain lines for glue to flow into cut.
Clean the piece with alcohol and wrap a thin ruler with a paper towel and clean the inside of the spline cut.
Rub soap all over the head and some of the stick if you’re not sure. It’s not necessary to soap up to the spline cut. Very carefully clean the cut again with a paper towel without cleaning the rest of the head.
Allow enough time for the alcohol to completely evaporate out of the wood- some swelling after alcohol is normal.
Wash hands.
Get a buddy to help with gluing (go through test run with them so they know what’s up)
Do a test run.
While holding the head with a piece of plastic, and the piece in place; tilt spline piece forward about 1 mm and rock it back into place and pinch head on the sides -especially towards edges of spline.
Test the CA bottle and make sure the glue flows.
Tip spline forward.
Have buddy drop an amount of CA (maybe 3-5 drops worth – no time to count) into back of spline. Immediately look away and rock piece back to place. It should squirt some CA out and it can get in your eyes (it burns us!). You can wear safety glasses during this if you’d like to.
Hold the head securely while your buddy dusts the head with baking soda. This will help the glue set. Apply a little more CA to the joint if it needs it. Dust again with baking soda – all while maintaining pressure on the sides of the head.

Trimming the Spline
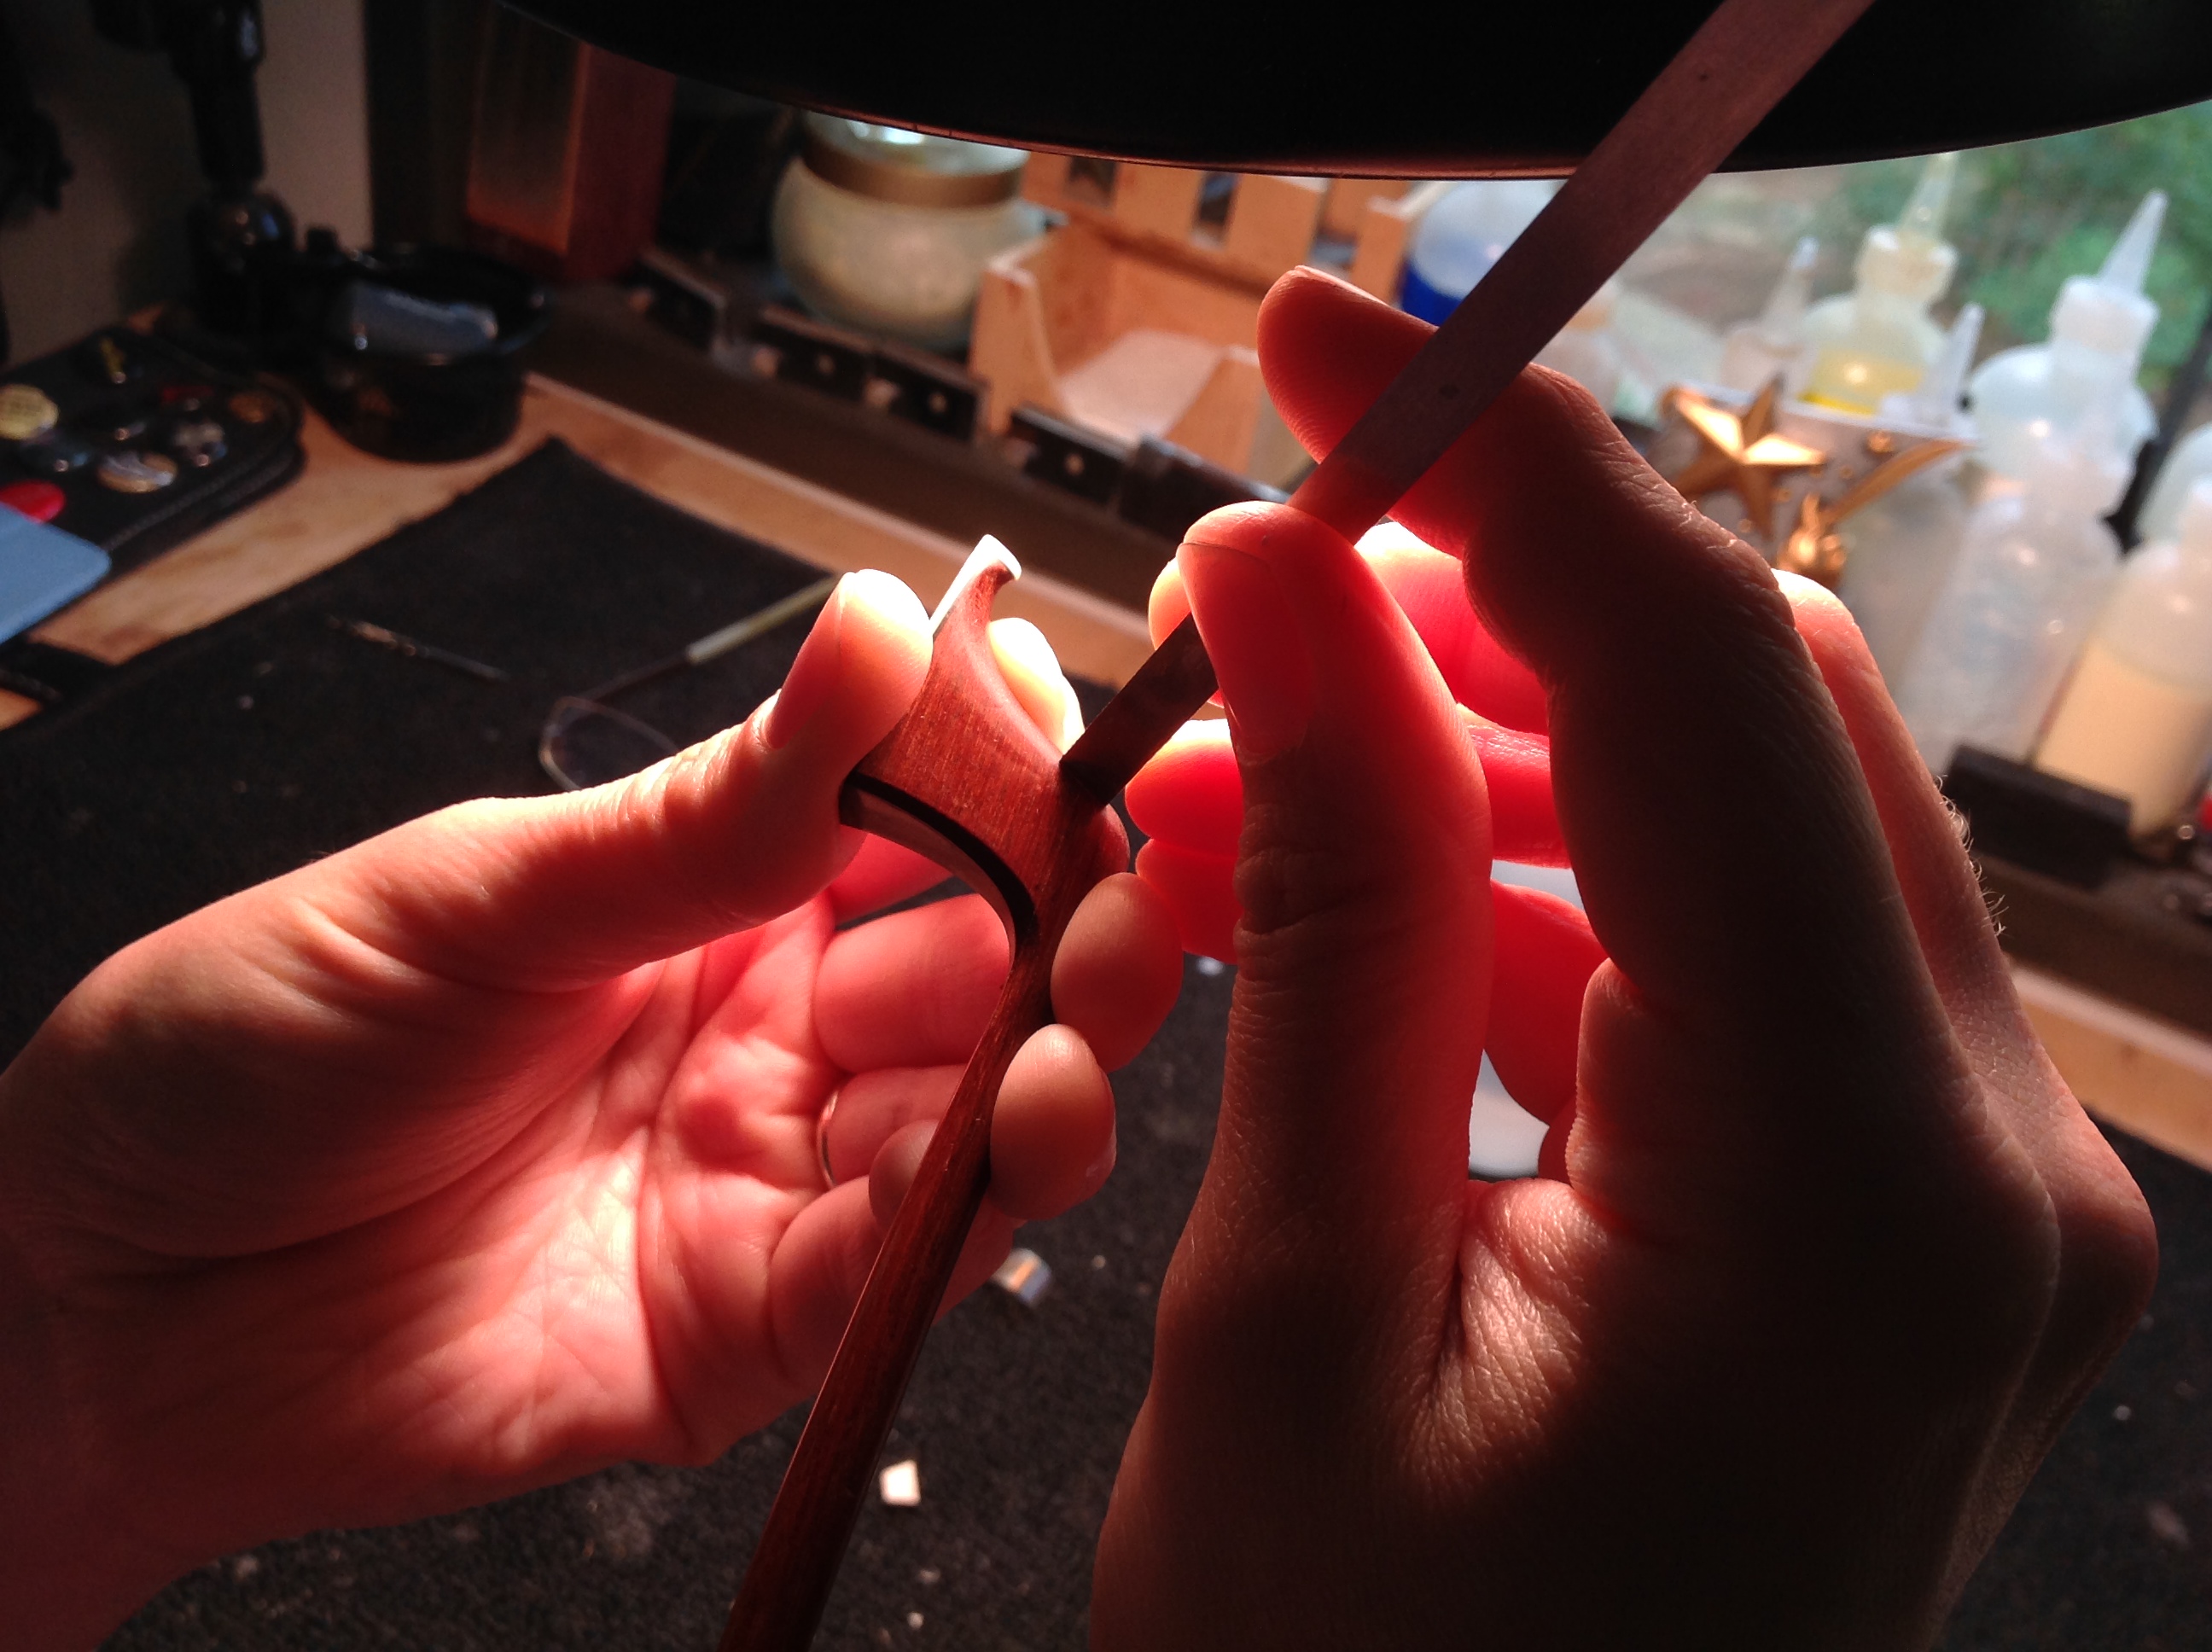
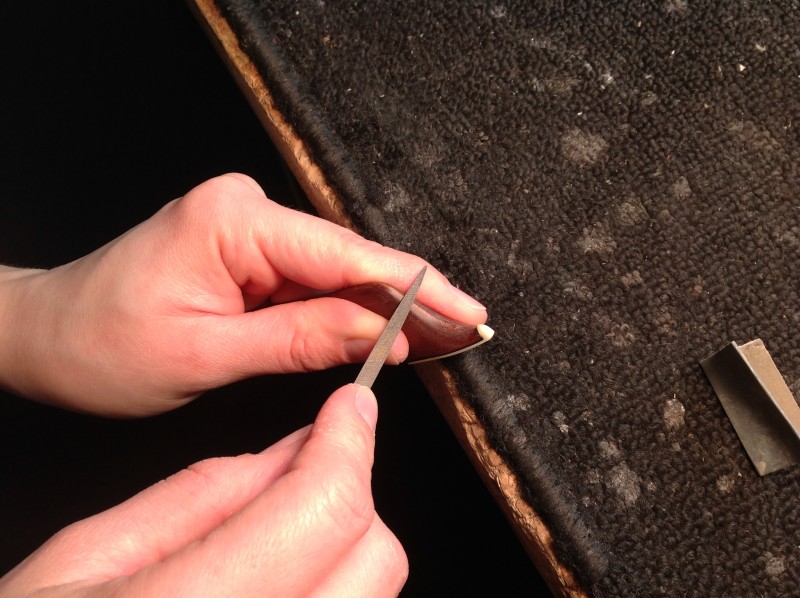
Trim the spline down with a knife.
Be aware of the split.
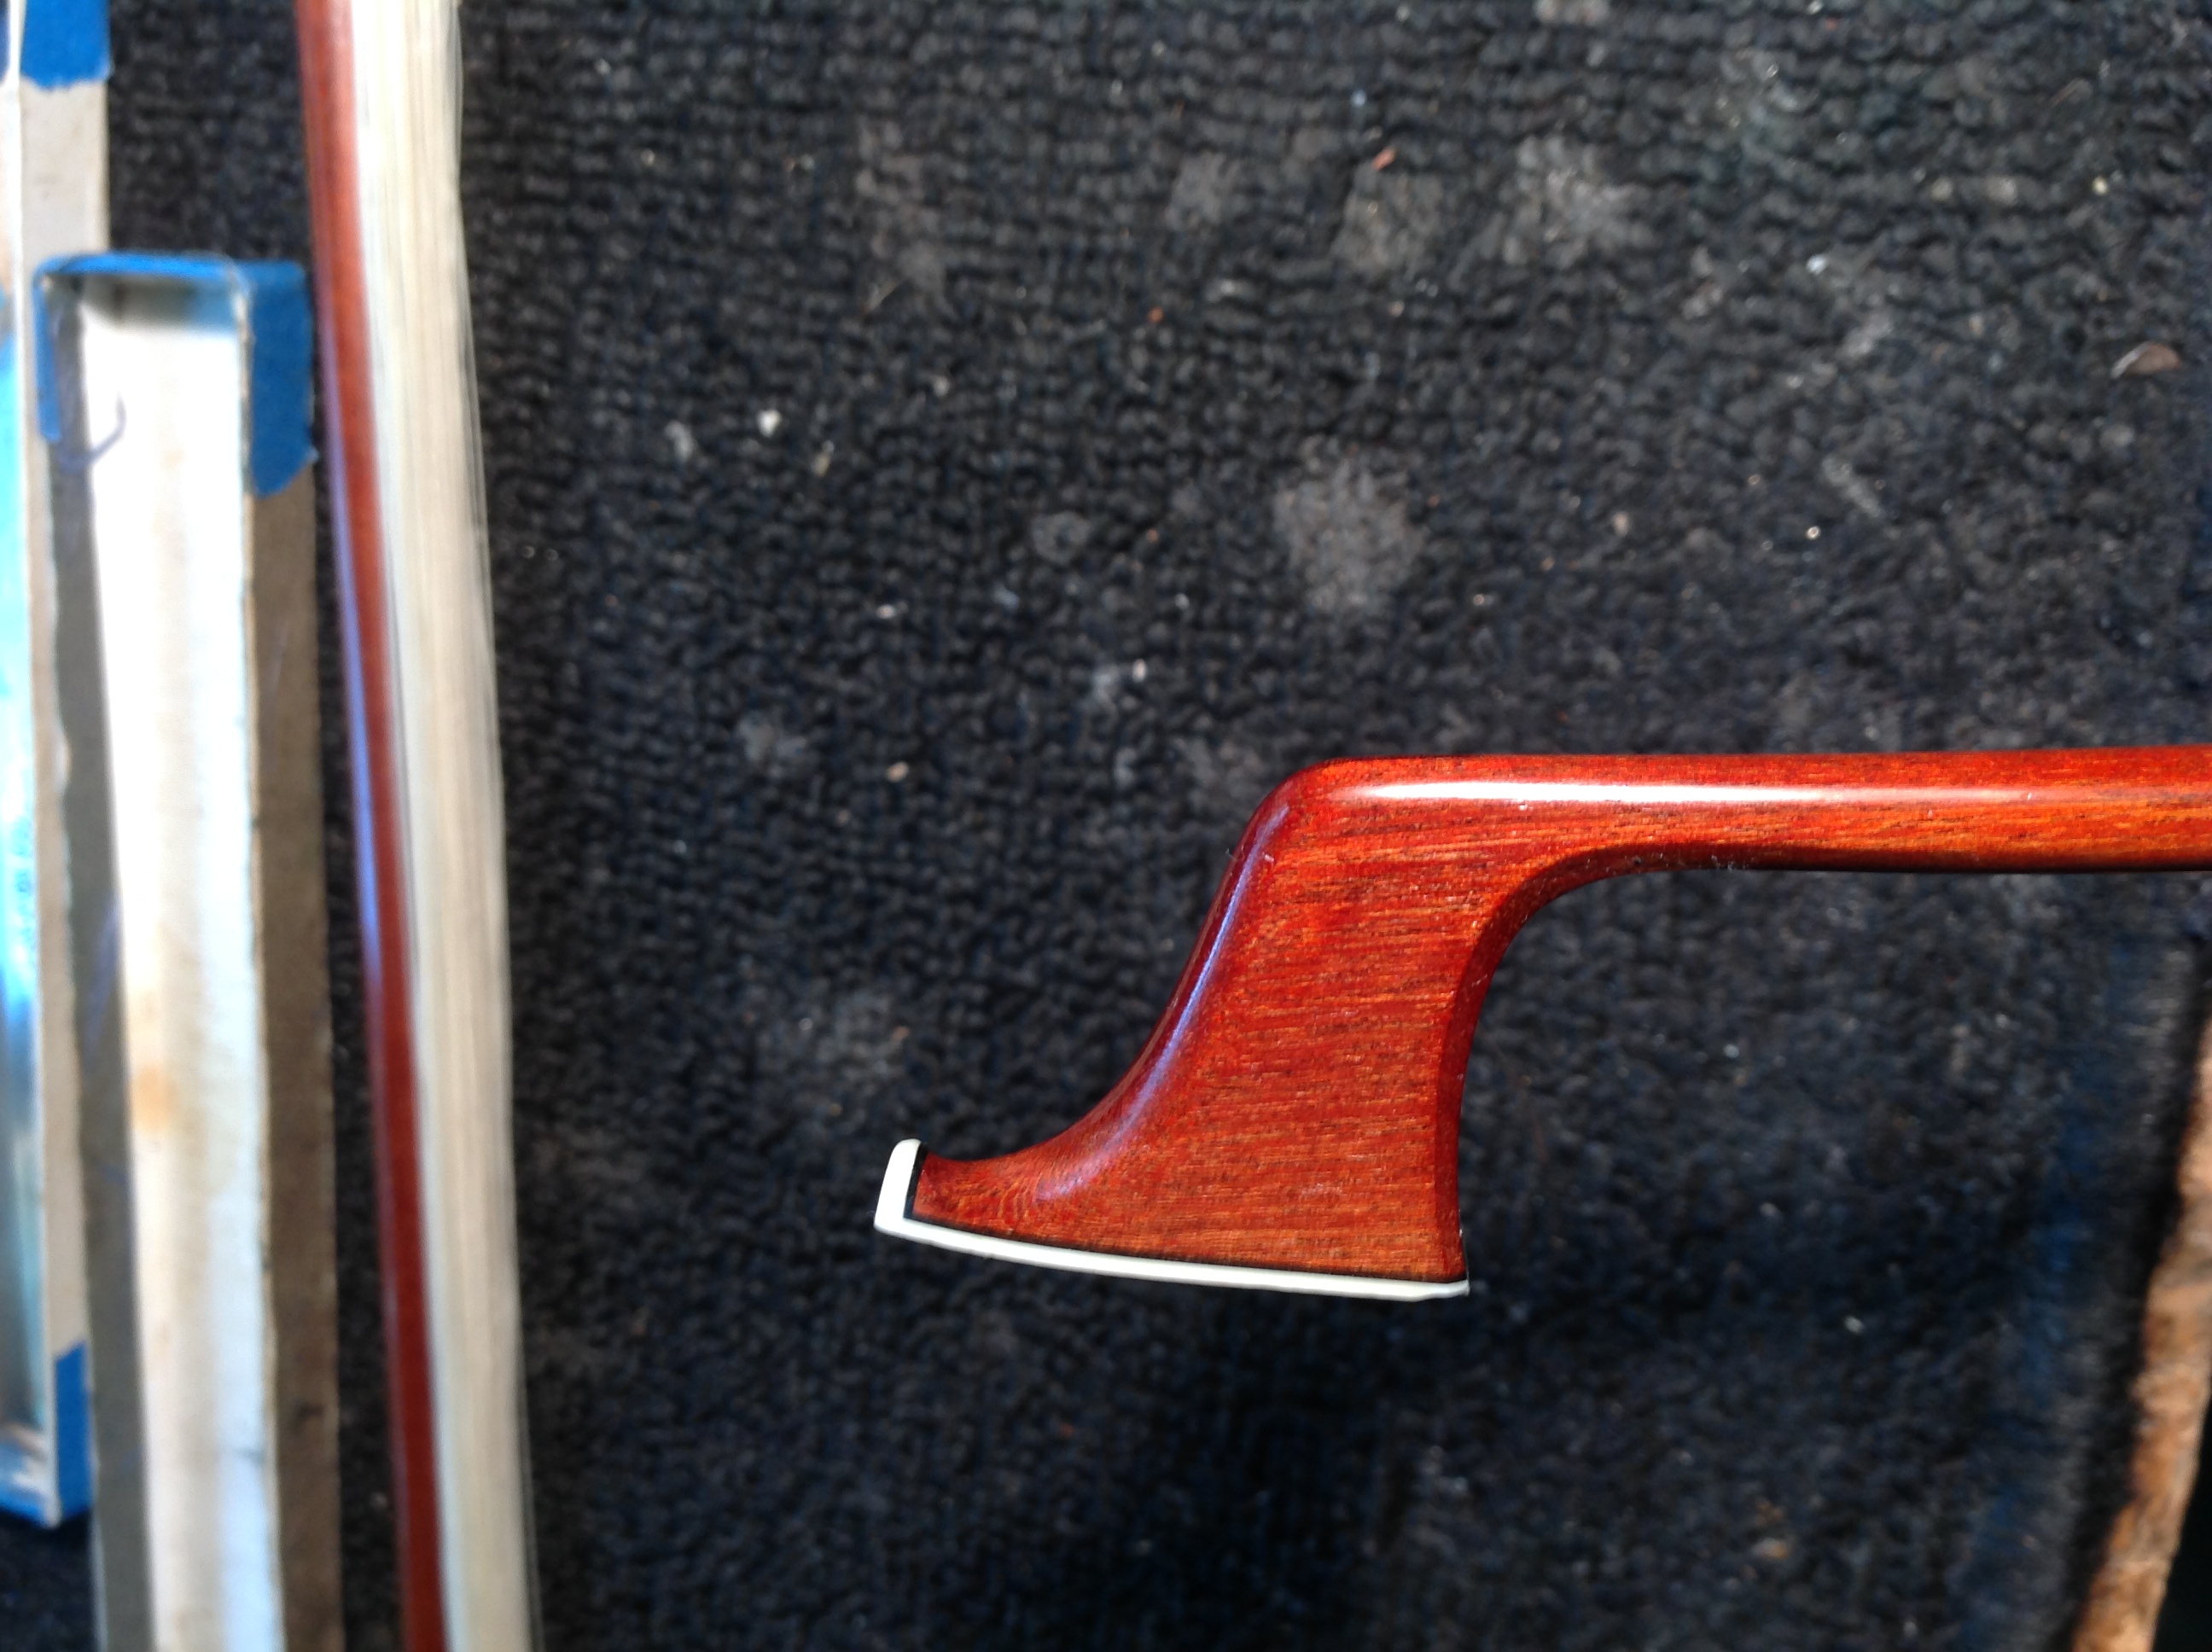
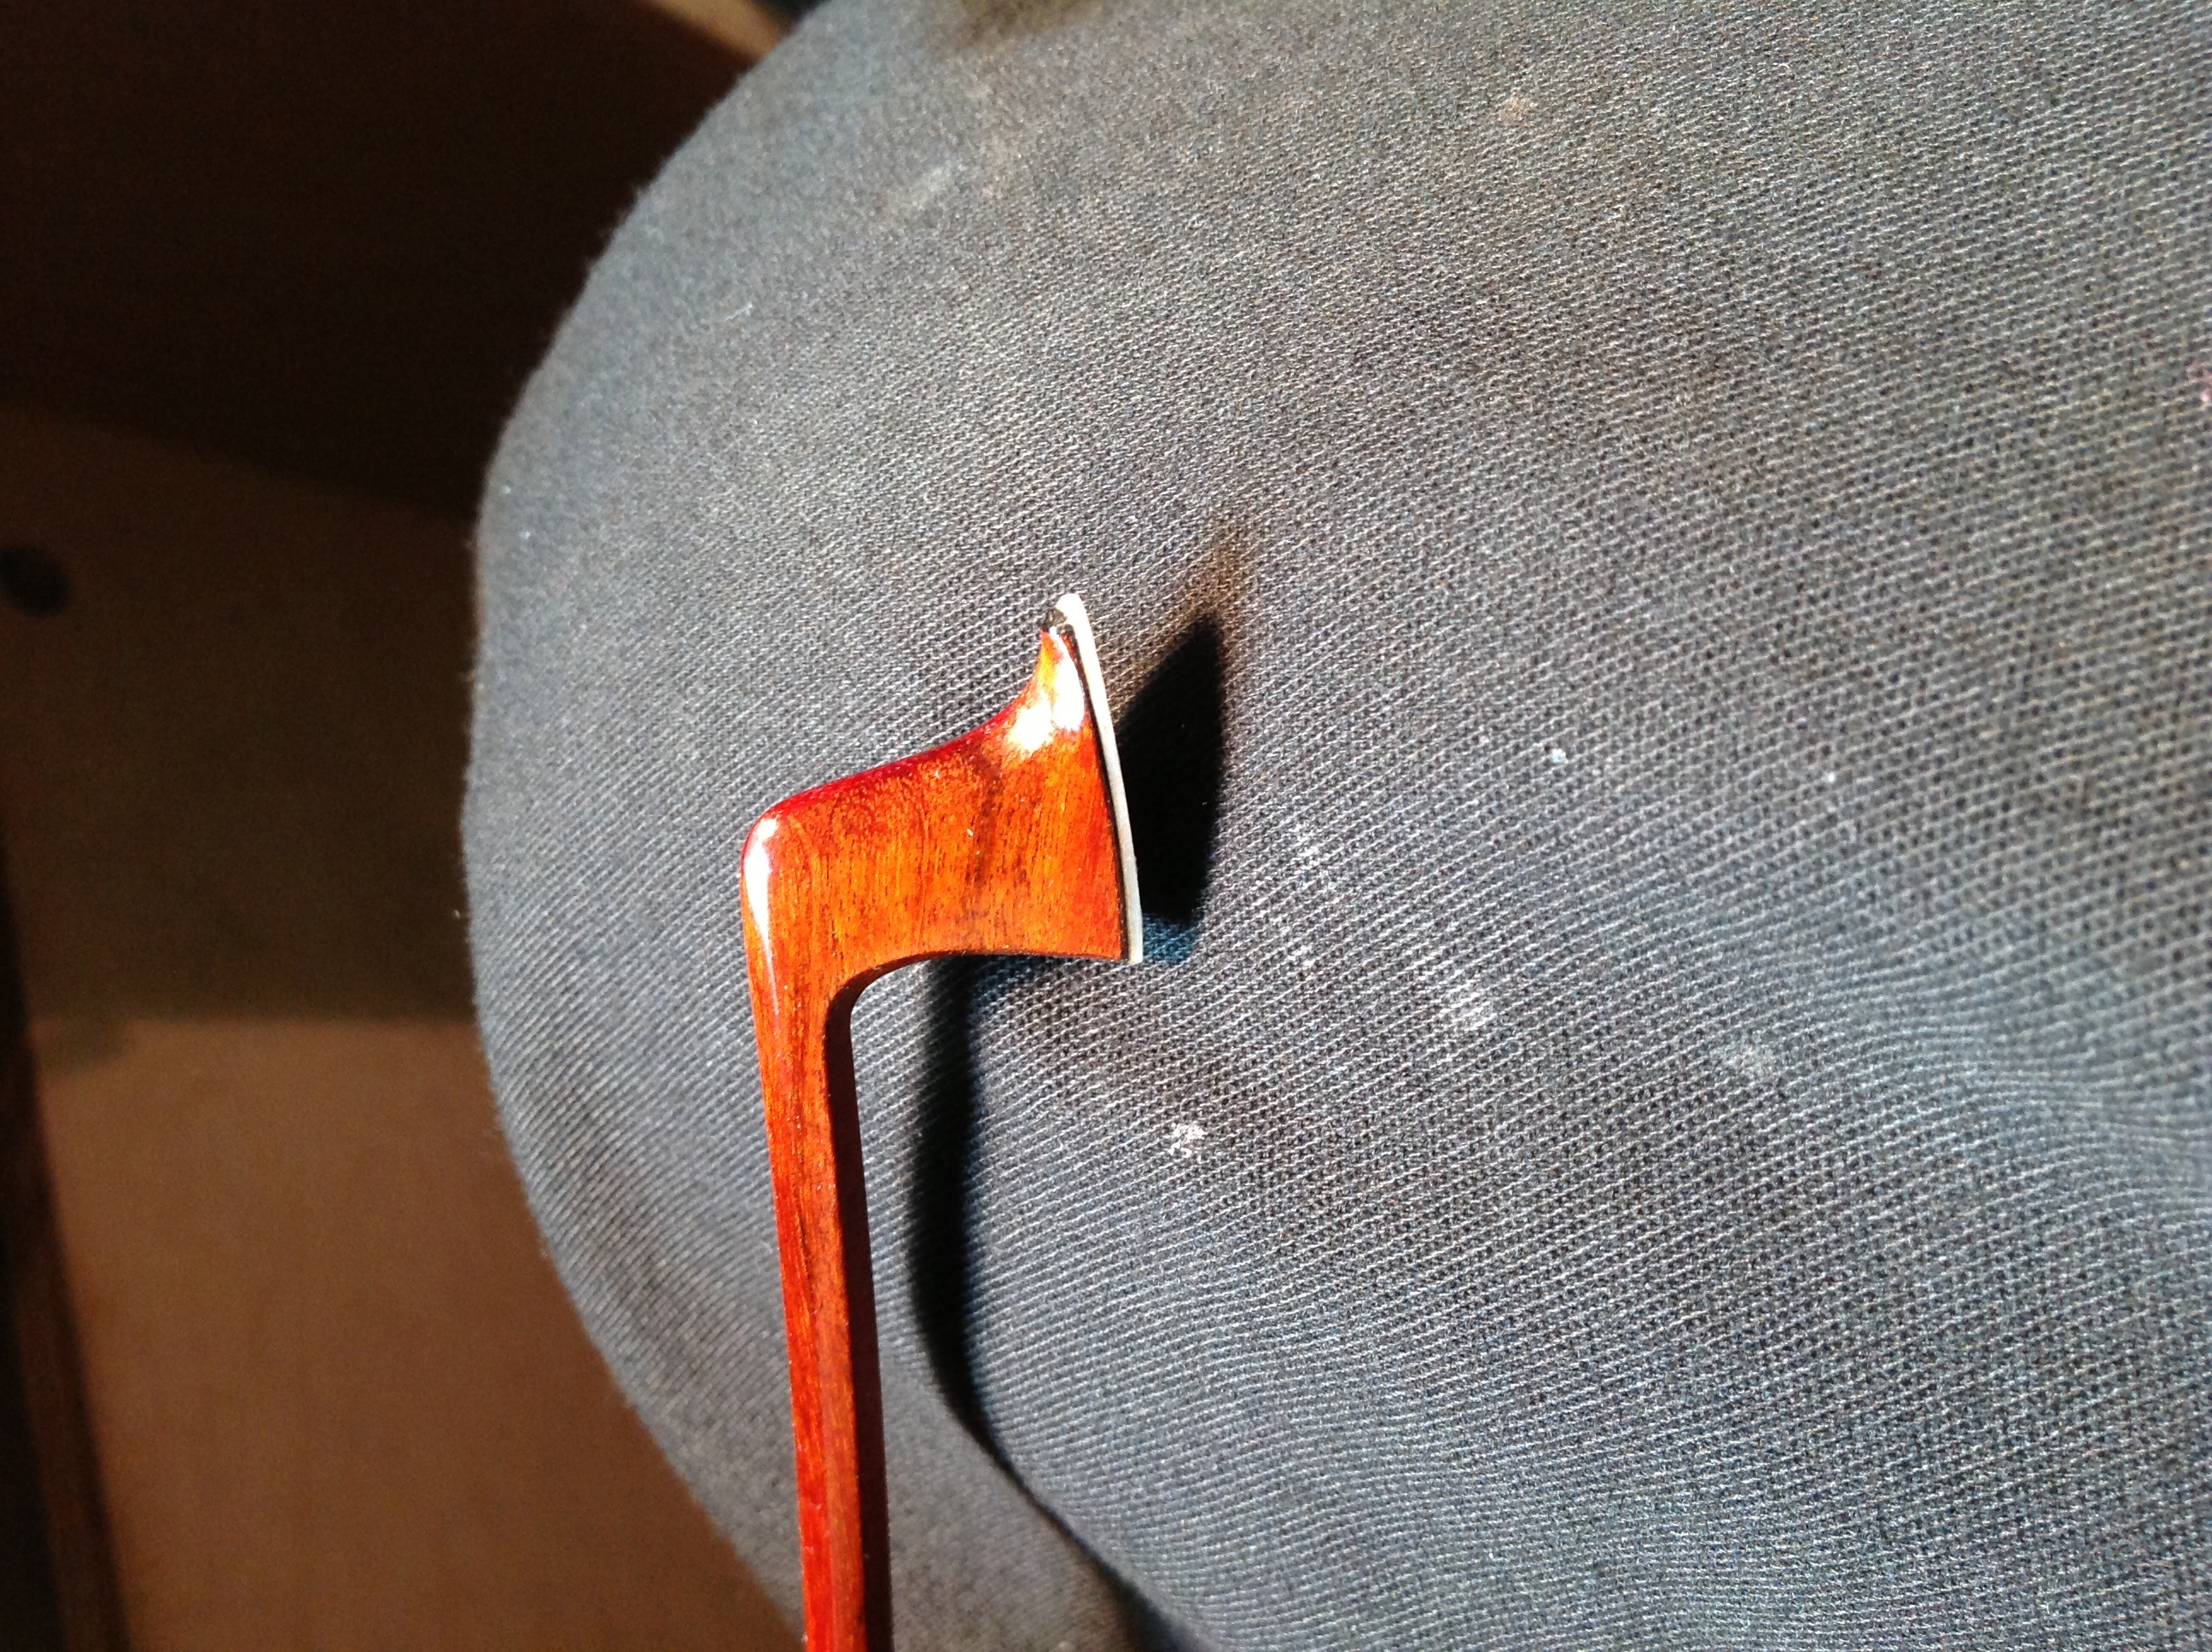
Try to follow the original idea of the bow. Do not take the profile too far. With the bow back-lit, I like to look at the profile of the head to make sure the lines flow.
Usually if the head was soaped enough, a fingernail will be able to scrape away CA residue on the head. Use a sharp knife to very carefully cut off any extra CA, use your knife more like a scraper.
As the spline is getting close (.5 mm tall), I switch to fine files.
While shaping head, apply mineral spirits to the spline to see the lines flash.
Once cleaned up and shaped, fold a little piece of 600 grit sandpaper up on itself three times and use mineral spirits as a lubricant; lightly sand-finish the spline.
Once sanded, evaluate color needs.
Apply water and potassium permanganate to the spline with a synthetic brush to darken the new wood – be aware that the end grain will soak up more of the color.
Polish like normal.

Ta da.
© Pasewicz String Instrument, Inc. 2015