
Instrument, Techniques
Repairing Rib Cracks Parallel to Rib Grain

Feb

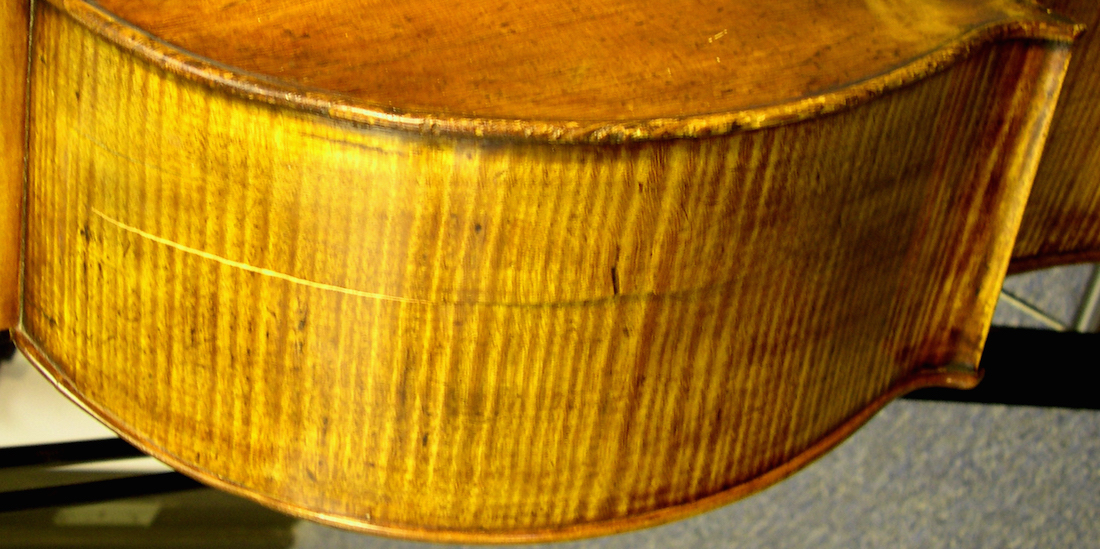
Rib cracks occur because of extreme changes in relative humidity, or from being struck with force by a foreign object. Rib cracks can come in many shapes and forms, and each crack requires a different repair technique. Due to the many different techniques required to repair rib damage, this article will be one of many focusing on one repair technique to solve one kind of problem.
Materials
1, 8′ 2X6 pine board preferably with out knots.
1 roll of thick closed cell rubber
Pencil
1 Roll of thin aluminum sheeting used for flashing
Wax Paper
Band saw
Hide Glue
1 sheet of medium thick, white or natural (non-dyed) linen with medium to fine thread count
Tin Snips
1 Large, stiff, trusty clamp
Opening knife
Excess trimmings from pine counter form
Oscillating Spindle Sander
Large Sharp Scraper
Large Flatt Rasp
10 Cam Clamps
Aliphatic Resin Glue
Cyanoacrylate Adhesive (CA or Super Glue)
Polyester Resin (Bondo)
Metal Tipped Digital Calipers of High Quality
Sturdy Cello Cradle
The Big Picture
To explain this process in the best possible way I think it’s important to explain each working part and its importance. If one part is removed the result will be altered, and can be undesirable.
Concave Form
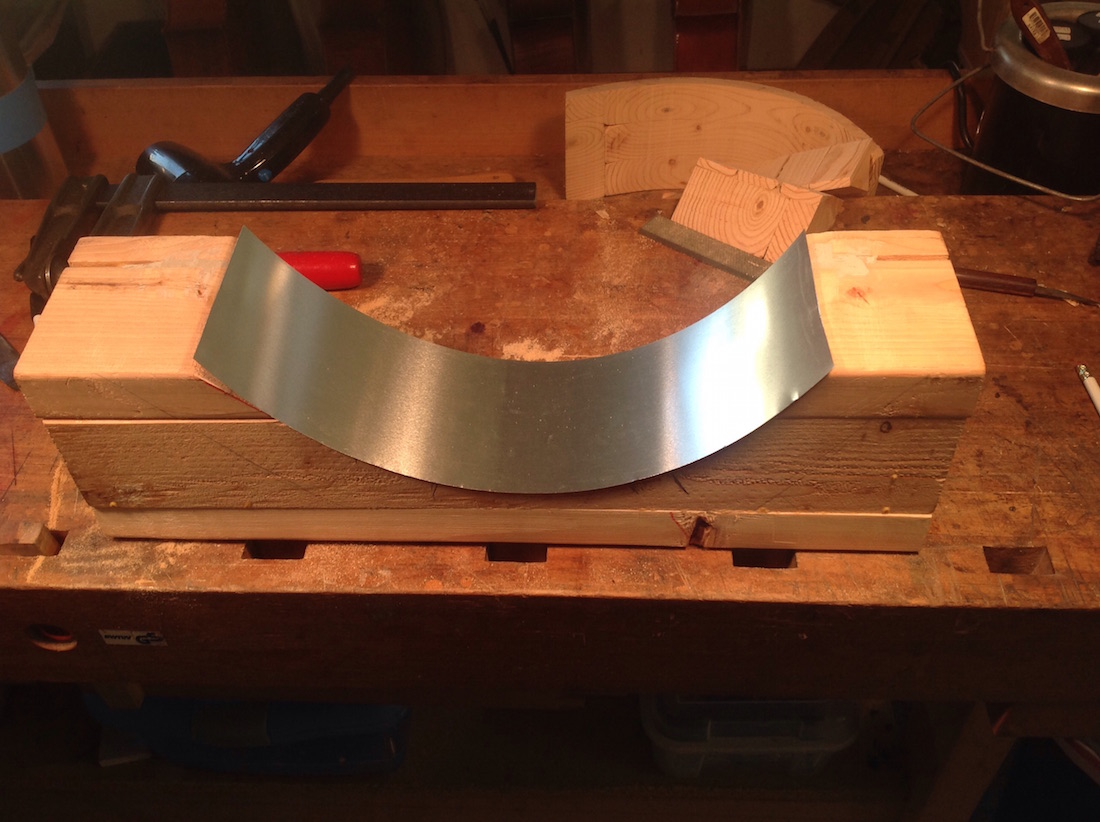
The outside concave form is a flat backing for the rib crack to lay against, which allows the crack to be leveled under clamping pressure.
Aluminum Sheeting
If you were to clamp the ribs to the form without the aluminum, it would either destroy the natural texture of the varnish, or imprint any texture form the concave form. Theoretically if you didn’t have the aluminum, the grain from the pine, and knots and lines from each pine board could be pressed into the rib.
Wax Paper
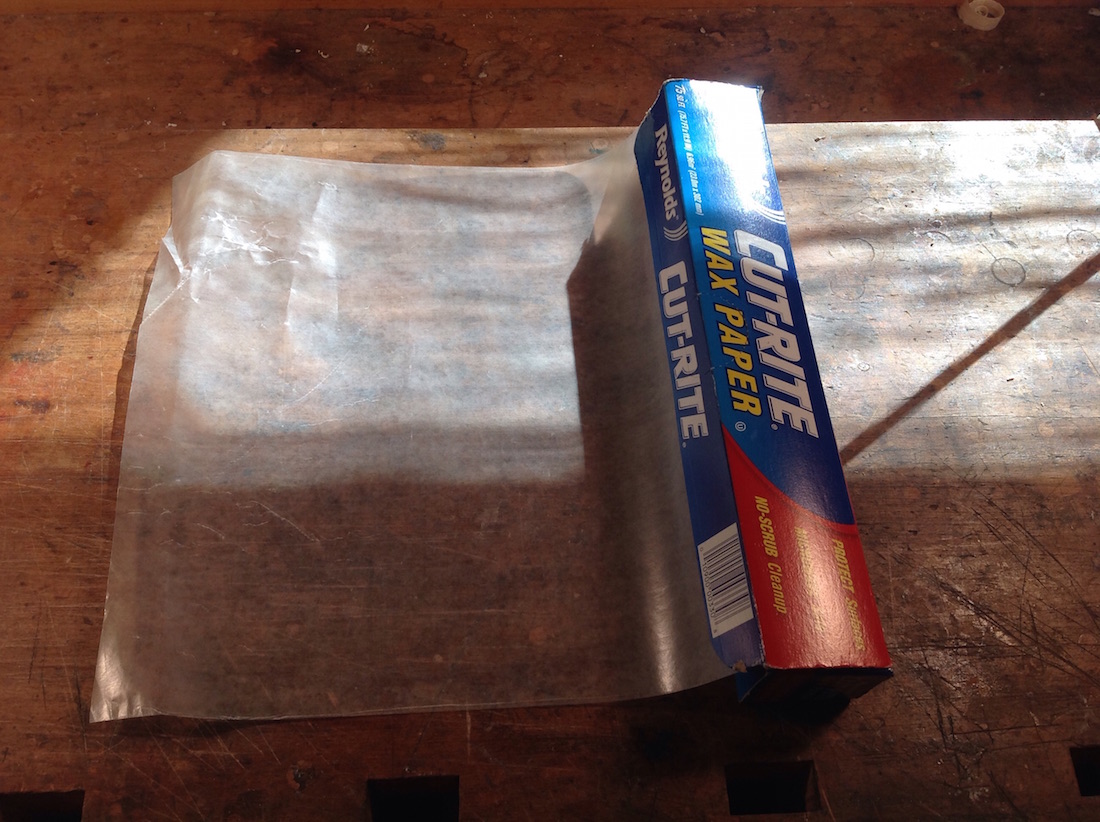
The wax paper is a barrier to protect the varnish surface, and to create a barrier in between the linen strips with wet hide glue. It also is a barrier that will let oxygen flow in so the glue has a chance to dry slowly.
Closed Cell Rubber Attached to a Convex form

The thick closed cell rubber and convex form will apply the most pressure on the center of the crack, and because of its dense spongy nature it will spread the pressure to the entire surface area of the rib. Yes, we are going to clamp the dickens out of it! With stout clamping pressure we can rest easy that the crack is level up against the concave form, and the aluminum will keep the natural texture in the ribs.
Linen Strips

The linen will be soaked in hide glue and applied to the inside of the rib. The linen serves two purposes:
- It will provide reinforcement for the crack without adding mass to the ribs.
- As the hide glue on the linen dries it will help keep the crack closed, and the moisture will close stubborn portions of the crack.
I heard Linen is bad! It distorts ribs and causes more cracks?!
I have seen linen strips do this, but there are a few rules to follow to avoid it. If you don’t follow these rules it most likely will distort the ribs, and possibly cause cracks. If you follow the rules, linen provides a strong, lightweight, and flexible reinforcement. Here are the rules:
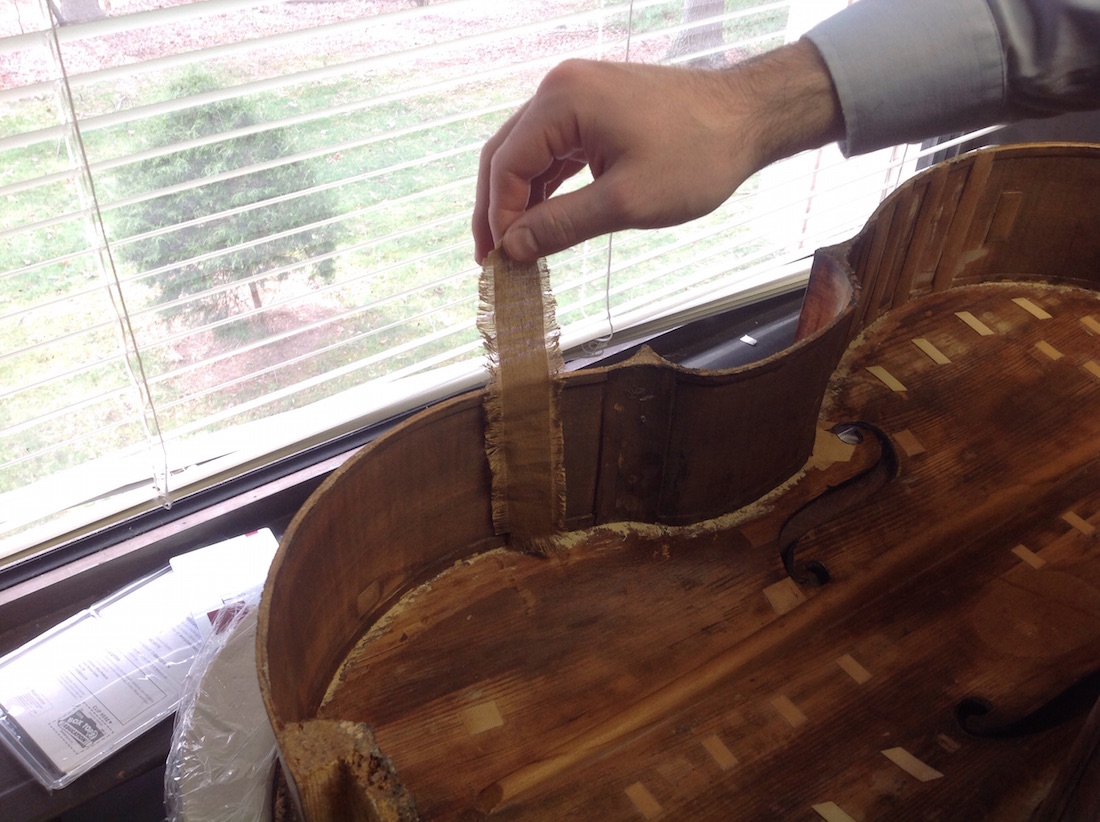
- The linen needs to be long enough to overlap both linings by half of the lining’s width. If the linen strip sits underneath the lining, then it will expand and contract underneath the stiff lining. It will push and pull the rib into and away from the lining. This can most certainly cause cracks.
- The linen needs to have frayed edges. The frayed edge will help spread the tension out on the linen strip while it expands and contracts.
- When applied correctly with hide glue it must dry for two to four weeks in the counter forms with ample clamping pressure. With the tight-fitting forms and clamping pressure, the glue will take forever to dry and that’s a good thing! When the glue dries, it will want to pull and distort the rib, and hold the crack together. In the two counter forms it has nowhere to go. All it can do is slowly pull the crack together with moisture. If you only wait a few days for the glue to dry, or let it dry outside of the forms, the rib will warp and possibly cause cracks. A month is a long time, but patience is a virtue! Once it is completely dry, it will no longer distort the rib.
When the linen is completely dry (which you can check by feel) and you’ve kept an eye on the shape of the rib for any distorts for a few hours, you need to varnish the linen. A healthy brushing of shellac will do it. This is imperative because linen is hygroscopic, meaning it will retain moisture quickly at high levels of relative humidity, and release moisture quickly at low levels of relative humidity. Varnish will hinder how much water it can take on, and will slow the rendering of moisture.

Assessing the damage and Making Rib Forms

Before starting any work, it’s important to take comprehensive pictures of everything. This will be a hard document of the exact damage when the instrument walked in the door, and help you later when doing retouch. After pictures, it’s time to get down to business! How many cracks are there? What part of the bout are the cracks located?
In situations where you have a few cracks on the lower bout near the corner block, and a small crack on the lower bout near the lower block, you will most likely need to make more than one form. You will also need to clamp them independently of each other. One large crack in the middle of the bout will necessitate making one large form. Once you have taken pictures and have a clear picture where you are headed with the repair, it’s time to remove the top. If you don’t have much experience removing tops perhaps this repair is not for you.
Making a Rib Form
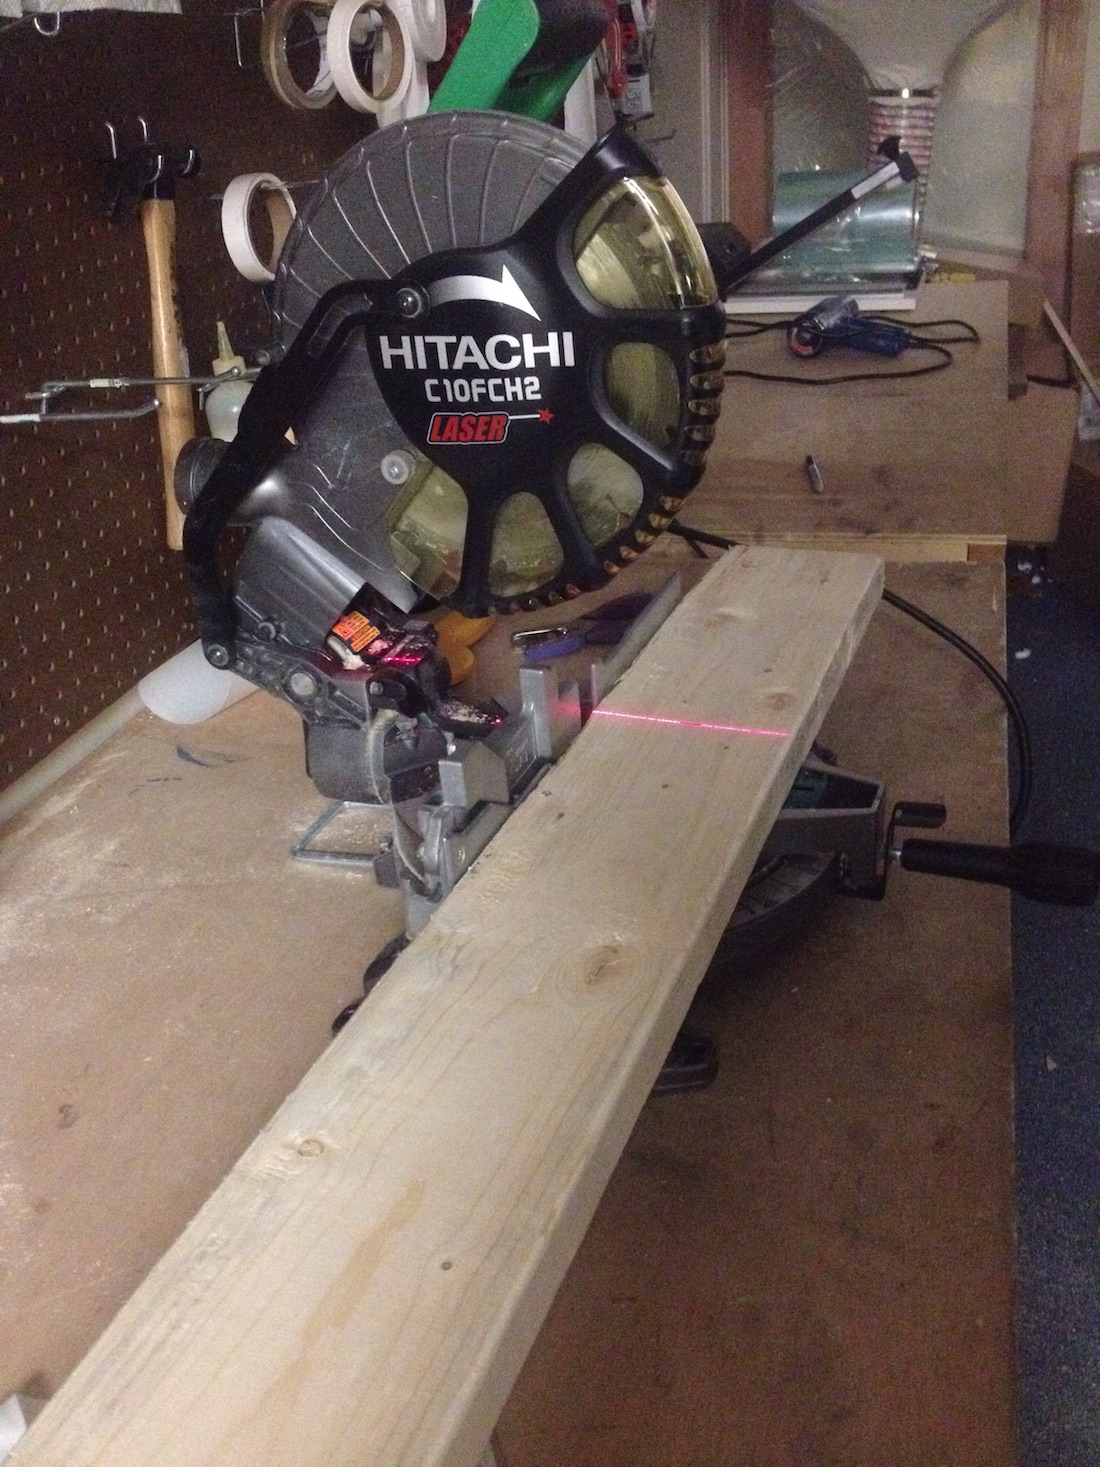
After removing the top and choosing how many forms you will need, measure the area where each form will be placed with a flexible ruler on the rib structure. Saw out portions of the 2X6 pine board to be the length of the crack plus extra length on either side of the crack for support. Keep in mind that if the crack is next to or near a block, you will need to overlap the block by a healthy amount. If you clamp the form next to the block area without overhanging it you could create a cross-grain crack. Saw out the boards so the quarter cut grain will be facing the varnish surface of the rib. Cut out as many sections needed to build the height of the form to the rib height or slightly greater. Try to avoid knots that lie on the quarter-cut grain surface and will meet the varnished surface of the rib. Keep in mind that the middle section of the pine board will be the surface facing the varnish. The 2X6 will end up being an inside and outside form.
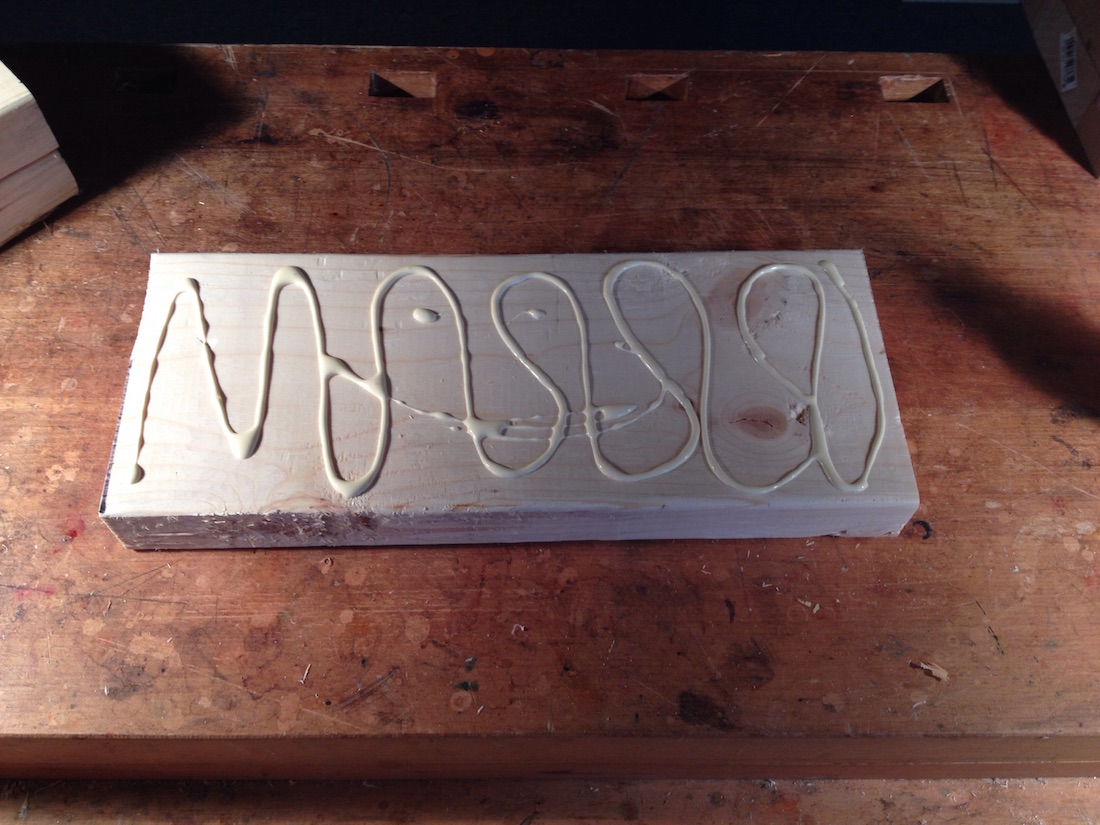
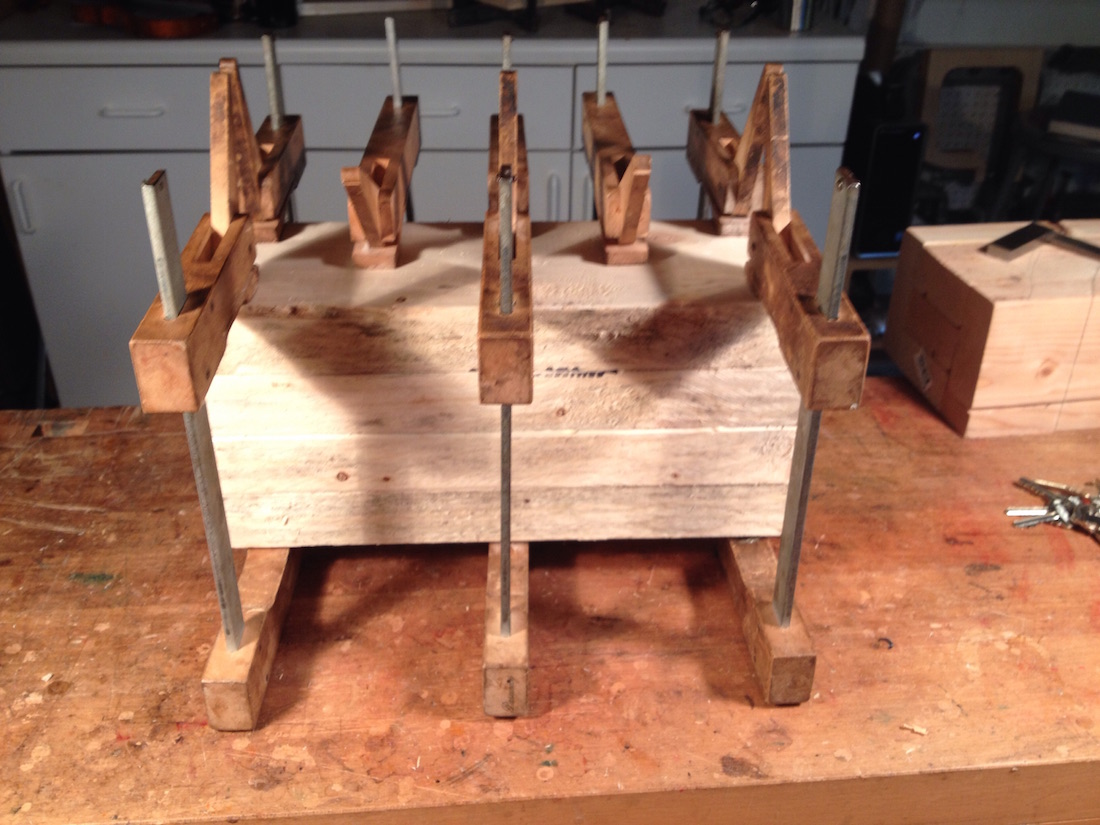
Take the pine board and flatten it with a jack plane if needed. This does not have to be particularly accurate, and often is not even necessary. Take each board and build a height that is equal to or higher than the rib height where the crack lays. Glue each board together with aliphatic resin, and use as many clamps as possible. I often find myself using eight to ten cam style clamps for this. I usually let this dry over night at the very least. If you are making more than one form, make and glue them simultaneously to save time.
Once the glue has dried thoroughly, flatten the bottom of the rib form with a jack plane. This will help stabilize the rib form when clamping, and will help you get a consistent and square cut on the band saw. This is also a good time to remove any excess height form the form if necessary.
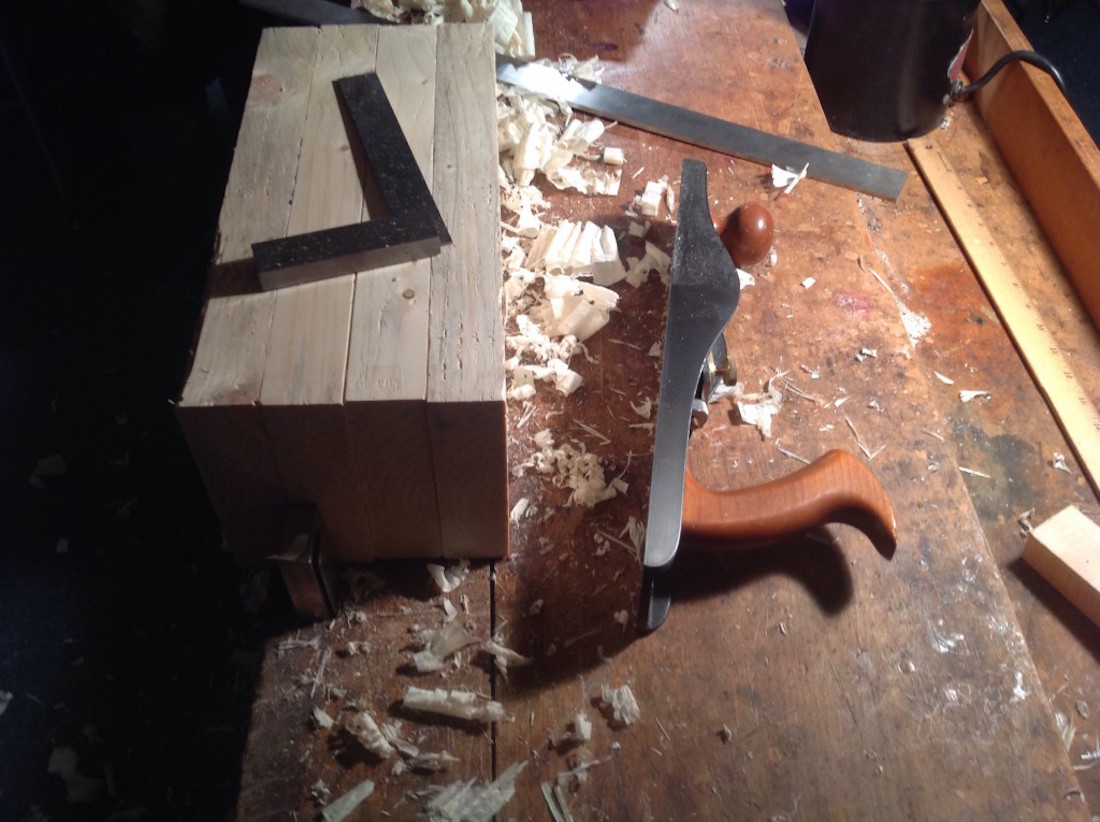
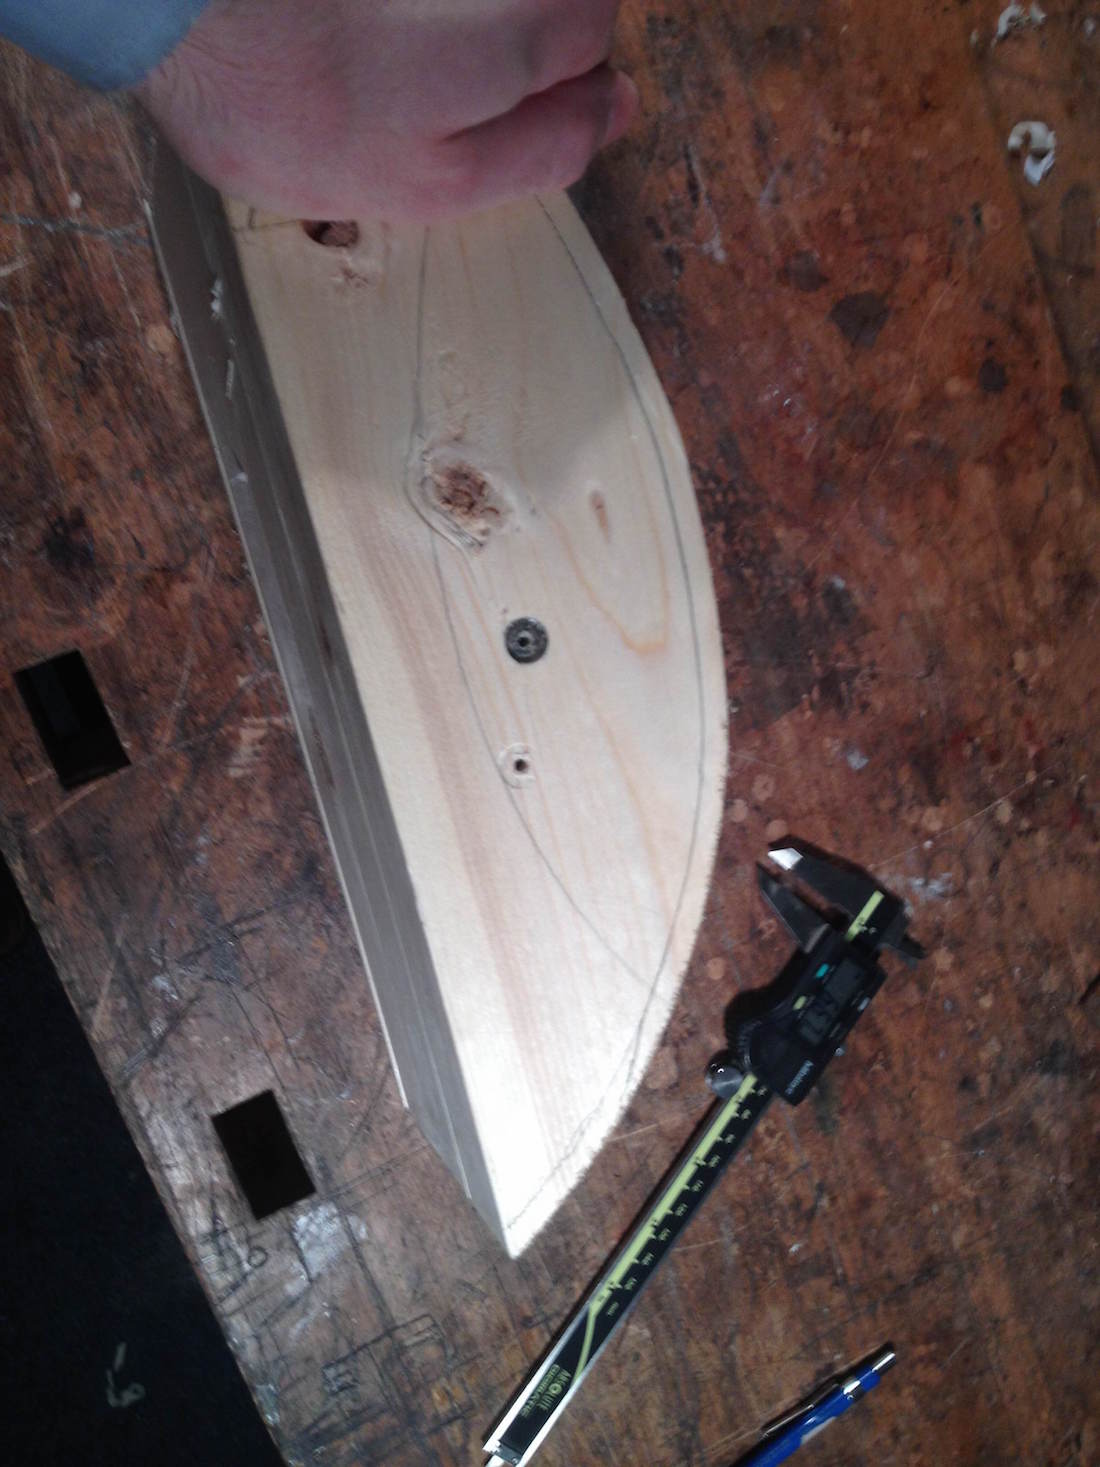
Using the rib outline or the outline of the top, trace the outline of the instrument on the rib form. Make this line on the center of the form.
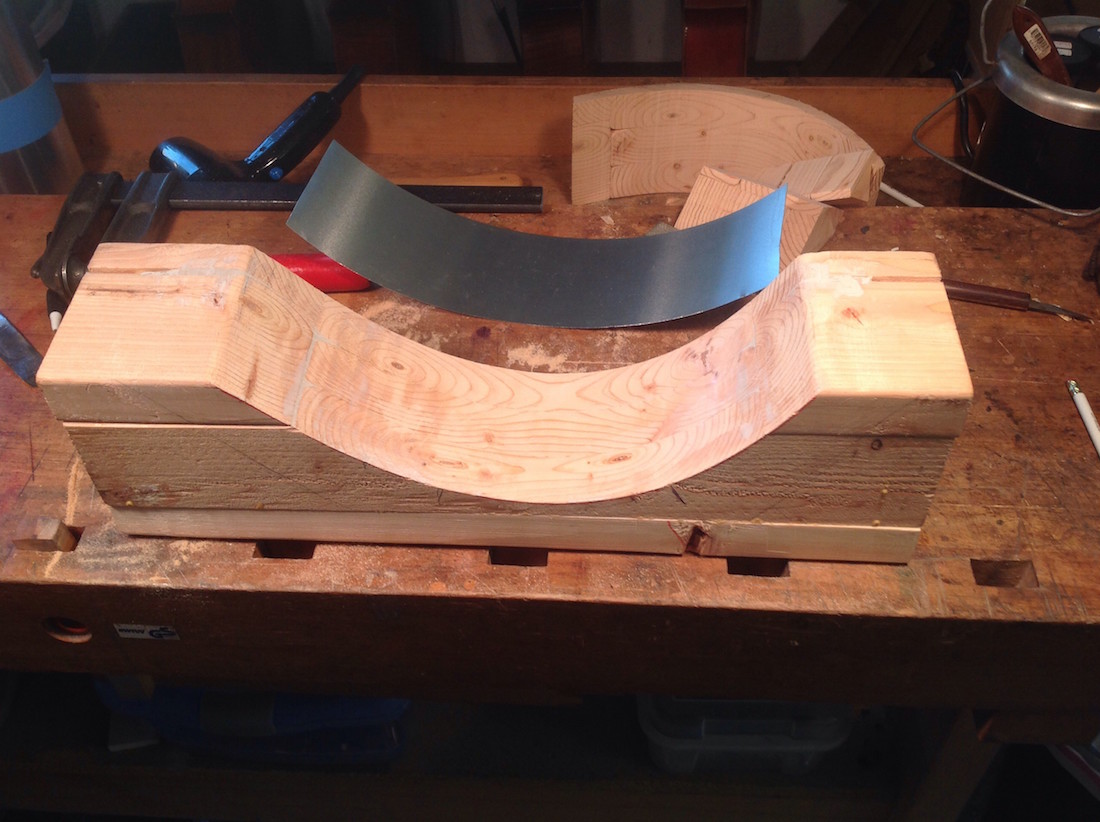
Preparing the Convex Part of the form
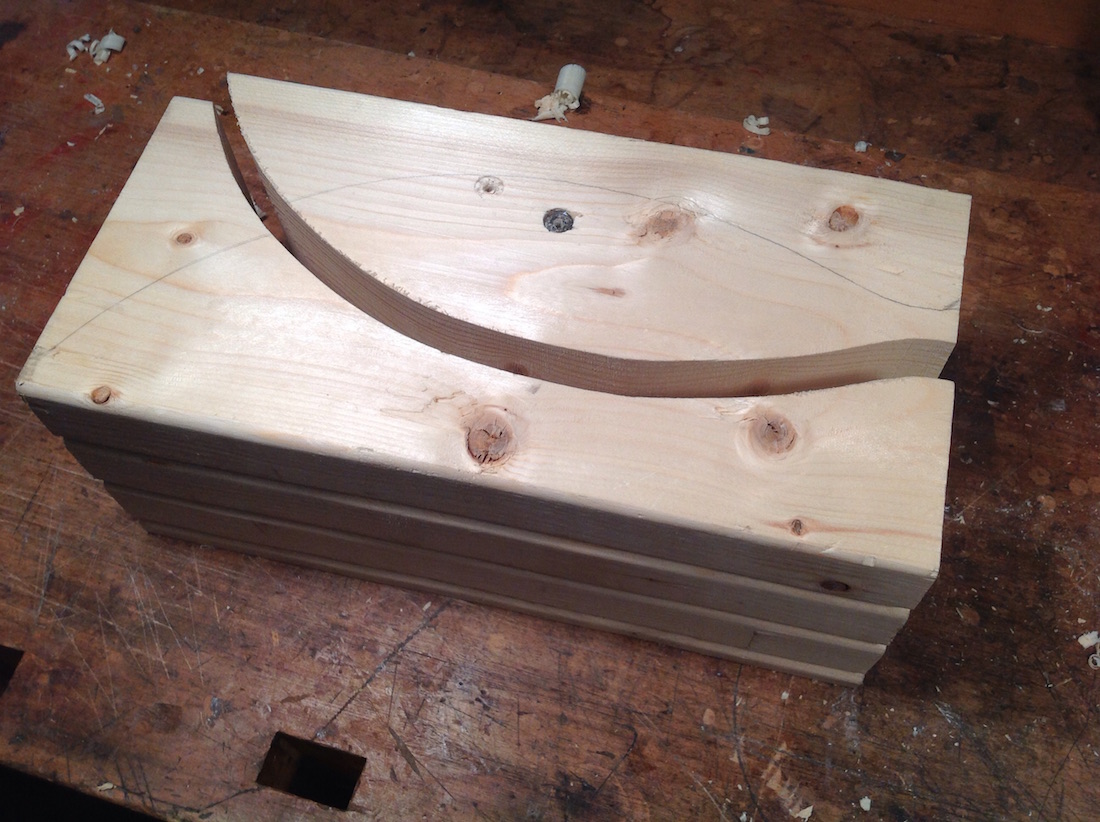
Set up the band saw where the table has been adjusted square to the blade, and carefully cut on the traced line. I would use a fresh blade, especially when sawing out a cello-sized form. Then use the oscillating spindle sander to “clean up the line” from the band saw. This only applies to the concave part of the form on the upper and lower bouts. In a C-bout rib crack, the part of the form that is facing the rib is convex. I can easily finish the surface of the form and fit it well using only the osculating spindle sander. For cello forms the spindle sander we own does not operate at a full rib height for cello, and I end up having to use cutting tools and a rasp to finish it off. If you don’t have a oscillating spindle sander this operation can be performed with a large rasp, file, and a scraper if necessary. Keeping a smooth line, and having a constant flat and square surface is paramount! If the form is round, hollow, or rippled it will distort the rib with it. It will also provide a flat surface to level out the rib cracks which is the whole point of this process.


After machine sanding and using a file, I like to finish off the concave section of the form with a scraper. Things need be clean, flat and smooth. If there are any hollow spots where the pine boards had a knot, or a gap occurred from the pine boards being glued together, I fill the area with a polyester resin (Bondo) and scrape it down later. When you are finished, round the outside edges of the form so there are no sharp edges.
Preparing the Convex Form
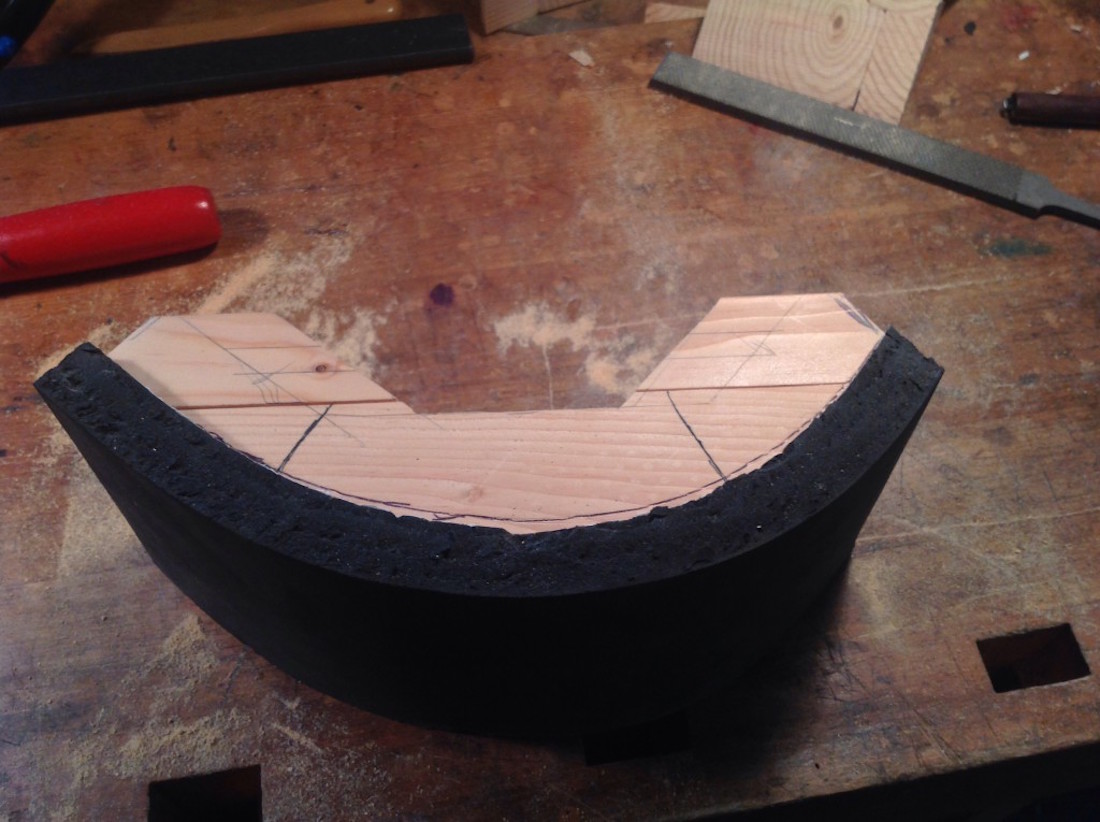
With the concave section of the form finished, we can move on to it’s convex partner. This part of the form is just as important and the concave part, but its function is rather different. This part of the form puts directional force on the epicenter of the rib crack, and is made from the cut-off from the concave form. Making this form is a different process, and flatness of the clamping surface is no where near as important as its counterpart, although its shape is equally important. This counterpart will be lined with closed cell rubber and will have considerable clamping pressure applied to it. It also needs to be slightly smaller than the concave form. The shape or radius of the form will depend how much clamping pressure needs to be applied to the concave form. The more the clamping pressure applied, the tighter the radius needs to be. The closed cell rubber compresses and applies pressure the the most important areas of the crack. The shape or radius will end up being determined by “feel” or based on your previous experience.
Determining the Radius of the Convex from
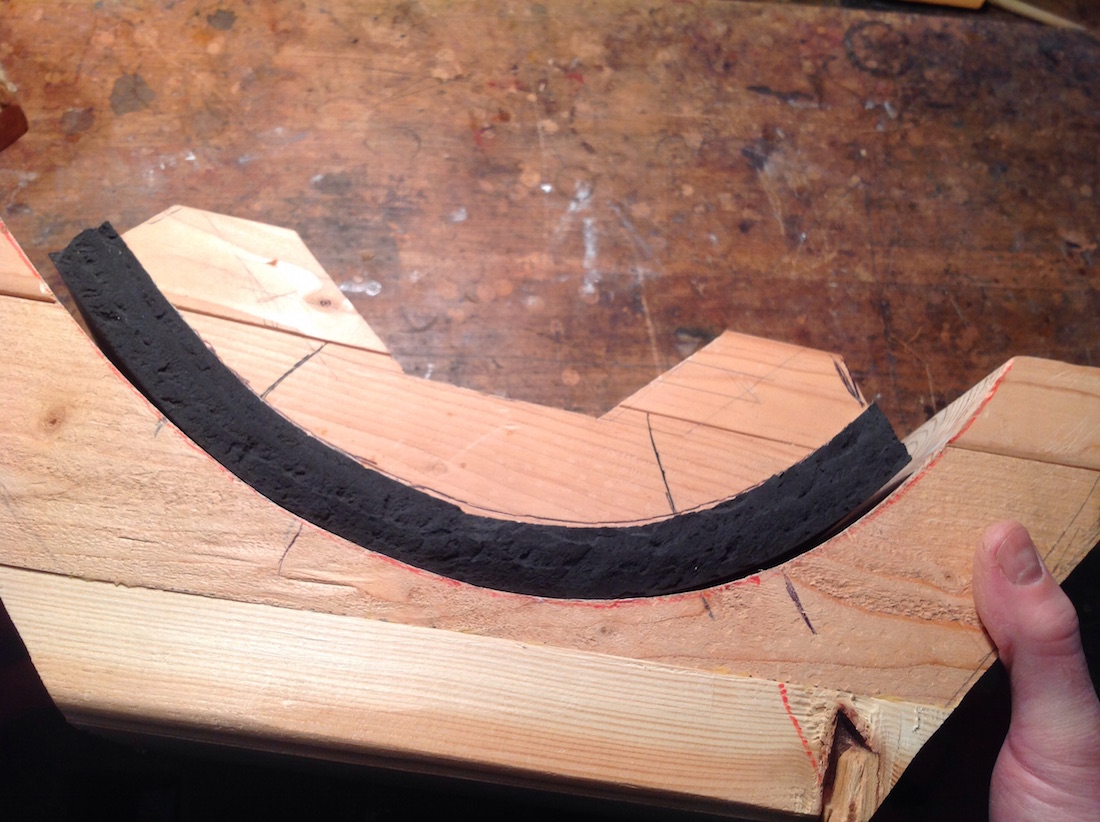
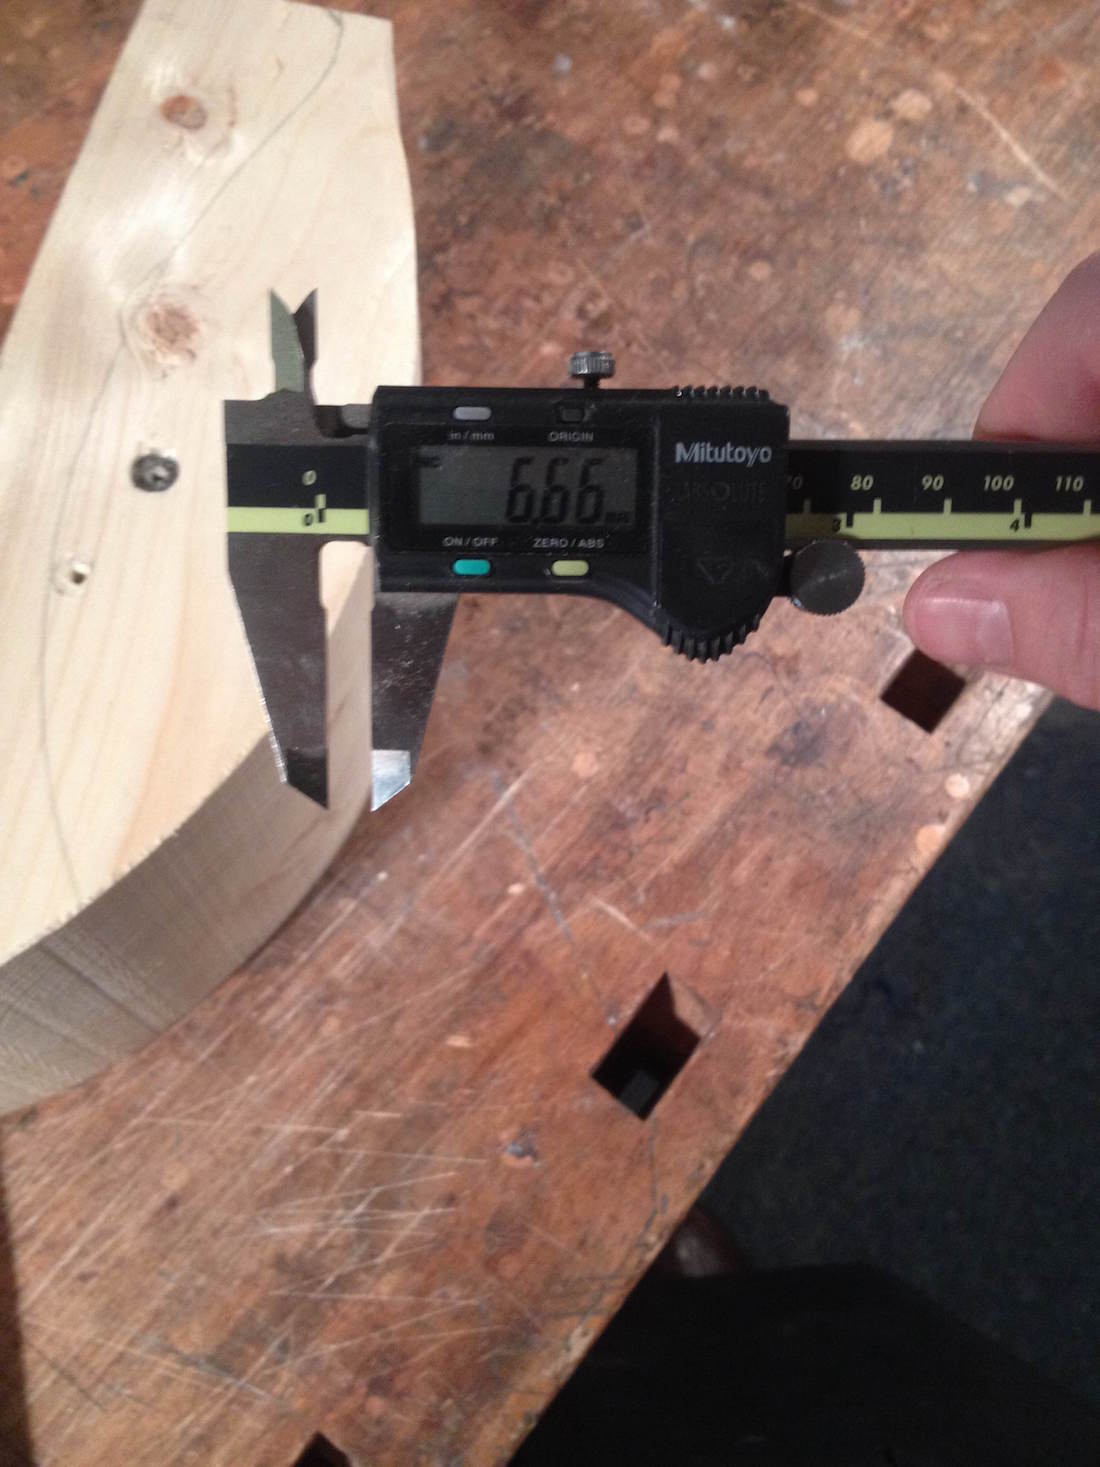
Take the roll of closed cell rubber and mark out a size and length that will fit the outside surface of the convex form, cut it with a knife. Measure the thickness of the rubber, and divide it into thirds. Find the middle of the form, and mark one-third of the thickness of the rubber onto the form.

Then adjust for the desired tighter radius by drawing a line, moving away from the center point, making the line slightly further away from the convex surface. This will be the line you cut to on the band saw. You will only be removing material at the ends, and blending the line to the center.
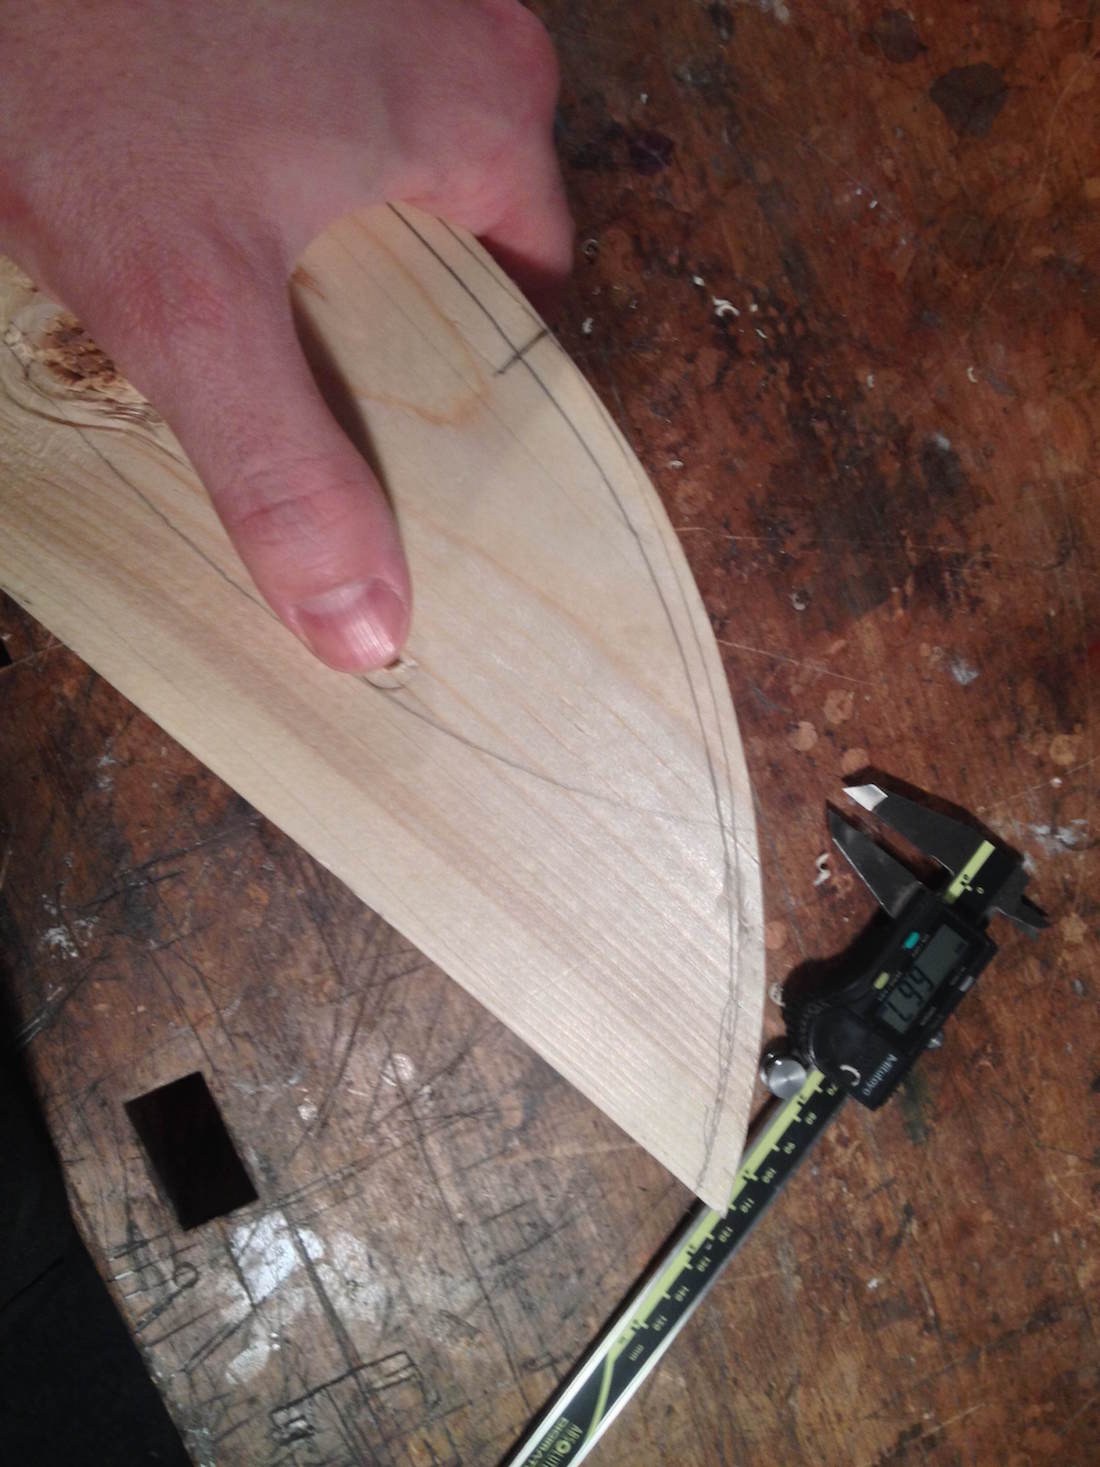
This is simply a starting point to find the correct radius of this counter form. From here I hold the closed cell rubber to the convex form, and check it against the concave form to see how things are fitting. After adding the thick closed cell rubber, the convex form should be a tighter radius than the concave form. Often I find that going to one third of the thickness of the rubber is not sufficient, and try one half, or even the entire thickness of the rubber blending from the highest point of the radius toward the ends. When the correct radius is achieved, glue the closed cell rubber down the the convex counter form with CA. I use baking soda as an accelerator for the glue, and hold the rubber in place with my hands. This only takes a few minutes.
Removing the Ribs From the Back
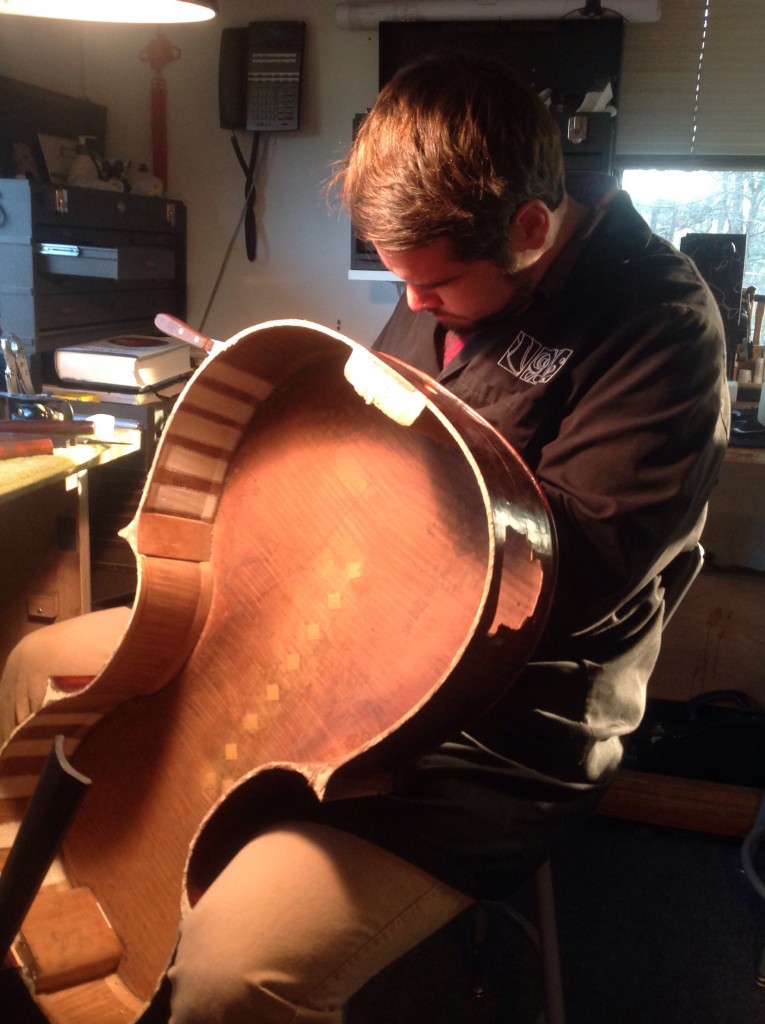
Before putting forms in place and and clamping them, you are going to need to remove a large section of the back from the ribs. This is extremely important! You are by no means removing the whole back, but large sections to compensate for the ribs flexing when clamping the counter forms. For example when there is a crack on a treble side lower bout, open the seam from the center of the treble side c bout and all the way to the center of the bass side lower bout. If you were to only remove the back from upper block to tail block on a lower bout you would inevitably crack the ribs perpendicular to the grain next to the blocks. Removing the back is tricky, and in my opinion more challenging than removing a top. Be cautious!
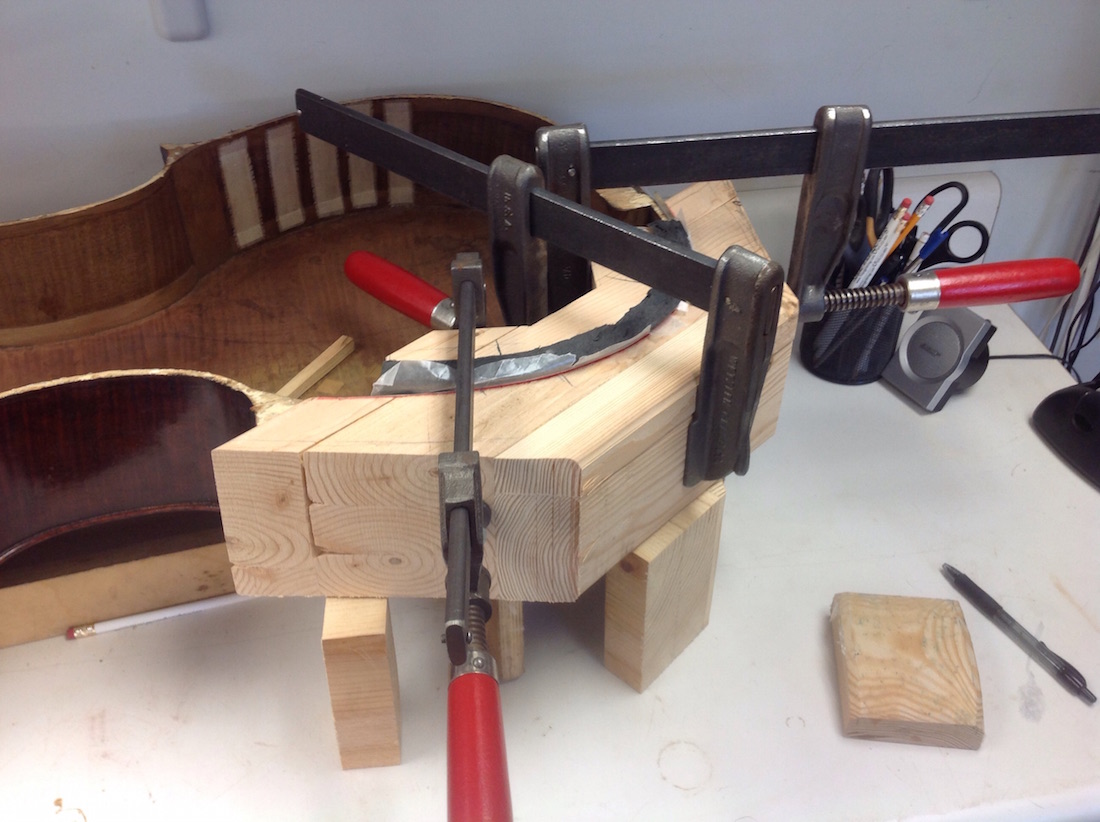
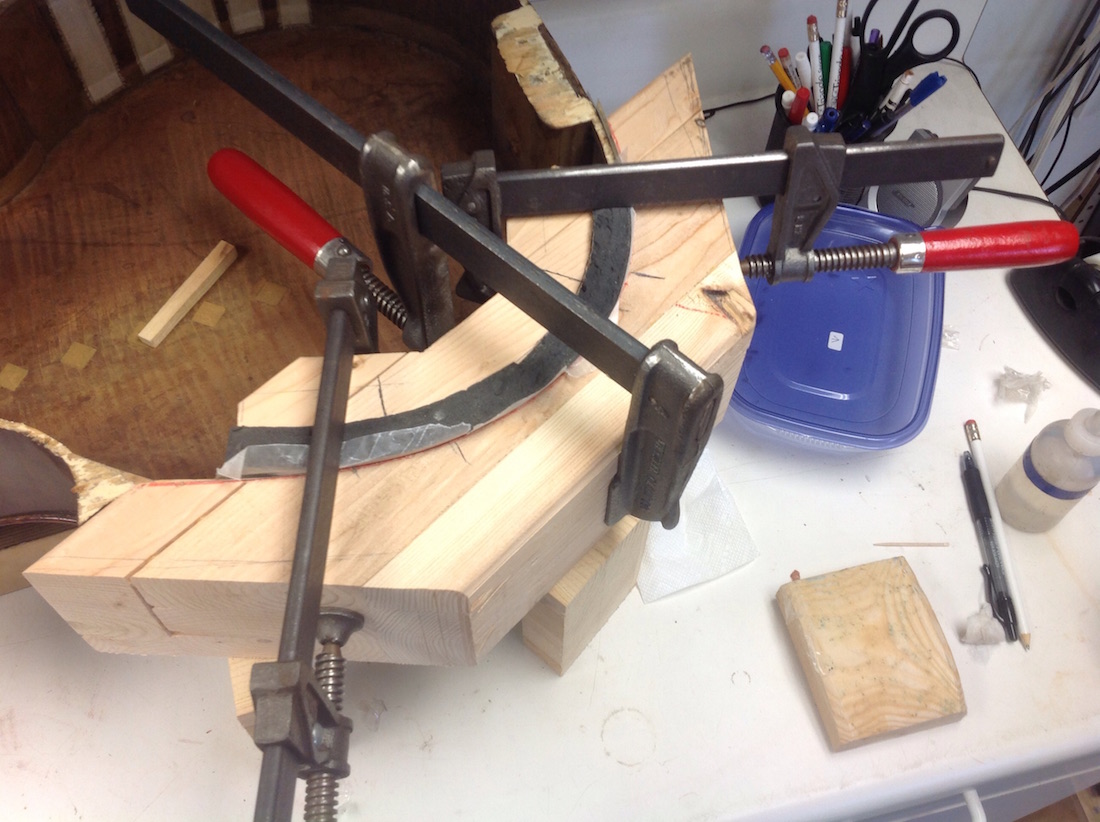
Setting Up the Forms for Clamping
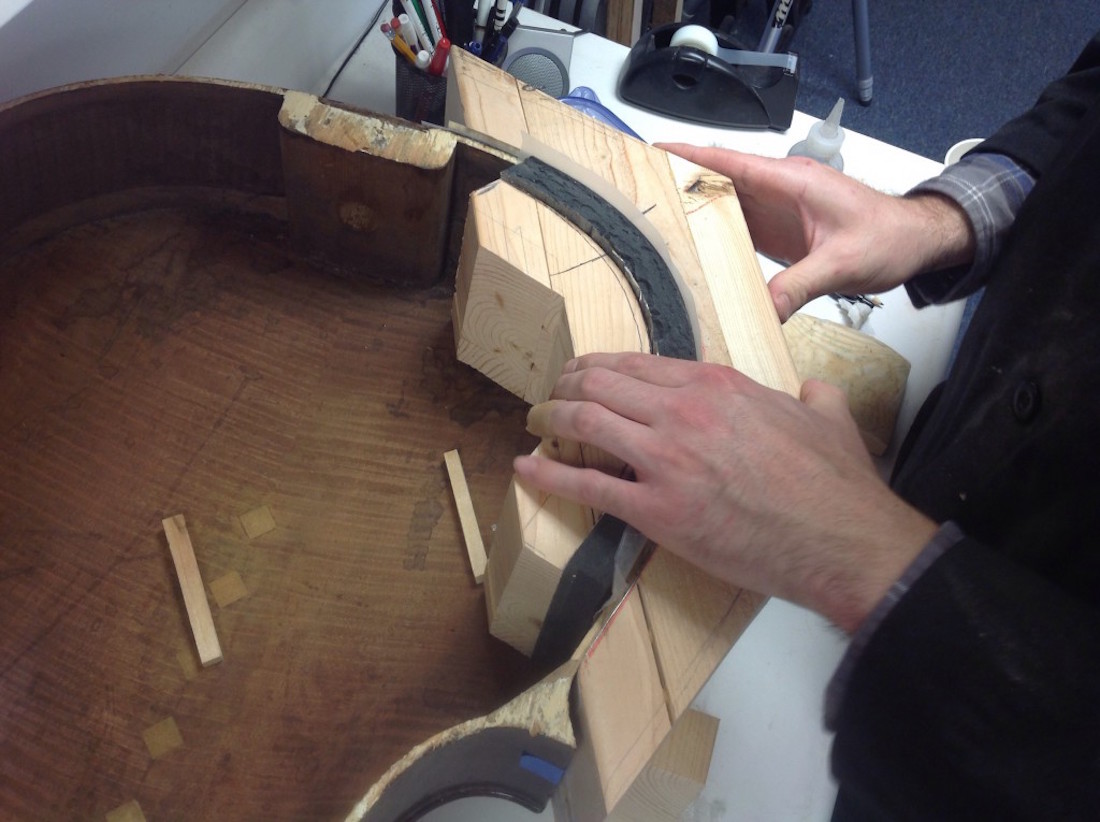
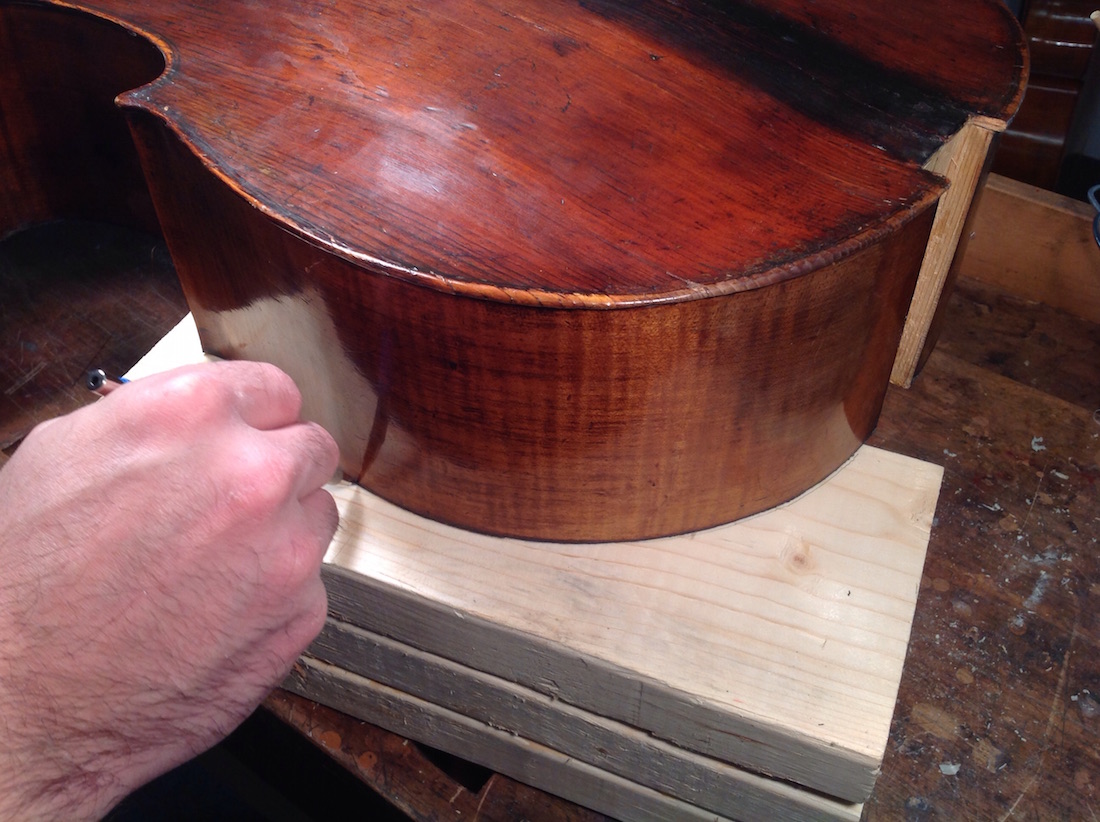
Setting everything up well for ease of clamping will reduce stress when it’s time to glue, and provide better results. I prefer to place the cello on a cradle that sits up high and make blocks (often out of my rib form cut offs) to support the concave form on the outside of the rib. These supports hold the concave form in place slightly higher than edge of the back, around five millimeters. For a large outside form I usually put two or three blocks to generously support the form.

With the form in place, gently hold the inside convex form on the inside of the rib and align the parallel angles on the back of the forms. These need to be parallel for clamping. If things are off, the clamps will move and loosen. It’s important when doing this to have everything in the exact place for clamping to show accurate angles. Make changes with a band saw as needed. No supporting block will be needed on the inside of the cello because the clamp will hold it in place.
Practice Clamping
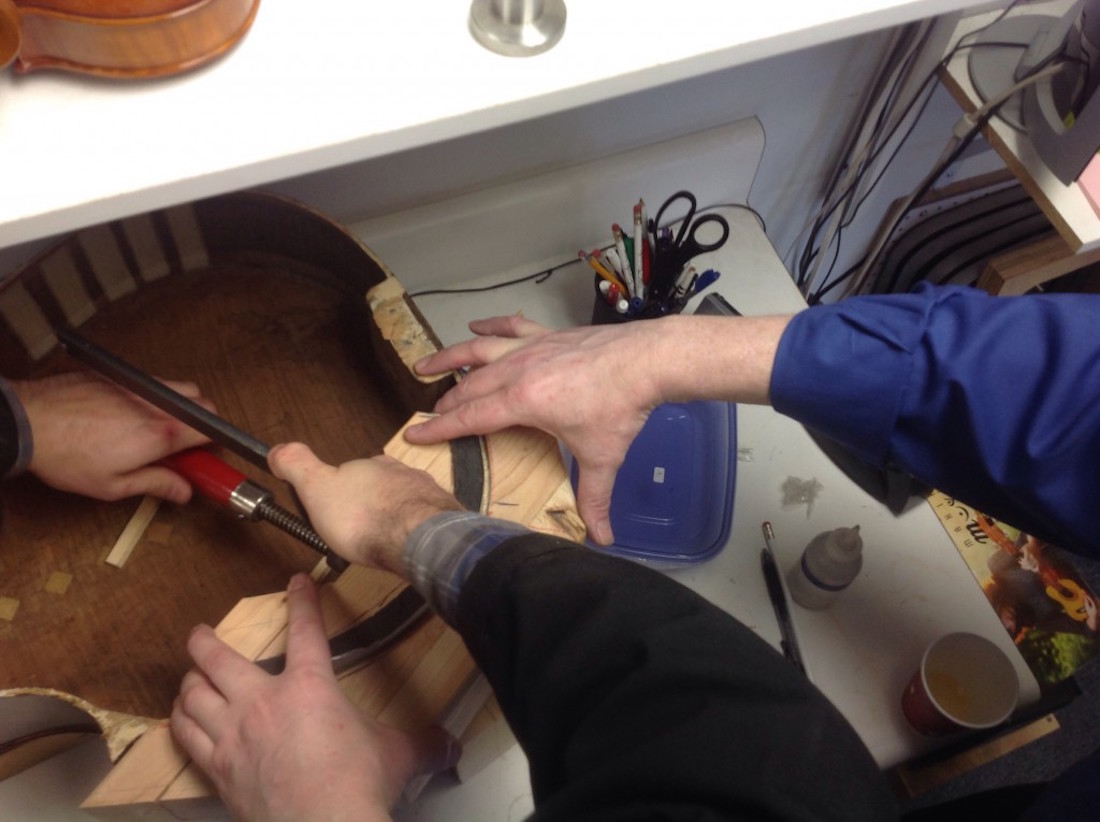
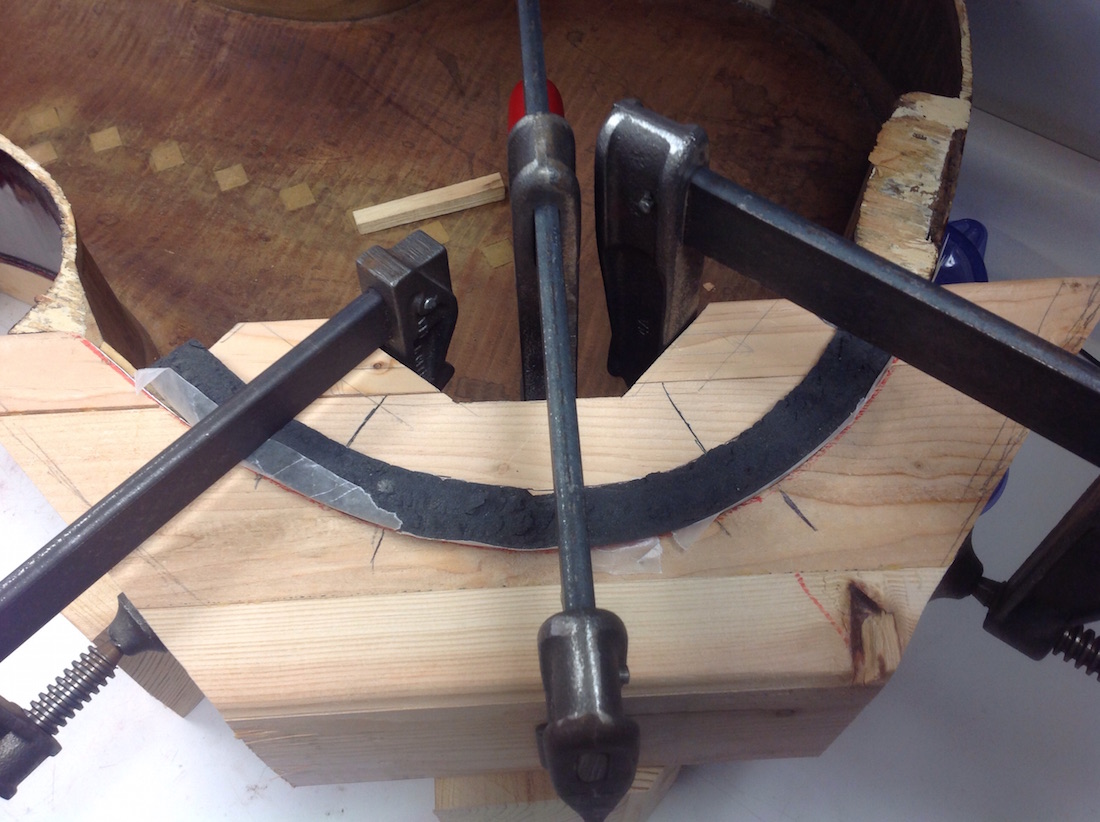
Remove the outside convex form. Measure the length, and with tin snips cut out a piece of aluminum sheeting slightly larger that the height and length of the form. Do the same with wax paper, and cut another piece of wax paper the size of the inside convex form. Now put the whole sandwich together: the convex form on the inside, a layer of wax paper creating a barrier on the inside unvarnished surface, then the rib, another layer of wax paper outside on the varnished surface, the aluminum sheet, and the outside concave form. Having everything in place you can finally test clamp it all together. You want the clamps to stay in place and make sure to check that the radius of the convex form is tight enough to allow the rubber to compress evenly when under pressure. Be careful that the convex rubber form is not mushrooming out and pushing on the cello back. You will notice this happening if the opening between the back and ribs are becoming larger. If this happens pull the inside convex form up towards the top side of the rib.
Gluing the Crack
Before gluing the crack wash your hands!! I apply glue over the length of the crack with a glue brush, then I use my index finger to rub the fresh hide glue into the crack. Moving your index finger in a diagonal motion over the crack. I also lightly flex the crack on the unvarnished side of the rib while working the glue into the crack with my index finger on the varnished side. Clamp the rib with stout clamping pressure to ensure you are leveling the crack in the form. Don’t forget the wax paper and aluminum! Do not let the crack dry more than 48 hours before applying linen!
Preparing the Linen

Now that the crack is glued it’s time to make linen strips. Take the sheet of linen you have, preferably white or natural color, and fray the top and one side edges. I find it easier to start this way rather than cutting out strips of linen and then fraying them.
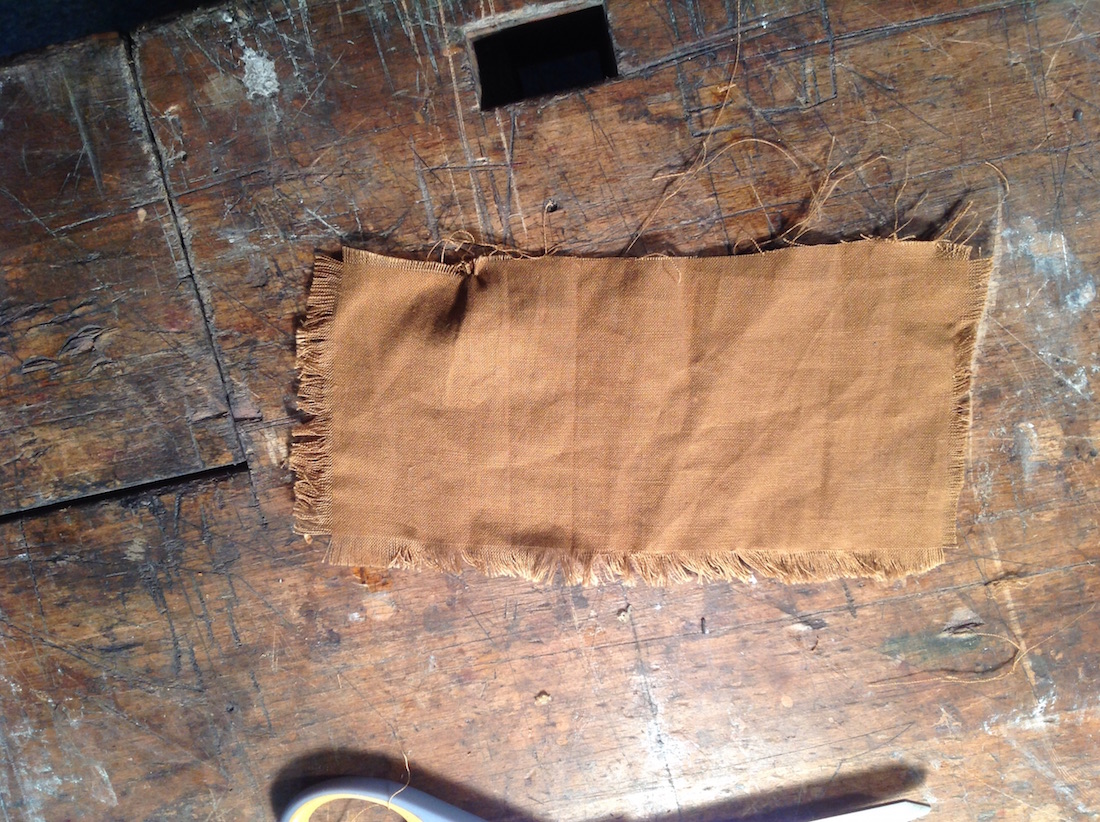
With an even fray around the edges you can start to lay out the strips and cut them. Pick a size, somewhere around 20-30mm for cello, and 6mm for violin. Leave the height longer than needed, and fray the linen to the correct size. These numbers are only guidelines! Things just need to “look” right.
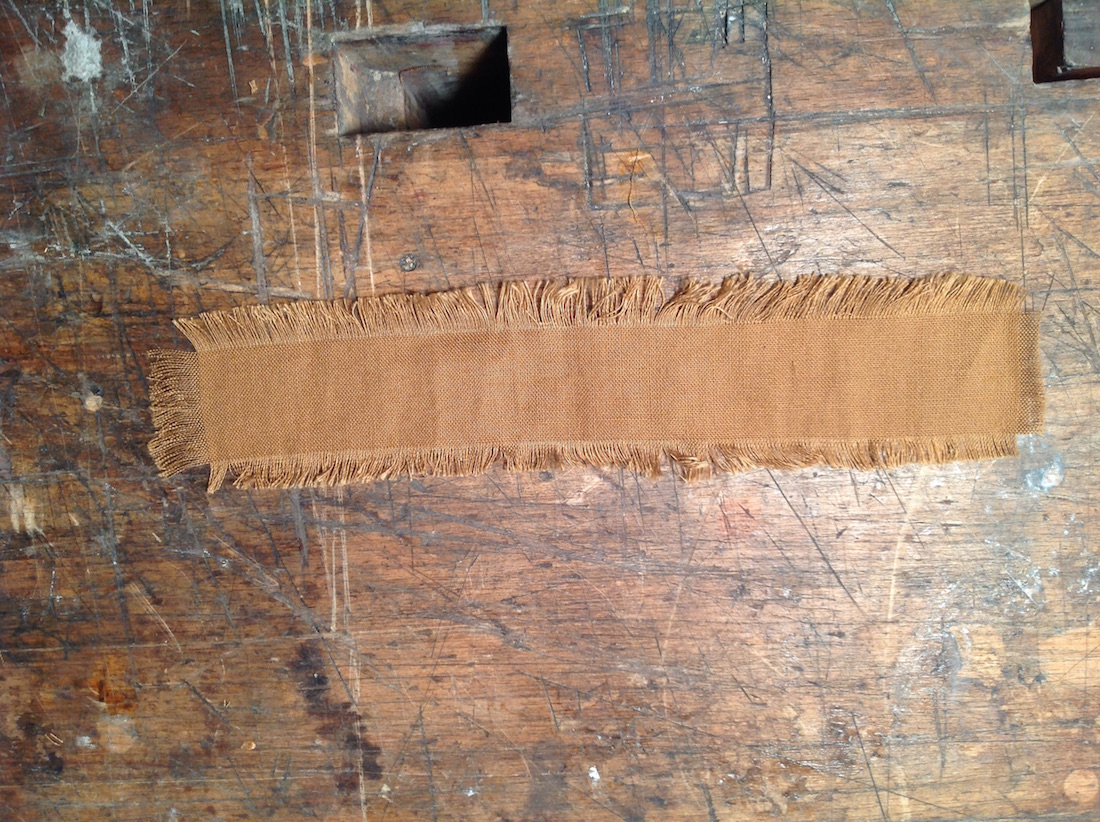
As you fray the edges you can trim the edges to the same size. Make it pretty! Depending on the crack, you can space them out 40mm from each frayed edge for cello, and 5mm for violin. Once again the numbers are not important! It’s more about how it looks!

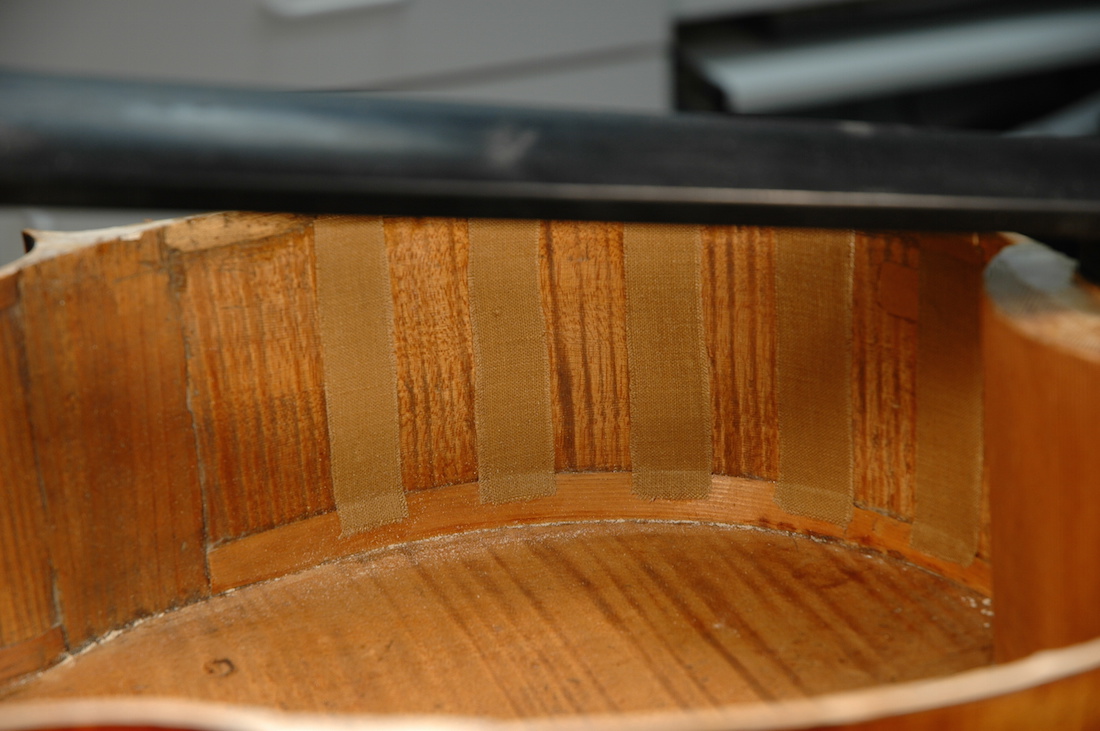
Gluing In the Linen Strips
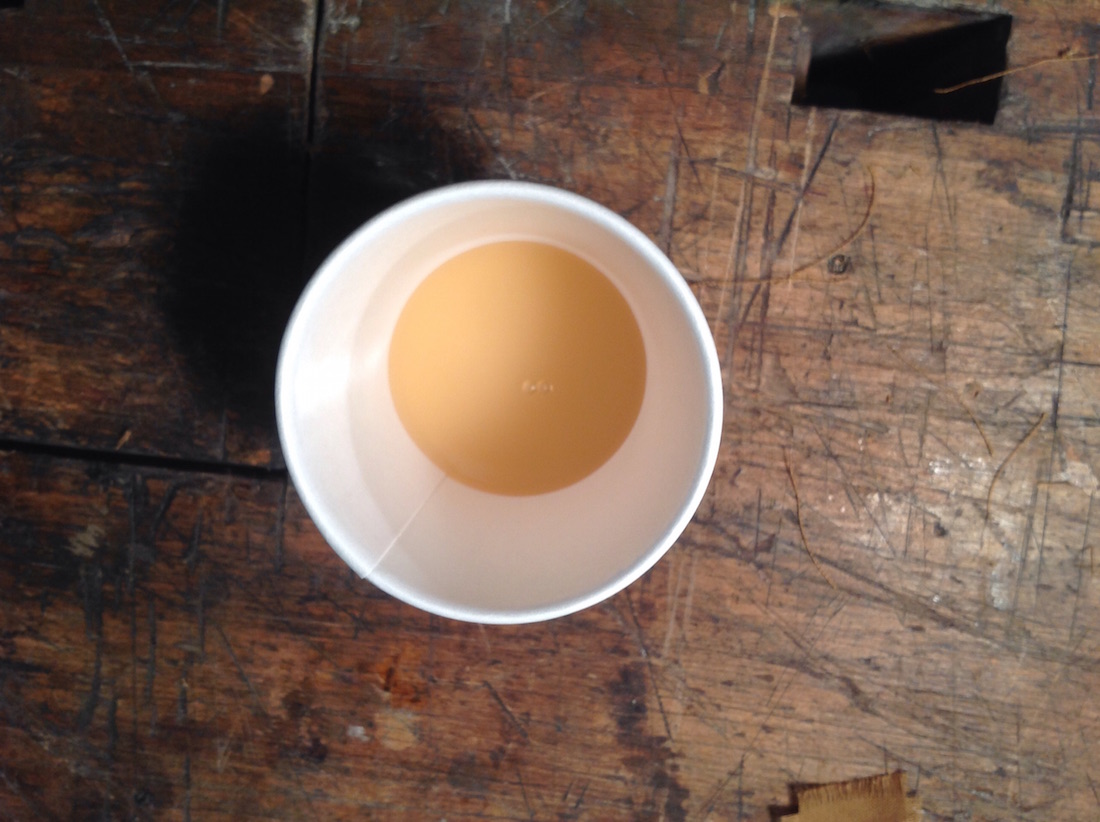
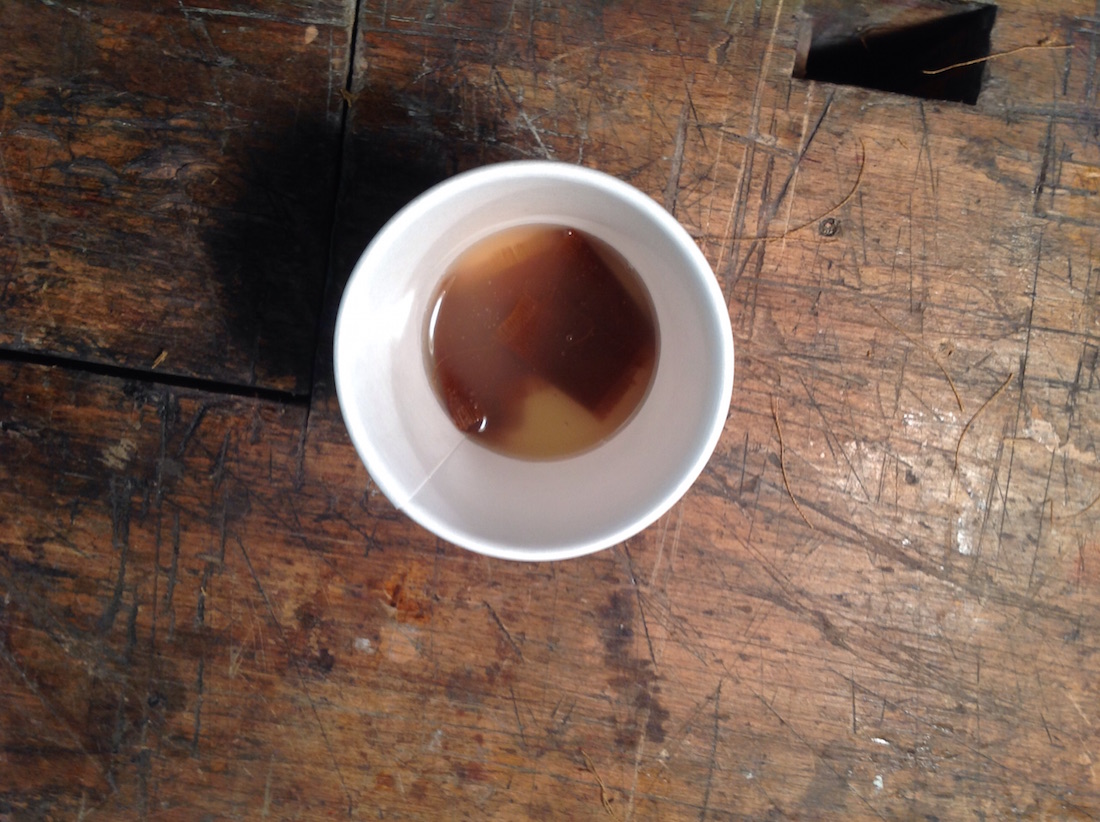
Now that everything is set up, and the linen strips are ready, it’s time to glue them in. Pour hide glue into a paper cup or bowl, and soak each strip separately. This only takes a second we just need them nice and soupy.
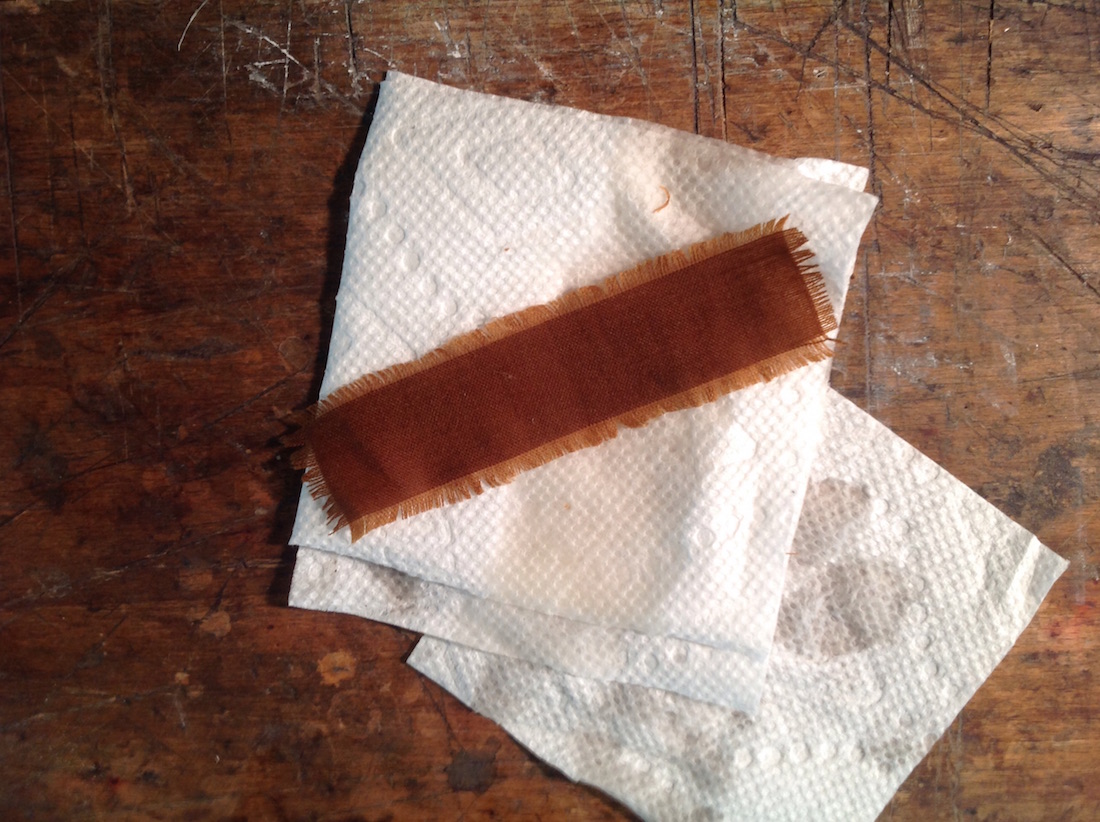
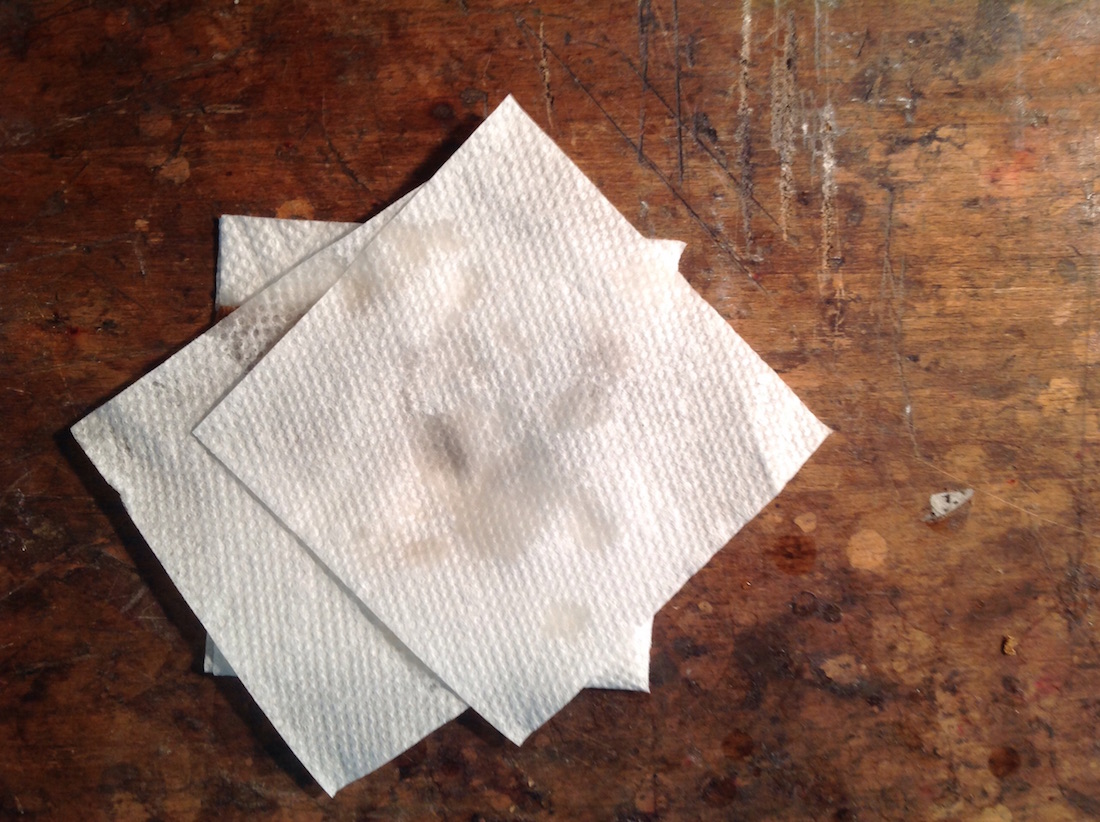
Before applying the linen strip to the inside of the cello, dab the linen strip with two paper towels to remove excess glue.
Apply the linen strip to the inside of the cello and repeat. You can use your finger to move around any air bubbles and the frayed fibers. Make them pretty! Nice, square, and evenly spaced. People notice!
Now it’s time to set up the clamps and the rest of the sandwich. Don’t forget where the wax paper and the linen goes! Apply ample clamping pressure.
The Waiting Game
After a 48 hour period I usually begin the daily process of removing the clamps, and changing out the wax paper with new wax paper. Changing the wax paper will expedite the drying time of the linen, and it will help you understand how quickly the linen is drying. The short period of time you take the rib out of the form will also give the linen a chance to pull the crack together slowly but surely. This is a slow process, but it’s supposed to be. If it happened too quickly the linen would distort the rib.
After two or three weeks the linen will probably be dry. The linen should “feel” dry when you touch it, when it’s wet if feels rather cold and slightly damp. Another test to know if it’s dry is to take the clamps off of the rib, take a straight edge and place it on the rib. Keep track of how the rib looks. Is it flat? Concave? Convex? Make a clear mental picture. Wait an hour, and come back and see how it looks. If it looks the same and has not distorted, the linen is dry.
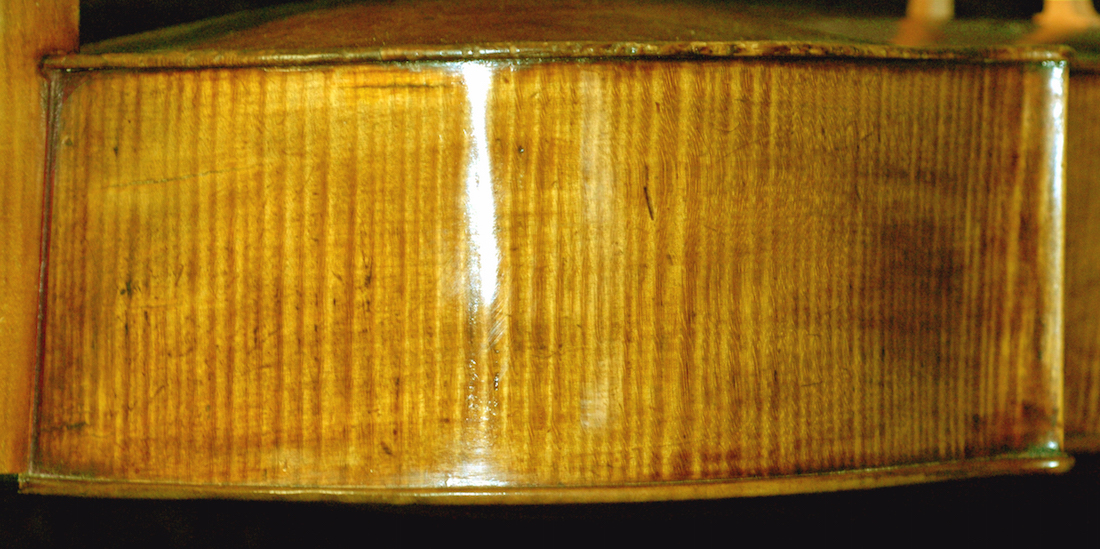
The Finishing Touches
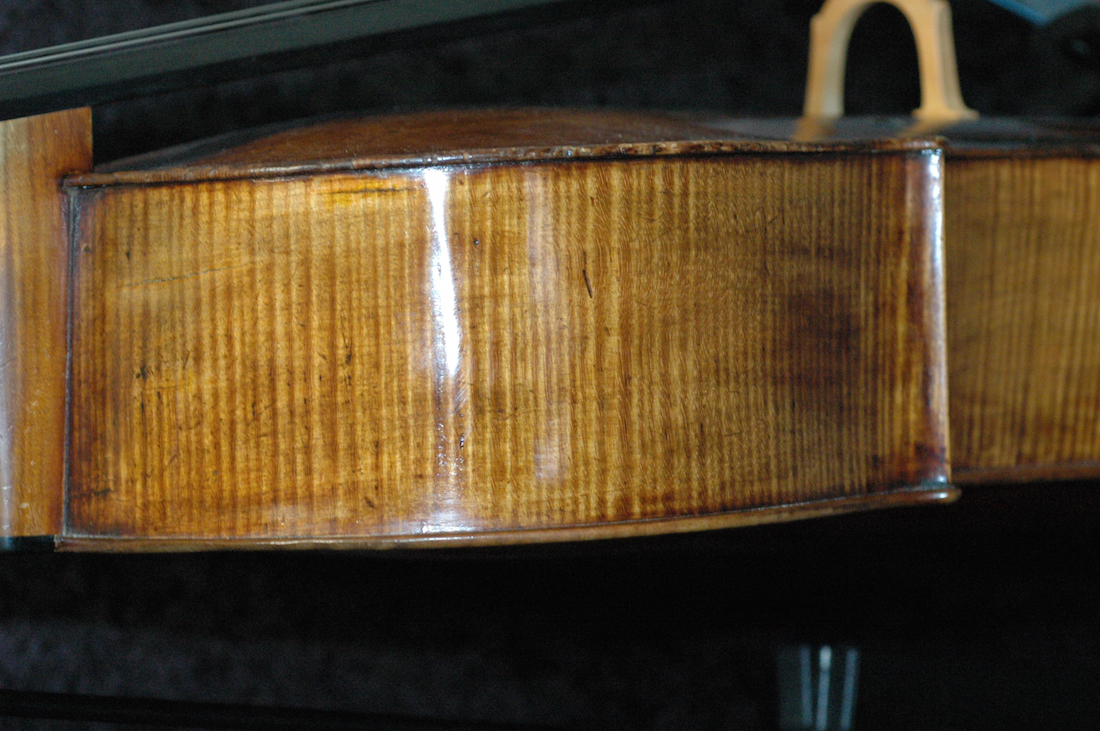
Now that the linen is dry apply a healthy coat of shellac on the linen strips. If you skip this step the linen strips will take on and release moisture at a rate that will distort the ribs. Don’t make a mess with the shellac, just put on enough to cover the strips and stop when you begin to see a layer form. Now you can glue the ribs back onto the back, and glue the top on. Then it’s time for retouch!
Fin
This process is long and requires a considerable amount of time to set everything up, but it gets consistent results. The linen is strong, and the cracks will be level. If you follow the rules given here, the repair should last and will retain its shape and form.