
A cheval is a form of wood replacement. Often, due to a bow frog’s small size, an entire section of wood has to be replaced with new wood to reinforce the structure and to supplement missing wood. Traditionally, a cheval is performed by planing away original material and replacing it with new wood. A rounded cheval maximizes the surface area for gluing, minimizes stress by dispersing the seam of new to old wood, minimizes the amount of original material that needs to be removed by using the precision of a mill, and creates a feather edge that visually blends old and new wood.

MATERIALS AND TOOLS
– dental tape if the metal parts have to be removed
– chalk, pencil, and scribe point
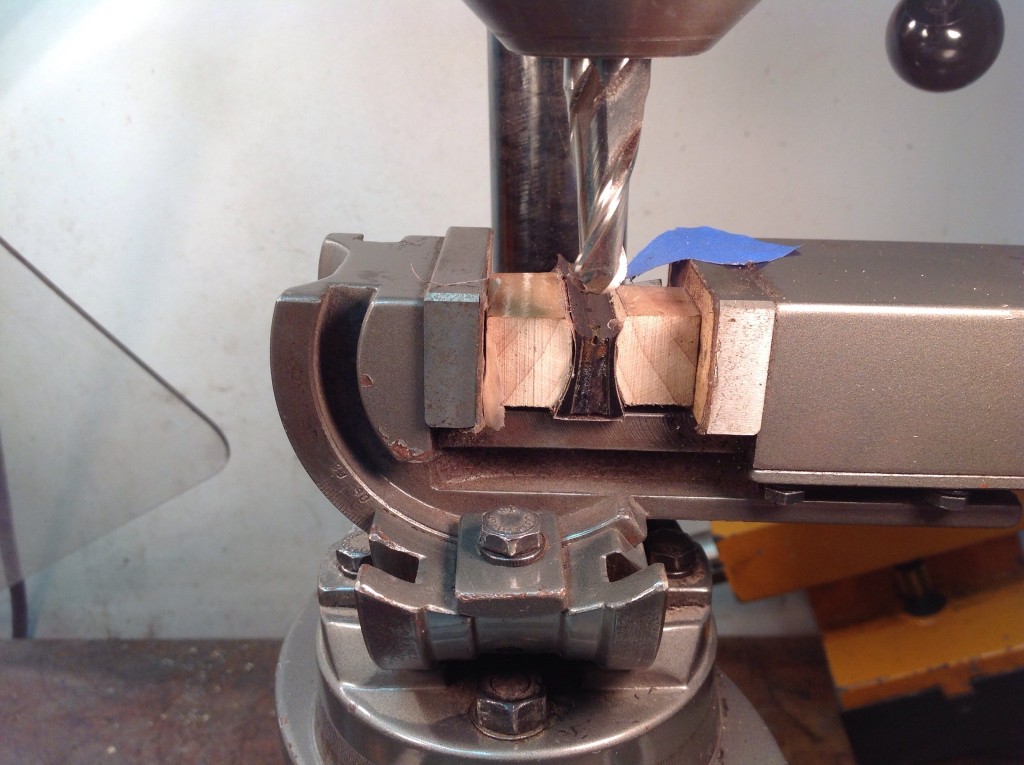
– 4 flute ball-end mill with a diameter appropriate for area needing replacement (10mm is probably the most used ball-end mill here at the shop)
– carving tools, including a knife with a sharp tip, chisels, and files
– 220, 320, 600, 2000 grit sandpaper
ASSESSMENT
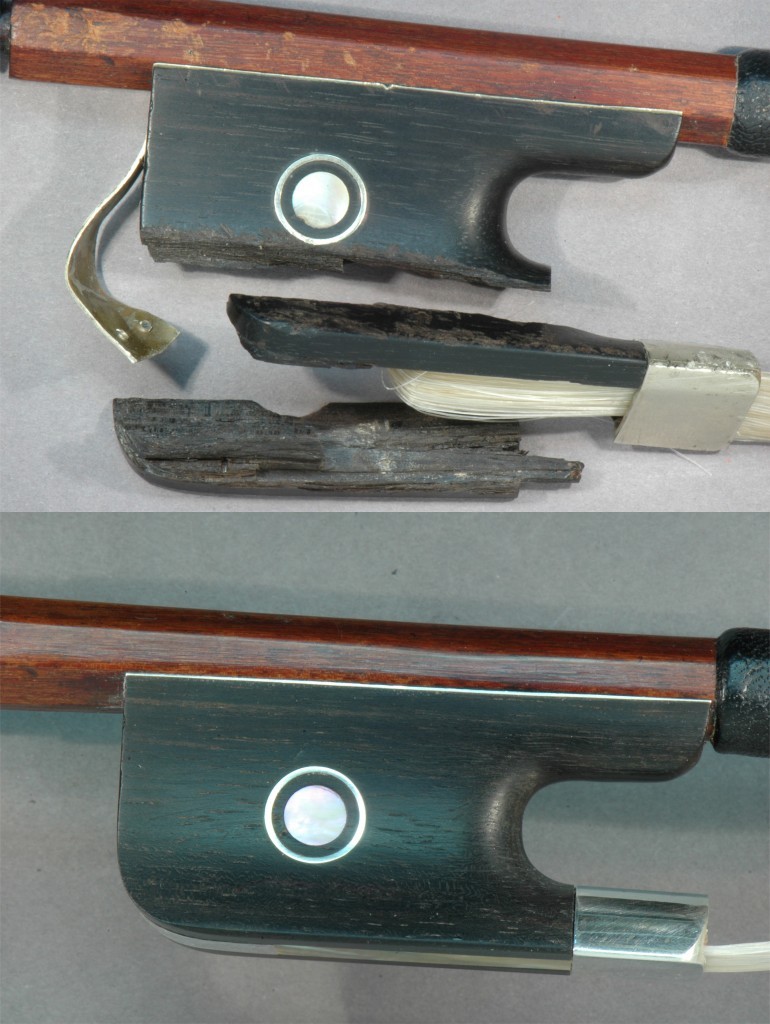
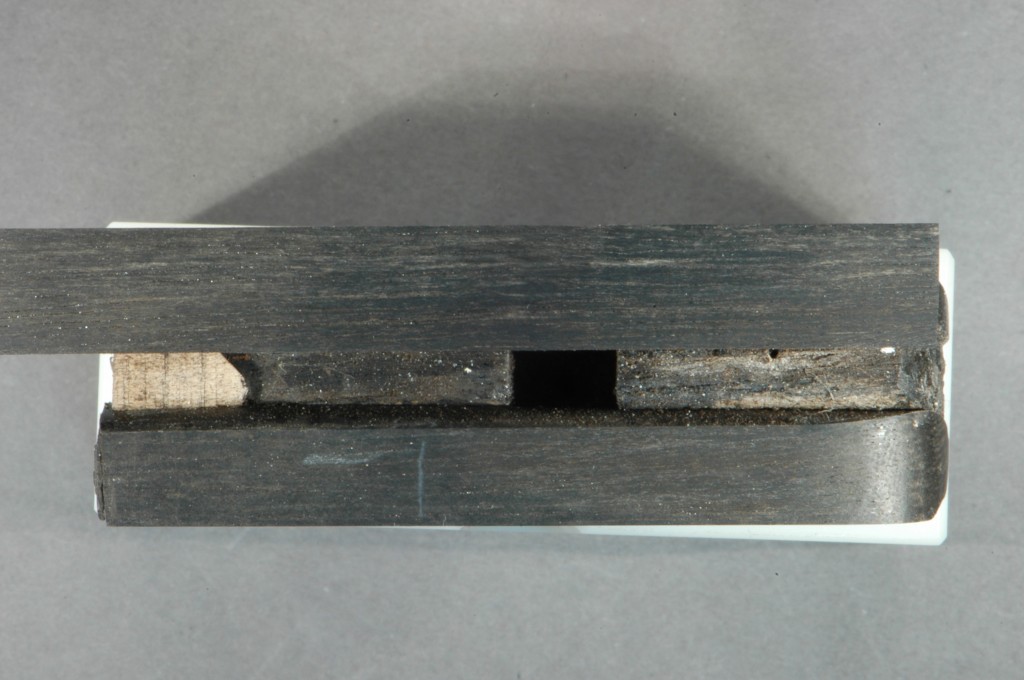
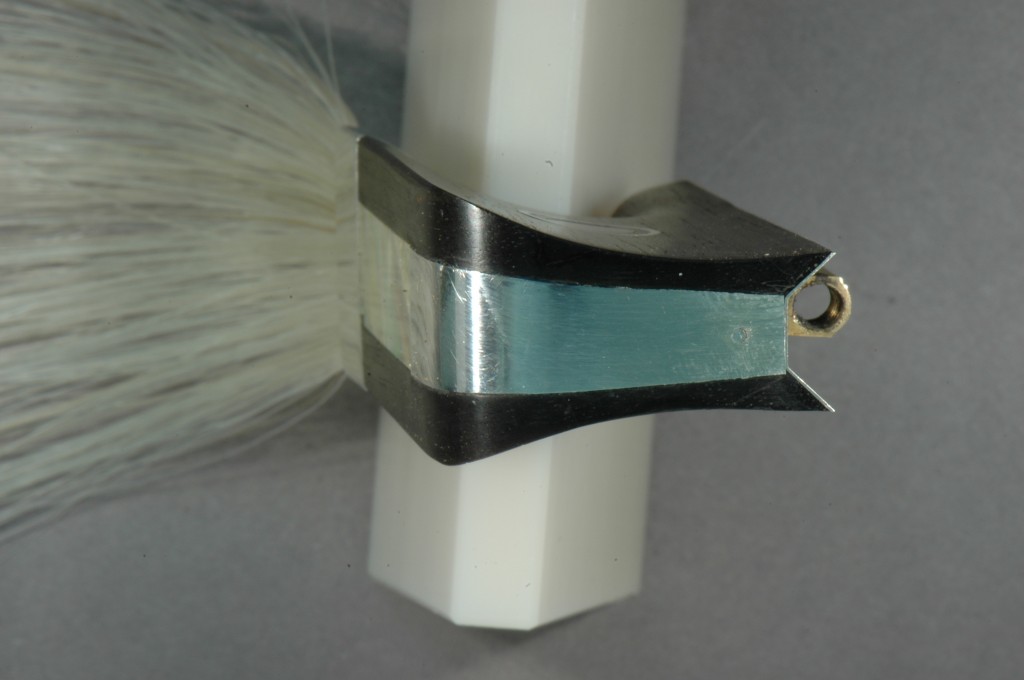
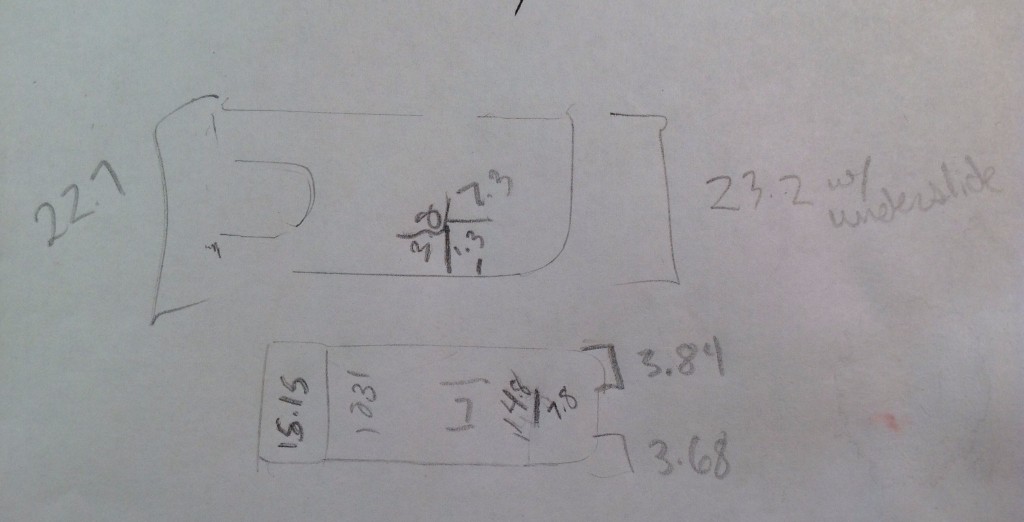
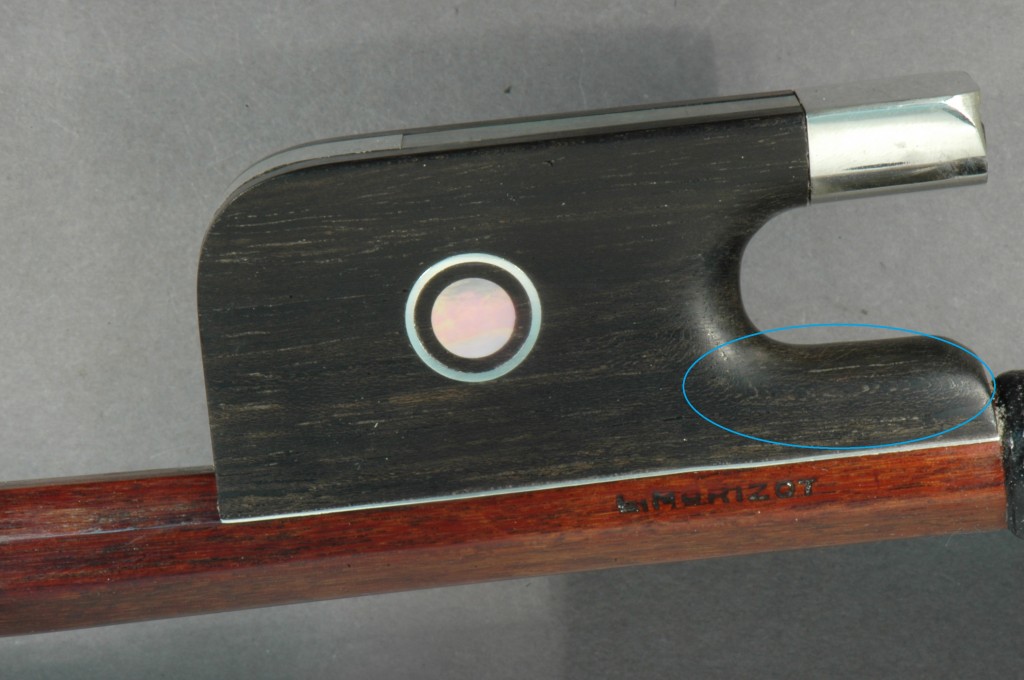
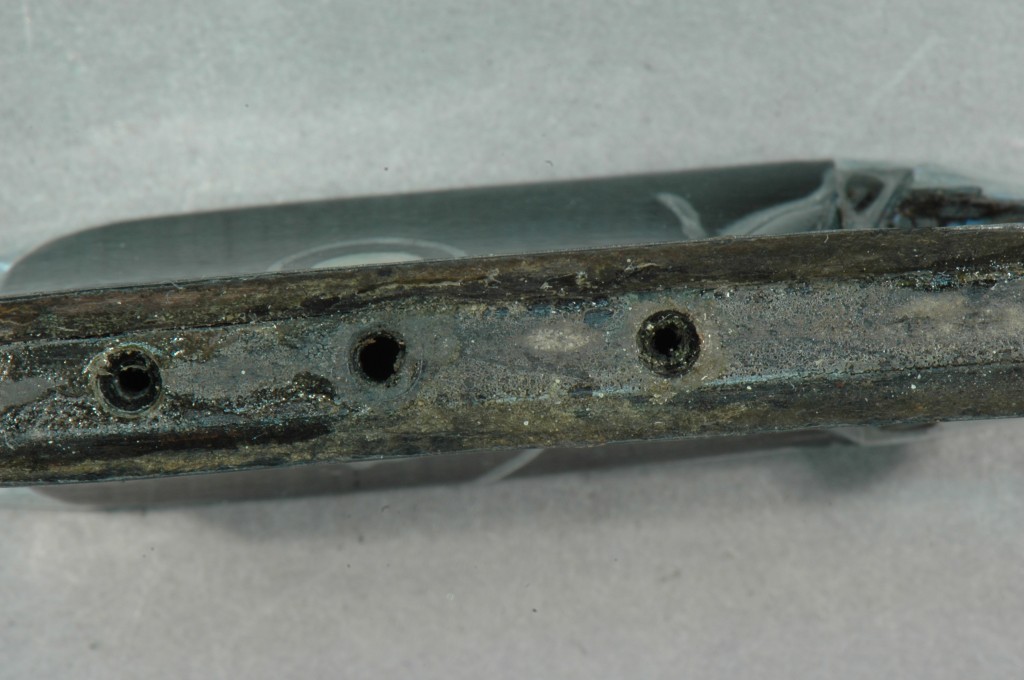
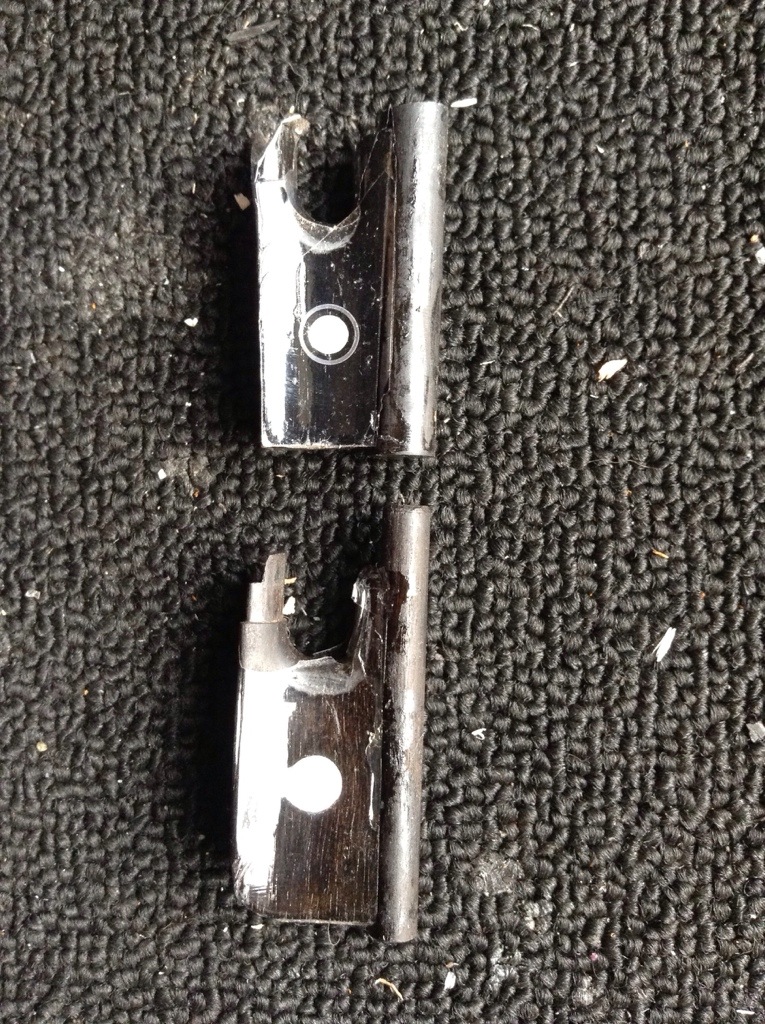
Two instances of chevals needed because of missing wood:
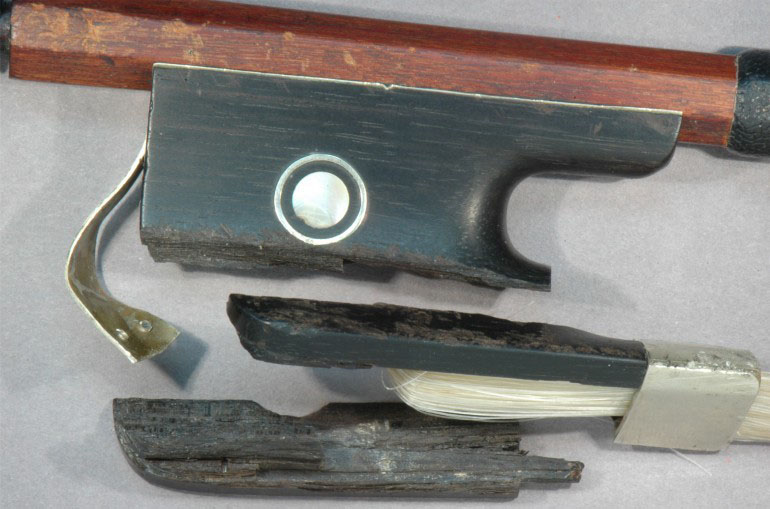
If necessary, glue all available pieces back together.
Take detailed measurements. If necessary, research appropriate proportions with finished frog in mind.
Identifying Medullary Rays and Preparing the Frog for Milling
Identify the orientation of the medullary rays. They look very similar to grain lines, and the wrong orientation can cause the cheval to separate from the original wood.
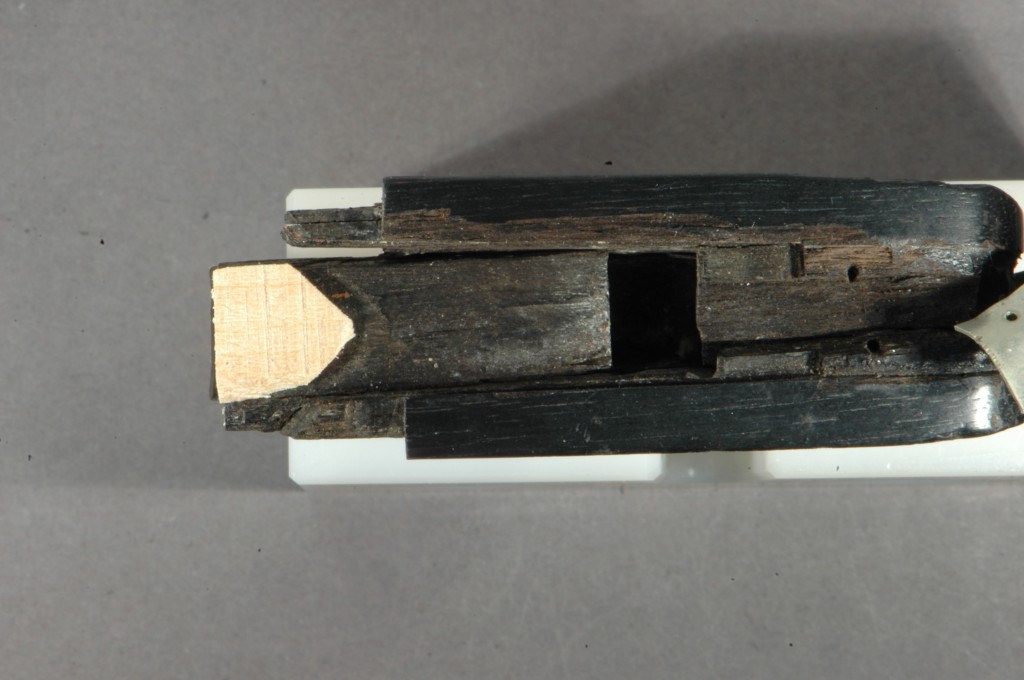
Use chalk to highlight area that absolutely needs to be removed to create a feather edge.
Cover the frog with packing tape. Especially the area where you will be removing wood. Trim the excess tape near the area to be cut so that it doesn’t get caught up in the mill which could tear off the feather edge. The tape should at least cover the damaged area to help maintain a feather edge when milling.
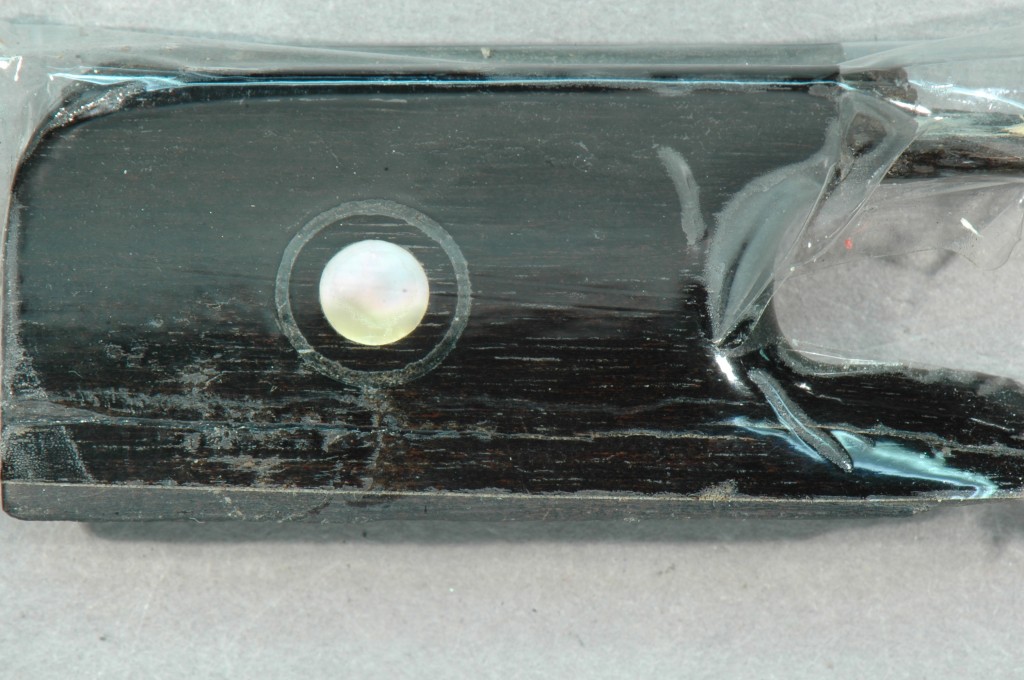
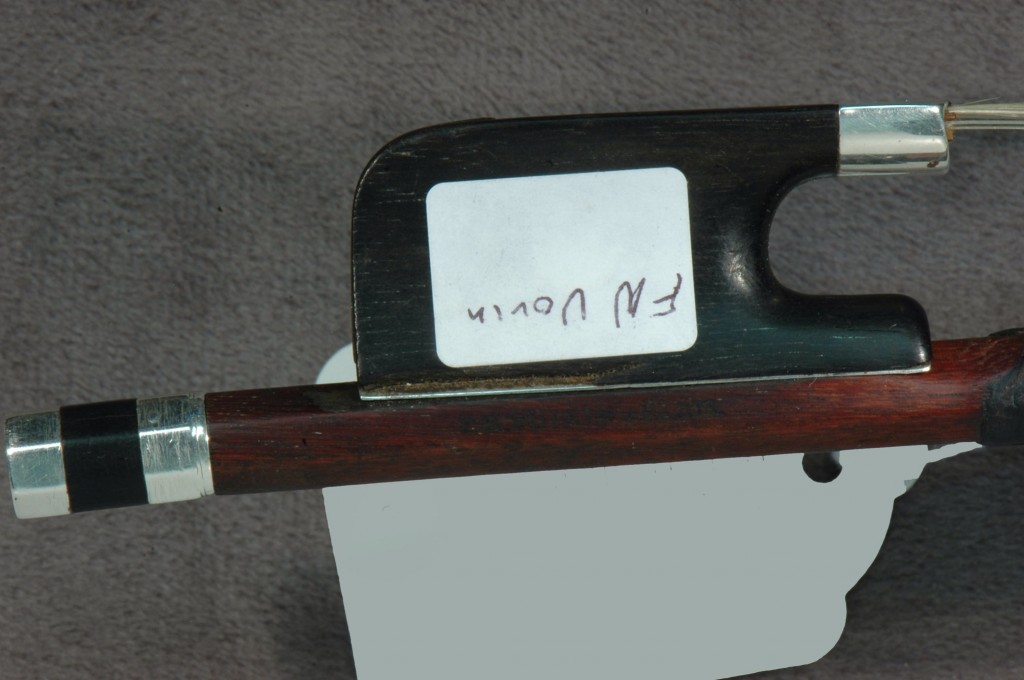
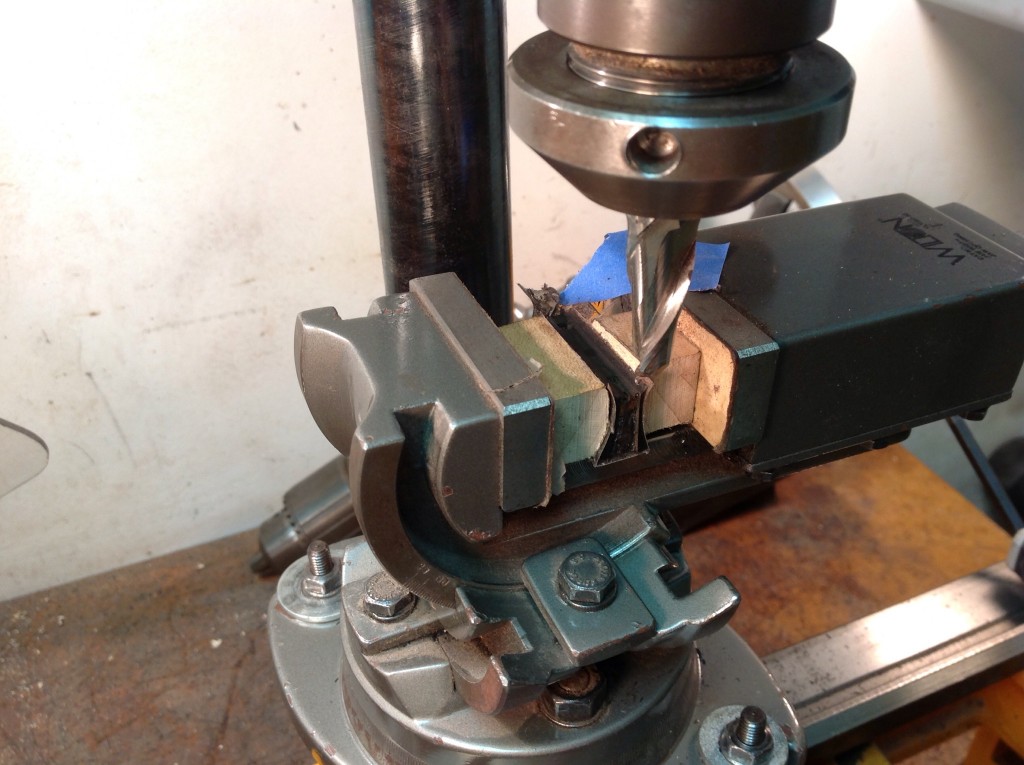
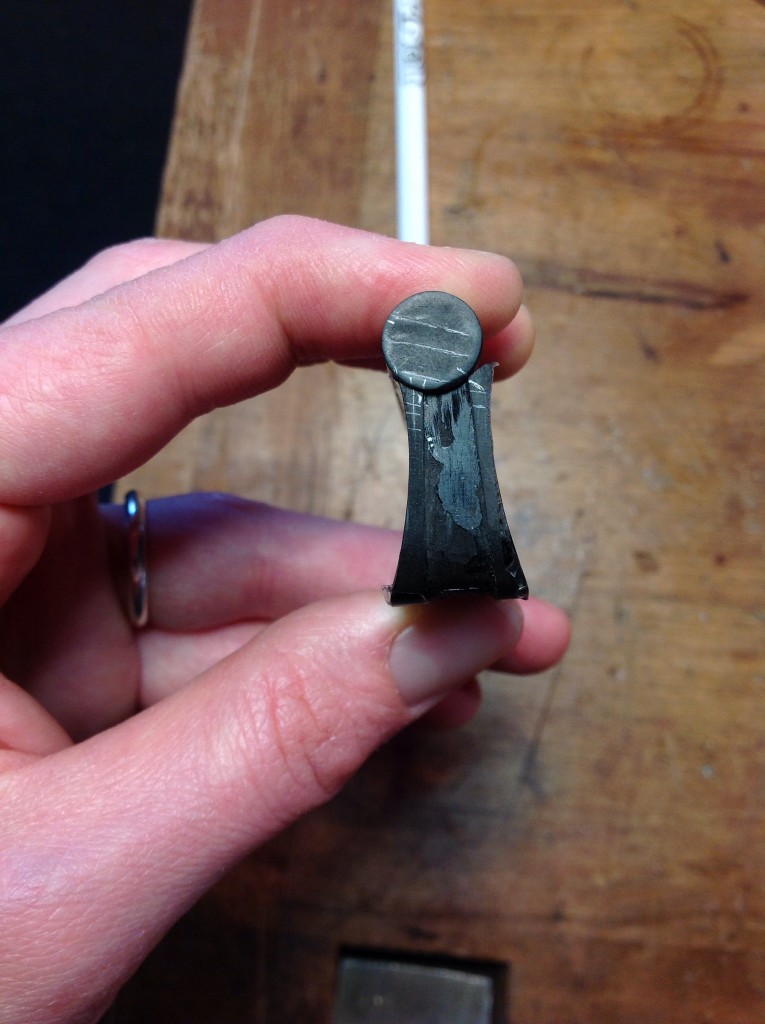
Find a ball-end mill that is as small in diameter to cover necessary area to maximize gluing surface while still getting damaged area. Set it aside. We will come to it after the frog is oriented. If you anticipate the original material to get really thin, as in the thumb projection in the photo below, add some dental compound to support the delicate area.

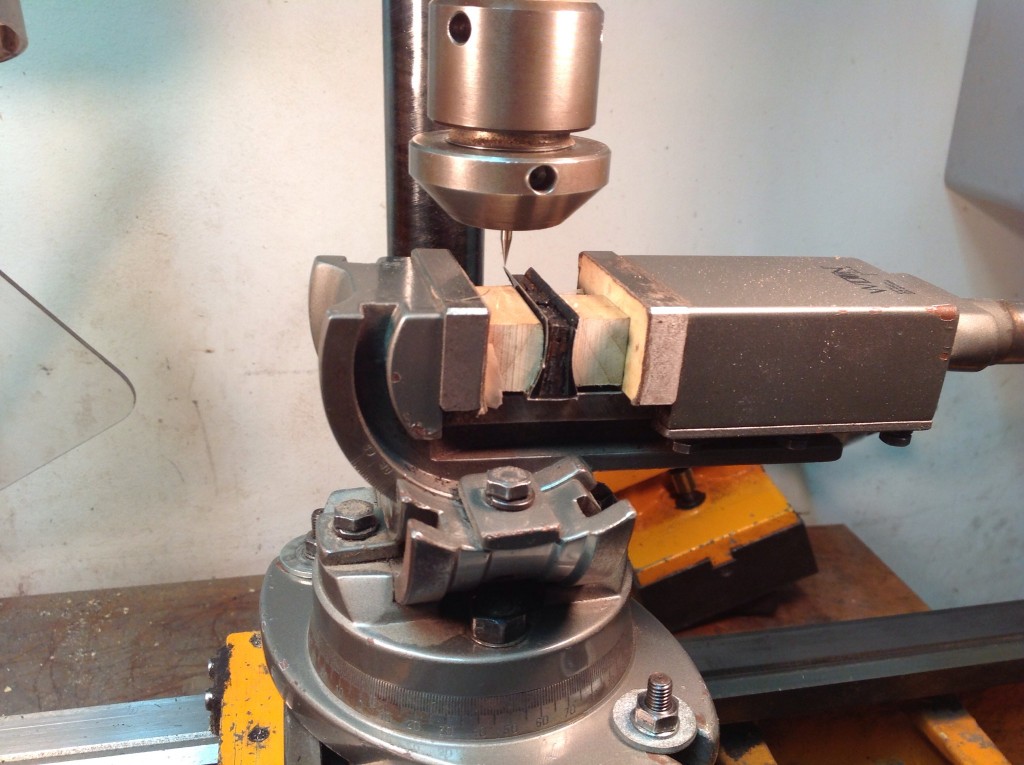
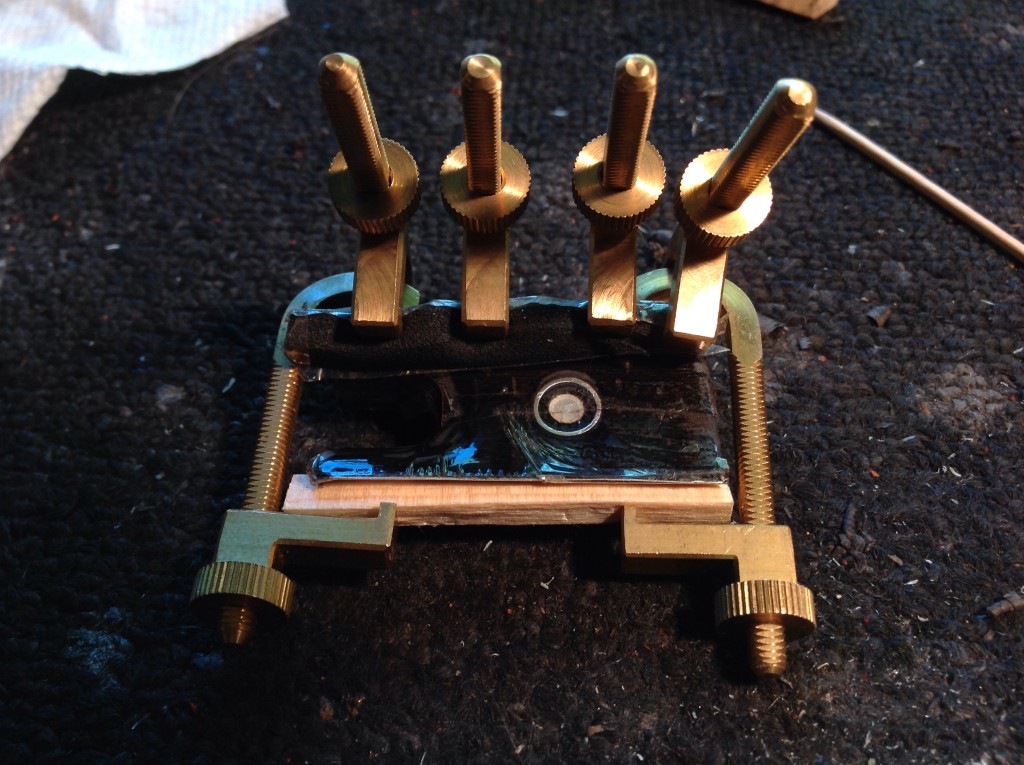
Setting Up the Mill
The 3 way tilting machine vise is really great for this part as it has a full range of motion for frog. Support frog using curved wood cauls so underslide area isn’t crushed. Use a mill with a fine point (in this case a broken .5 mm end mill that works perfectly because of the precision) and without the machine running, run the frog back and forth until it is adjusted for a straight back, level (if that’s what you’re going for), and direct to the damaged area to maximize the feather edge.

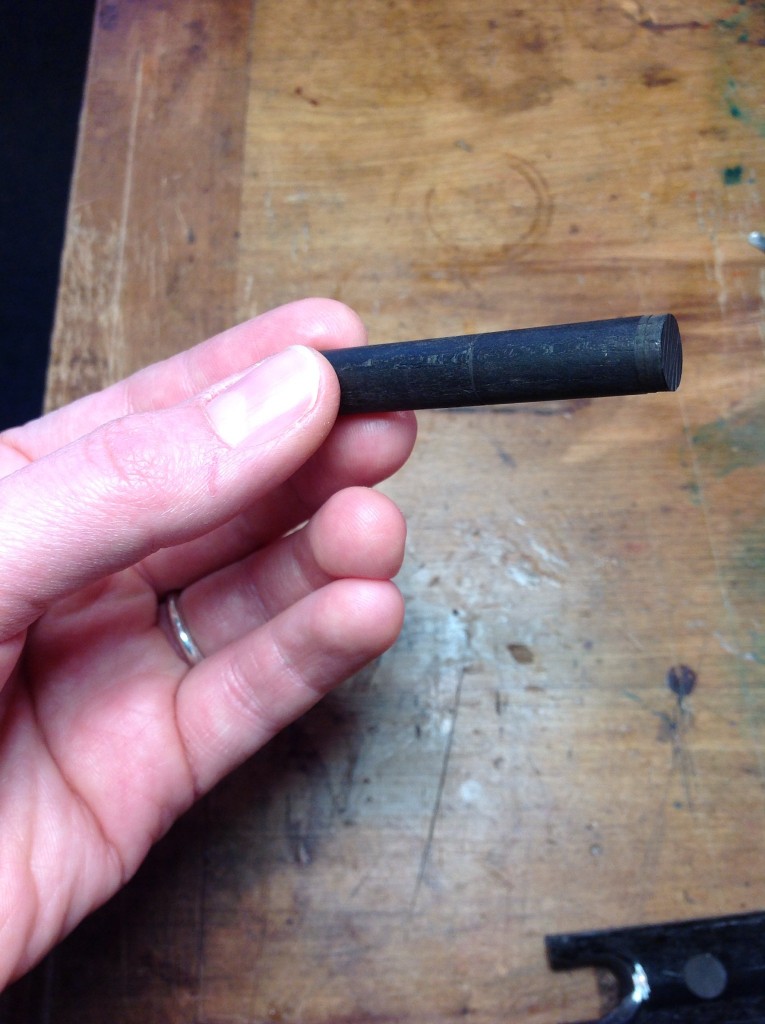
Replacement Ebony Dowel
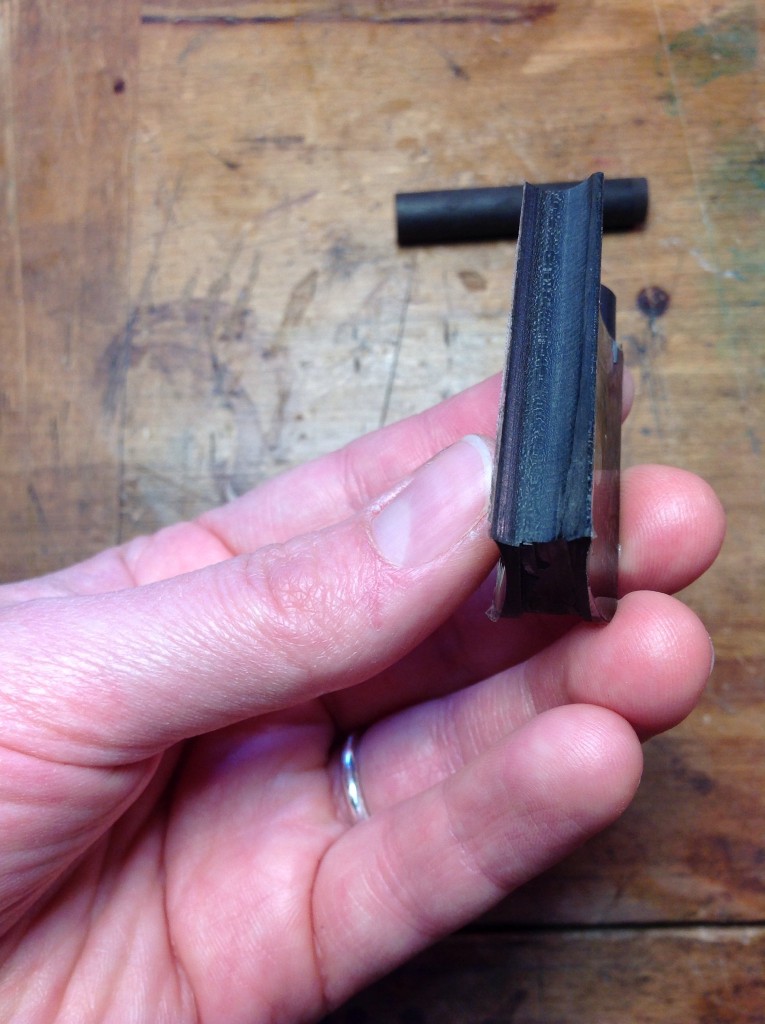
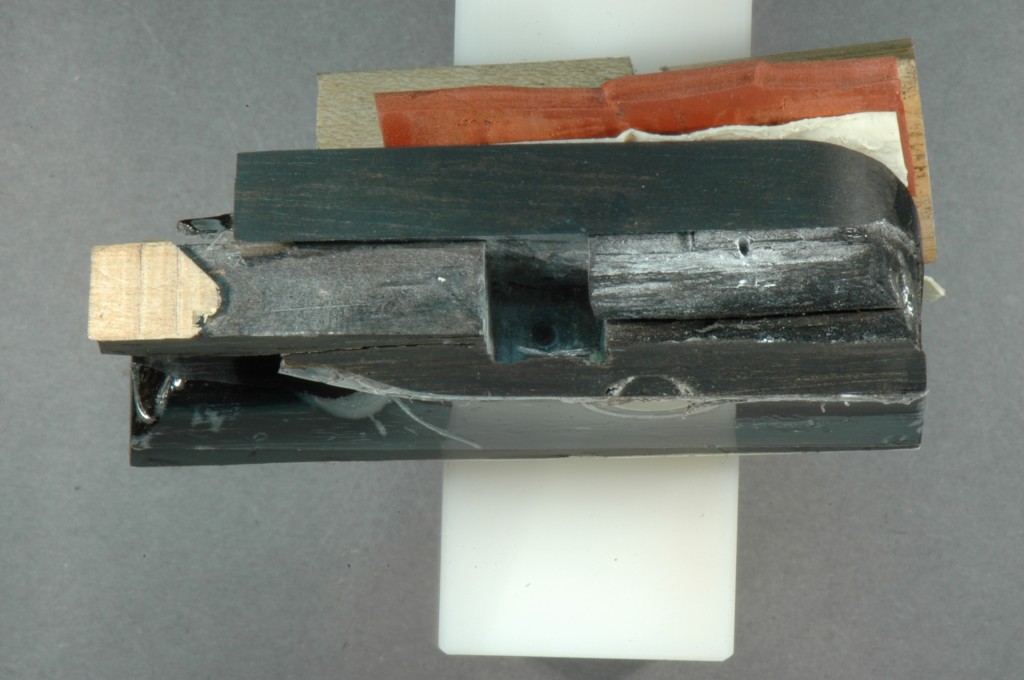
Gluing the Cheval
Prepare the glue joints by carefully cleaning the dowel and original wood with a paper-towel wet with alcohol. Have a few clean and damp paper-towels on hand to clean up messes.
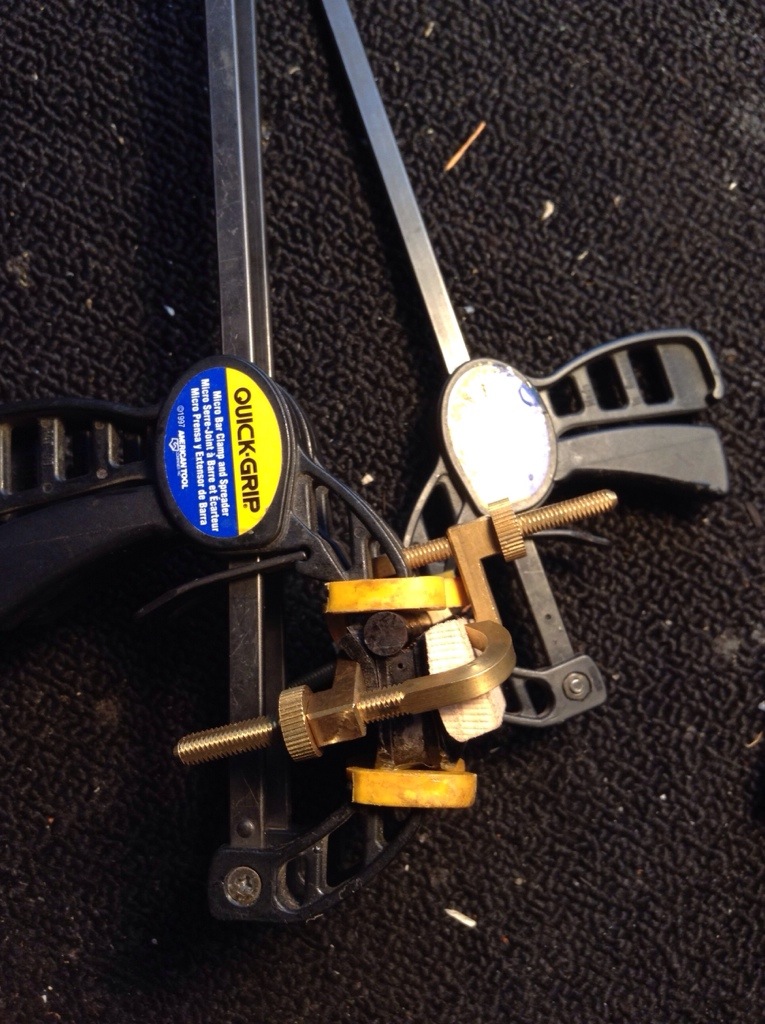
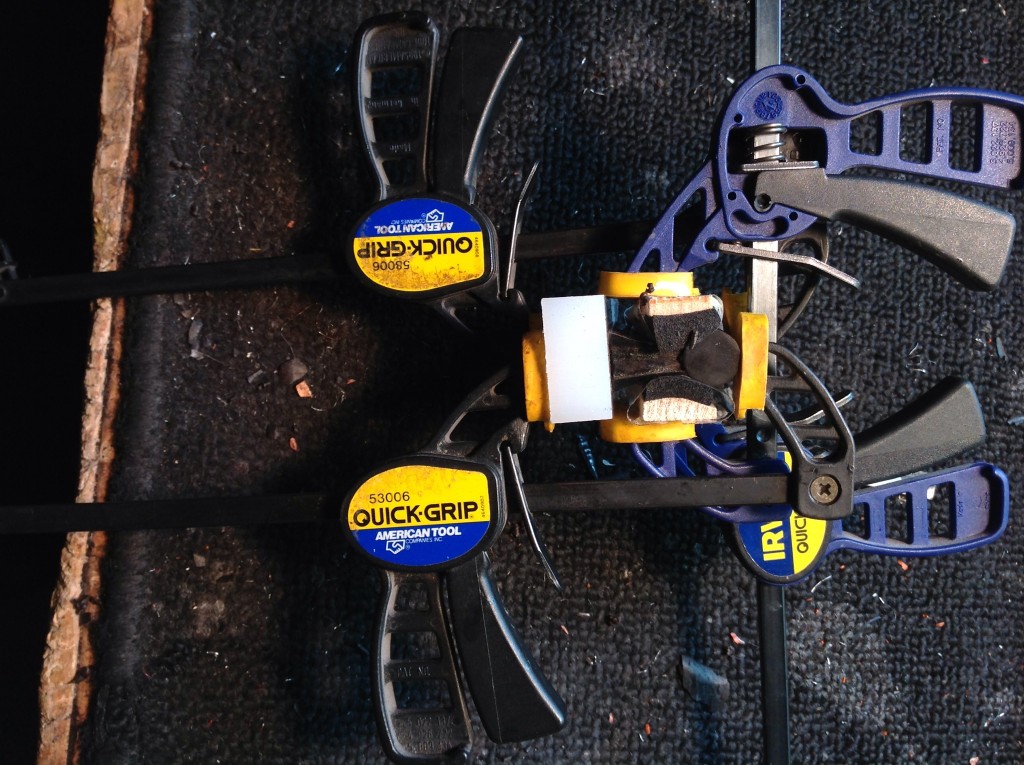
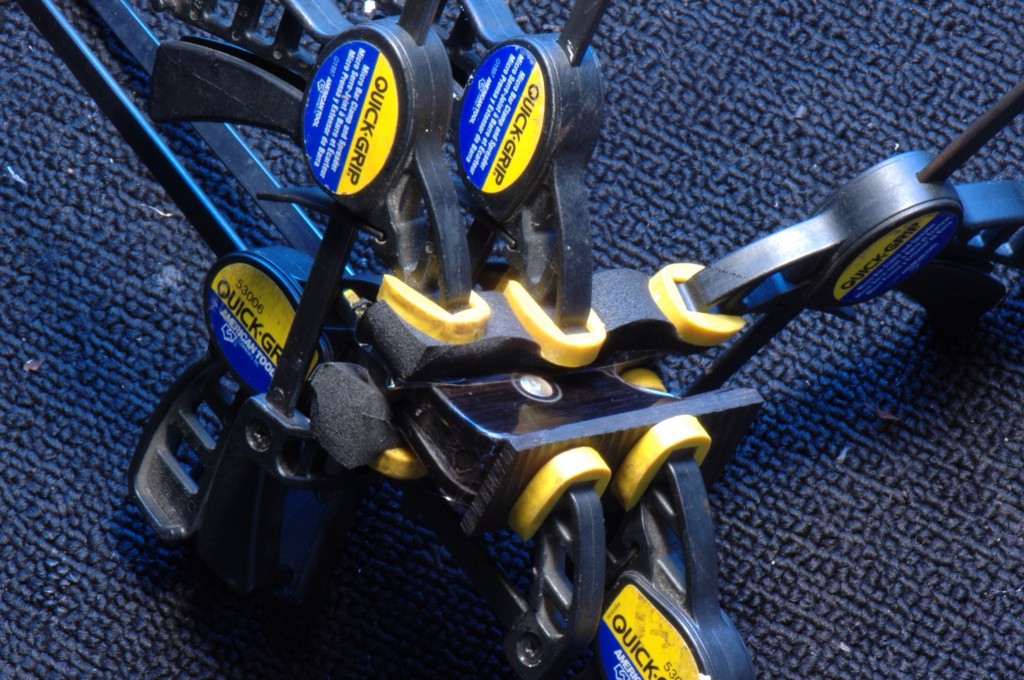
Do a dry run first to help figure out the best clamping situation, especially through supporting the feather edge with tape covered closed cell rubber. See photos below for clamping examples.
Treating the Glue Joints with Formaldehyde
Treat the glue joints with formaldehyde using a q-tip. It changes the cellular structure so that the hide glue isn’t water soluble. Use whatever safety precautions possible: ventilation hood, full respirator mask, and nitrile gloves.
Trimming Down the Cheval
Use the initial measurements and the metal pieces taken off the frog for reference to cut down dowel replacement. I like to wear nitrile gloves and a dust mask while dealing with the ebony that has been treated with formaldehyde.
Finish the piece with different types of abrasives. Sometimes applying a little nitric acid to the new piece can make the new wood match the old wood by adding a punkiness or softness to the wood. Applying shoe polish and/or a little magic marker can help transition the new wood to old by masking the change until a little wear takes care of the rest. Sometimes a grain line might run out in either the old or new piece and extending the line just a bit with a tip of a sharp knife can help lead the eye past the joint.


1. It has been suggested to try Glutaraldehyde instead of formaldehyde. As of the writing of this article, we have yet to try it out.