
Instrument, Techniques
Conical Through Patch, Edge, and Underlay: C-Bout

Mar

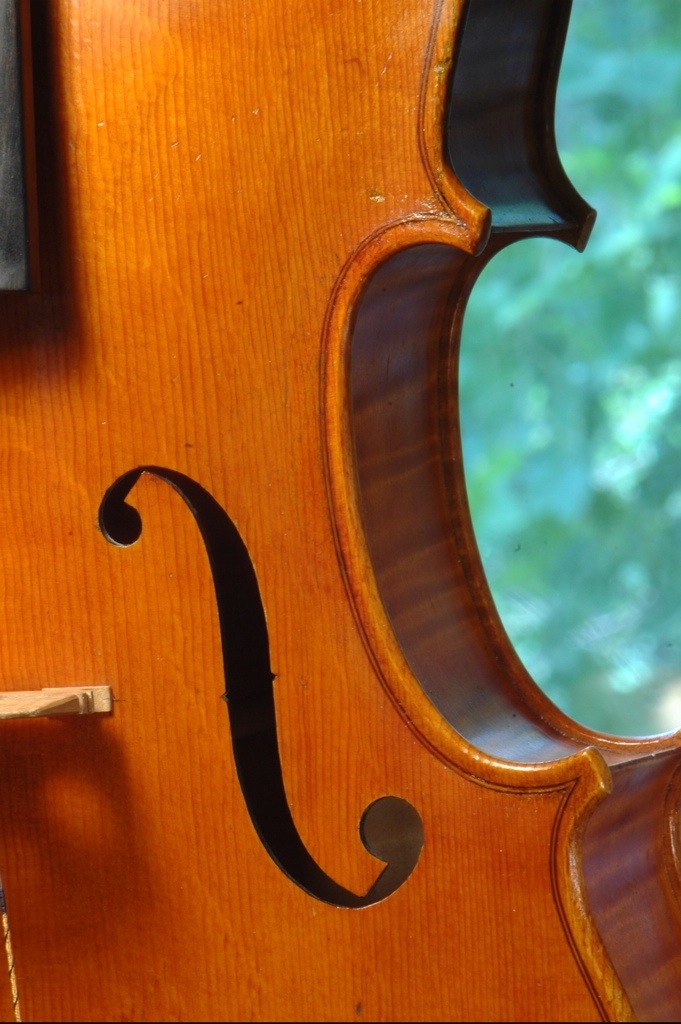
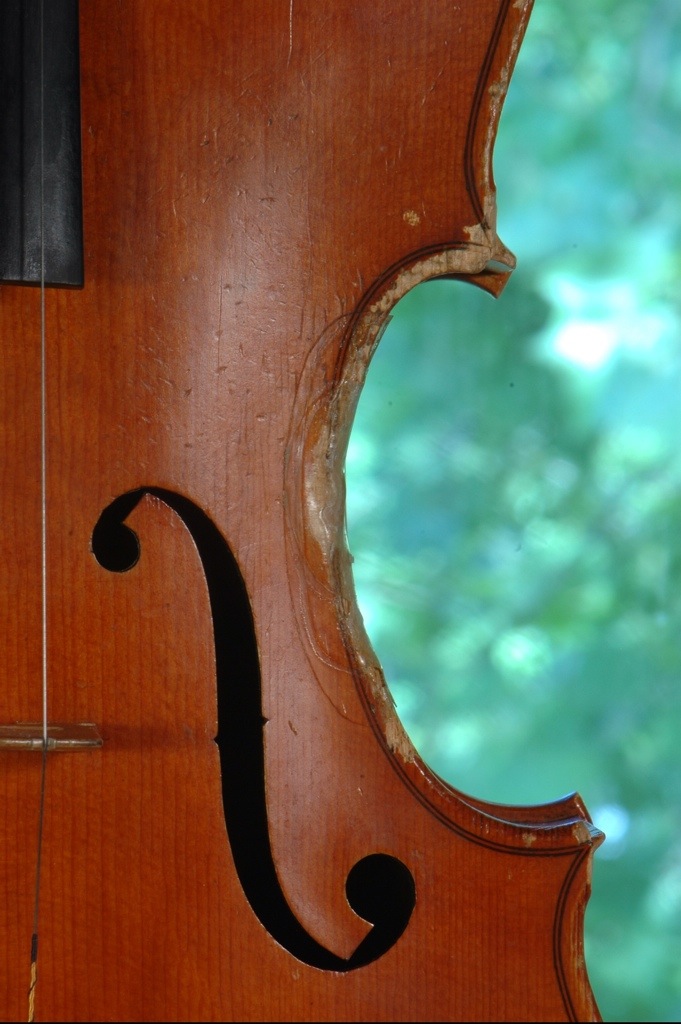
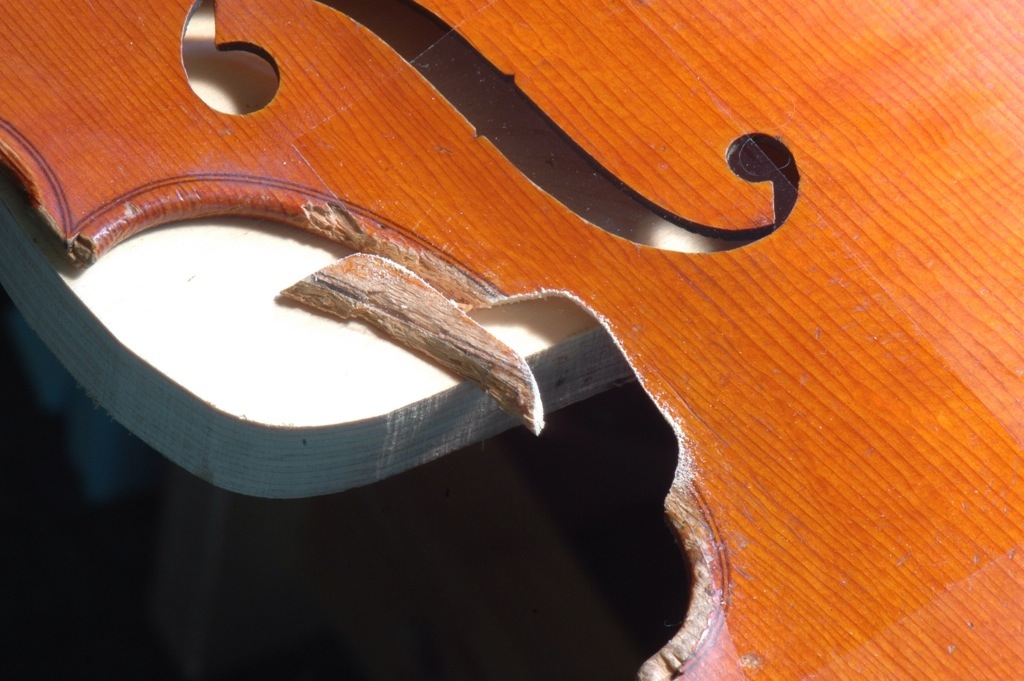
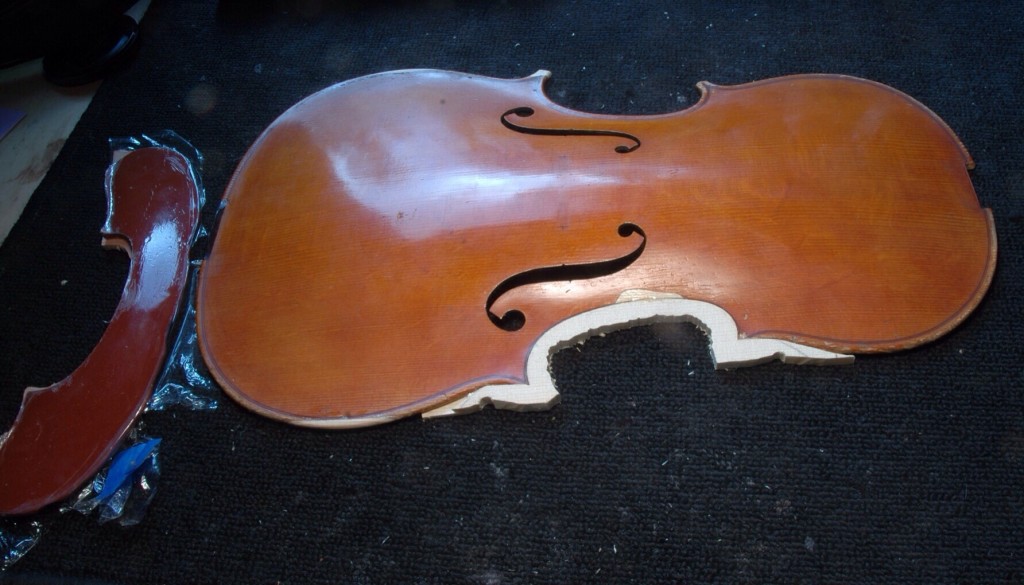
This viola came in with some serious damage to the treble c-bout edge due to the bow hitting it. The purpose of the conical patch is to use the existing wood and raising it into a position that is past the damage so that the joint is almost invisible. In this case in particular, there was some prominent haselfichte through the damaged area that we needed to preserve. The new edge was needed because the c-bout and corners were destroyed. The underlay was necessary to support the new edge and conical through patch.

MATERIALS AND TOOLS
-Opening knives
-Mineral spirits
-Dental compound and way to heat the compound
-Thin plywood roughly the size of area that needs an underlay – in this case about 10″ x 5″
-Mineral oil
-Plastic wrap
-Good-quality, non-stretching transparent packing tape
-The backing from contact paper
-Carving tools including files, knives, chisels, scrapers, gouges
-Dividers
-Replacement spruce and purfling
-Coping saw with a large enough opening to clear bouts
-4/0 saw blade for coping saw – or some other thin, clean blade
-“Cutting V” jig, large enough for a viola, clamped to the bench
-Hide glue
-Chalk
-Straight-edge
-C-Clamps (The ones from Alberti are our favorite)
-220, 320 and 600 grit sandpaper
-Q-tips
-Nitric acid
-Lighter
-Dichromate
-Alcohol
-Touchup materials (such as Orasol Powdered dyes, powdered earth pigments, watercolors, and touch-up brushes)
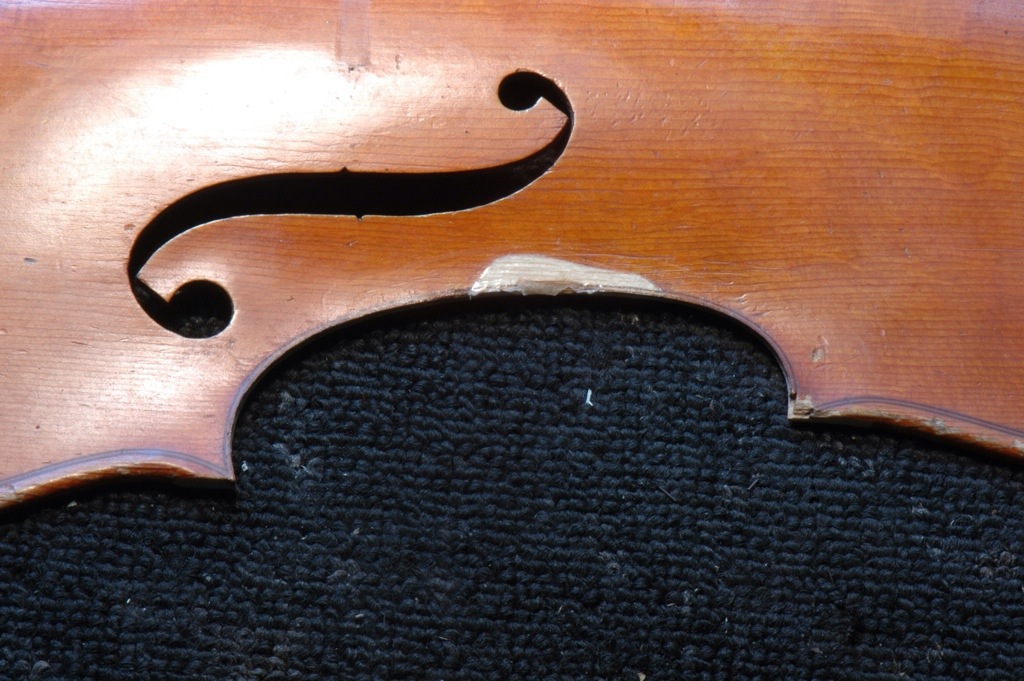
Assessment
The first step in any restoration is assessing the level of damage. Clean the area with mild solvents to get rid of rosin and dirt. There was a large buildup of thick tape on the edge, which were removed with mineral spirits. We then could see how far down the damage goes inside the purfling line.
Make any measurments that might be relevent for set-up or if wood removal is necessary, then make note of how new wood should look – irregular edges, thick corners, subtle turning of edge, etc.
Remove the top.
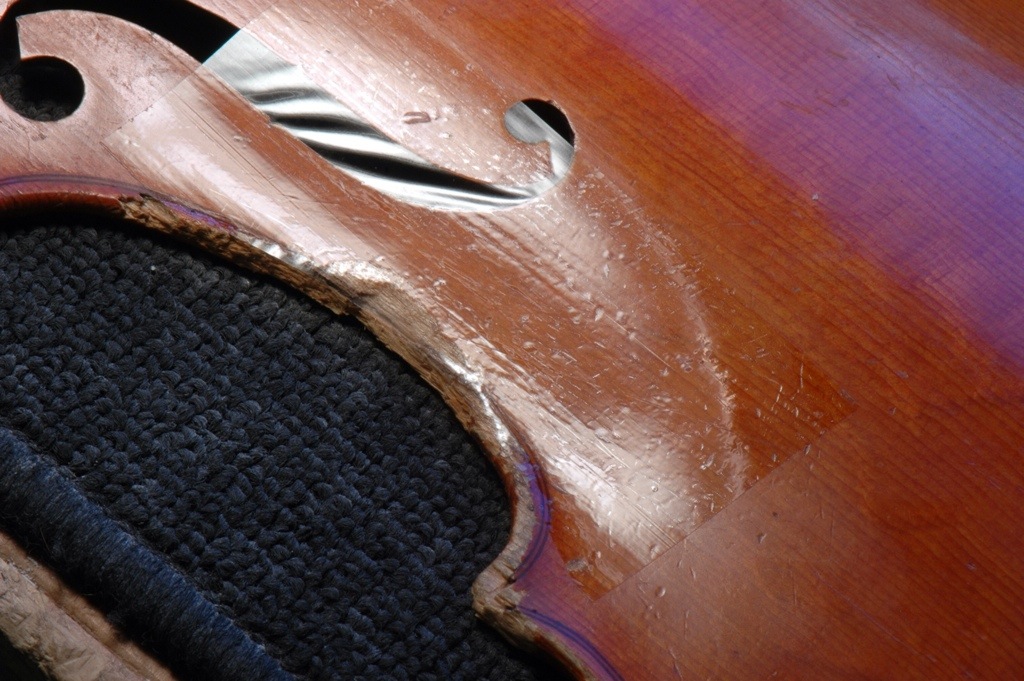
Remove the nonstick backing from the contact paper. Keep the paper backing. Cut an appropriately large enough piece of packing tape. The tape will protect edges of area about to be cut. Apply the tape to the nonstick backing. [1] Tape up area to be worked on starting with a little section of the tape exposed and stuck on to the instrument in the desired area. Peel away the backing as slow as needed to minimize air pockets and smooth out with a q-tip as you go.
Set up a coping saw large enough to clear the bouts with the fine saw blade and cutting v large enough to support a top plate.
Clean the sawblade with alcohol for a nice clean joint.
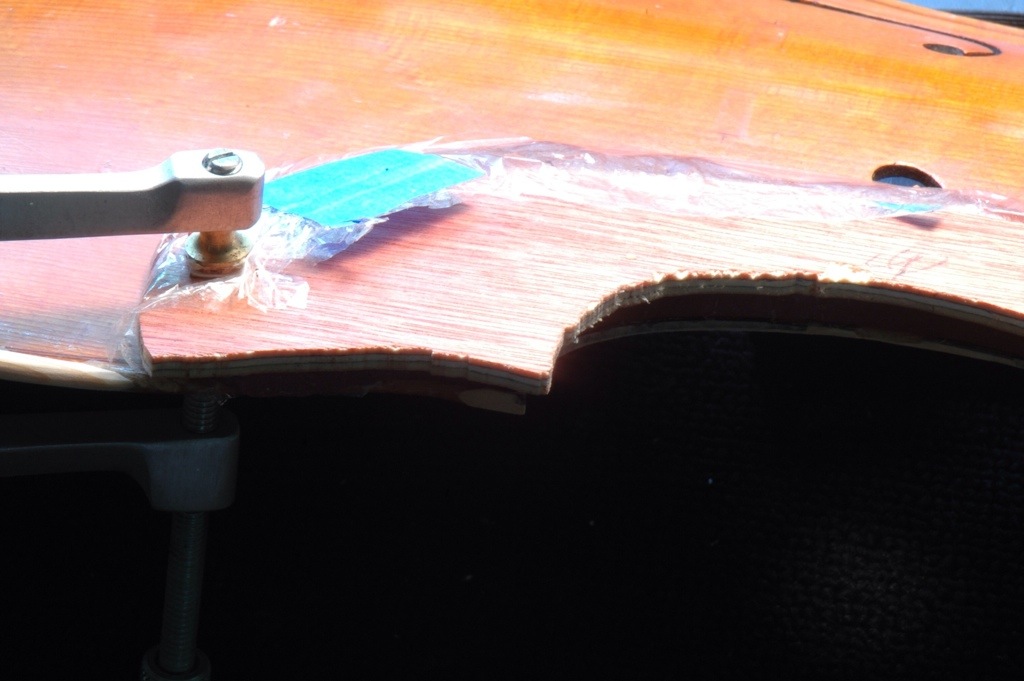
Cutting out the damaged material for raising it up.
Undercut, like a cone, with the smaller end of the cone towards the varnished surface.
The shape to be cut out is similar to half an egg.
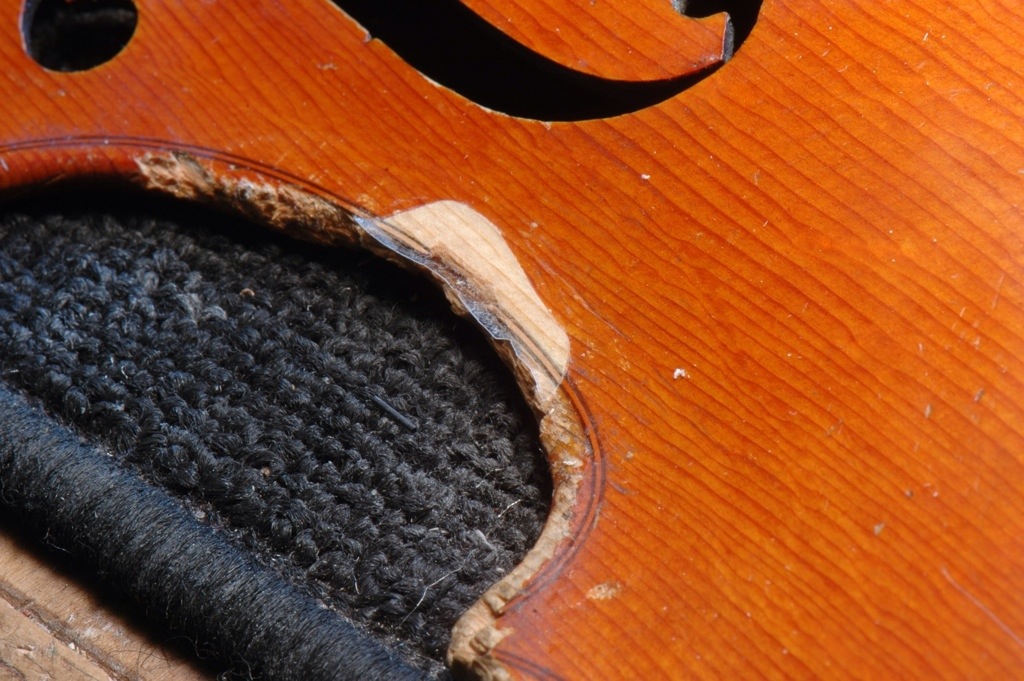
Now that the damaged area is sawn out, keep it! It is time to refit that original damaged piece back into the top while elevating it past the depth of the damage inside the purfling line. 3/4 mm proud of the top plate was determined to be enough elevation for the damaged piece to be trimmed and fit without the grain wandering too far away from the rest of the top.
Remove just enough of the wood from the piece and the top and then to elevate the piece up about 3/4 mm above the plate. You can use knives, small files, and other burnishing tools. This goes by surprisingly quick. Don’t go too crazy and make everything super smooth otherwise it will ruin the puzzle-like fit with the top plate. Beware of wandering grain lines and trying to maintain a continuous line through the repair.
Glue the piece in place with bar clamps and fresh hide glue.
Put an extra bead of glue along the joint surfaces so the outside of the joint doesn’t dry faster and separate from the center of the piece.
When dry, trim down patch area with a sharp, shallow sweep gouge or a small fingerplane and leave the wood about 1/4 mm high.
Remove all the old tape from the instrument with mineral spirits and apply tape to the newly exposed wood to protect it from dirt.
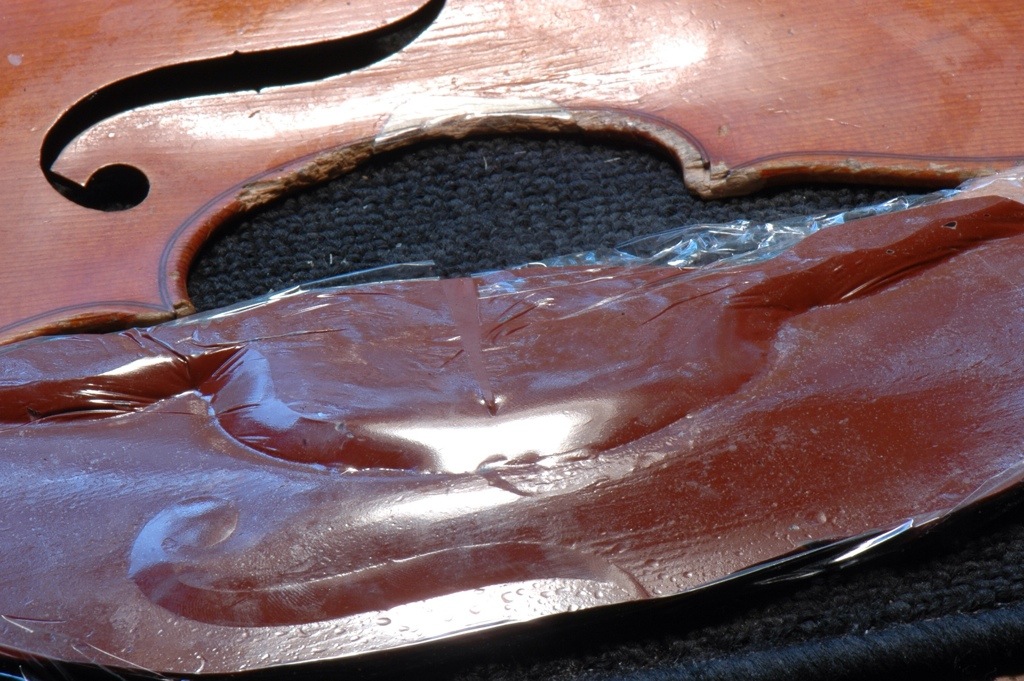
Dental Cast
Cover the instrument with plastic wrap – nice and seamless.
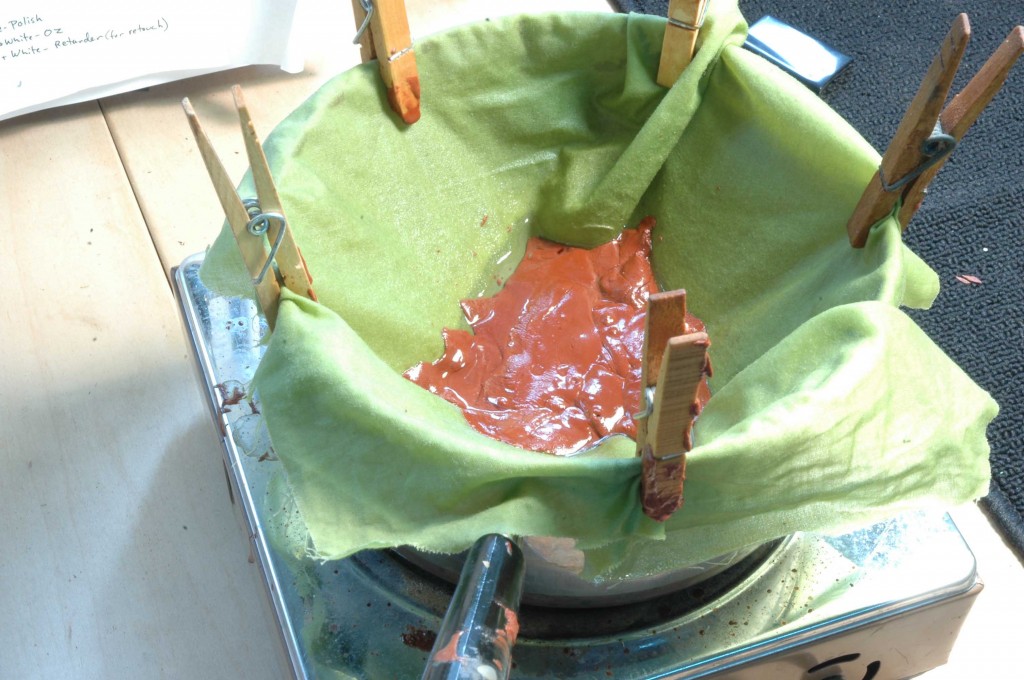
Heat up the compound – hot to touch almost too hot to handle. We use a pot with water and an oiled cloth pinned to the edge.
Caution: if it is too hot when you apply it to the instrument, you can damage the varnish.

Apply mineral oil to a piece of 3/8 inch plywood that has been roughly shaped to the area that is being repaired so that the dental compound may be removed easily and reused.
Remove the compound from the cloth and apply the compound on the plywood.
Try to avoid creases, finger holes and air pockets they will show up in the cast.
With this particular instrument, leaving the plywood and compound on a stable surface while we pressed the instrument into the compound left the smoothest transfer.
Let the cast cool completely before seperating the instrument and cast, otherwise the might varnish come off with the cast.


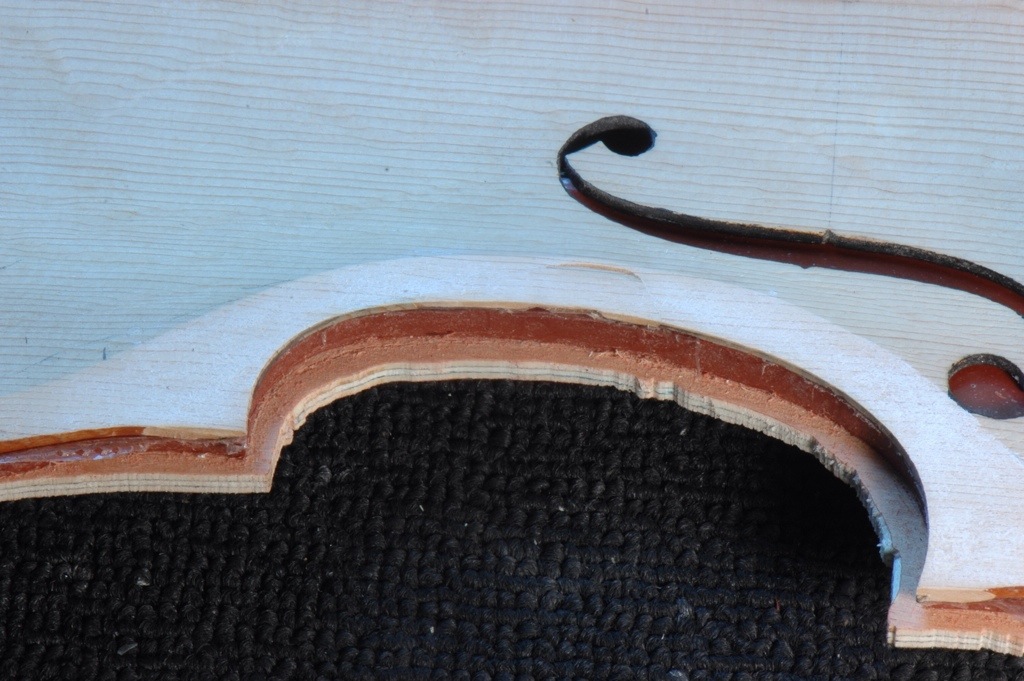
Edge and Underlay
To prep for the underlay, trim off edge the edge of the instrument to the purfling with a sharp knive. Maintain a square edge straight down so new edge is easier to fit.
Using a crossing file and chisel remove wood from the inside of the top plate square to purfling and straight in. The amount of original edge will vary from about 1-1.5 mm thick throughout most of the c-bout ramping to the full thickness past the corners (creating a feather edge for the underlay to exit). The more flat the center of the patch throughout the c-bout, the easier it is to fit the patch. Maintain flatness from middle of the plate radiating outward by checking with a straight edge.
Scribe onto the dental compound cast the new outline (purfling line) and bandsaw or cutaway the dental compound so that there is no overlap of dental compound to the top. The new piece will eventually go past the top and be fitting next to the cast.
Find a new piece of spruce, match up the grain lines and if possible match the medullary rays and split by testing with freshly-planed wood. Once you’re happy with the selection, trace a rough outline for what will be your new edge and underlay onto the new piece of wood and add approx. 15mm excess of final underlay and edge to give yourself some breathing room. Then band saw out your piece of wood and uniformly trim and plane it flat to be a height of about 8 mm.
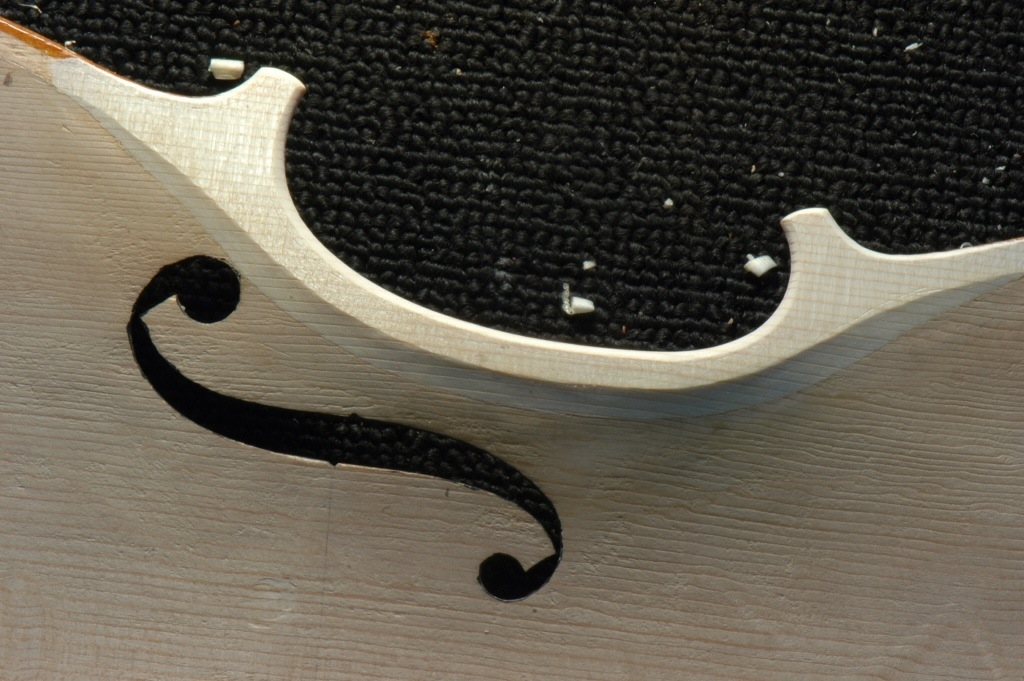
Trace an accurate outline onto the new replacement piece of wood, saving room for fitting it to the prepared patch-bed on the inside. Based on the new outline, use a knife to start cutting straight down along the outline. Start fitting the outline and the patchbed simultaneously. It’s important to pay attention to the depth of the patch-bed, thickness of your plate and desired edge-thickness. Continuously check for squareness, do not over or undercut. The new edge/underlay relationship will look deep at the corners and shallow for most of the C-bout. You must not take too much off, otherwise the patch will get too thin and the edge will be too low and thin. In addition, Make sure that the new edge is thick enough. When a lot of the bulk of the patch has been removed and you are really fitting it into place, thin out the edge and underlay piece so that it is flexible and exact size of area needed. Use chalk for this process once it is close.
It is important that the instrument must be able to lay without rocking, tension, or stress onto the new piece of wood.
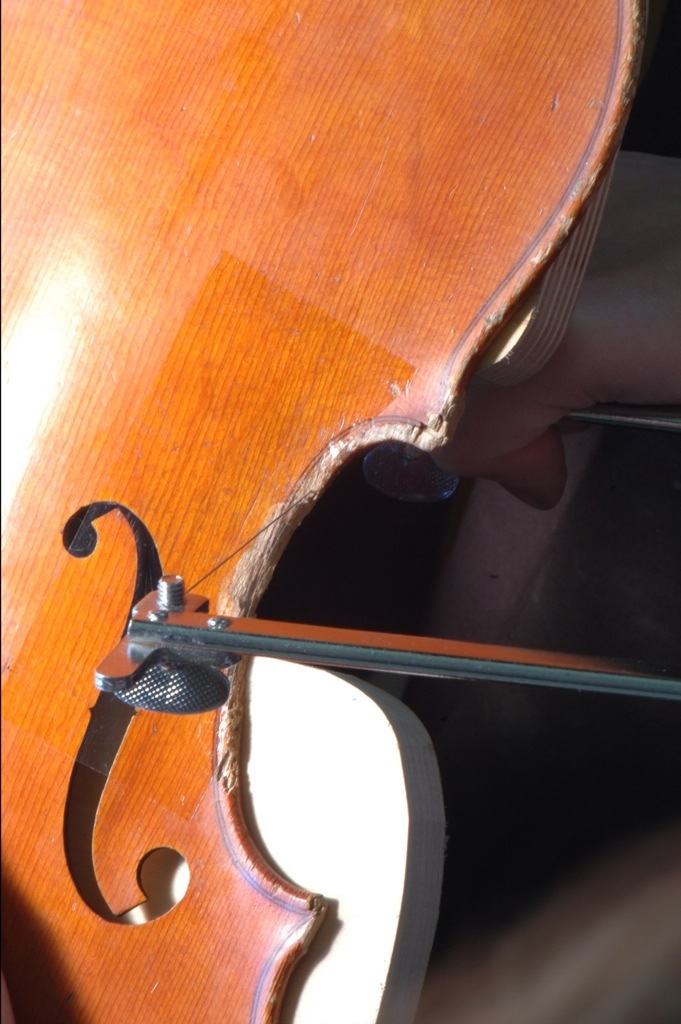
All the while that you are fitting the new piece, test the fit with dental compound cast clamped on. Draw layout marks on the plywood side of the cast where it should be clamped to the top and likewise draw on the top so the clamps are consistently and conveniently placed out of your way. Look at the fit with and without the cast in place.


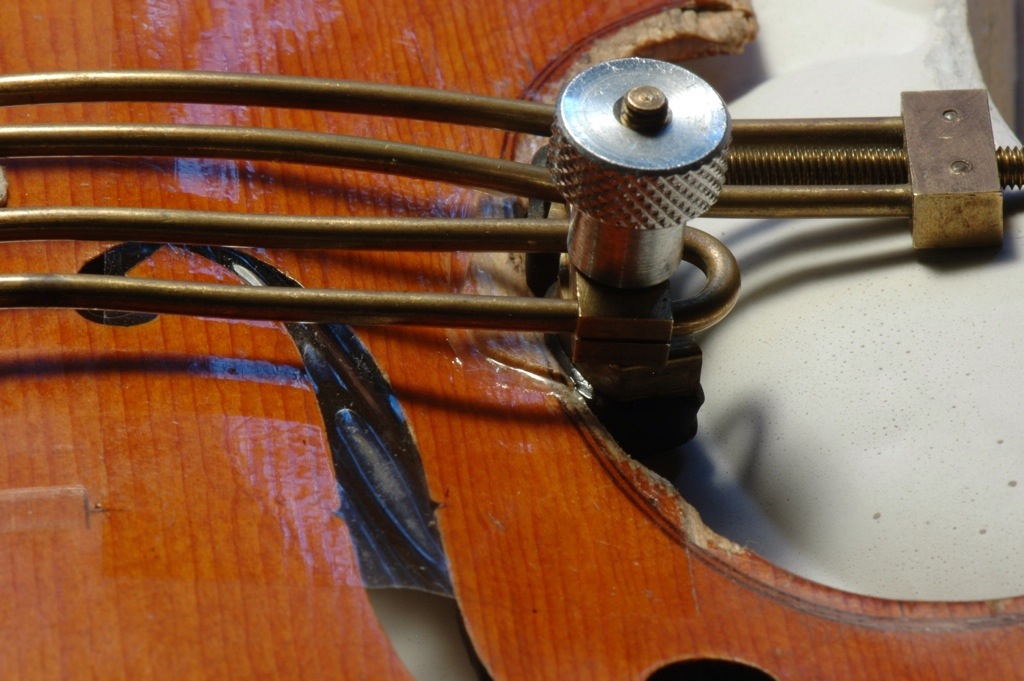
When the new piece and the top fit well, clamp dental compound cast into place on the top and glue in patch with fresh hide glue. Clamp with as many clamps as possible. As soon as all the clamps are on and in place, go back through clamps and release the clamping pressure to a light finger pressure.

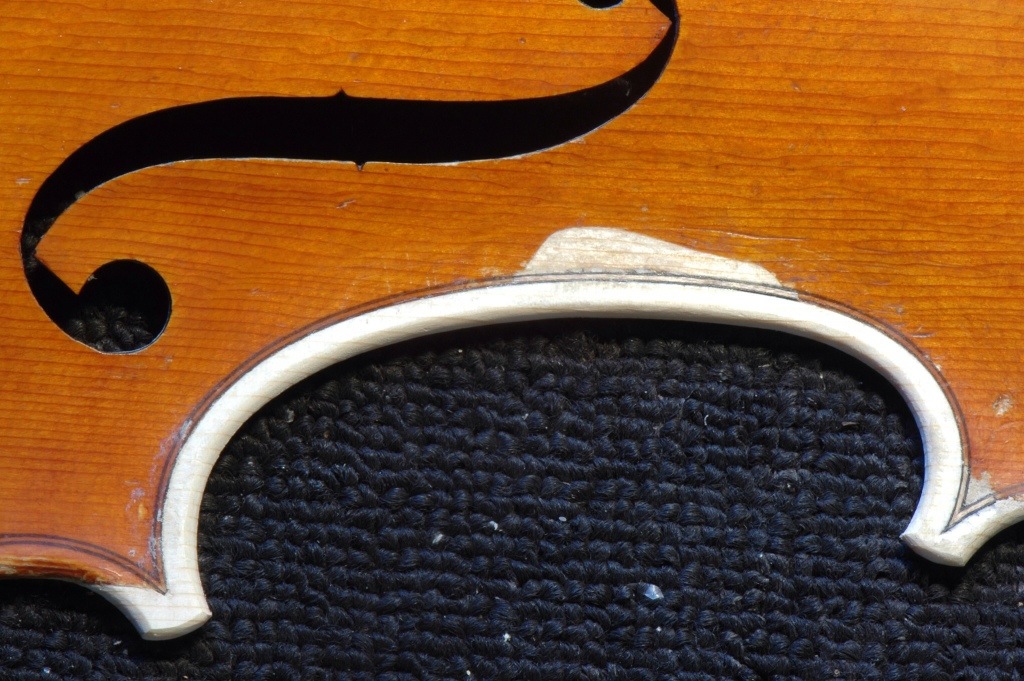
Once the piece is glued on, go ahead and remove protective layer of tape from through patch. A stock of random purfling supplied what was needed for the area that was missing purfling. If you need to move purfling minutely over to match, wedge knife in the channel to shove over. Standard scarf joints were used to blend new and old purfling. Use dividers to mark out from the outside of purfling to outline. Trim close to original outline with a bandsaw. Cut and shape edge and corners to match outline. Also, plane the underside edge flat to re-establish gluing surface for closing the box.
Scrape and wet sand the edge 3 times with 220, 320 and 600 sandpaper.
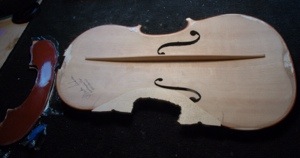
Trace the outline of the ribs to the underside of the top and make sure you room for the linings. Finish the inside of the top with fingerplanes, gouge, and scraper. Make sure the edges match the original in shape and then color the inside of the underlay with dry pigments to take down the bright white look of new wood.
Glue the top on as usual – most of the way minus the projection. Set. Once dry, then set up with clamps on and check the projection under string tension. Adjust if the projection necessary.
Touch Up
Touch up the ground first with yellow using alcohol. Then spray coat the area with shellac and then work on the grain lines.
On this viola we ended up using dichromate and nitric acid (neutralized with a flame) to color the edges.
Touch up slowly trying to match the color of original.
Pigments were applied over the dye to cut some of the dichromaticism.
Alternate spray coats and hand polishing.
Black watercolor over red will cut some of the red.
Some of the color in the purfling faded from the nitric acid, and was touched up with black watercolor.
Neusbaum was applied to the bright edges.
Go very very slowly. The change in color should hardly be perceptible each time.
Notes
1. The packing tape backed with the nonstick backing from contact paper is easier to maneuver around the working surface and minimizes air pockets when applying the tape. BACK TO POST