
Instrument, Techniques
Repairing Rib Cracks Perpendicular to the Grain

Jan

Rib Cracks are a common problem on violin family instruments, and cracks running perpendicular to the grain present different challenges than cracks running parallel to the grain. Without the support of parallel grain lines, cracks perpendicular to the grain need more substantial reinforcement. In this article I will go over how to double a rib to provide reinforcement for this kind of crack.
MATERIALS AND TOOLS
1 3′ 2″X6″ pine board preferably with out knots.
1 3″X12″ piece of thick closed cell Neoprene rubber
Pencil
1 Roll of thin aluminum sheeting used for flashing
Wax Paper
Band saw
Hide Glue
Tin Snips
1 Large, stiff, trusty clamp
Opening knife
Oscillating Spindle Sander (not necessary, but nice to have)
Large Sharp Scraper
Large Flat Rasp
10 Cam Clamps
Aliphatic Resin Glue
Cyanoacrylate Adhesive (CA or Super Glue)
Polyester Resin (Bondo)
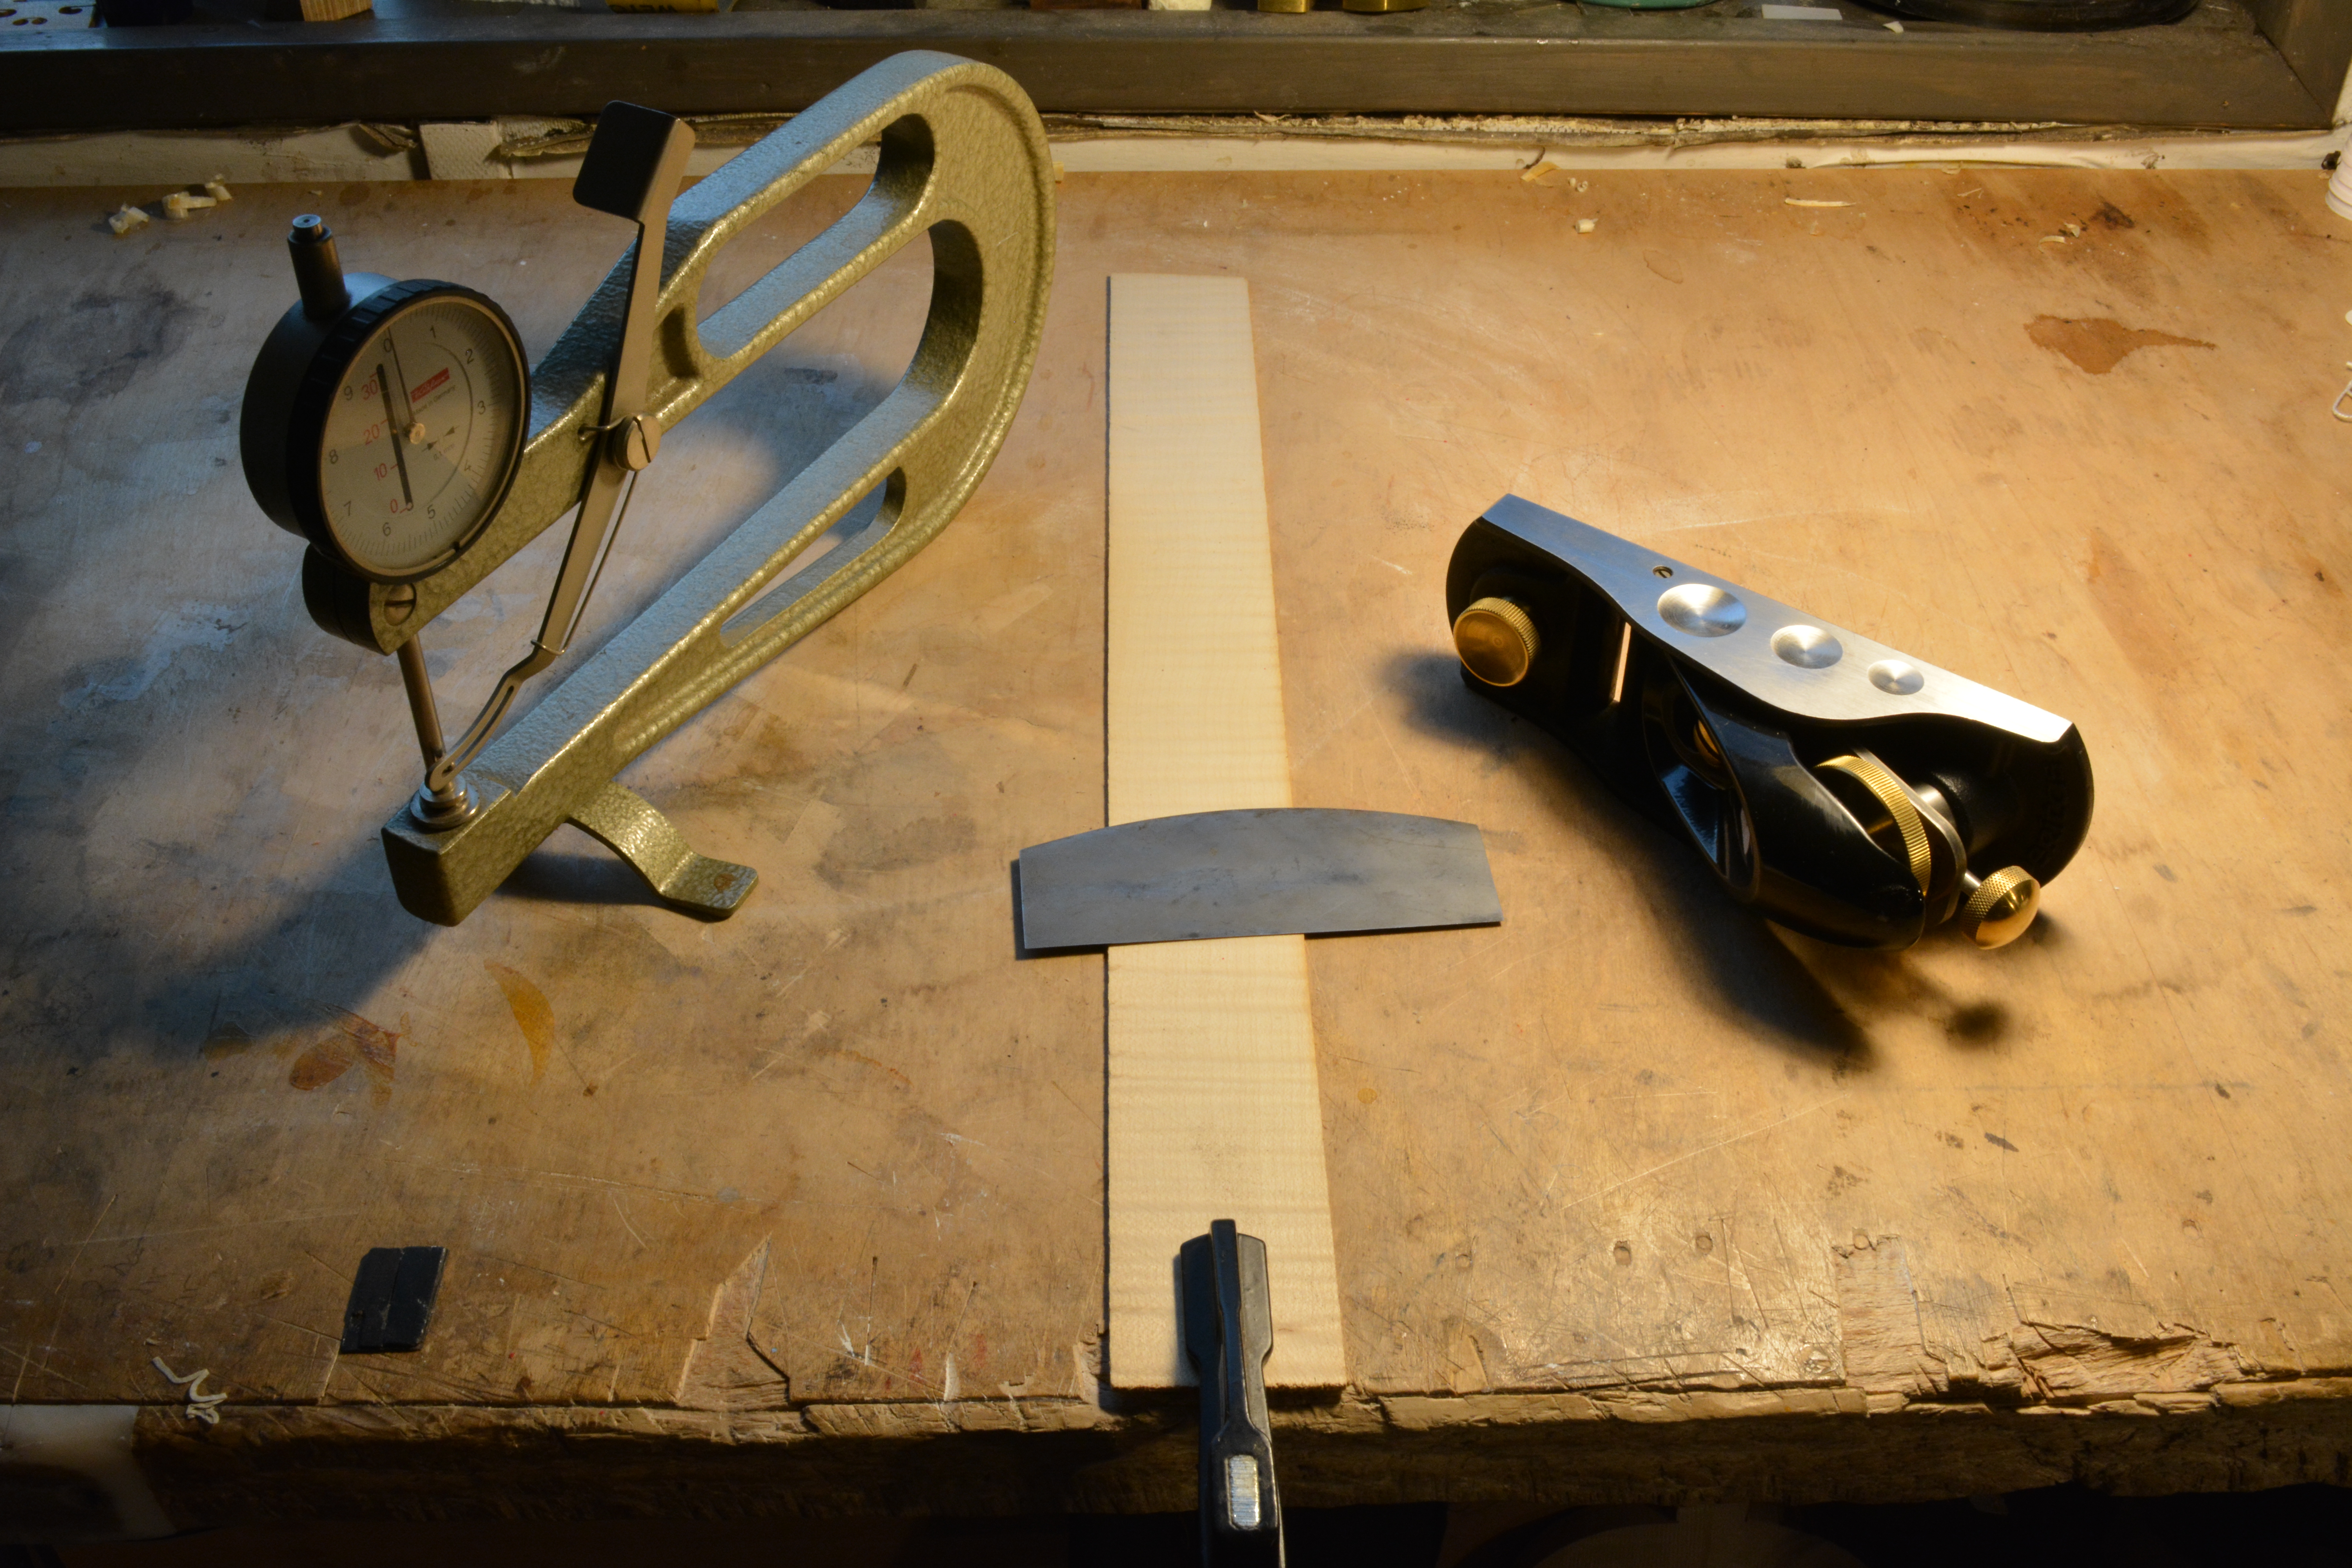
Metal Tipped Digital Calipers of High Quality
Fine Cut Crossing File
Dial Graduation Calipers
Finger Plane with Rounded Sole
Finger Plane with Flat Sole (the longer the better)
Fine Cut Crossing File (bird tongue) 00
Closing Clamps
Bending Iron and Bending Strap
Rib Stock
Potassium Dichromate
Orasol Dyes
Nussbaum
Block Plane with Toothed Blade
2 Long Alberti Clamps, or “Bass Bar Clamps”
2 Small Quick Grip Clamps
Clear Contact Paper
A wide roll of thin Packing Tape, we use 3M Tartan 3765 tape
Masking Tape
Mineral Spirits
1 Tooth Pick Sharpened into a Spatula
Sharp Scissors
Ruler
Pencil
Measuring Tape
Removing the Top
To begin the process of removing and doubling the rib you have to remove the top.
See article about removing top https://trianglestrings.com/removing-the-top/
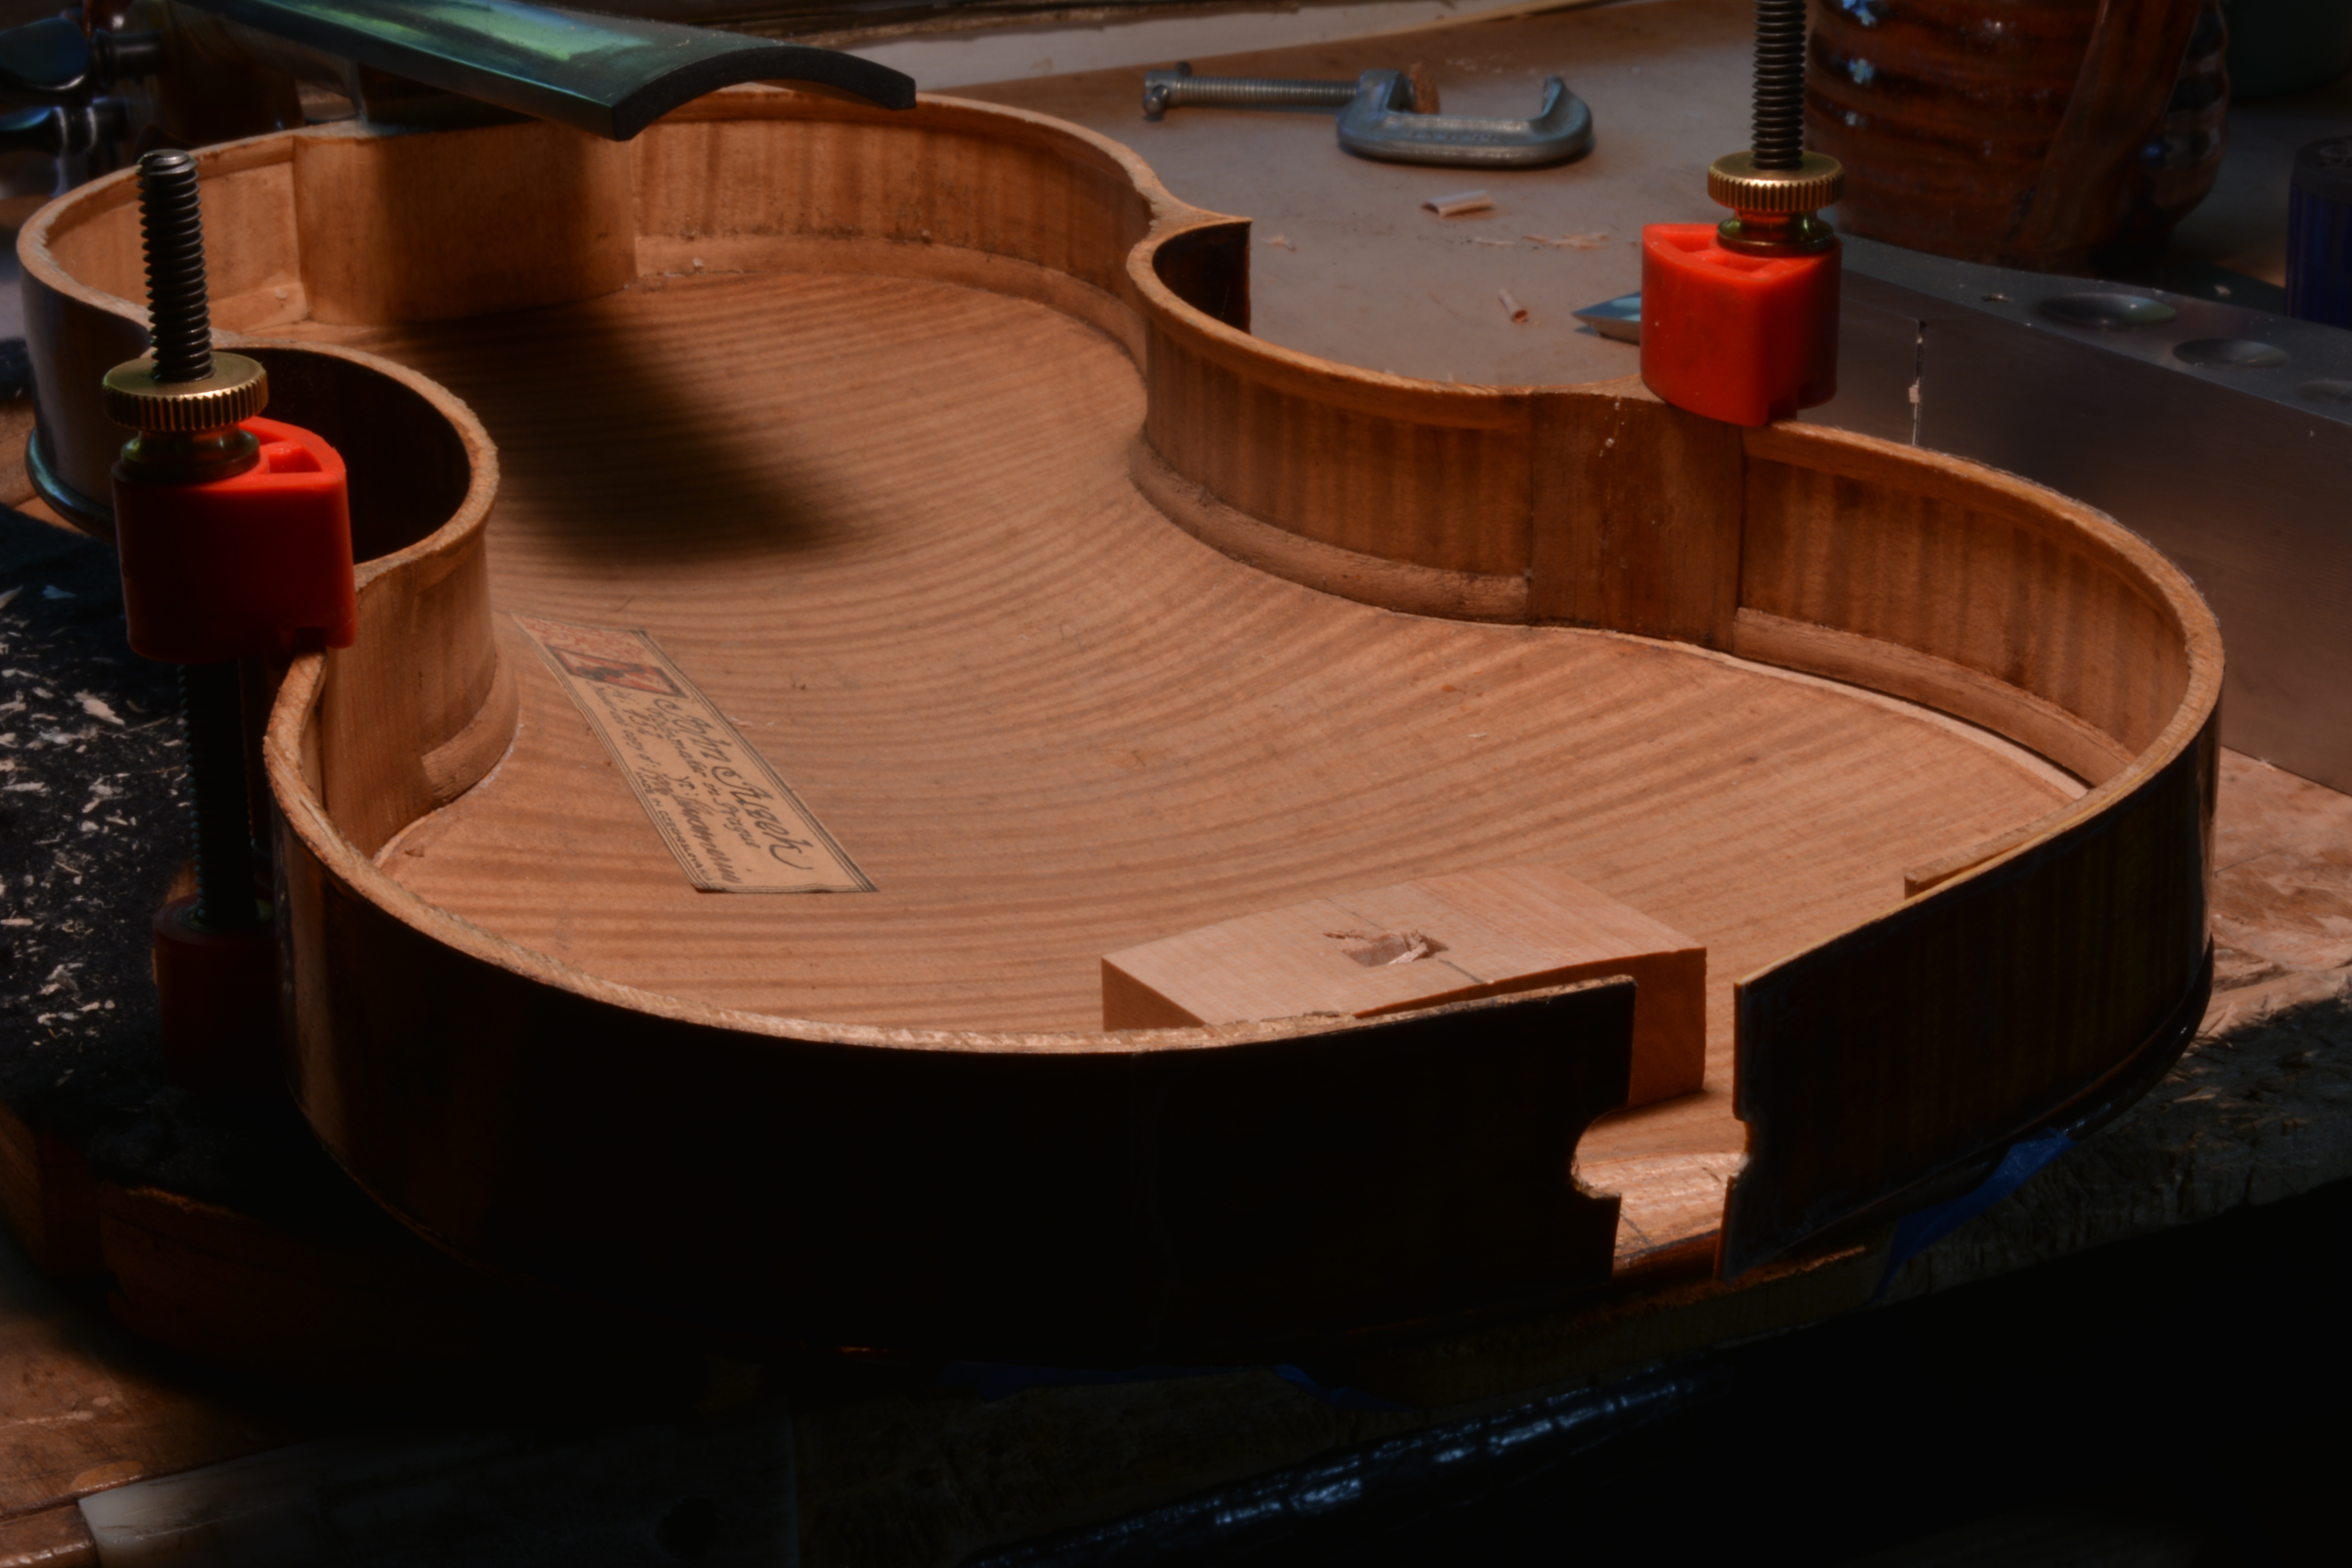
Making a Rib Form
Before removing the ribs from the instrument I prefer to have the rib form made and ready to use. With this prep, I will immediately have a safe clean place to put the rib while I’m working on other parts of the instrument. The process and concept for making a rib form is basically the same as it in my article about “Repairing Rib Cracks Parallel To Rib Grain” (see https://trianglestrings.com/repairing-rib-cracks/). The only difference is with this form, the foam is cut down to 5-10mm thick, and we do not reinforce the crack with linen.
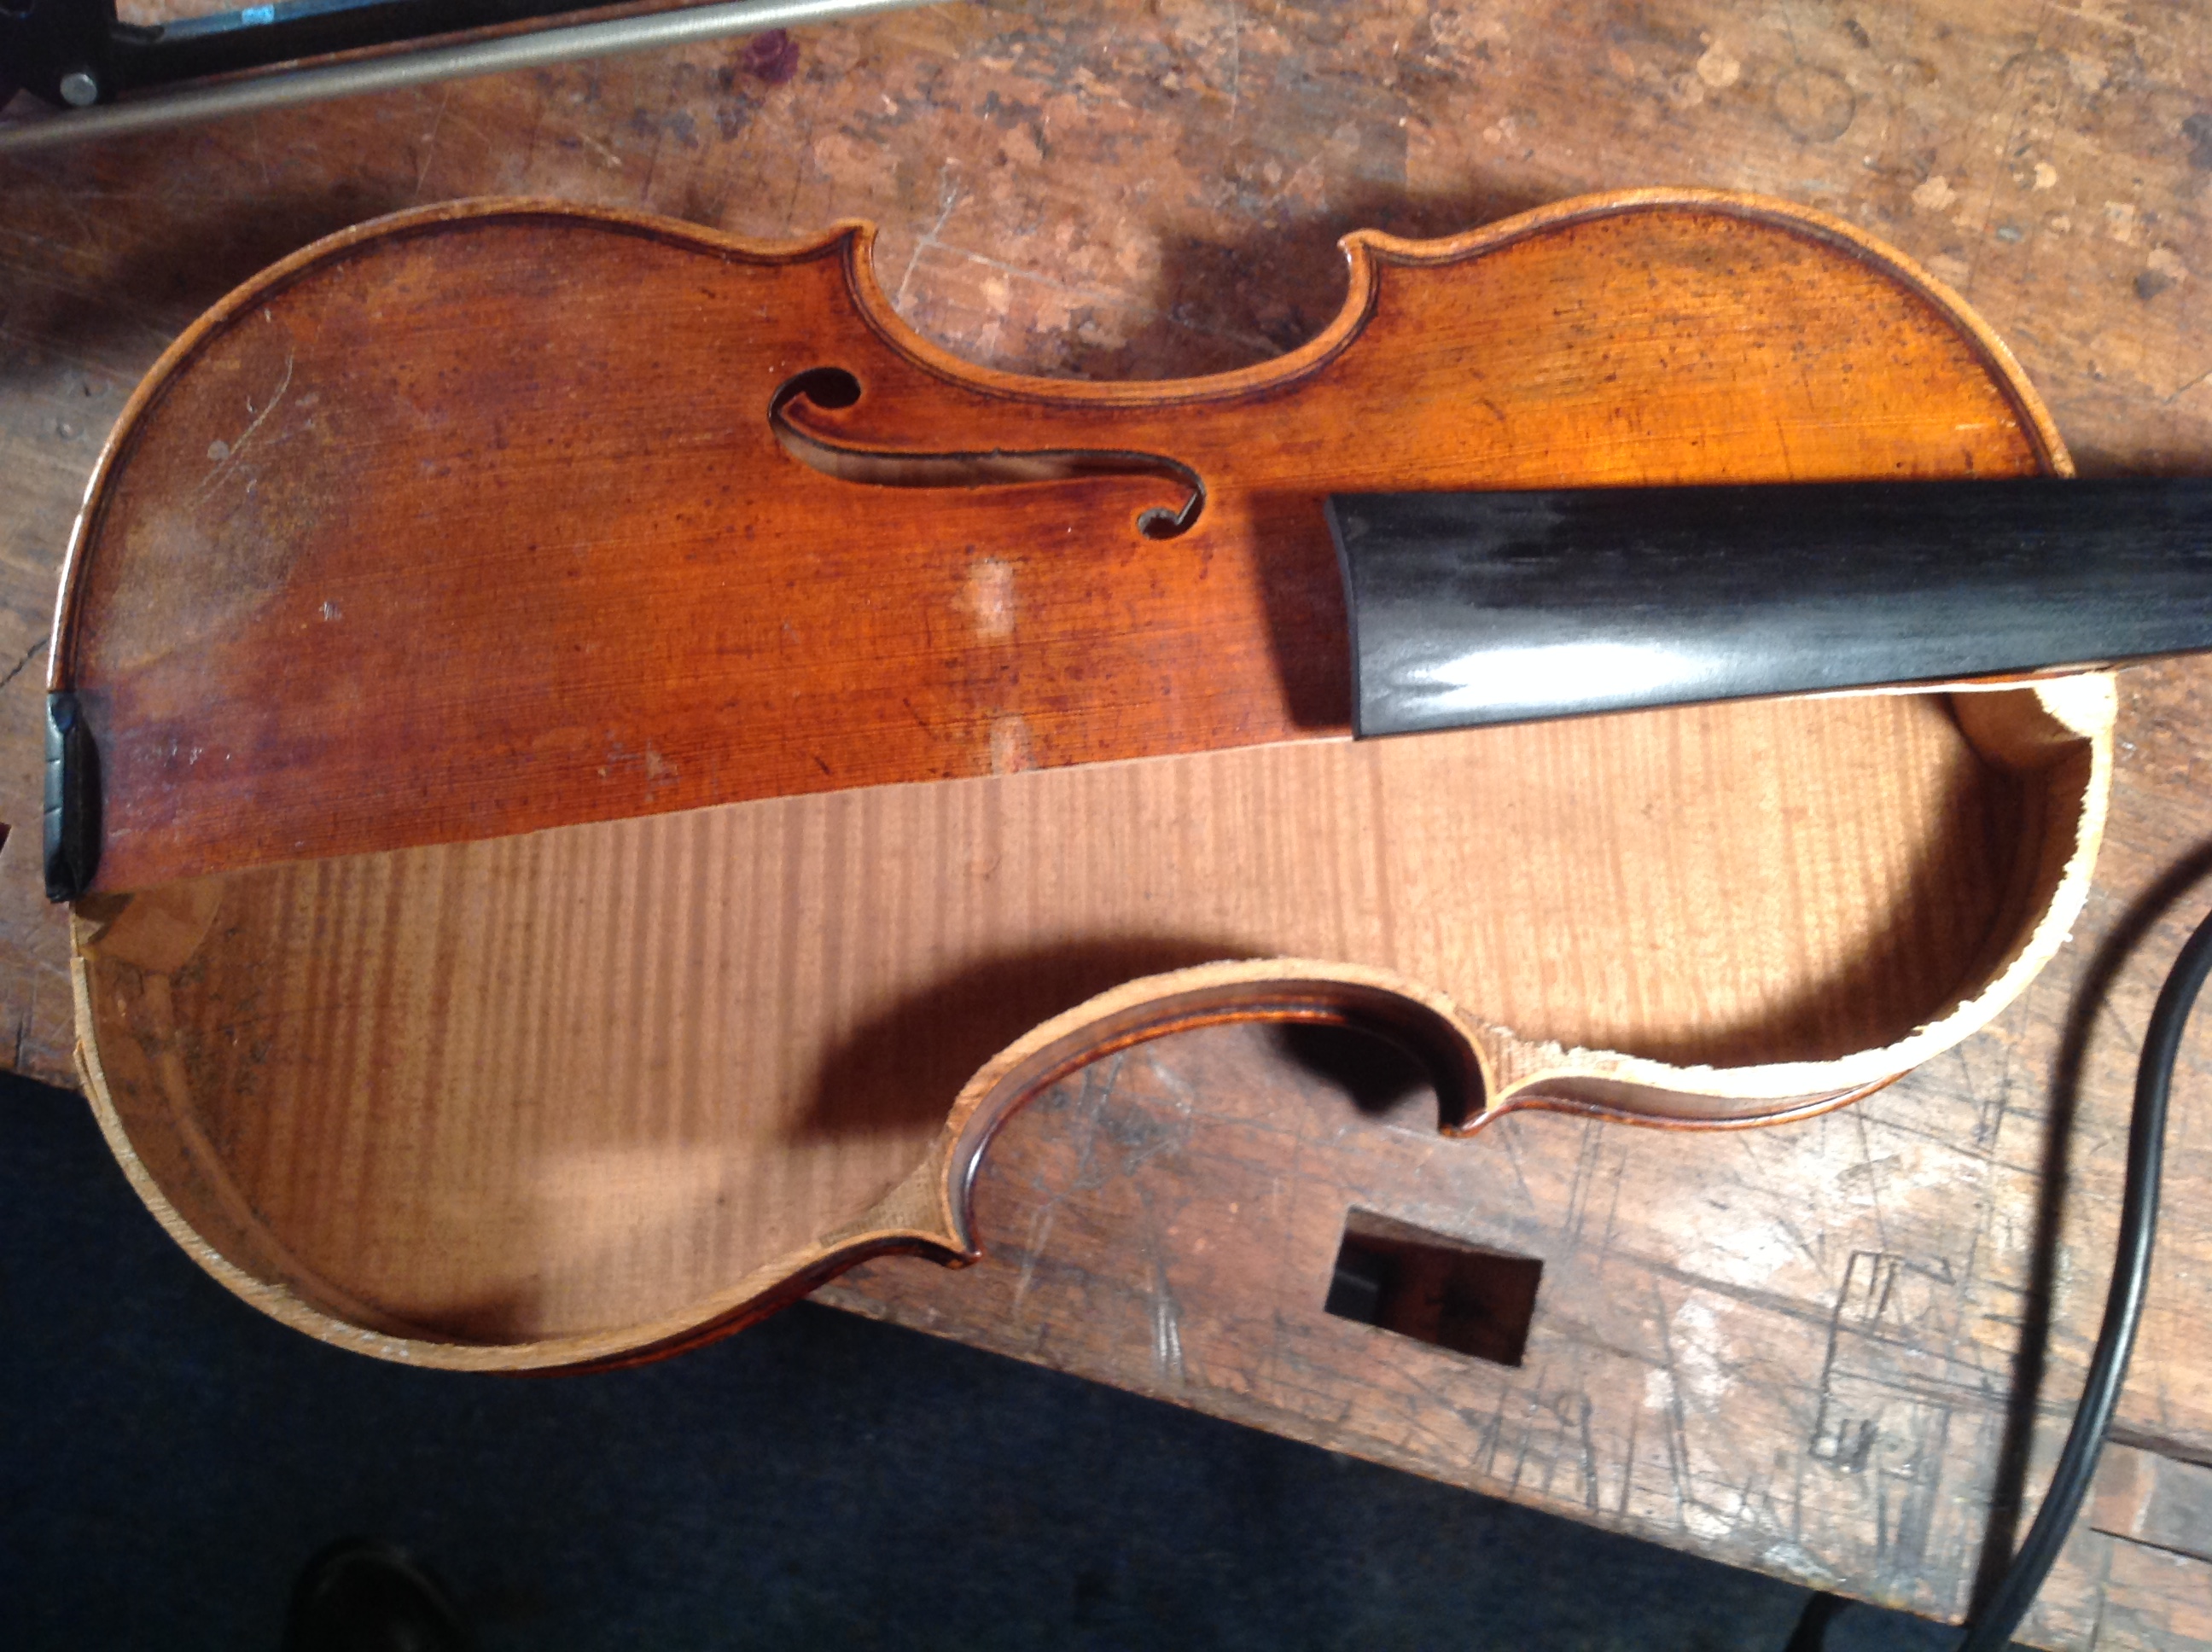
Removing the Rib
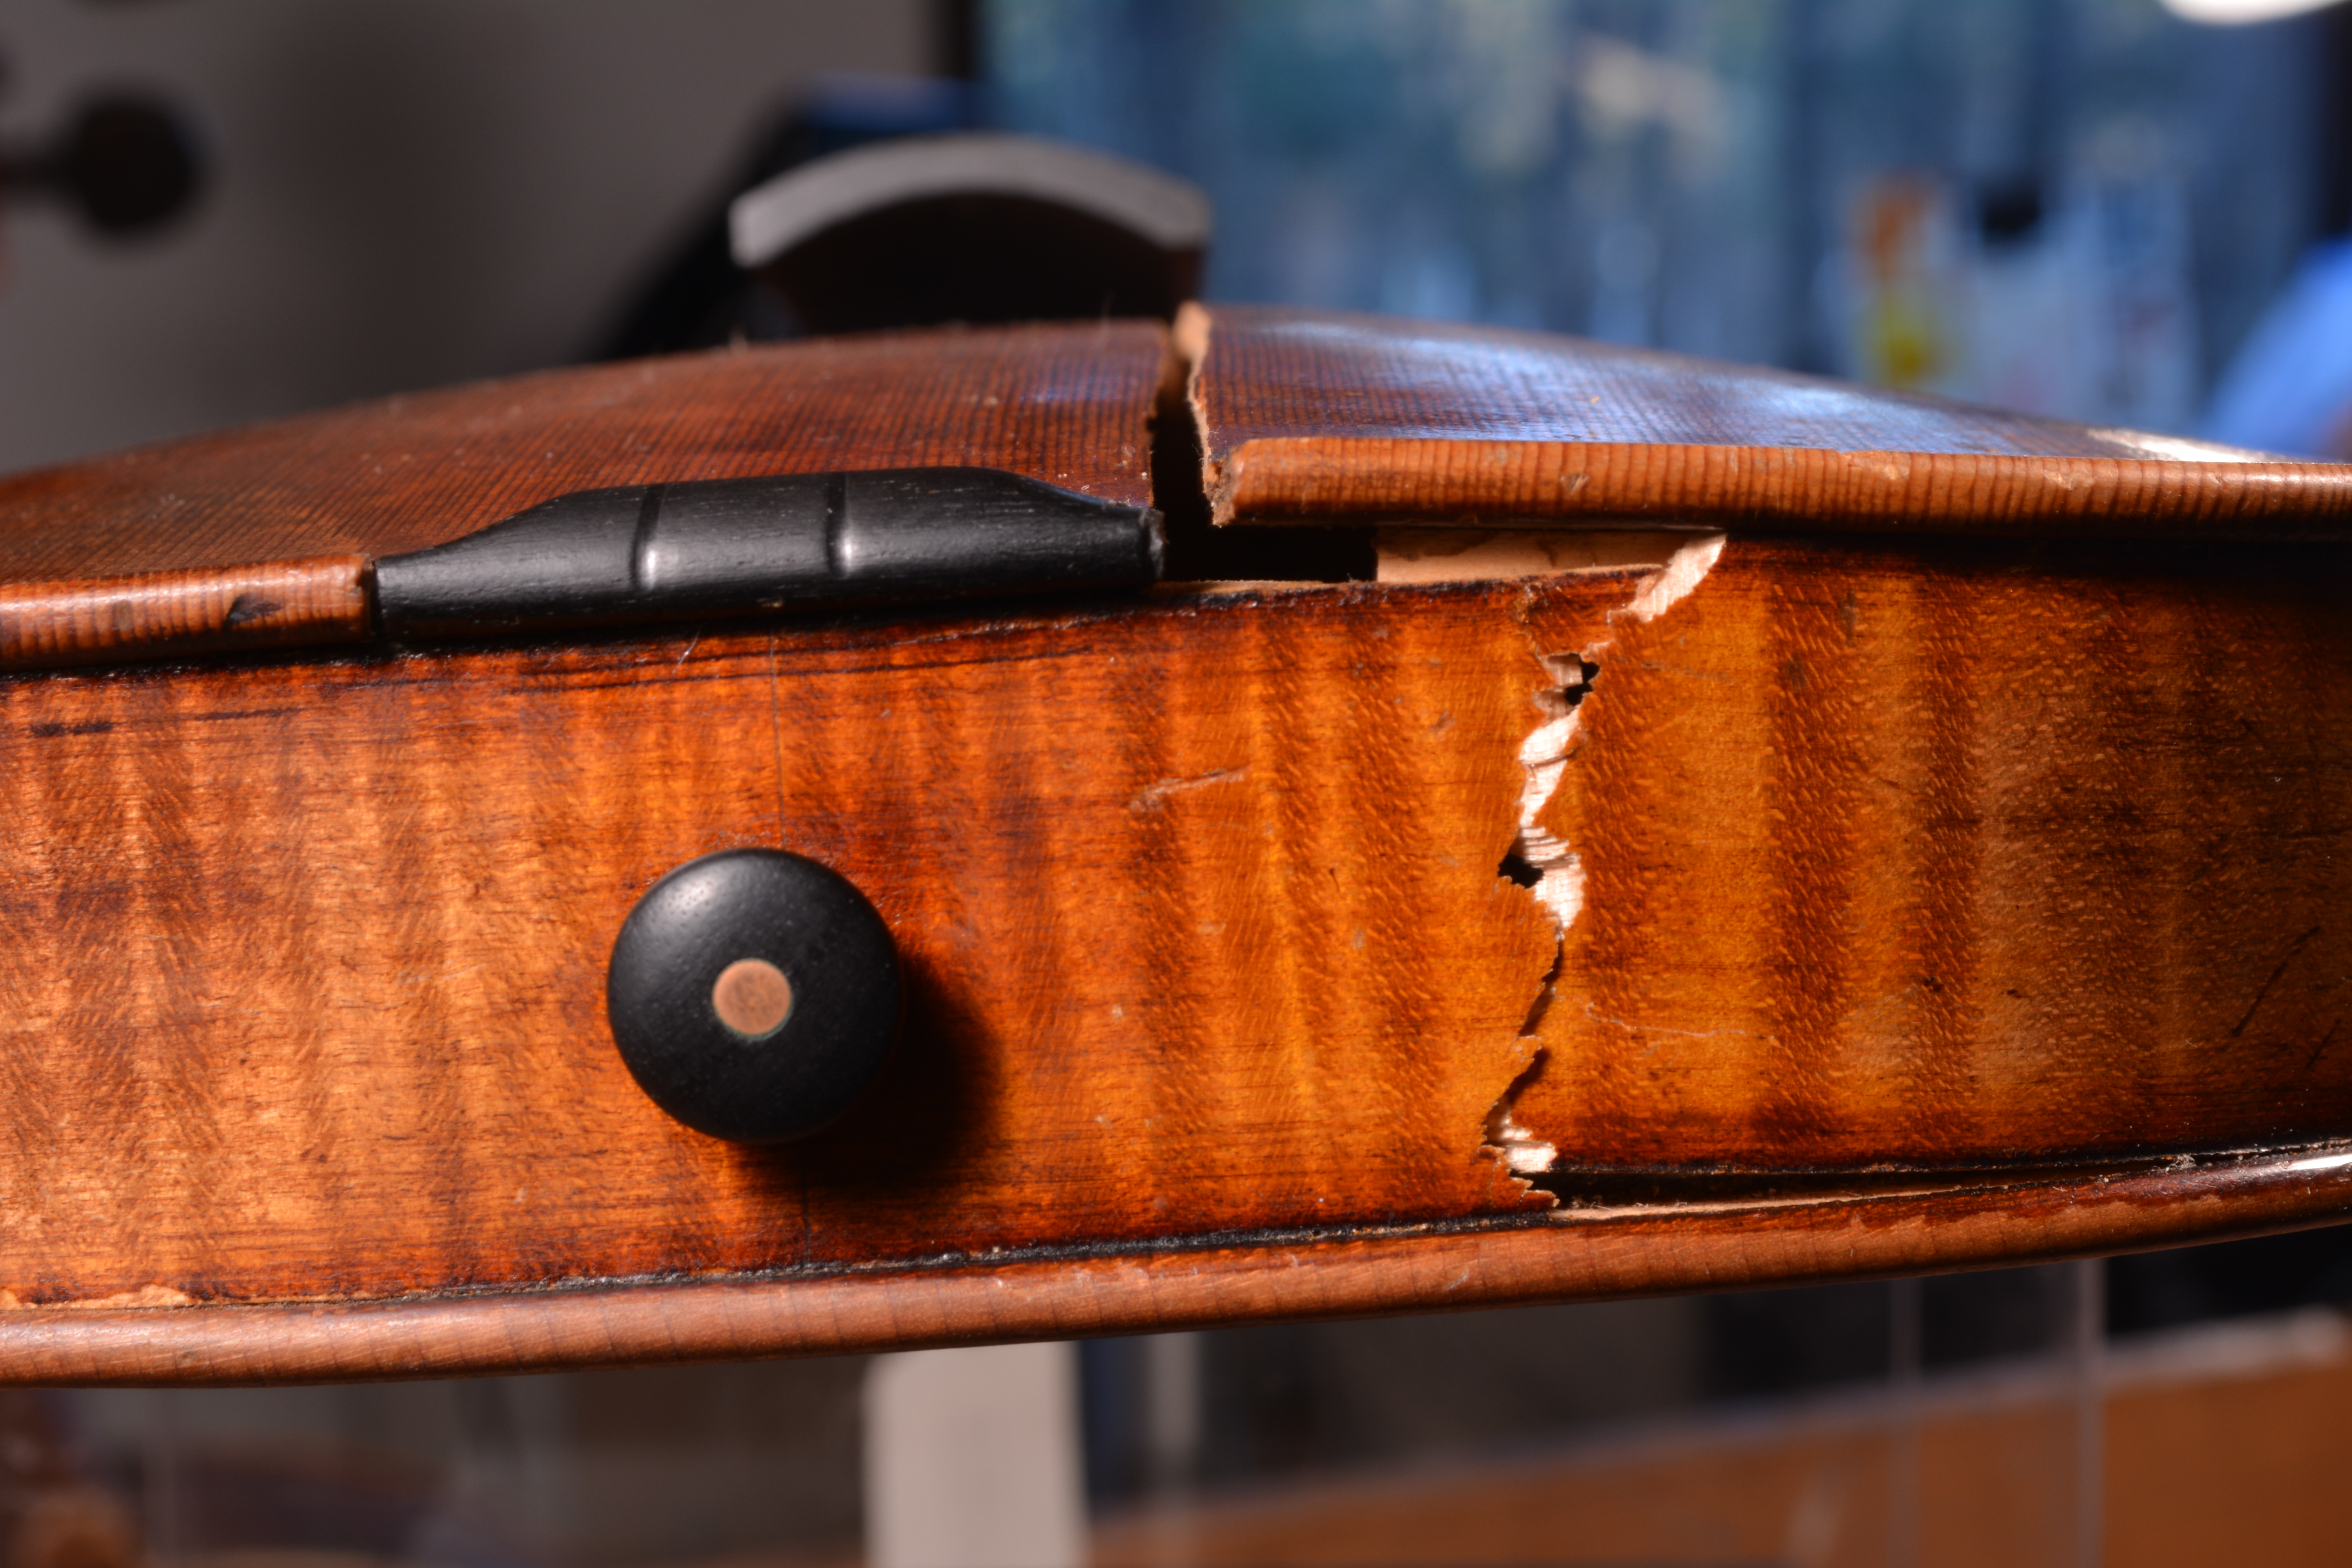
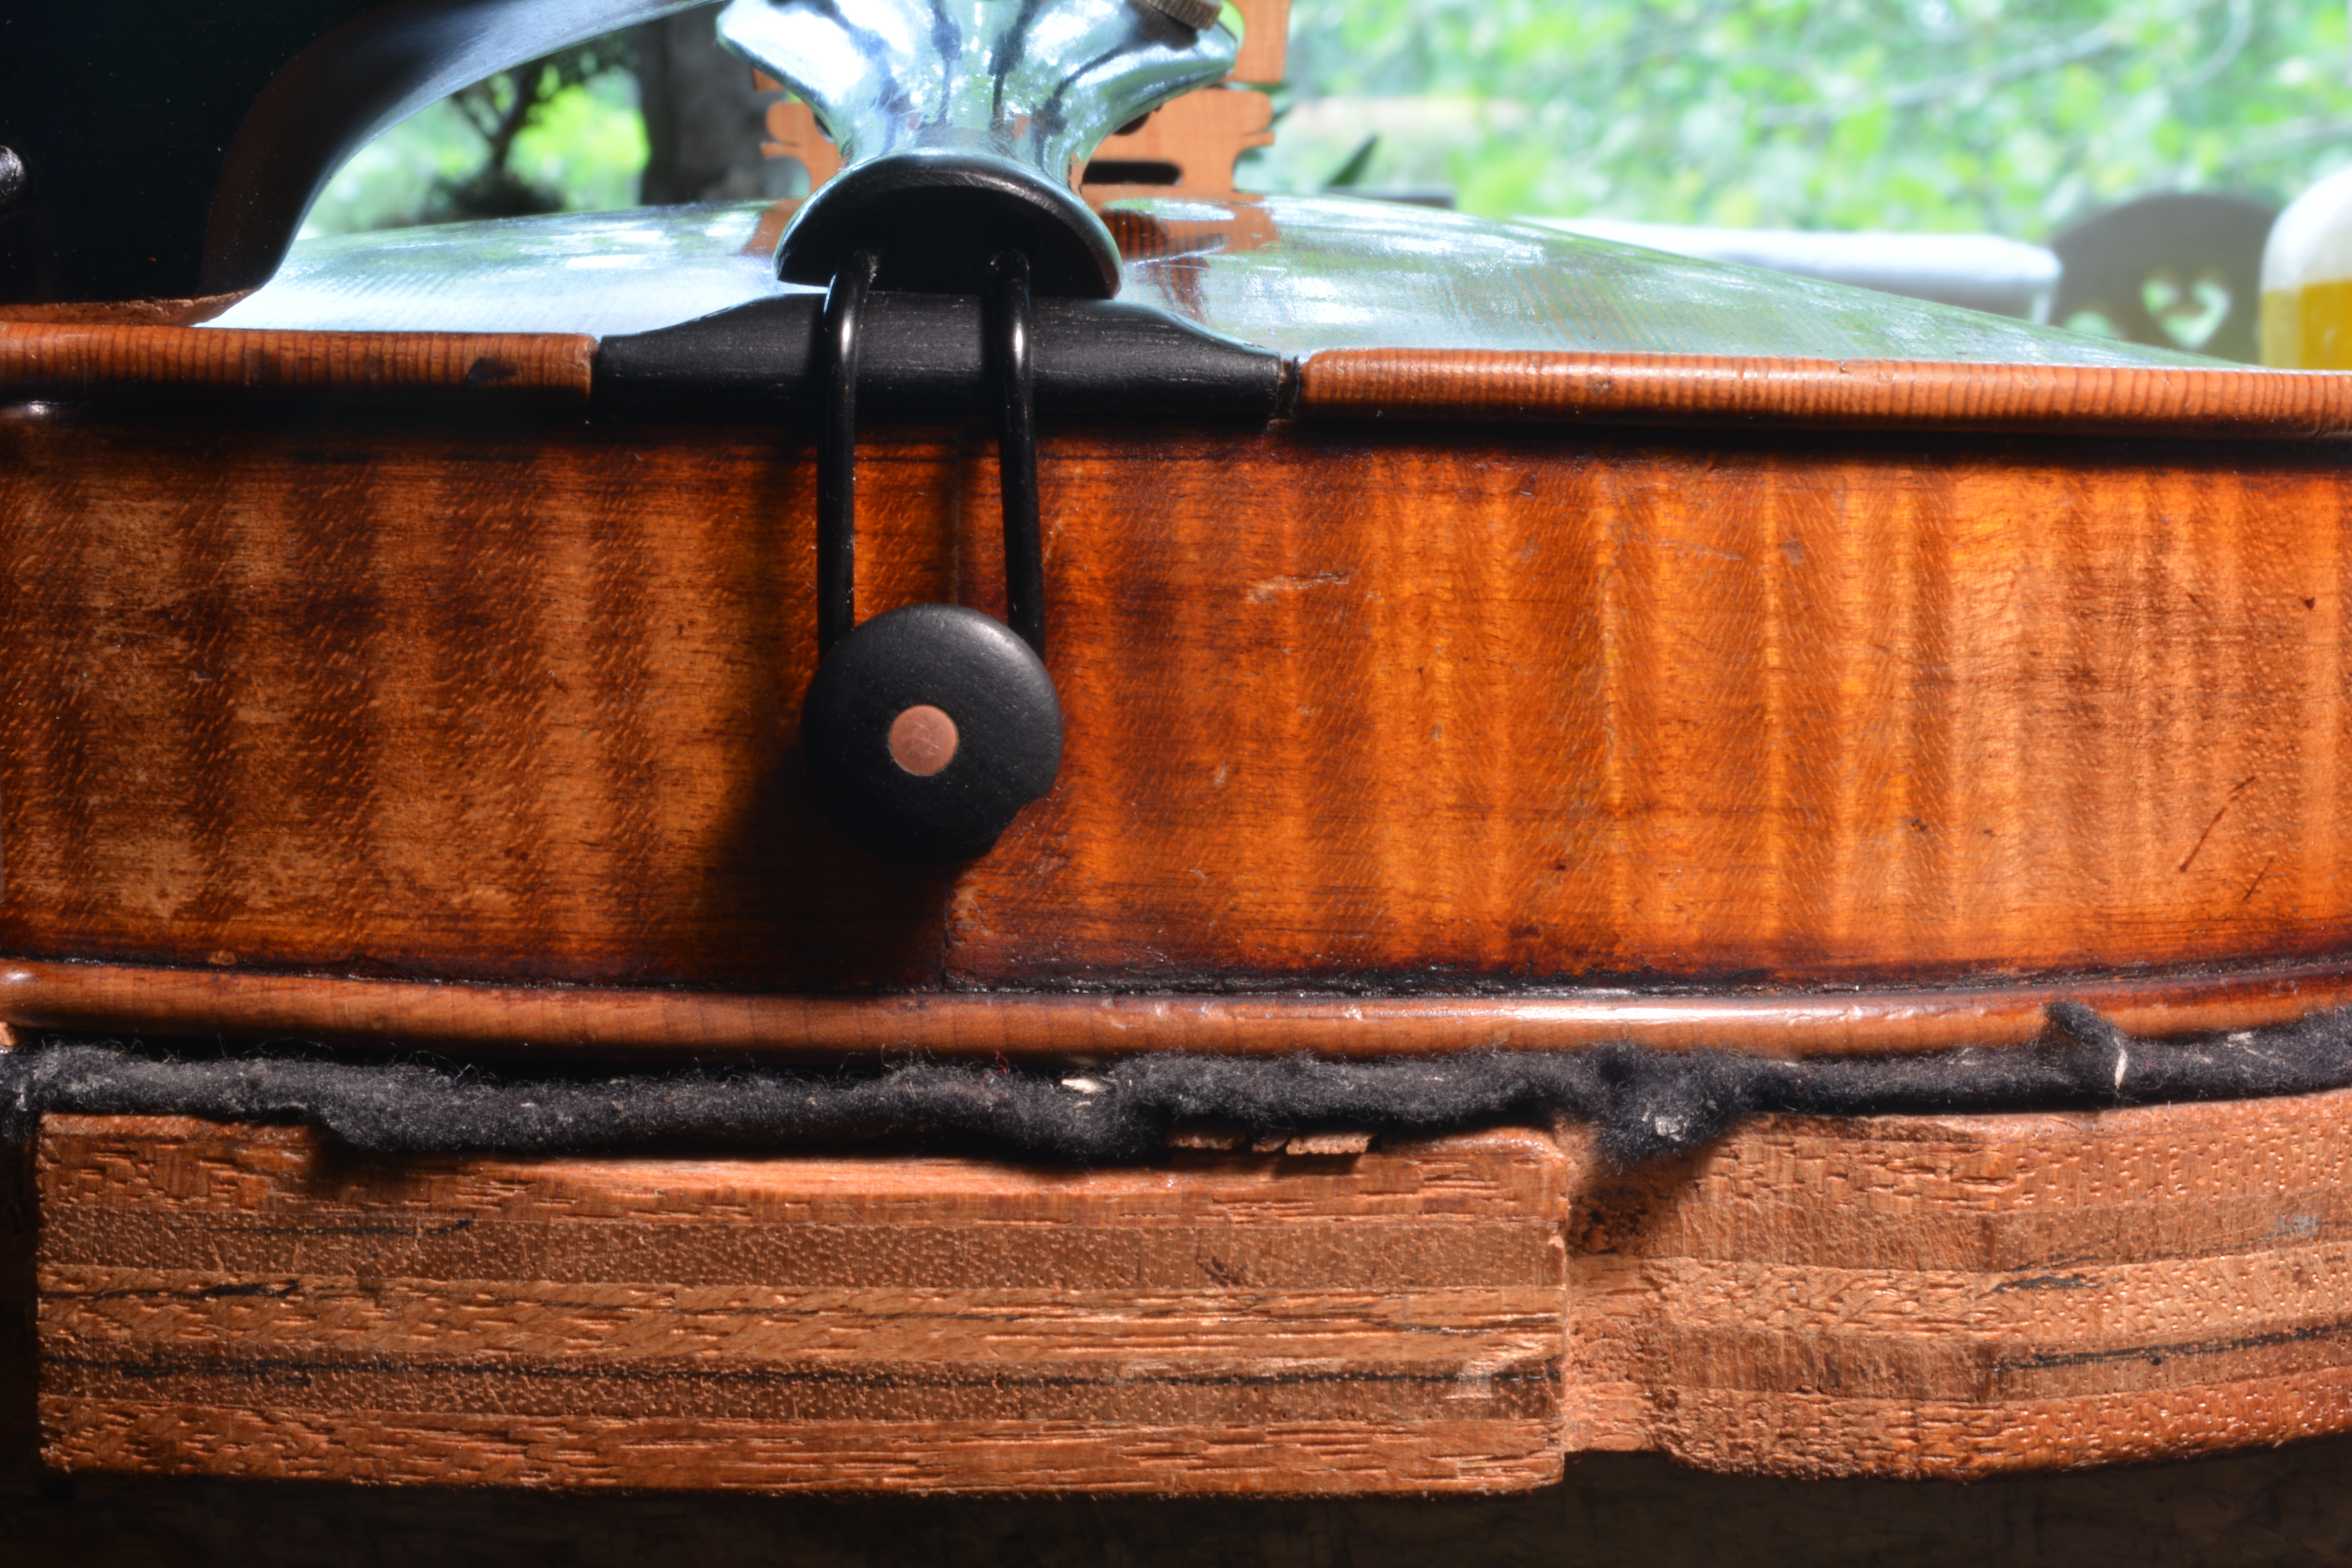
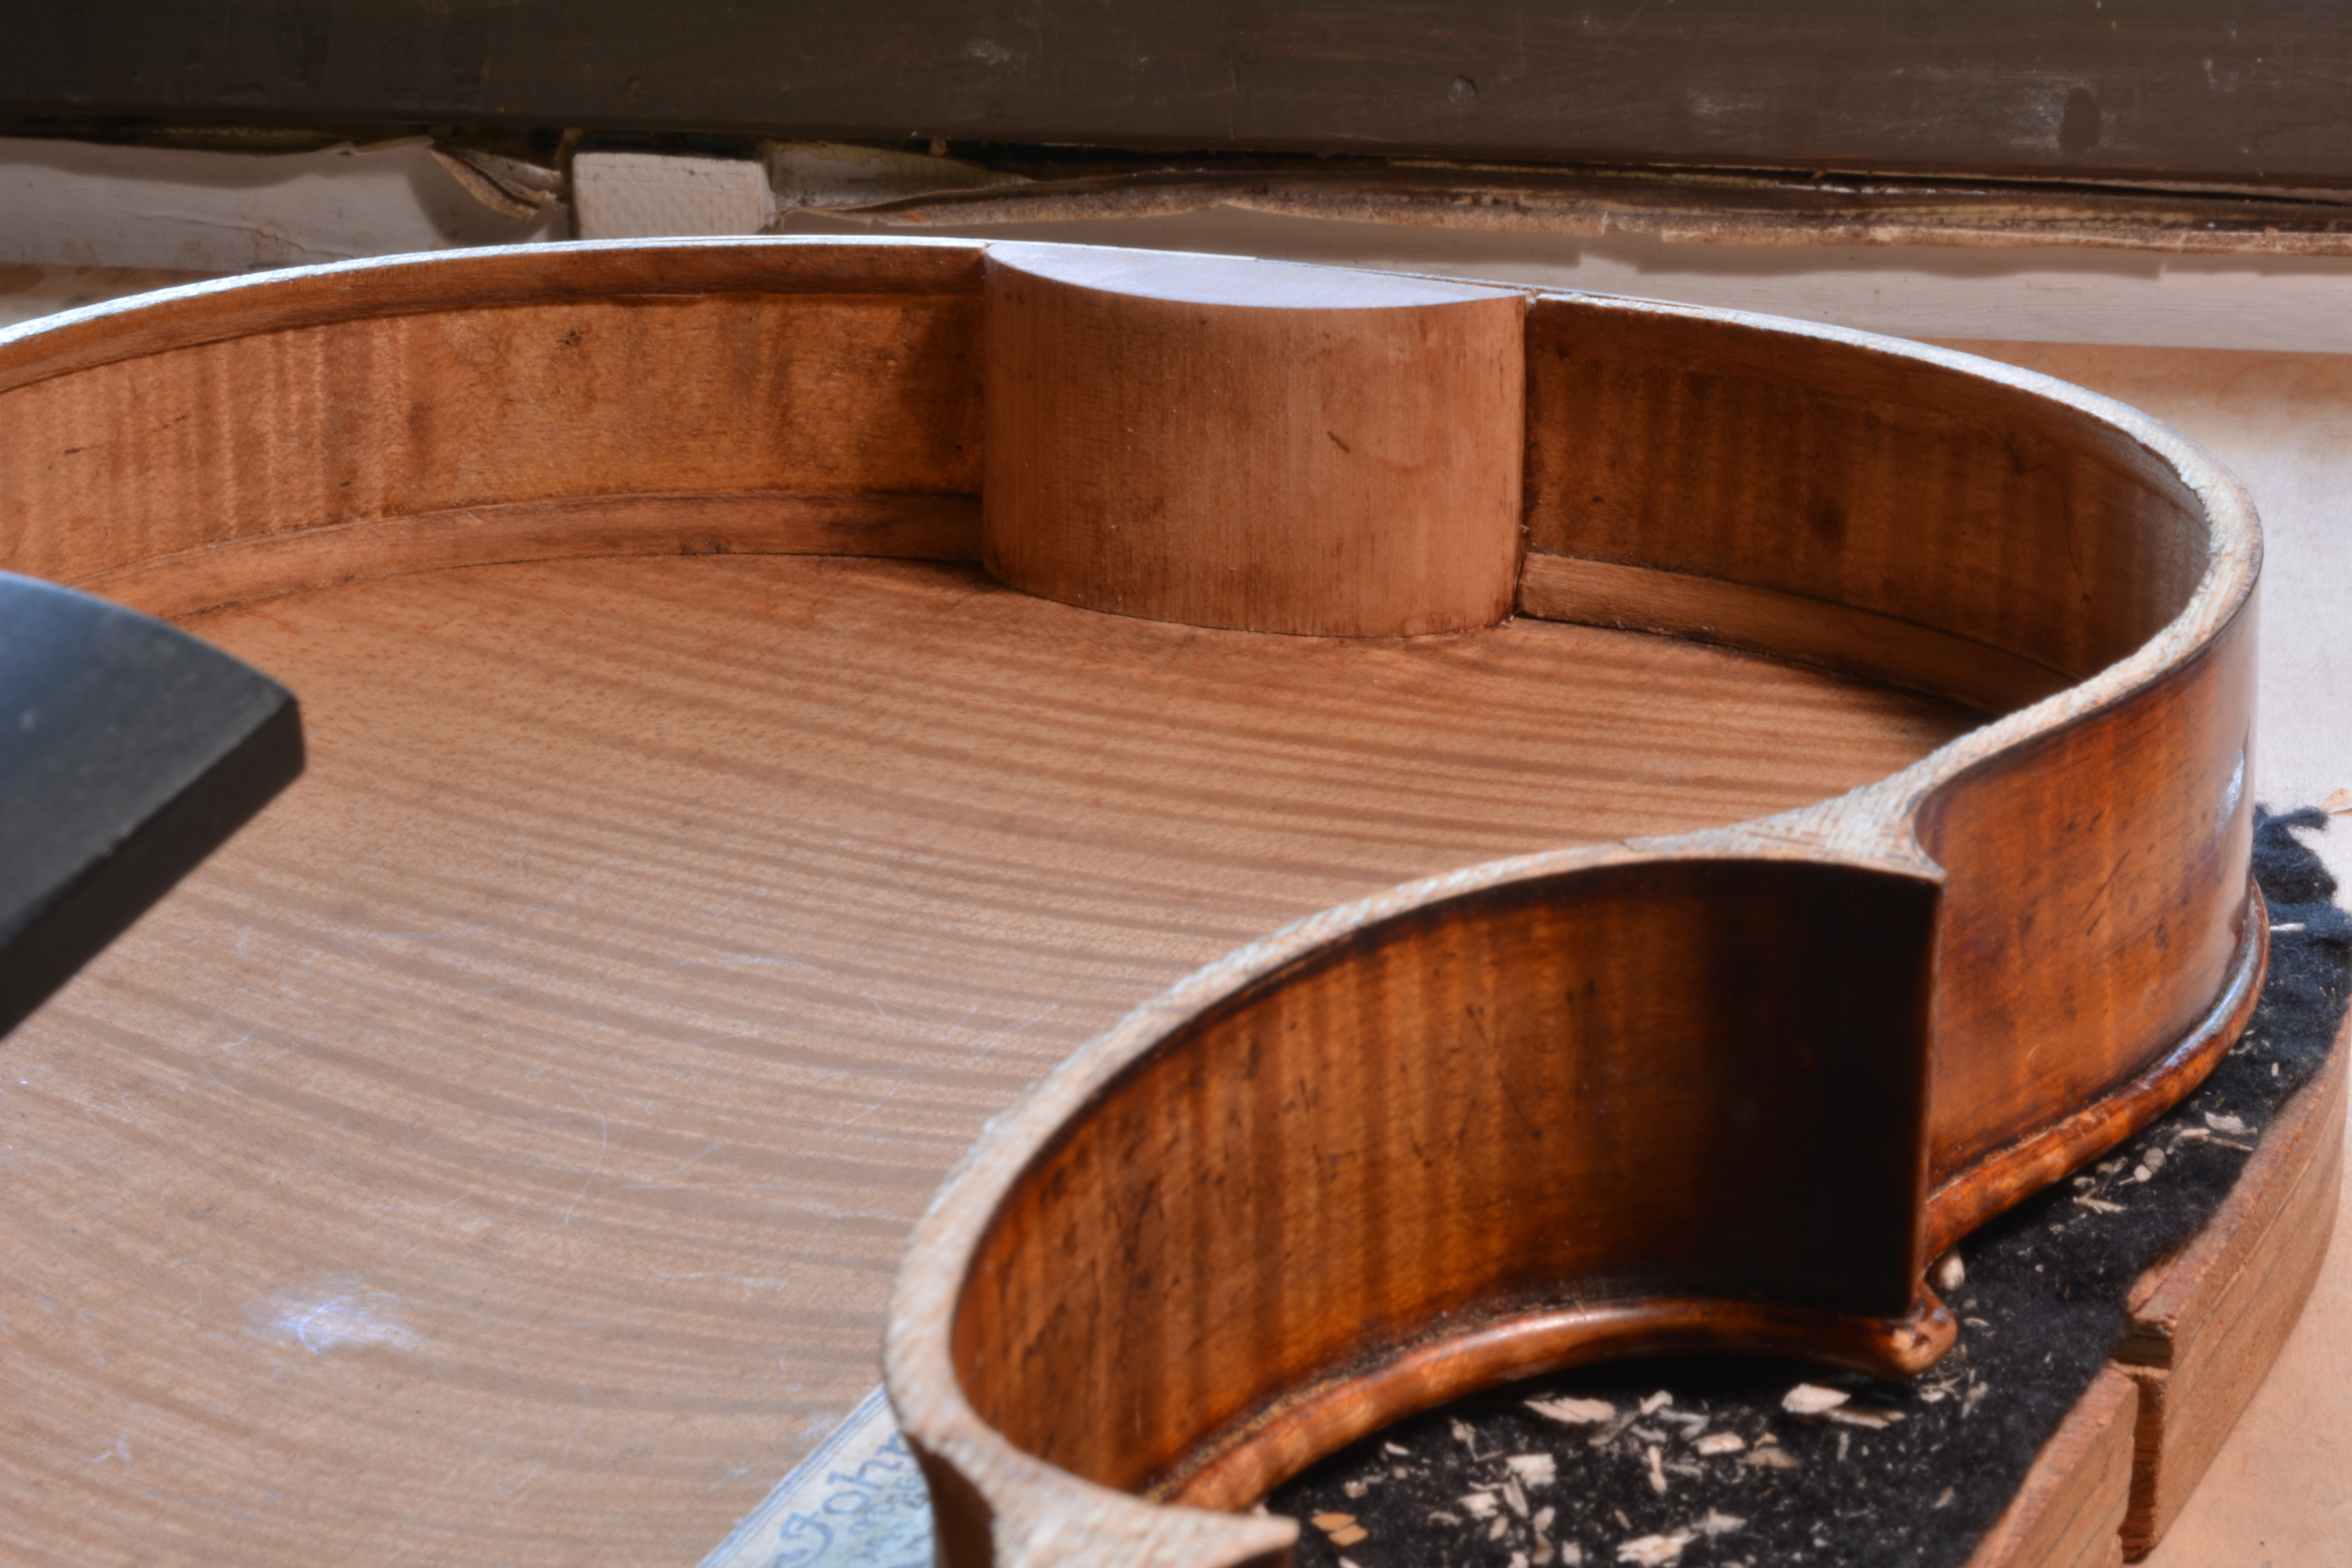
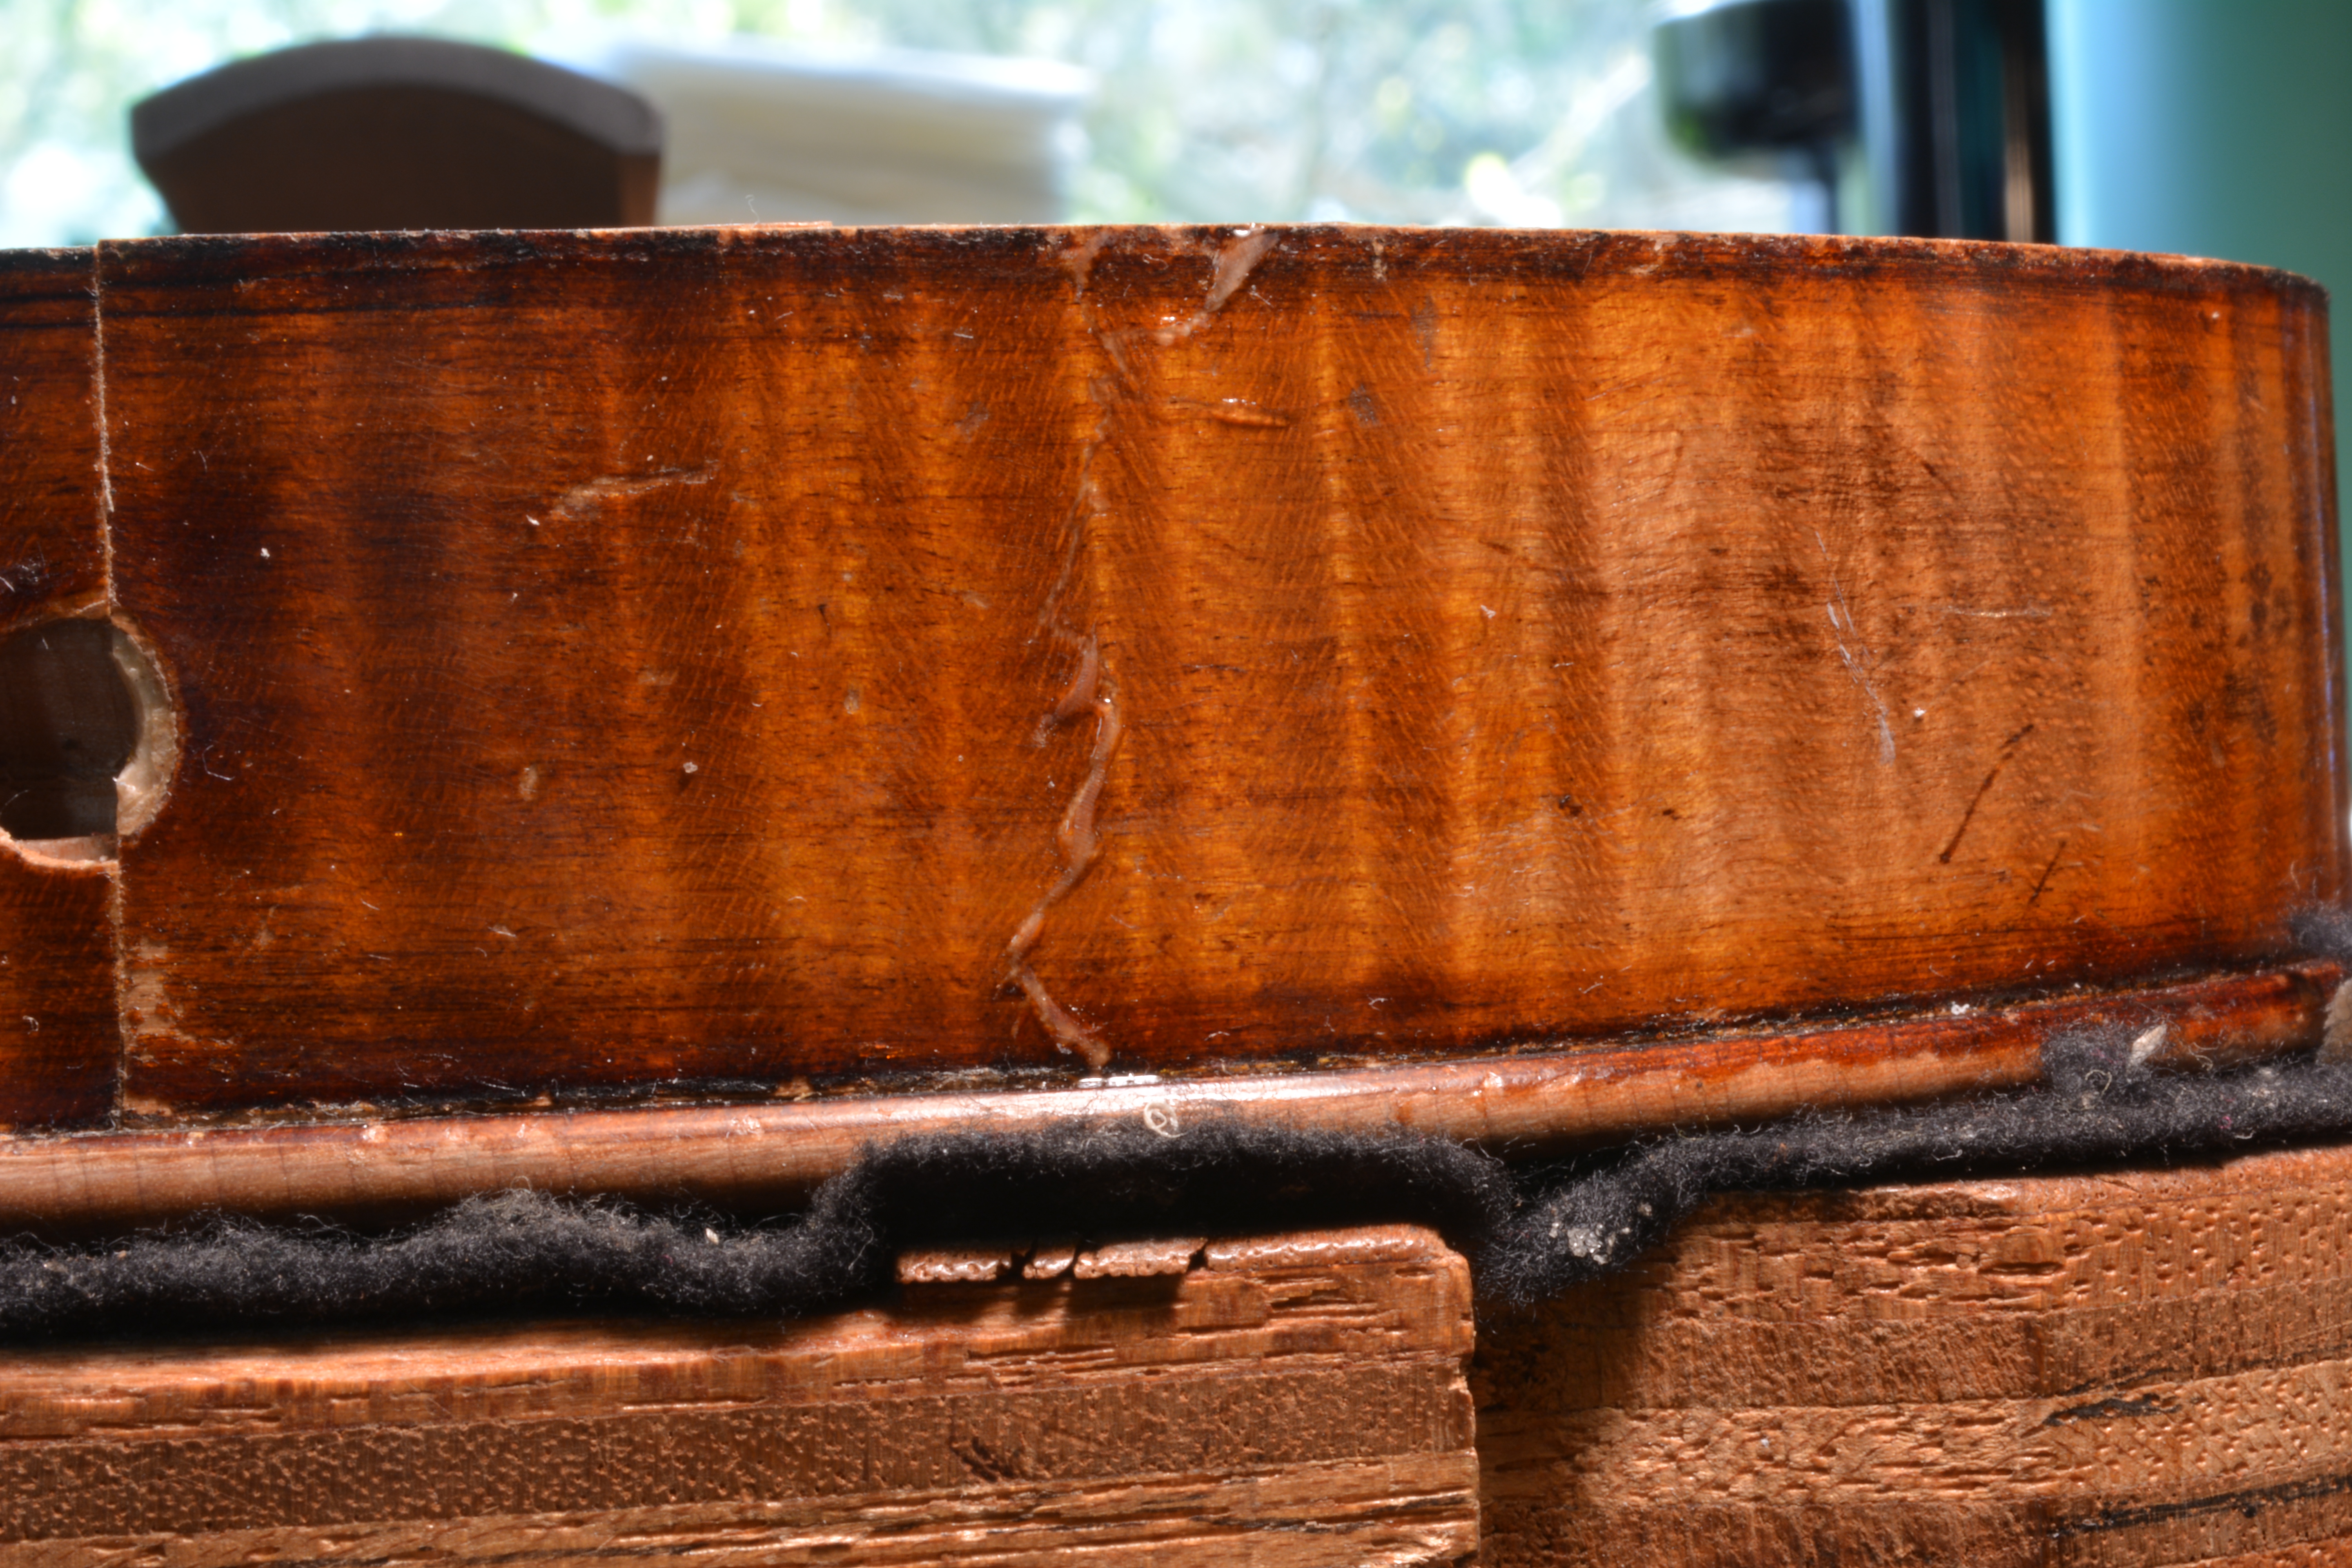
Before removing the rib from the back I completely cut away the broken bottom block. This is a fairly simple operation carried out with a sharp gouge. It’s very important to be in complete control so you DO NOT nick the instrument back with the tool. Take your time and ensure that you don’t lose control.
With the block removed, open the rib to back seam in this area, continue past the lower bout corner block, and more than half way up the C-bout.
After separating the ribs in this section from the back and using an opening knife, split the block in half, aiming for the center of the rib miter. If you split the block exactly at the center of the rib miter, the glue seam at the rib miter will release. Half of the block will still be attached to the rib that you remove, and the other half will still be attached to the rest of the rib structure. Now that the ribs are completely removed, you can release the linings using an opening knife. After removing each lining, it’s important to label where they are from (top and back), and store them in a safe place (such as a Tupperware container).
Gluing the Crack
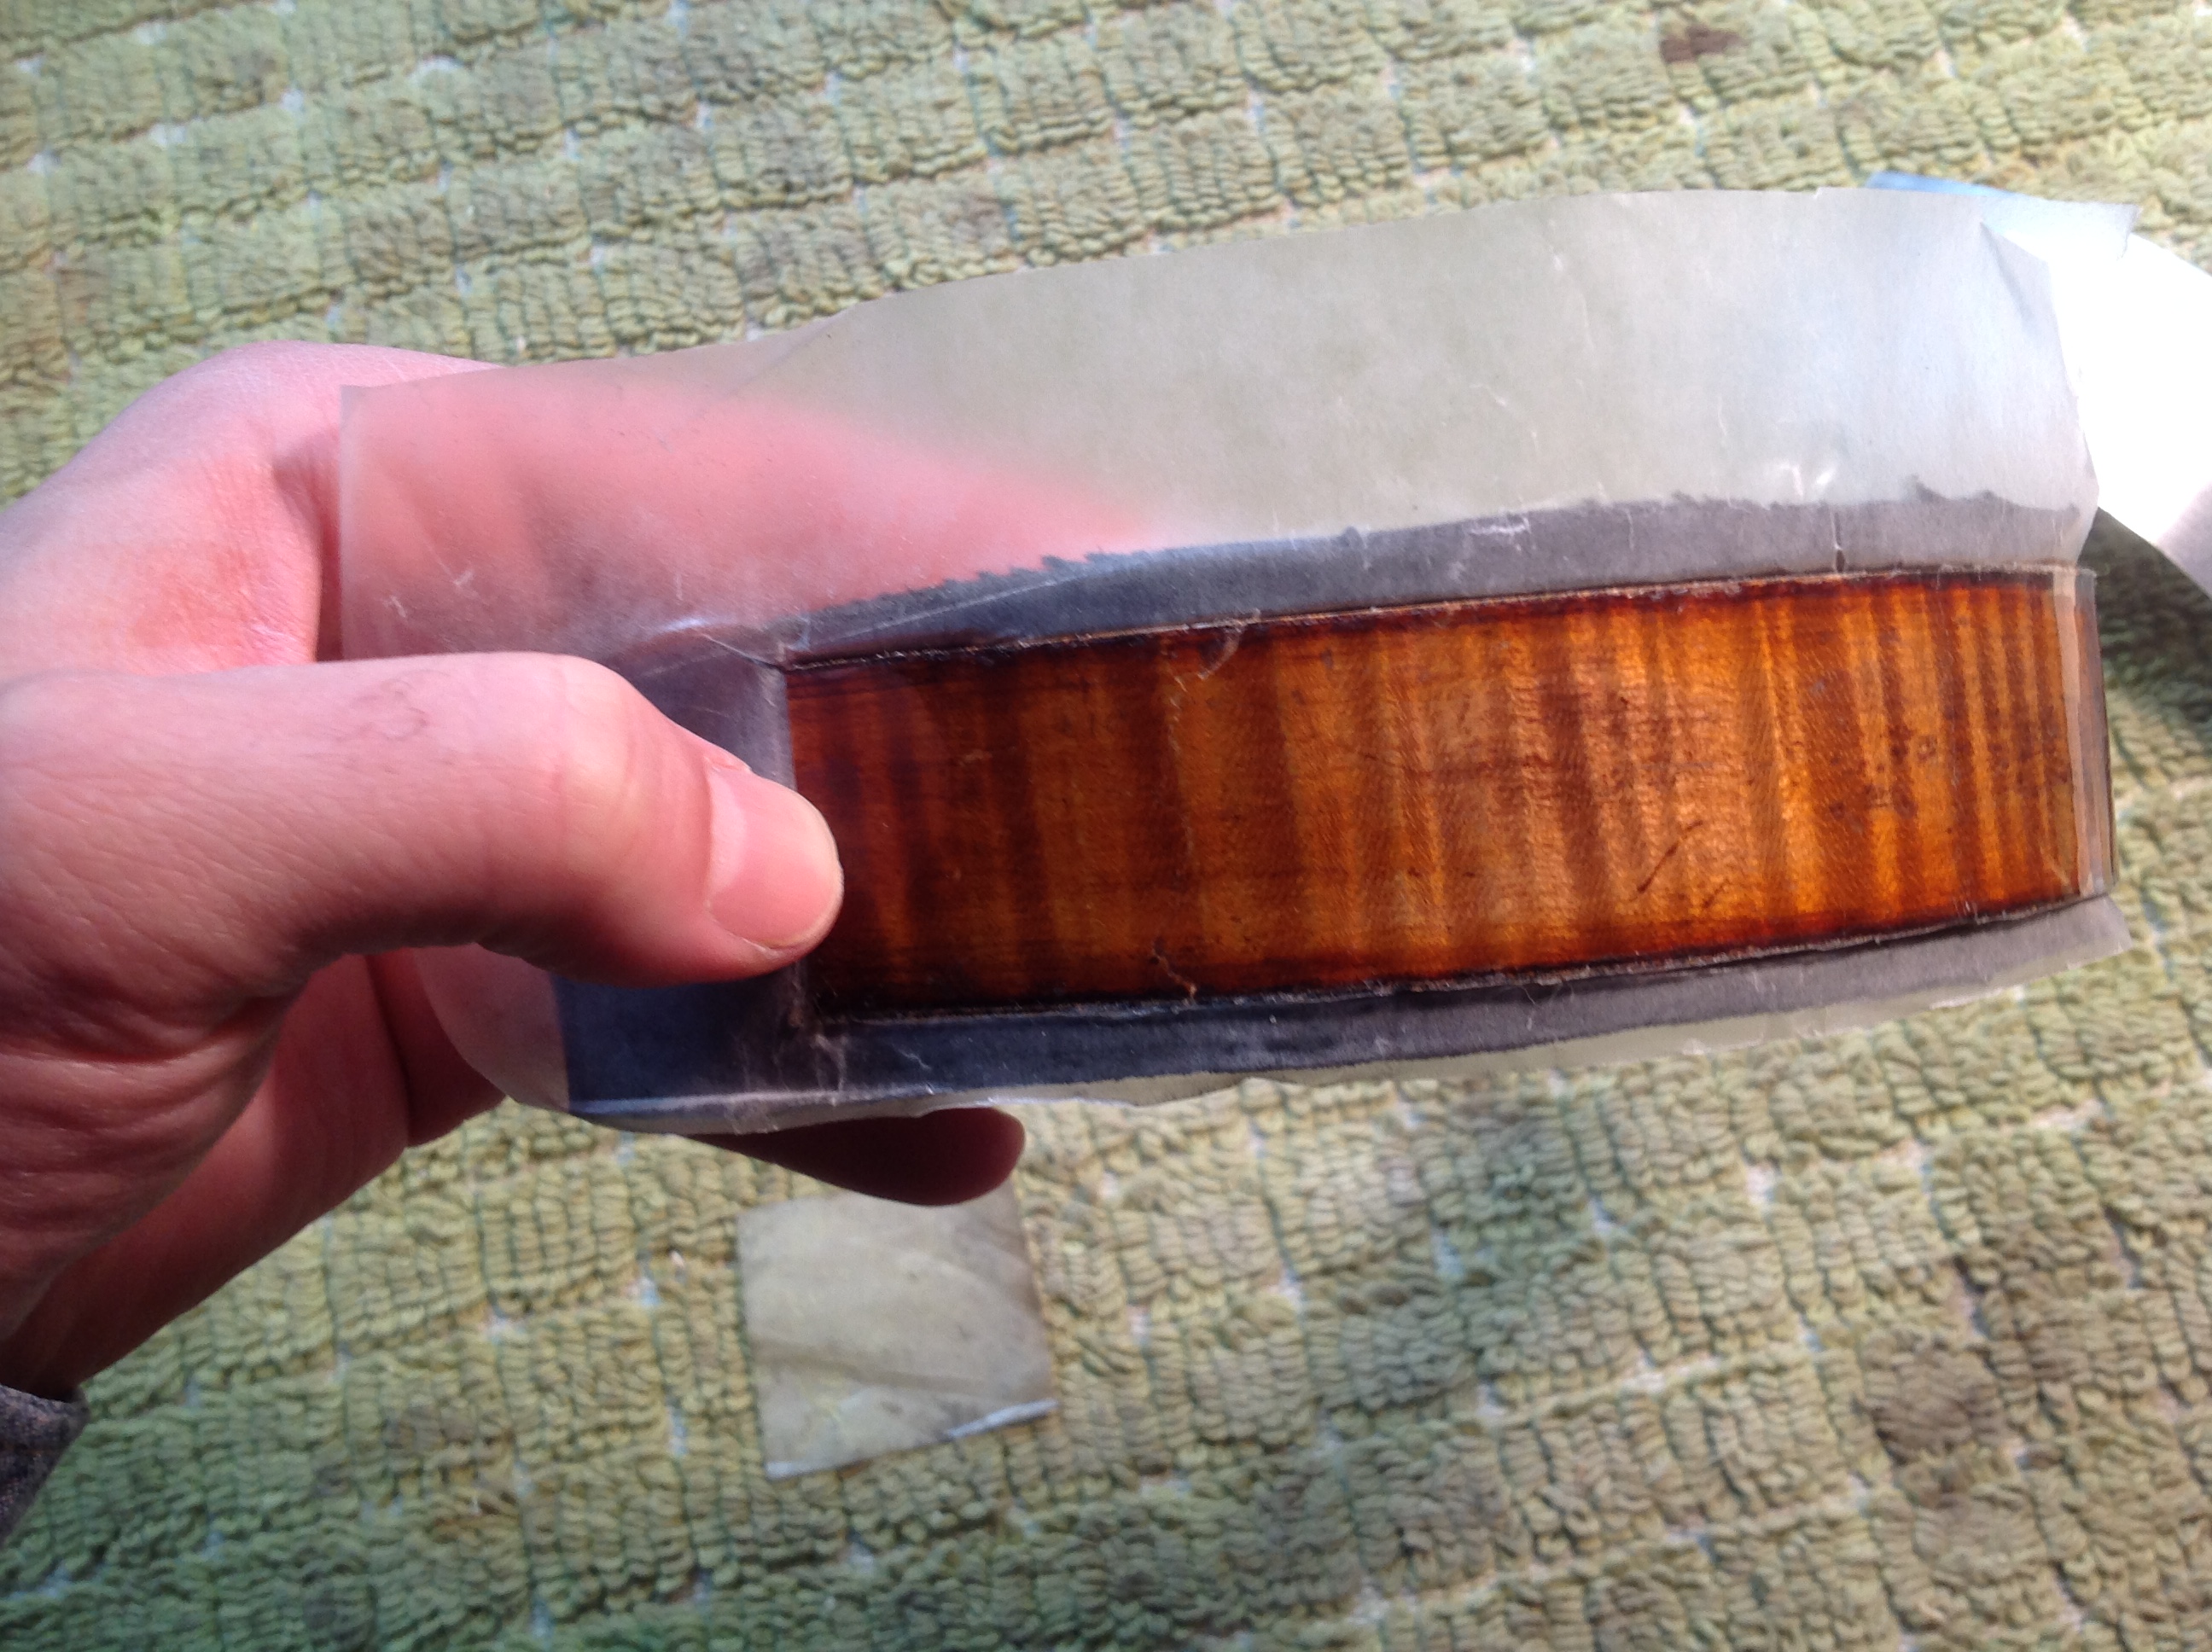
After removing the rib, place the rib in the rib form and line up the crack. It’s very important to make sure that the crack does not gap when the two sides are placed together as closely as possible. Of course there will be missing material, but for strength, ethics, and your ability to do quality retouch later you must keep this crack as closed as possible. This may seem to be obvious, but once you glue this kind of crack and place it in a rib form under tension, the wood’s natural tendency is to migrate apart. To counteract this we are going to use thick packing tape along the entire surface of the rib and over the crack.
Properly Applying Tape Over Rib
Read the full technique article at: https://trianglestrings.com/applying-removing-rib-protector. The process for applying the tape to this rib is the same, although for this application I used a thicker packing tape that was less likely to stretch. The packing tape will act as a hinge when gluing the crack, and will also keep the crack together while it’s in the form.
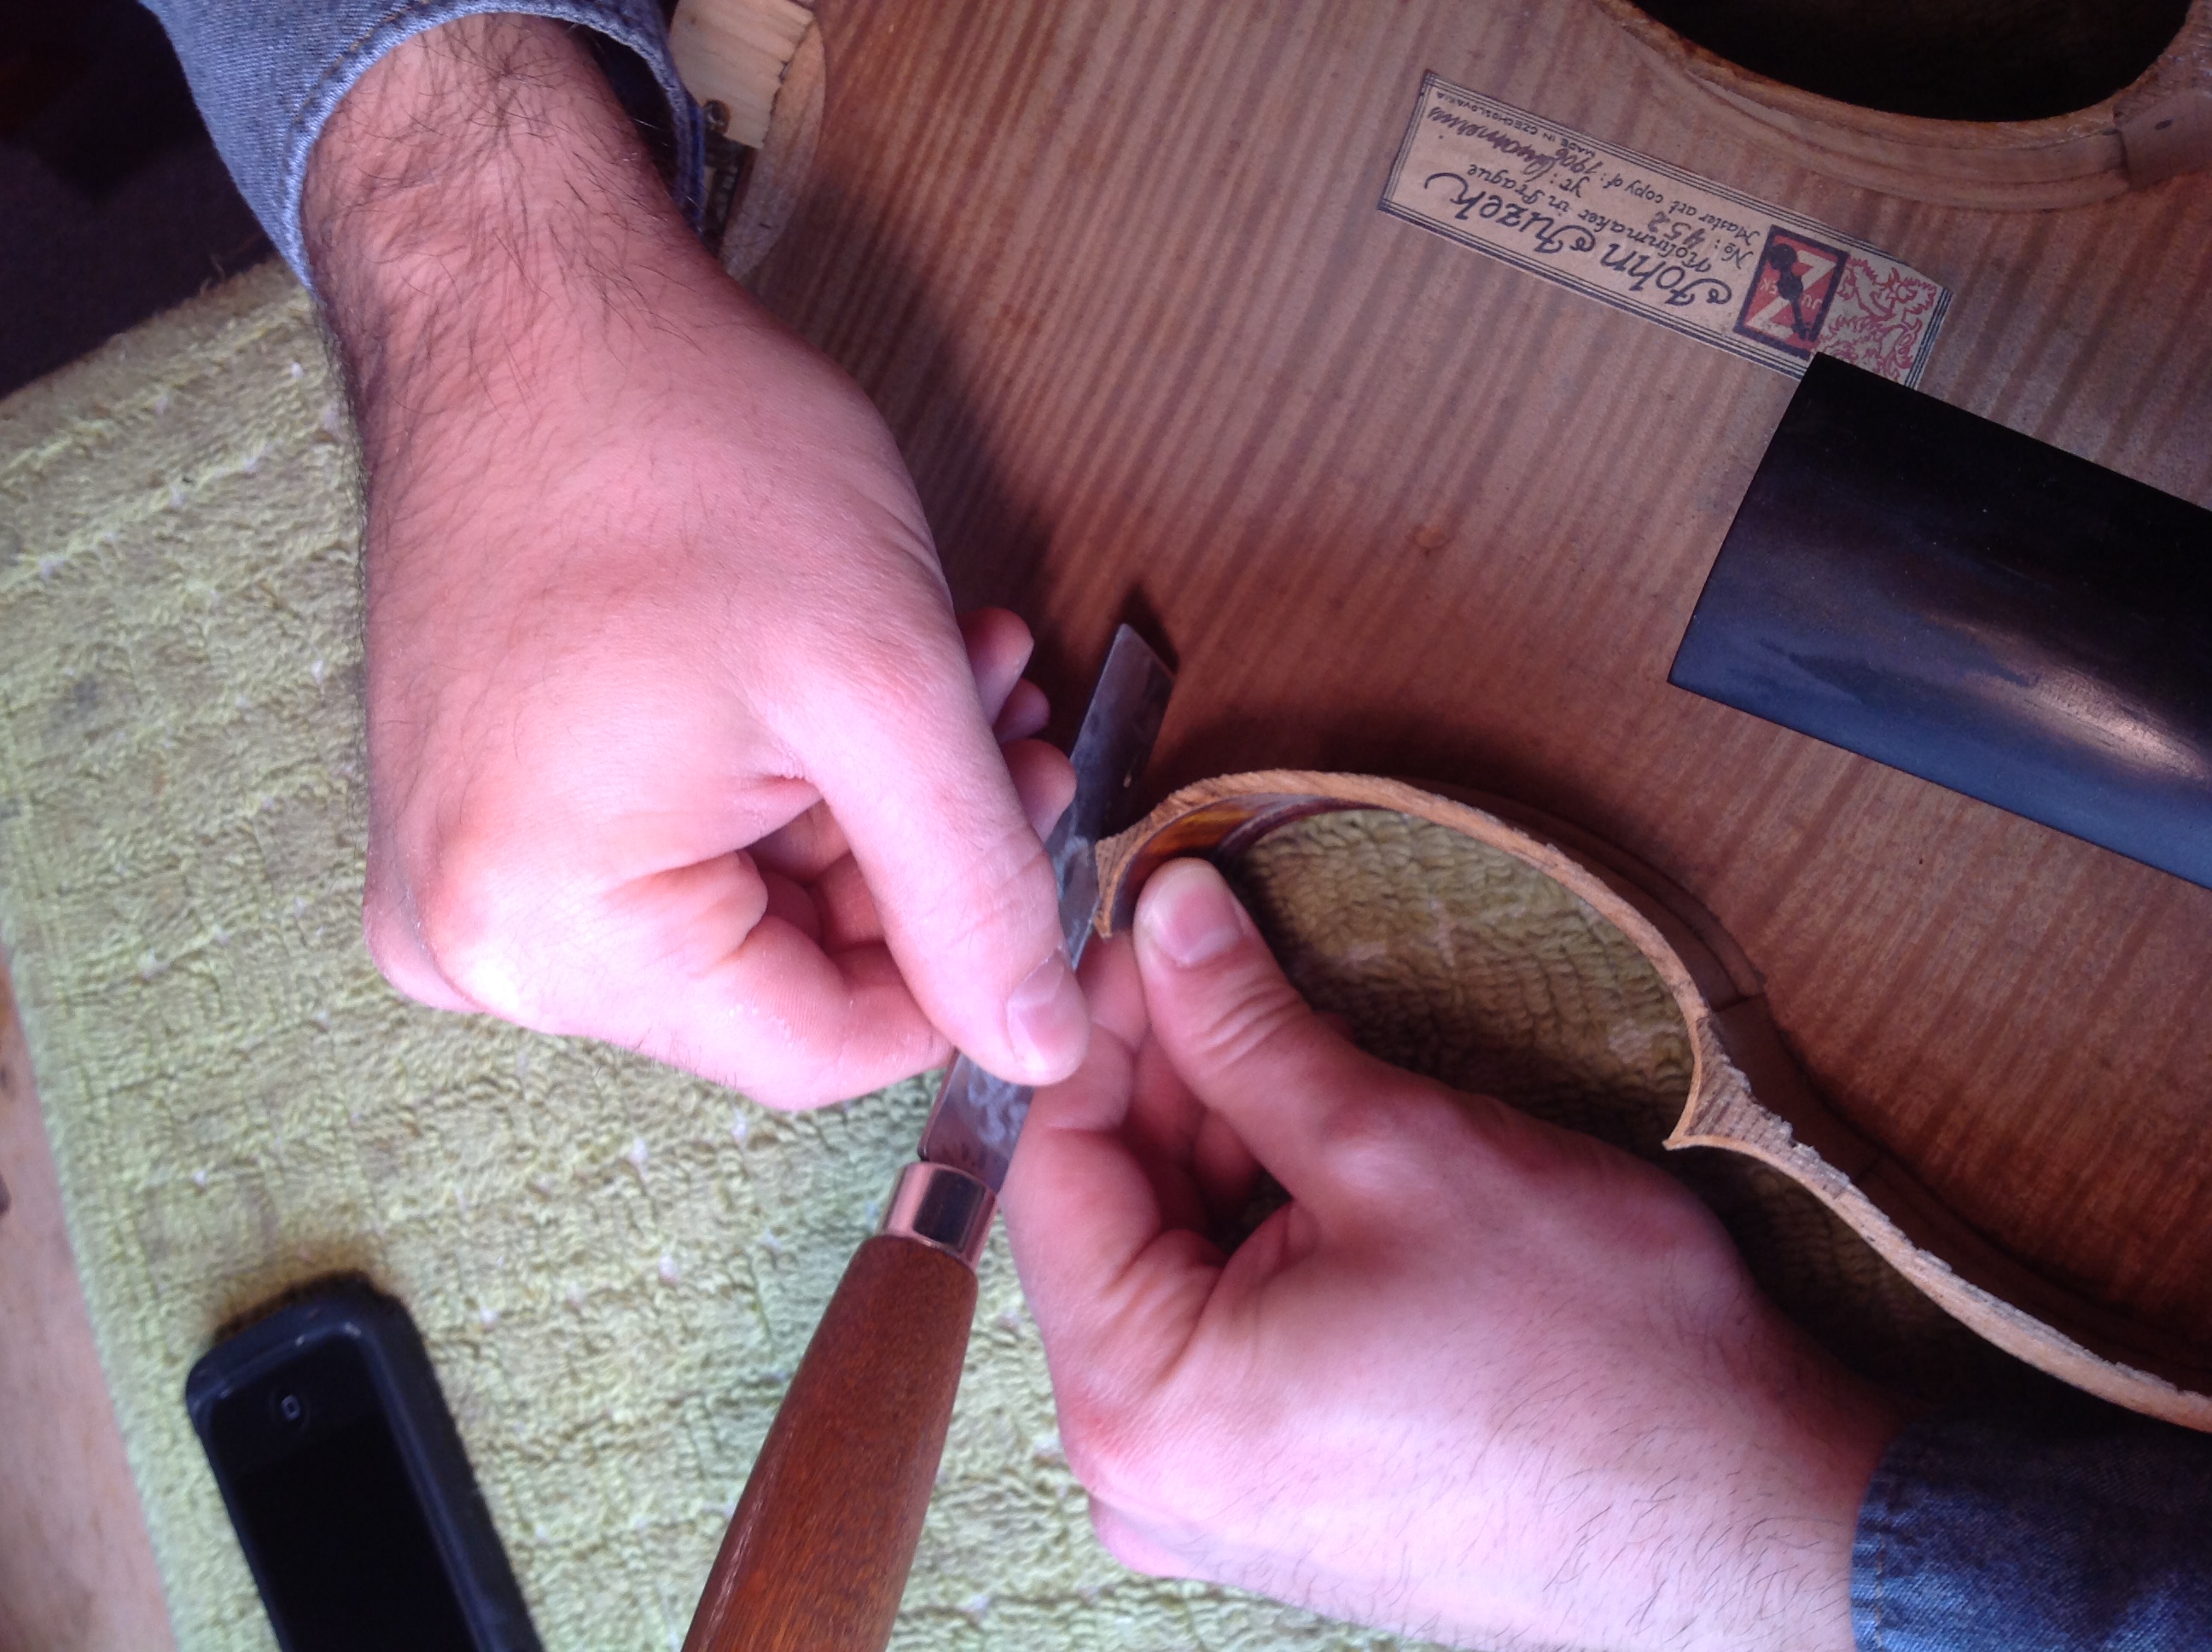
Gluing the crack
Using a clean brush, dot glue along the crack on the inside, unvarnished surface of the rib while slightly hinging the crack open. You have to be careful when doing this because if you hinge it too much, you will damage the crack even further. After applying the glue with a brush, take your (clean!) index finger and move it diagonally along the crack. After you have worked glue into all inner surfaces of the crack, remove the excess with a moist, but not wet, paper towel.
Clamp it
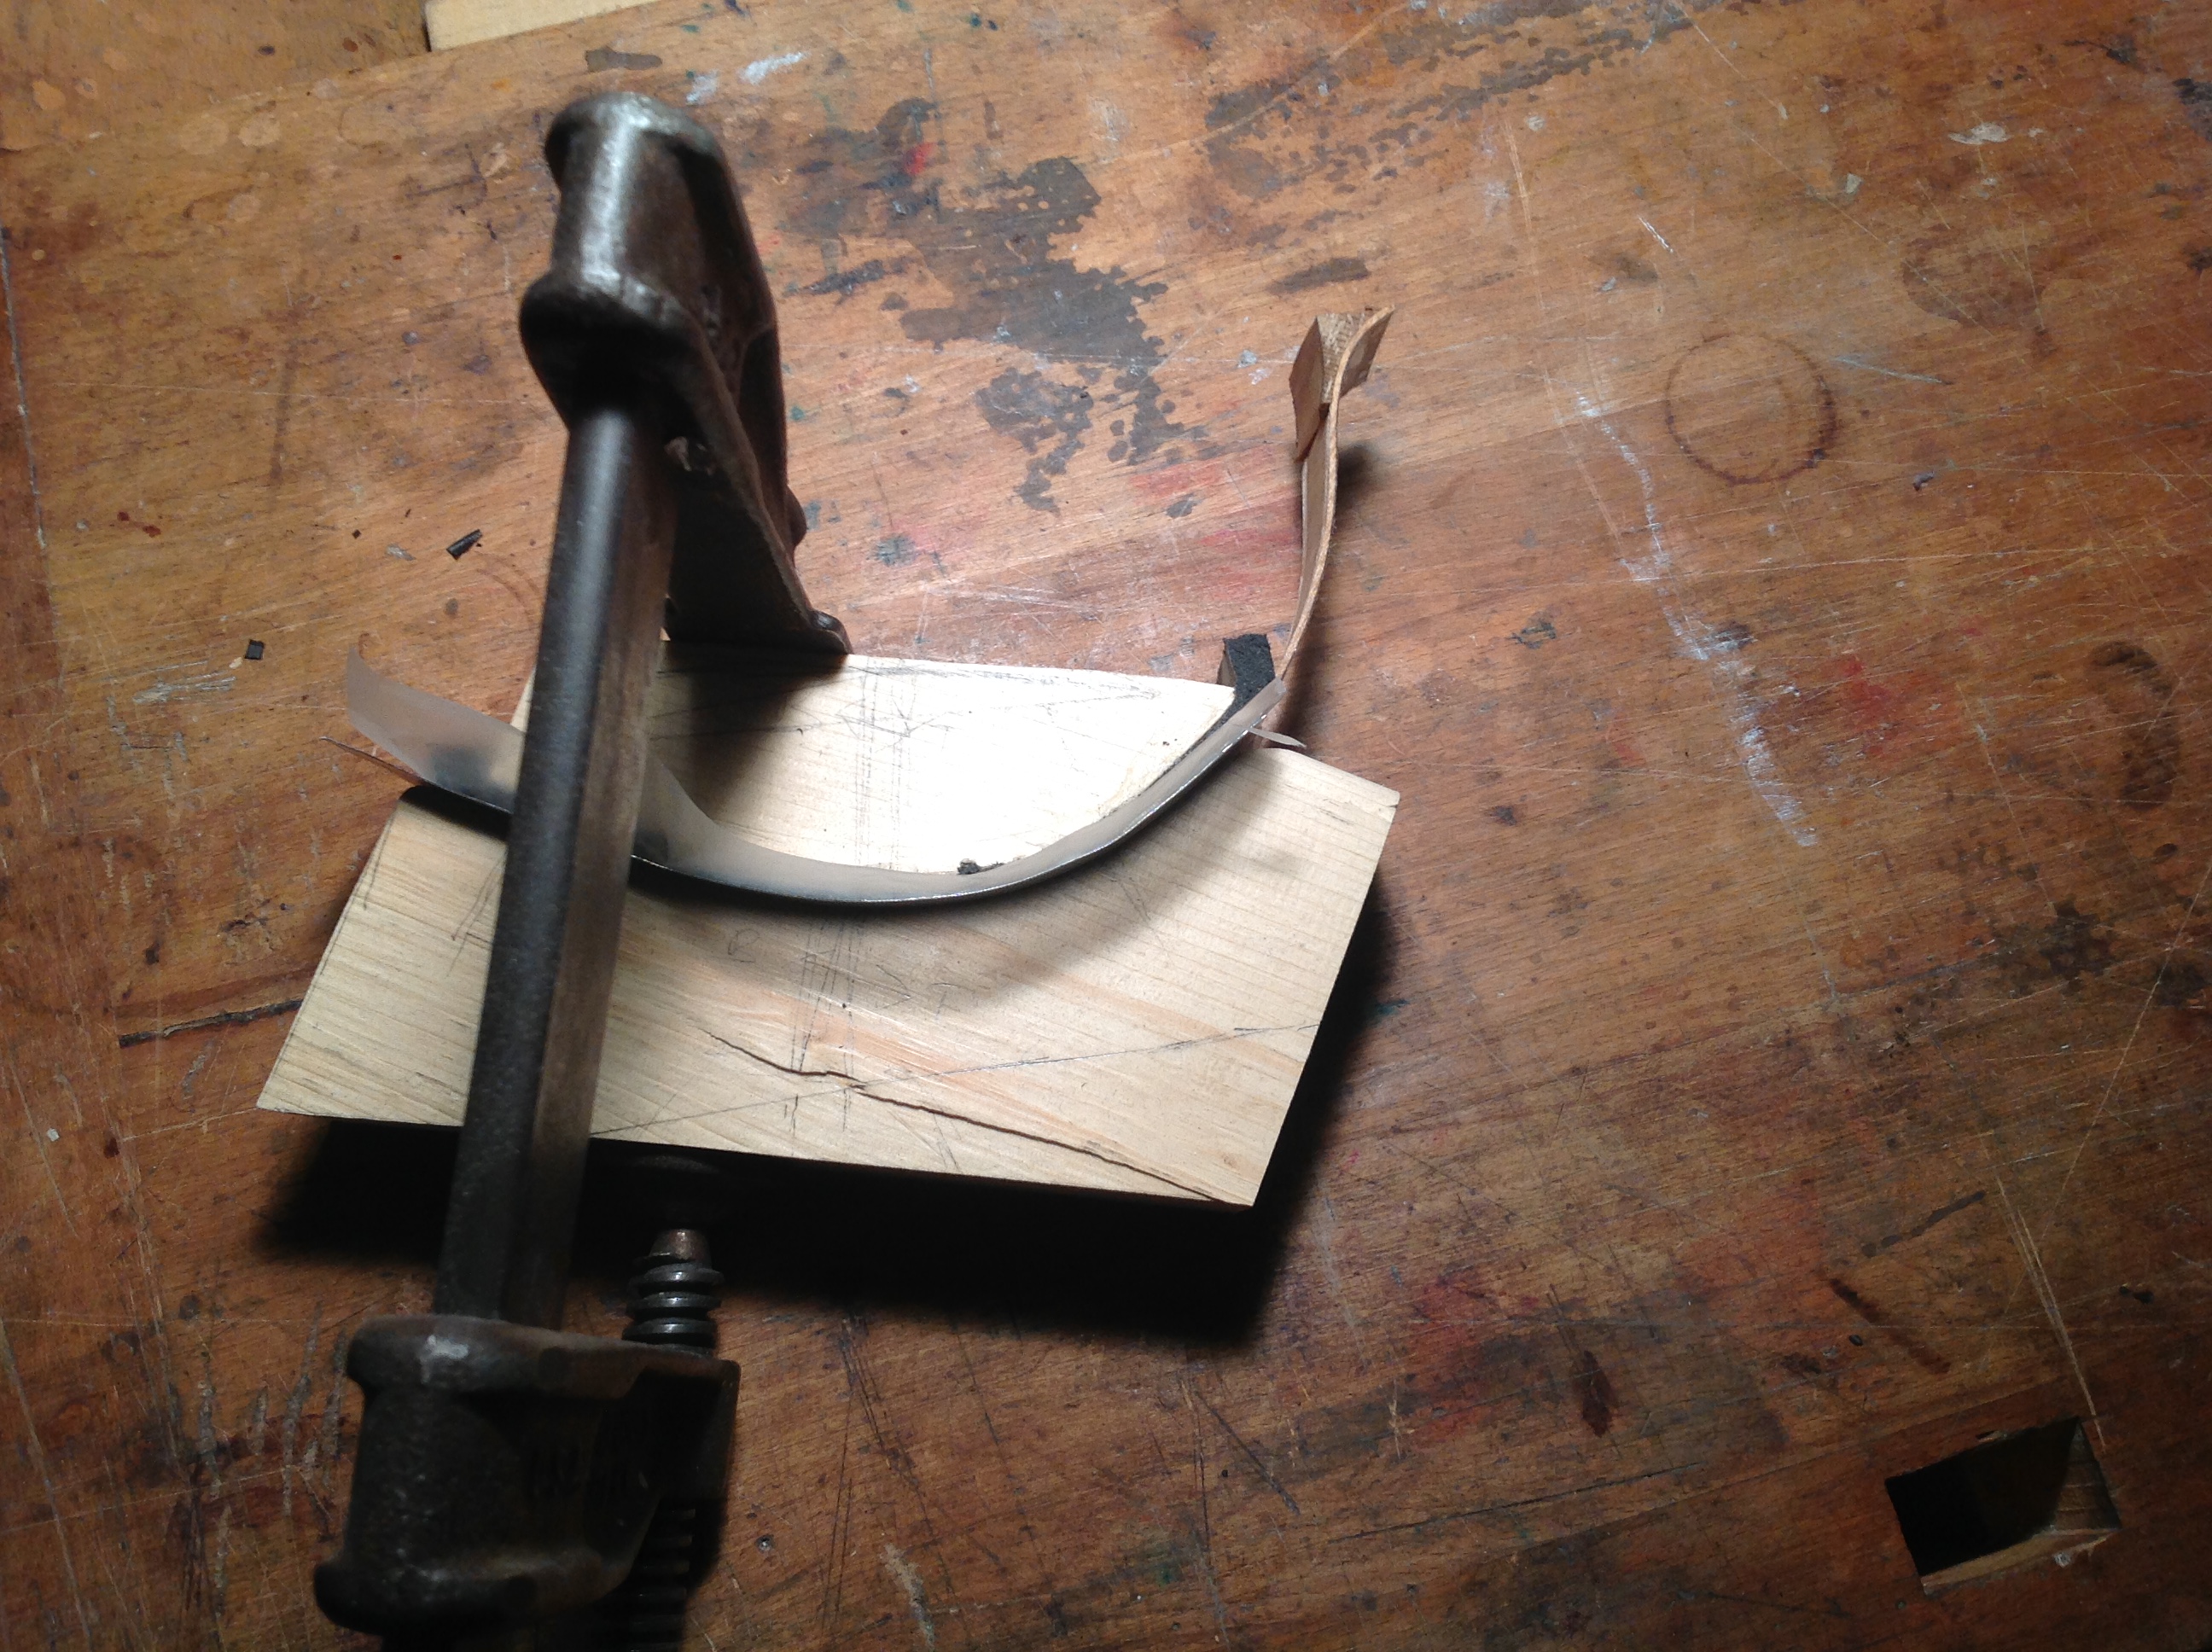
Place the rib back in the form and clamp it with generous clamping pressure. Don’t forget the wax paper and aluminum mentioned in the previous article! Without them the glue will stick to the closed cell rubber and take forever to dry. Most importantly, without the aluminum you will ruin the texture on the varnish surface.
I would allow several days if not a week to let this crack dry in the form.
Starting the Ramp
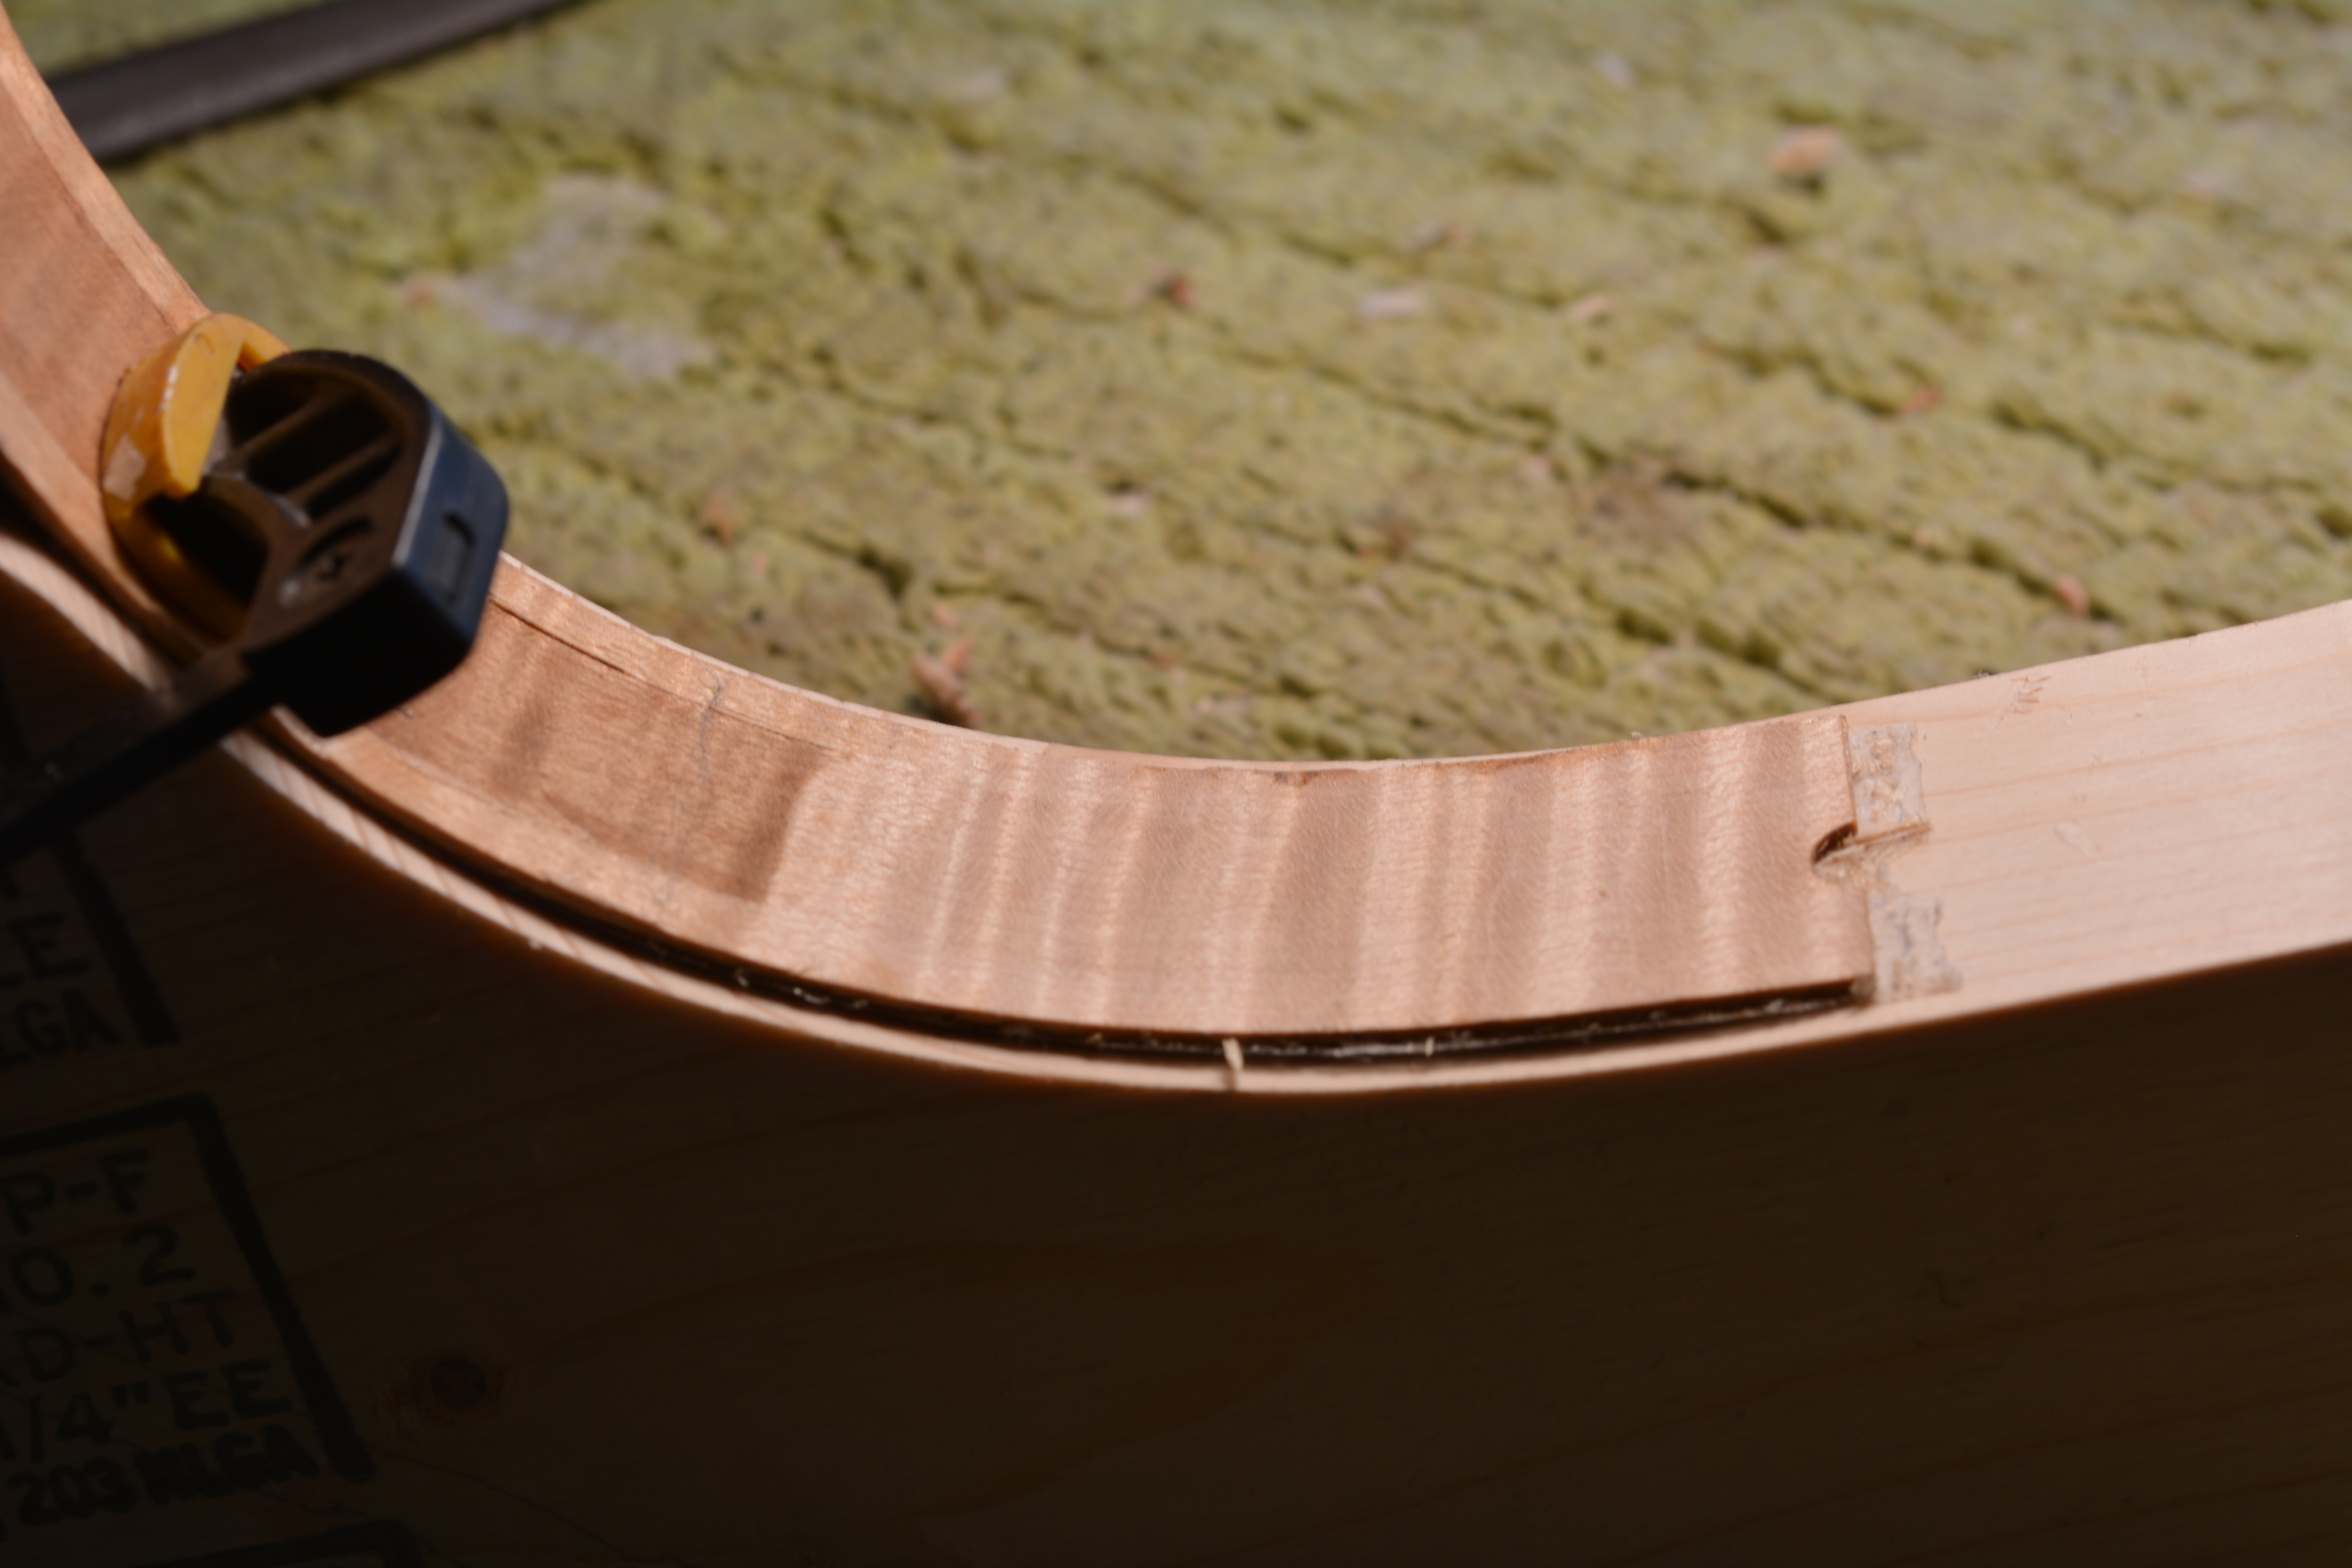
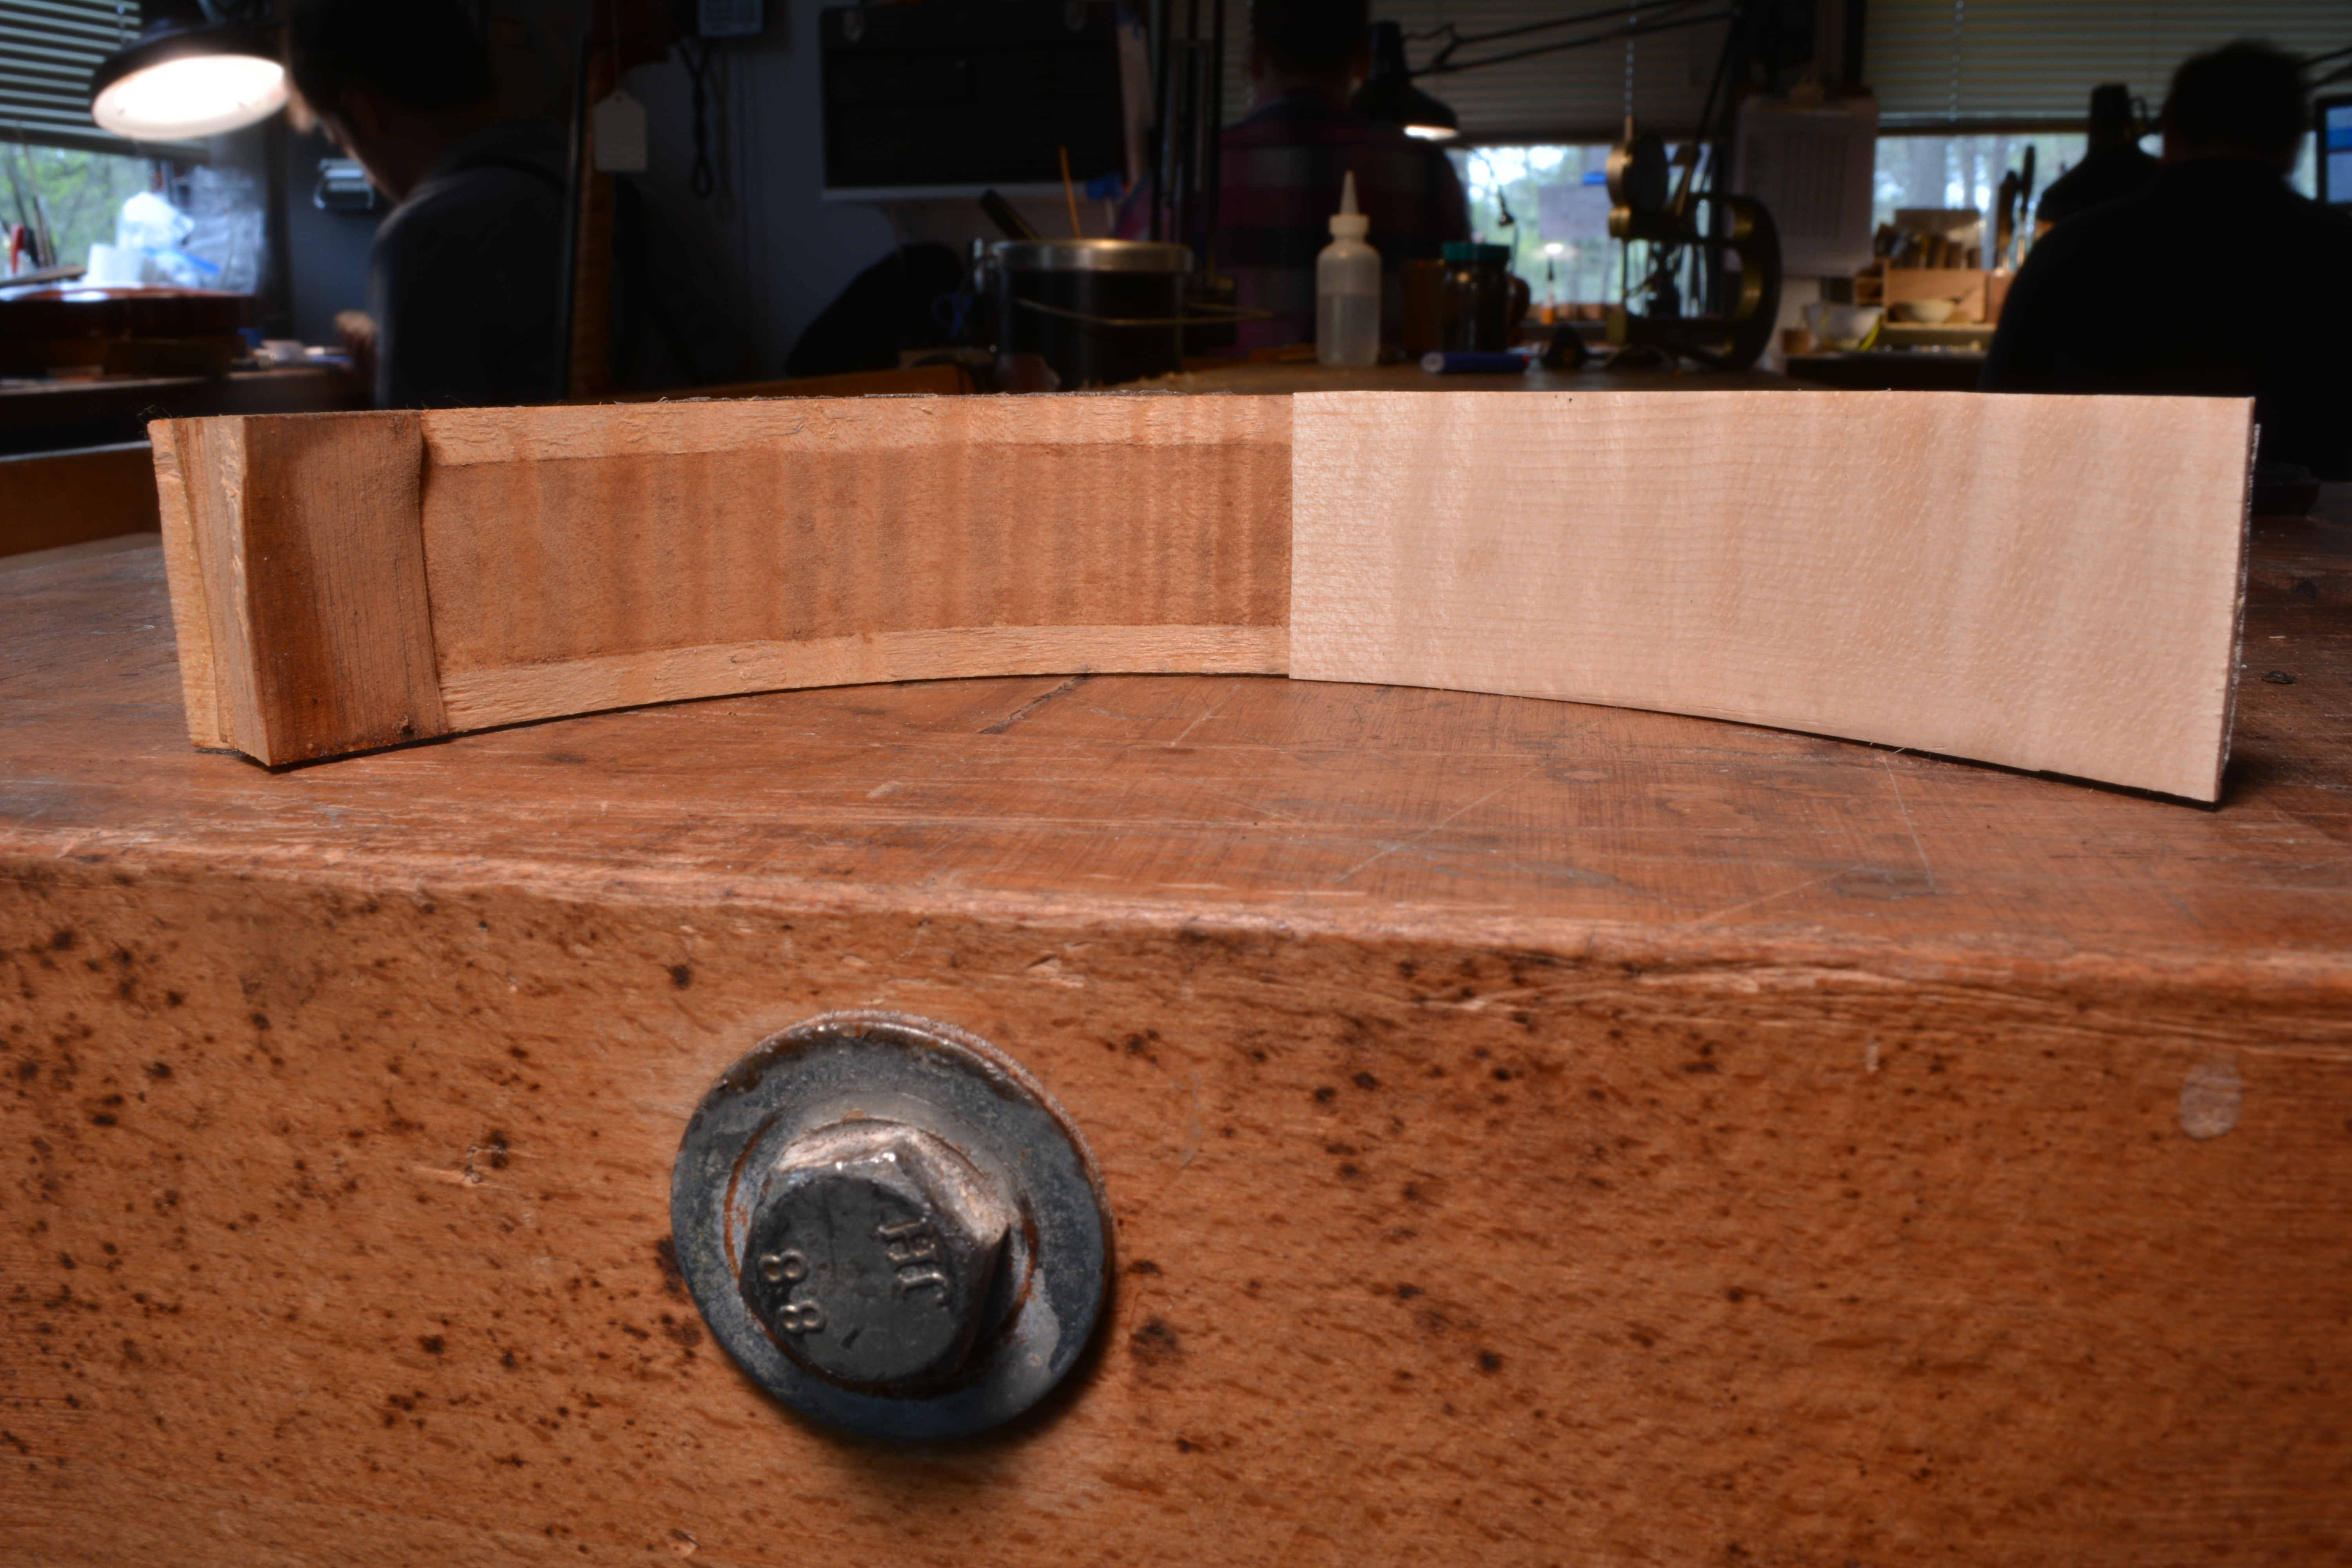
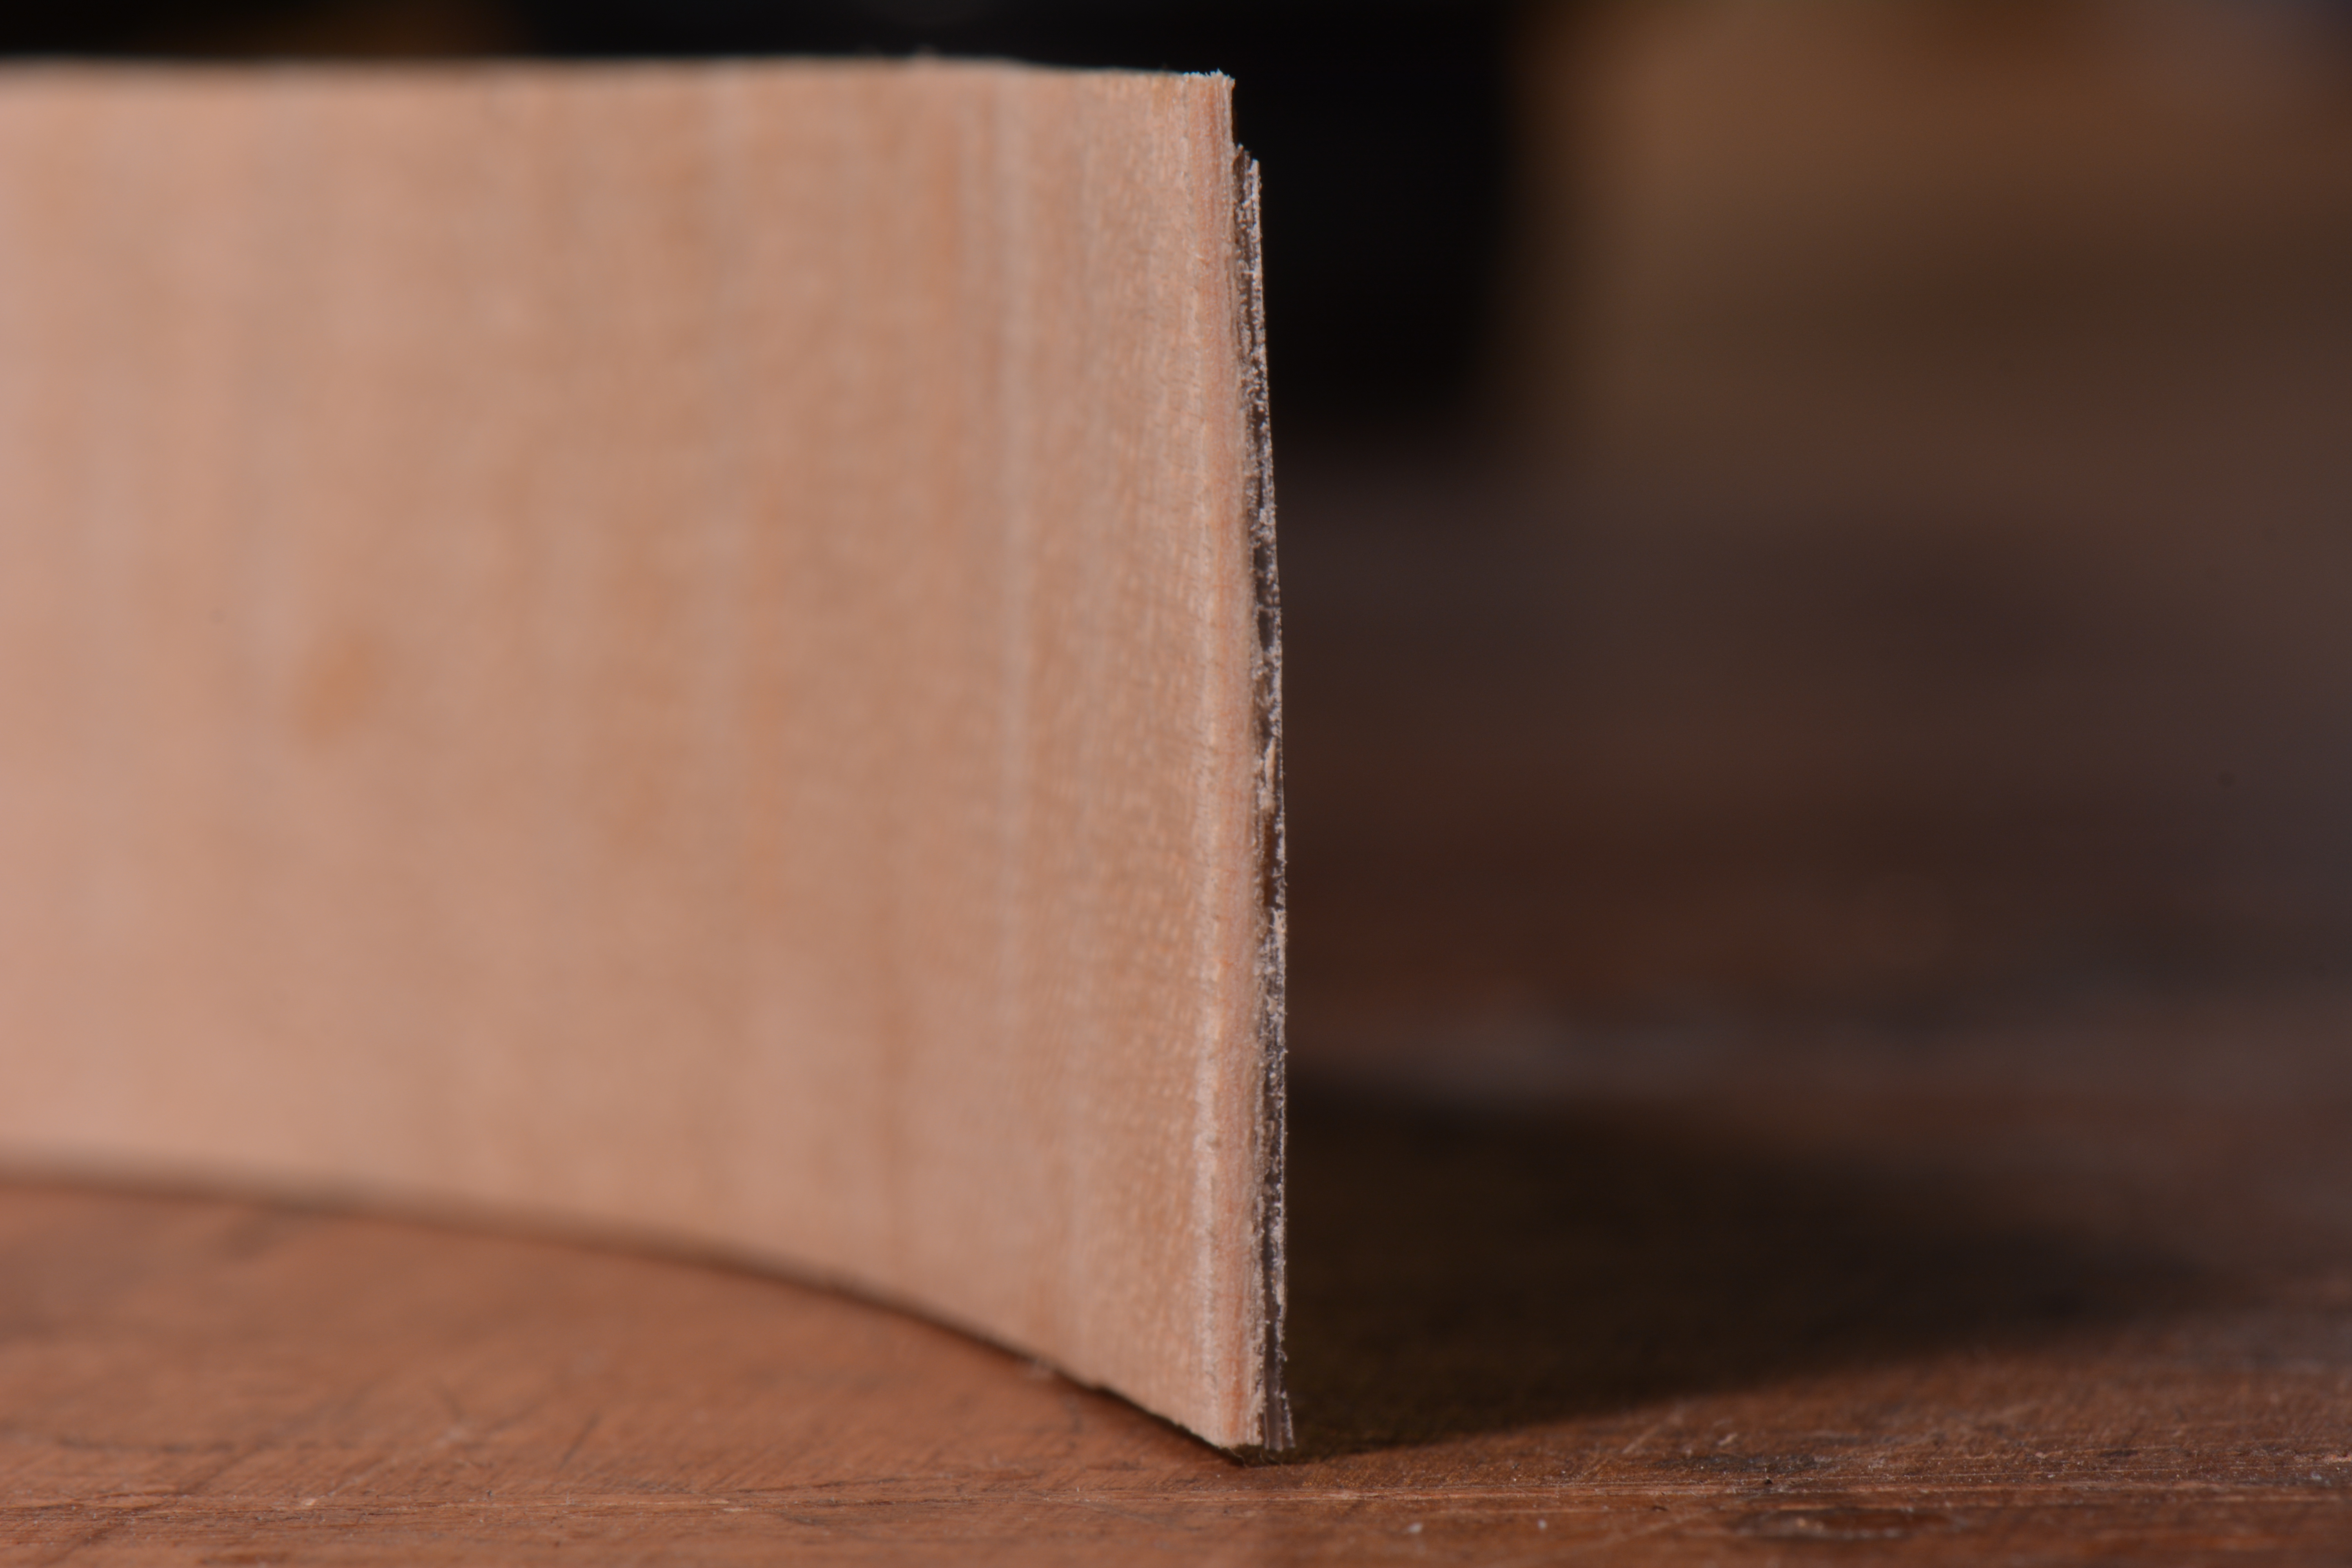
In this case, the crack was outside of the block and fairly close to it. There were no other cracks on the rib, and it was not necessary to double the entire rib. This doubling started 60mm before the crack, and continued 40mm after the crack.
The finished ramp (the ramp is wood removed from the the original rib that the doubling will be glued too) will be half the thickness of original rib at the thinnest point. In this case the ramp started 60mm before the crack, comes to the final thickness 20mm before the crack (which is half the thickness of the original rib) and continues for 40mm to the end of the rib.
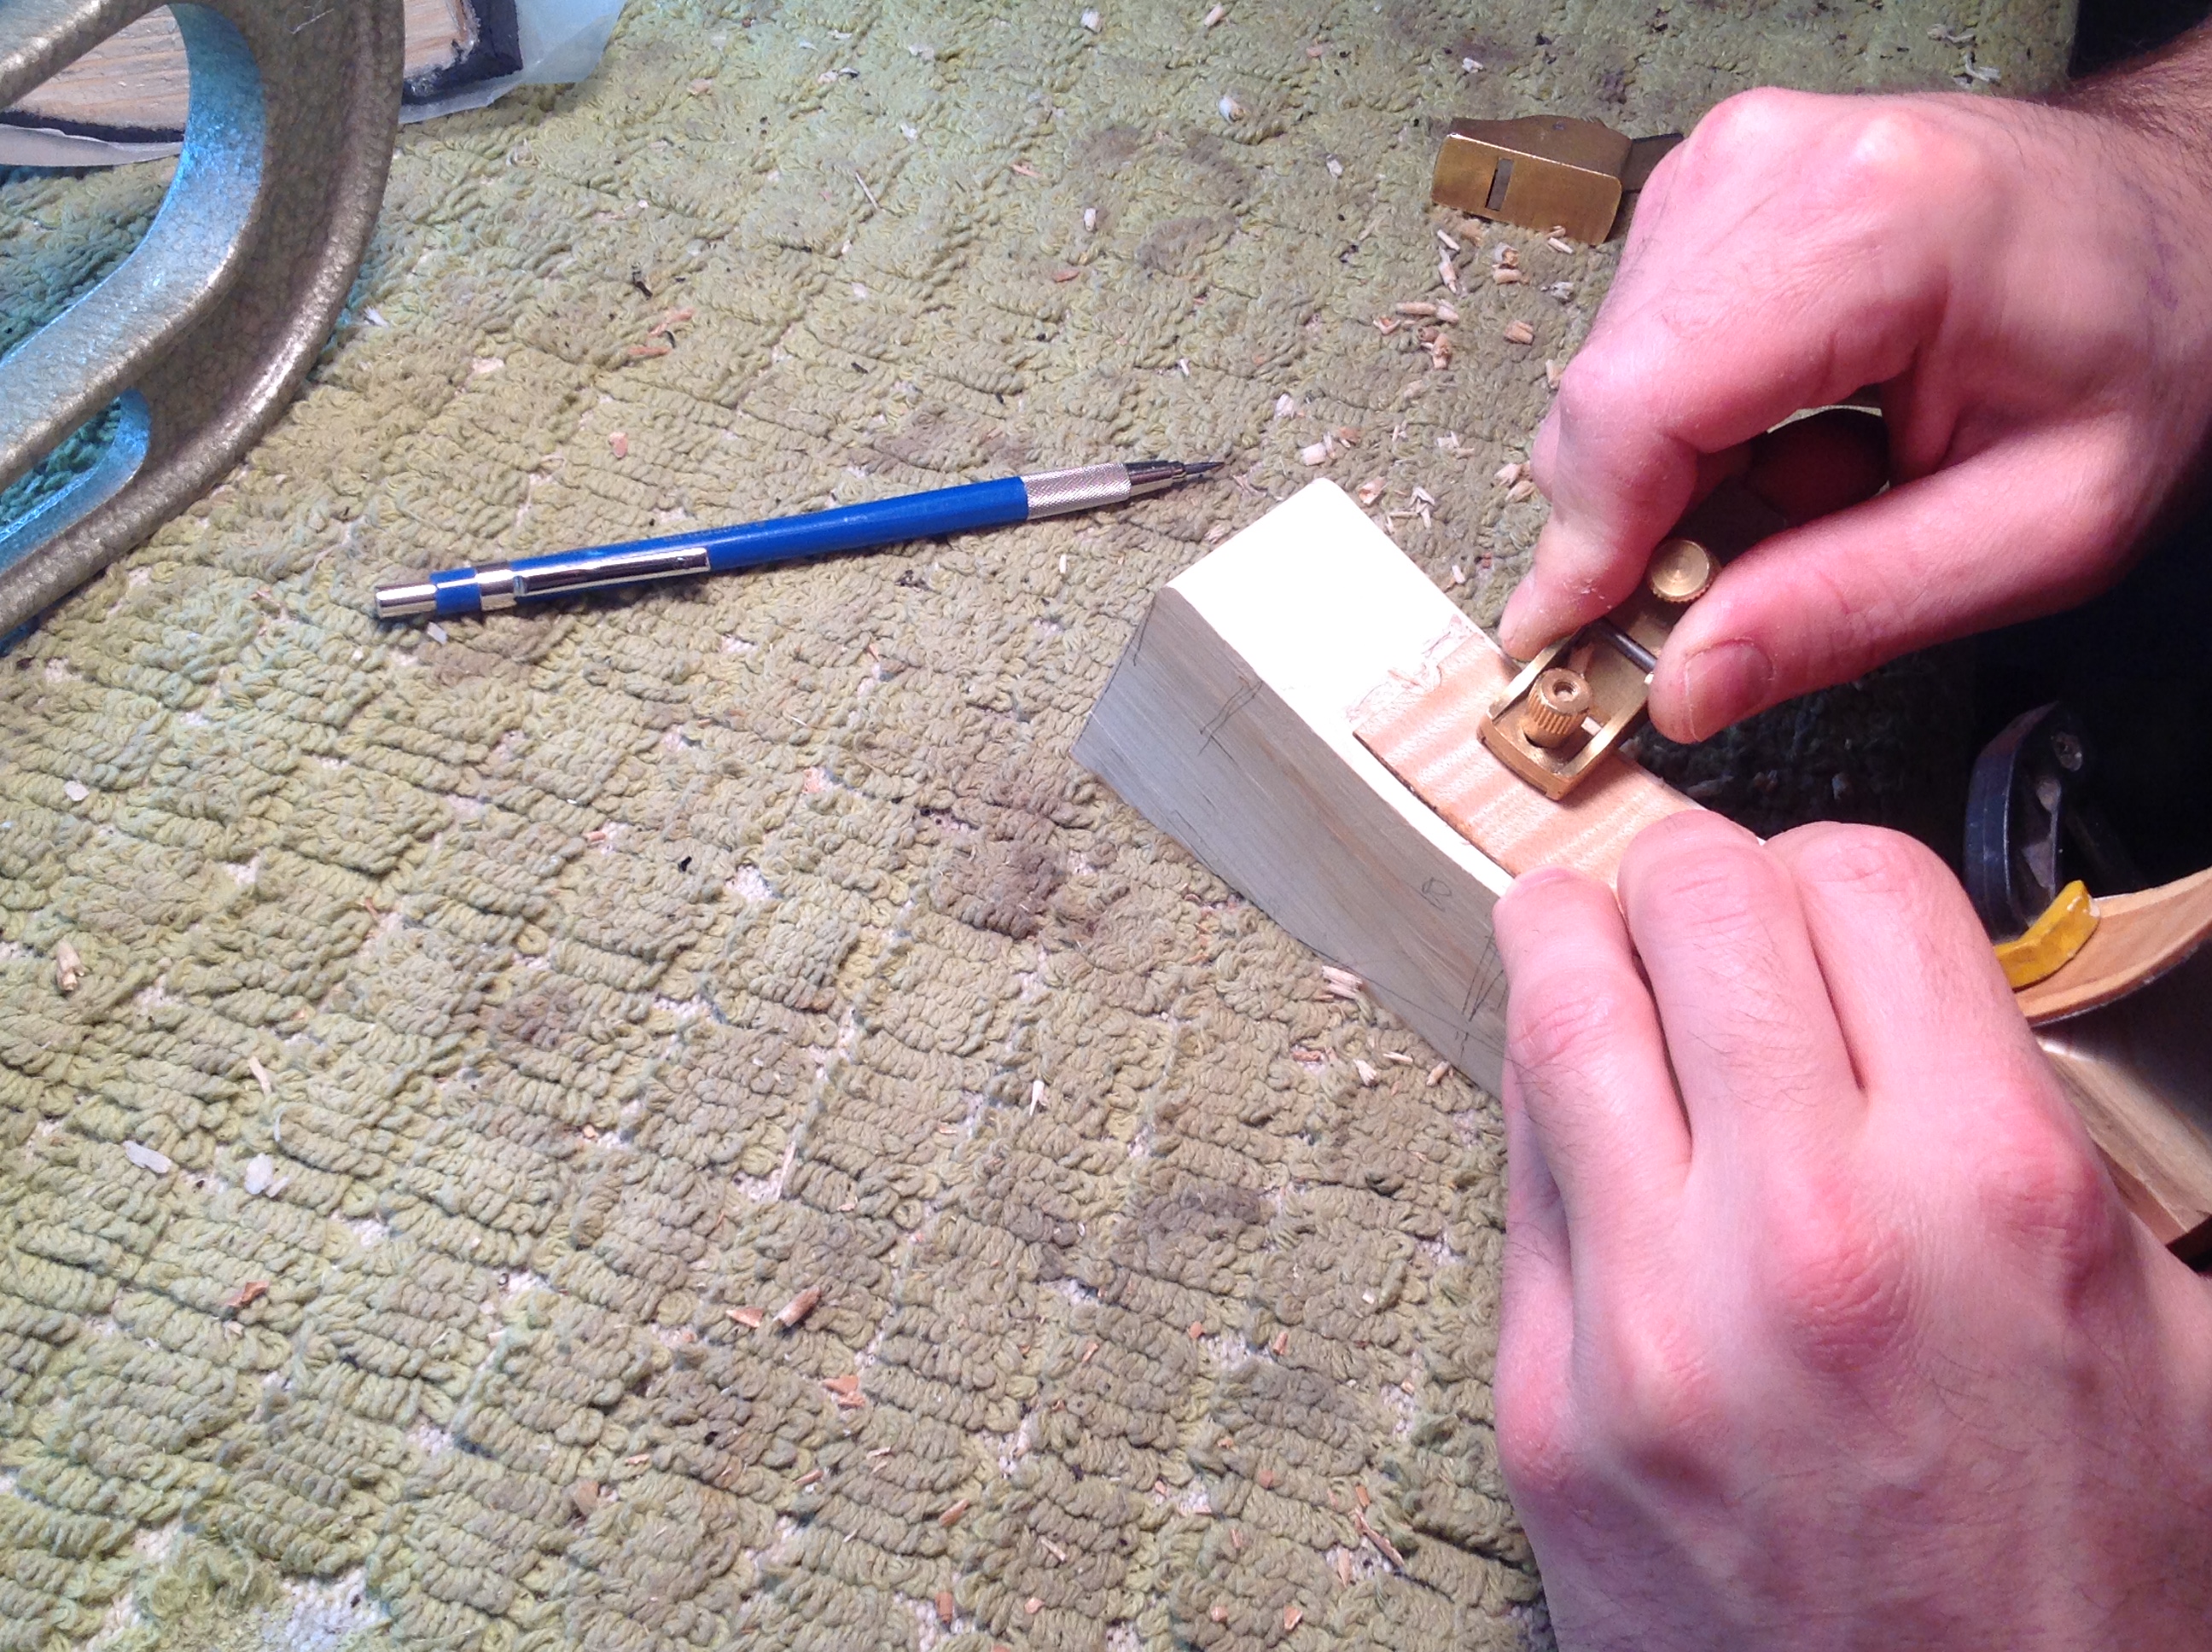
Always work with the rib in the form, otherwise you will most likely crack the rib when graduating it. I used a finger plane first, and took light cuts following the direction of the flame.
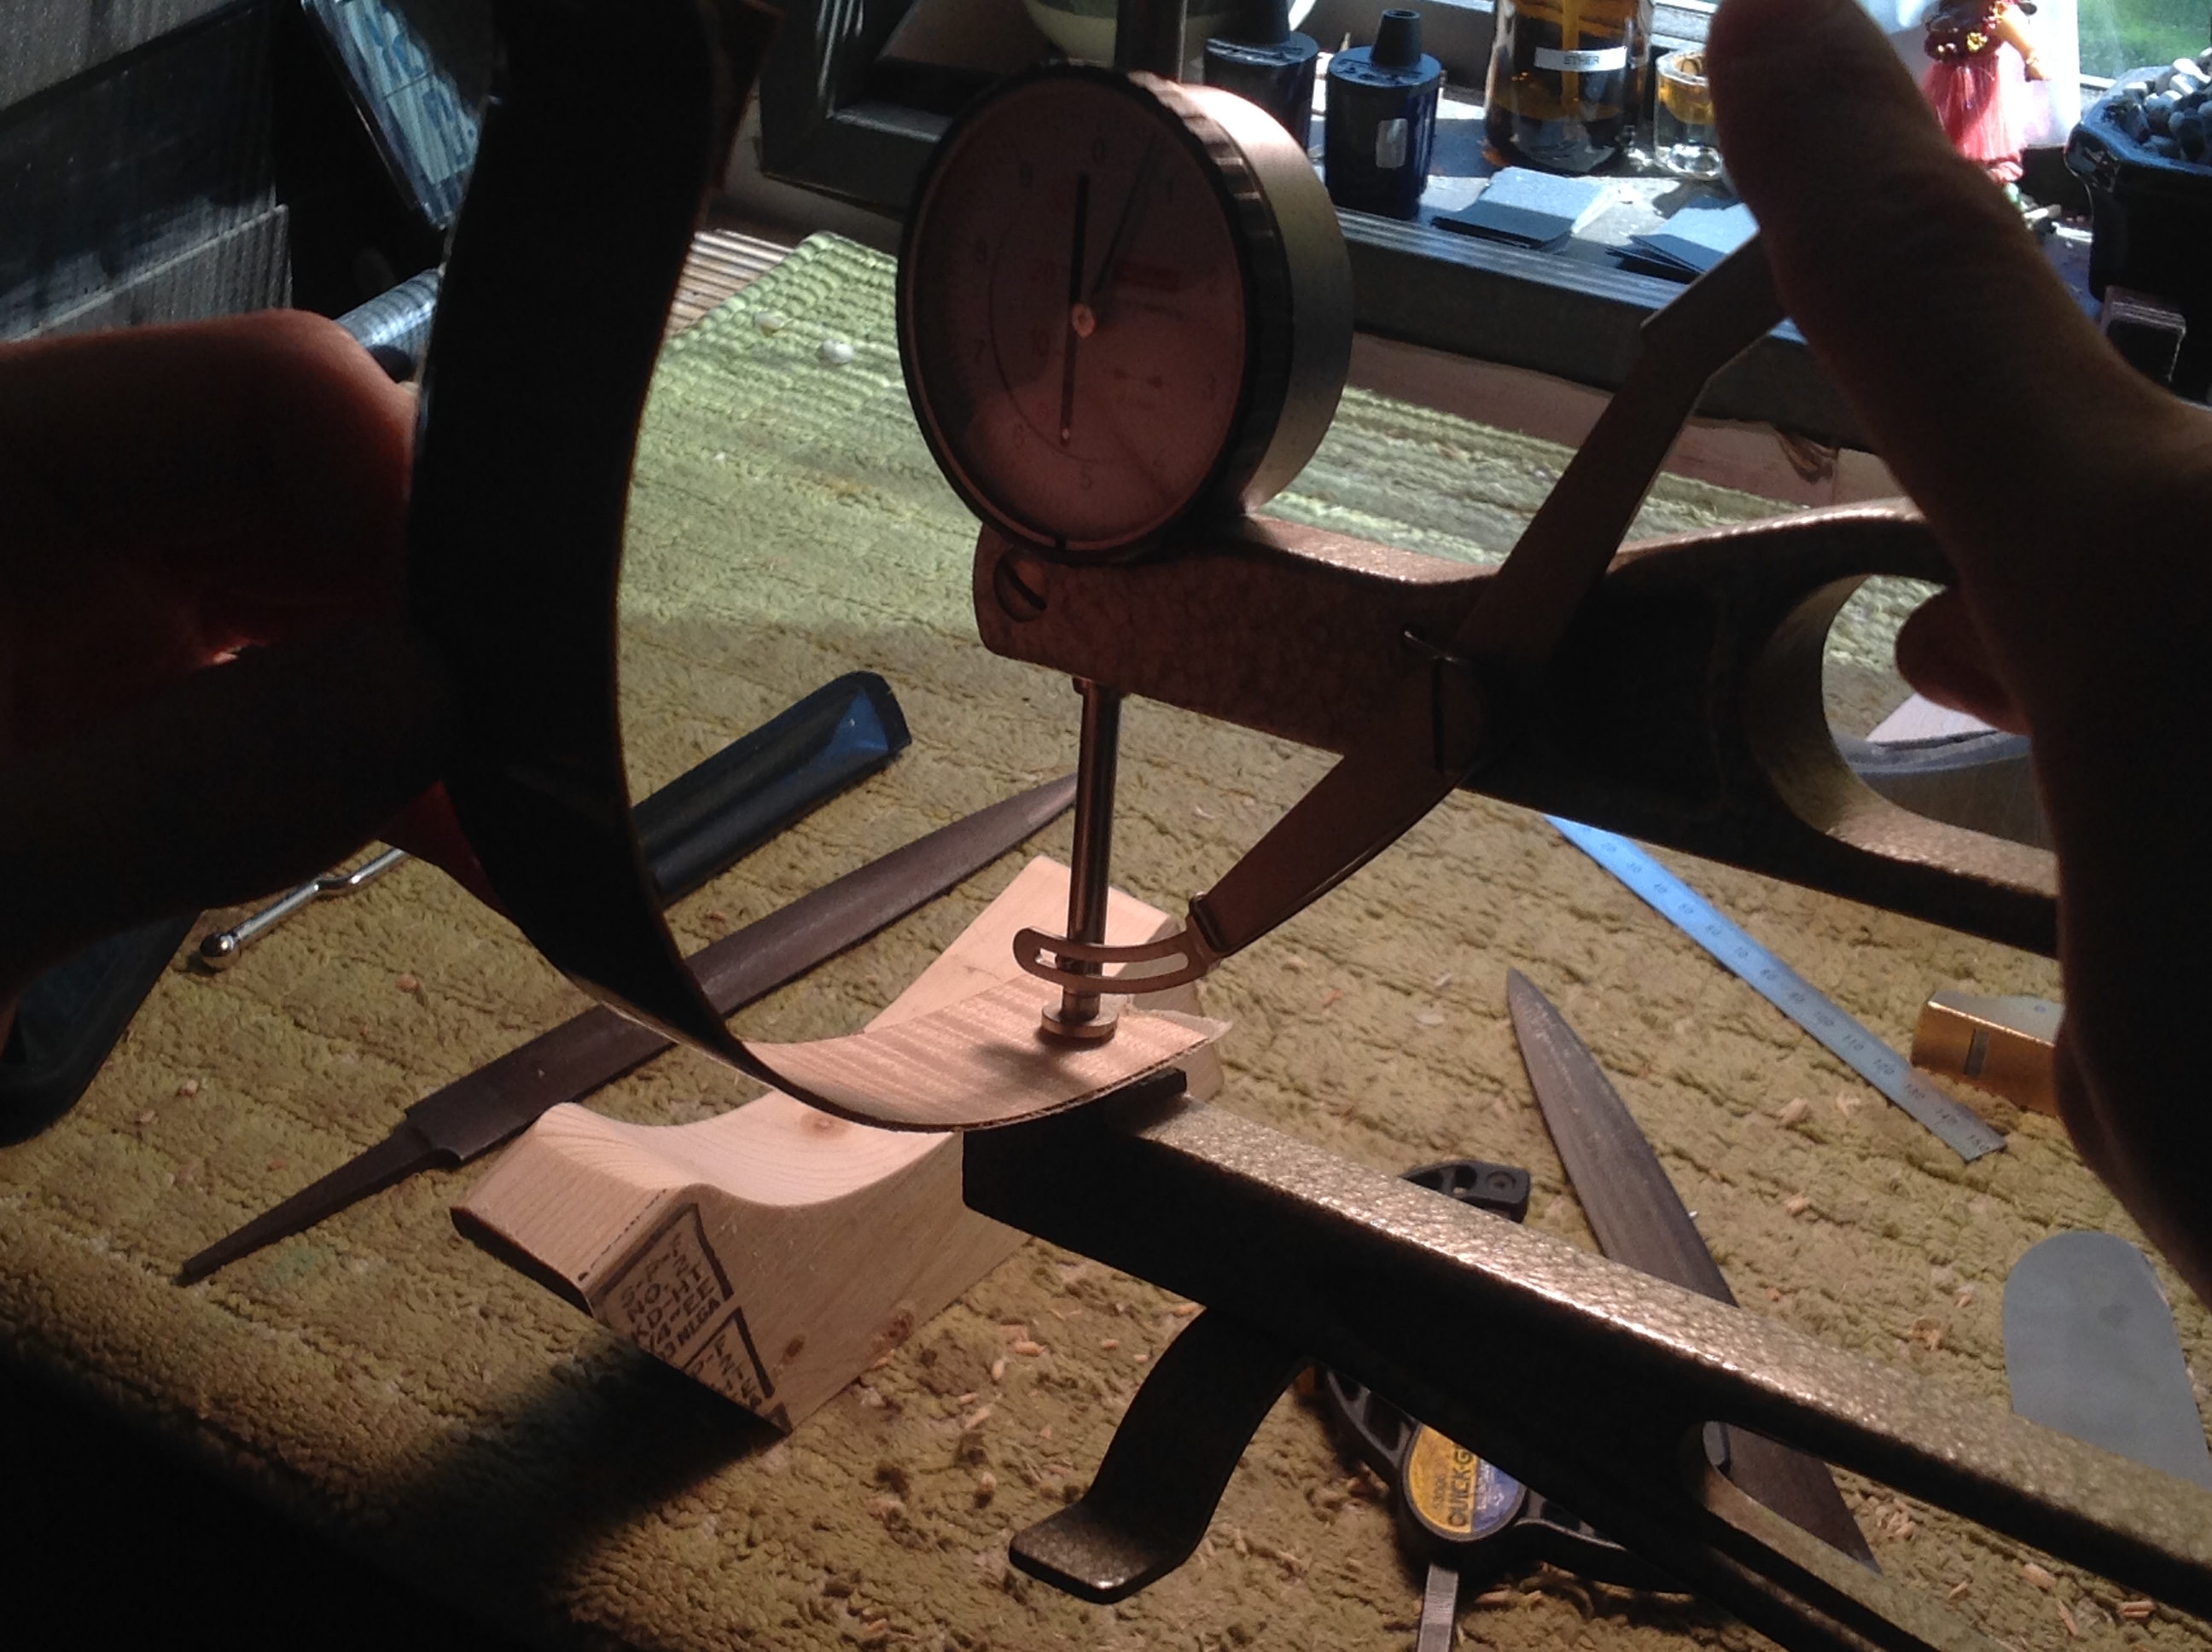
I constantly kept an eye on the measurements.
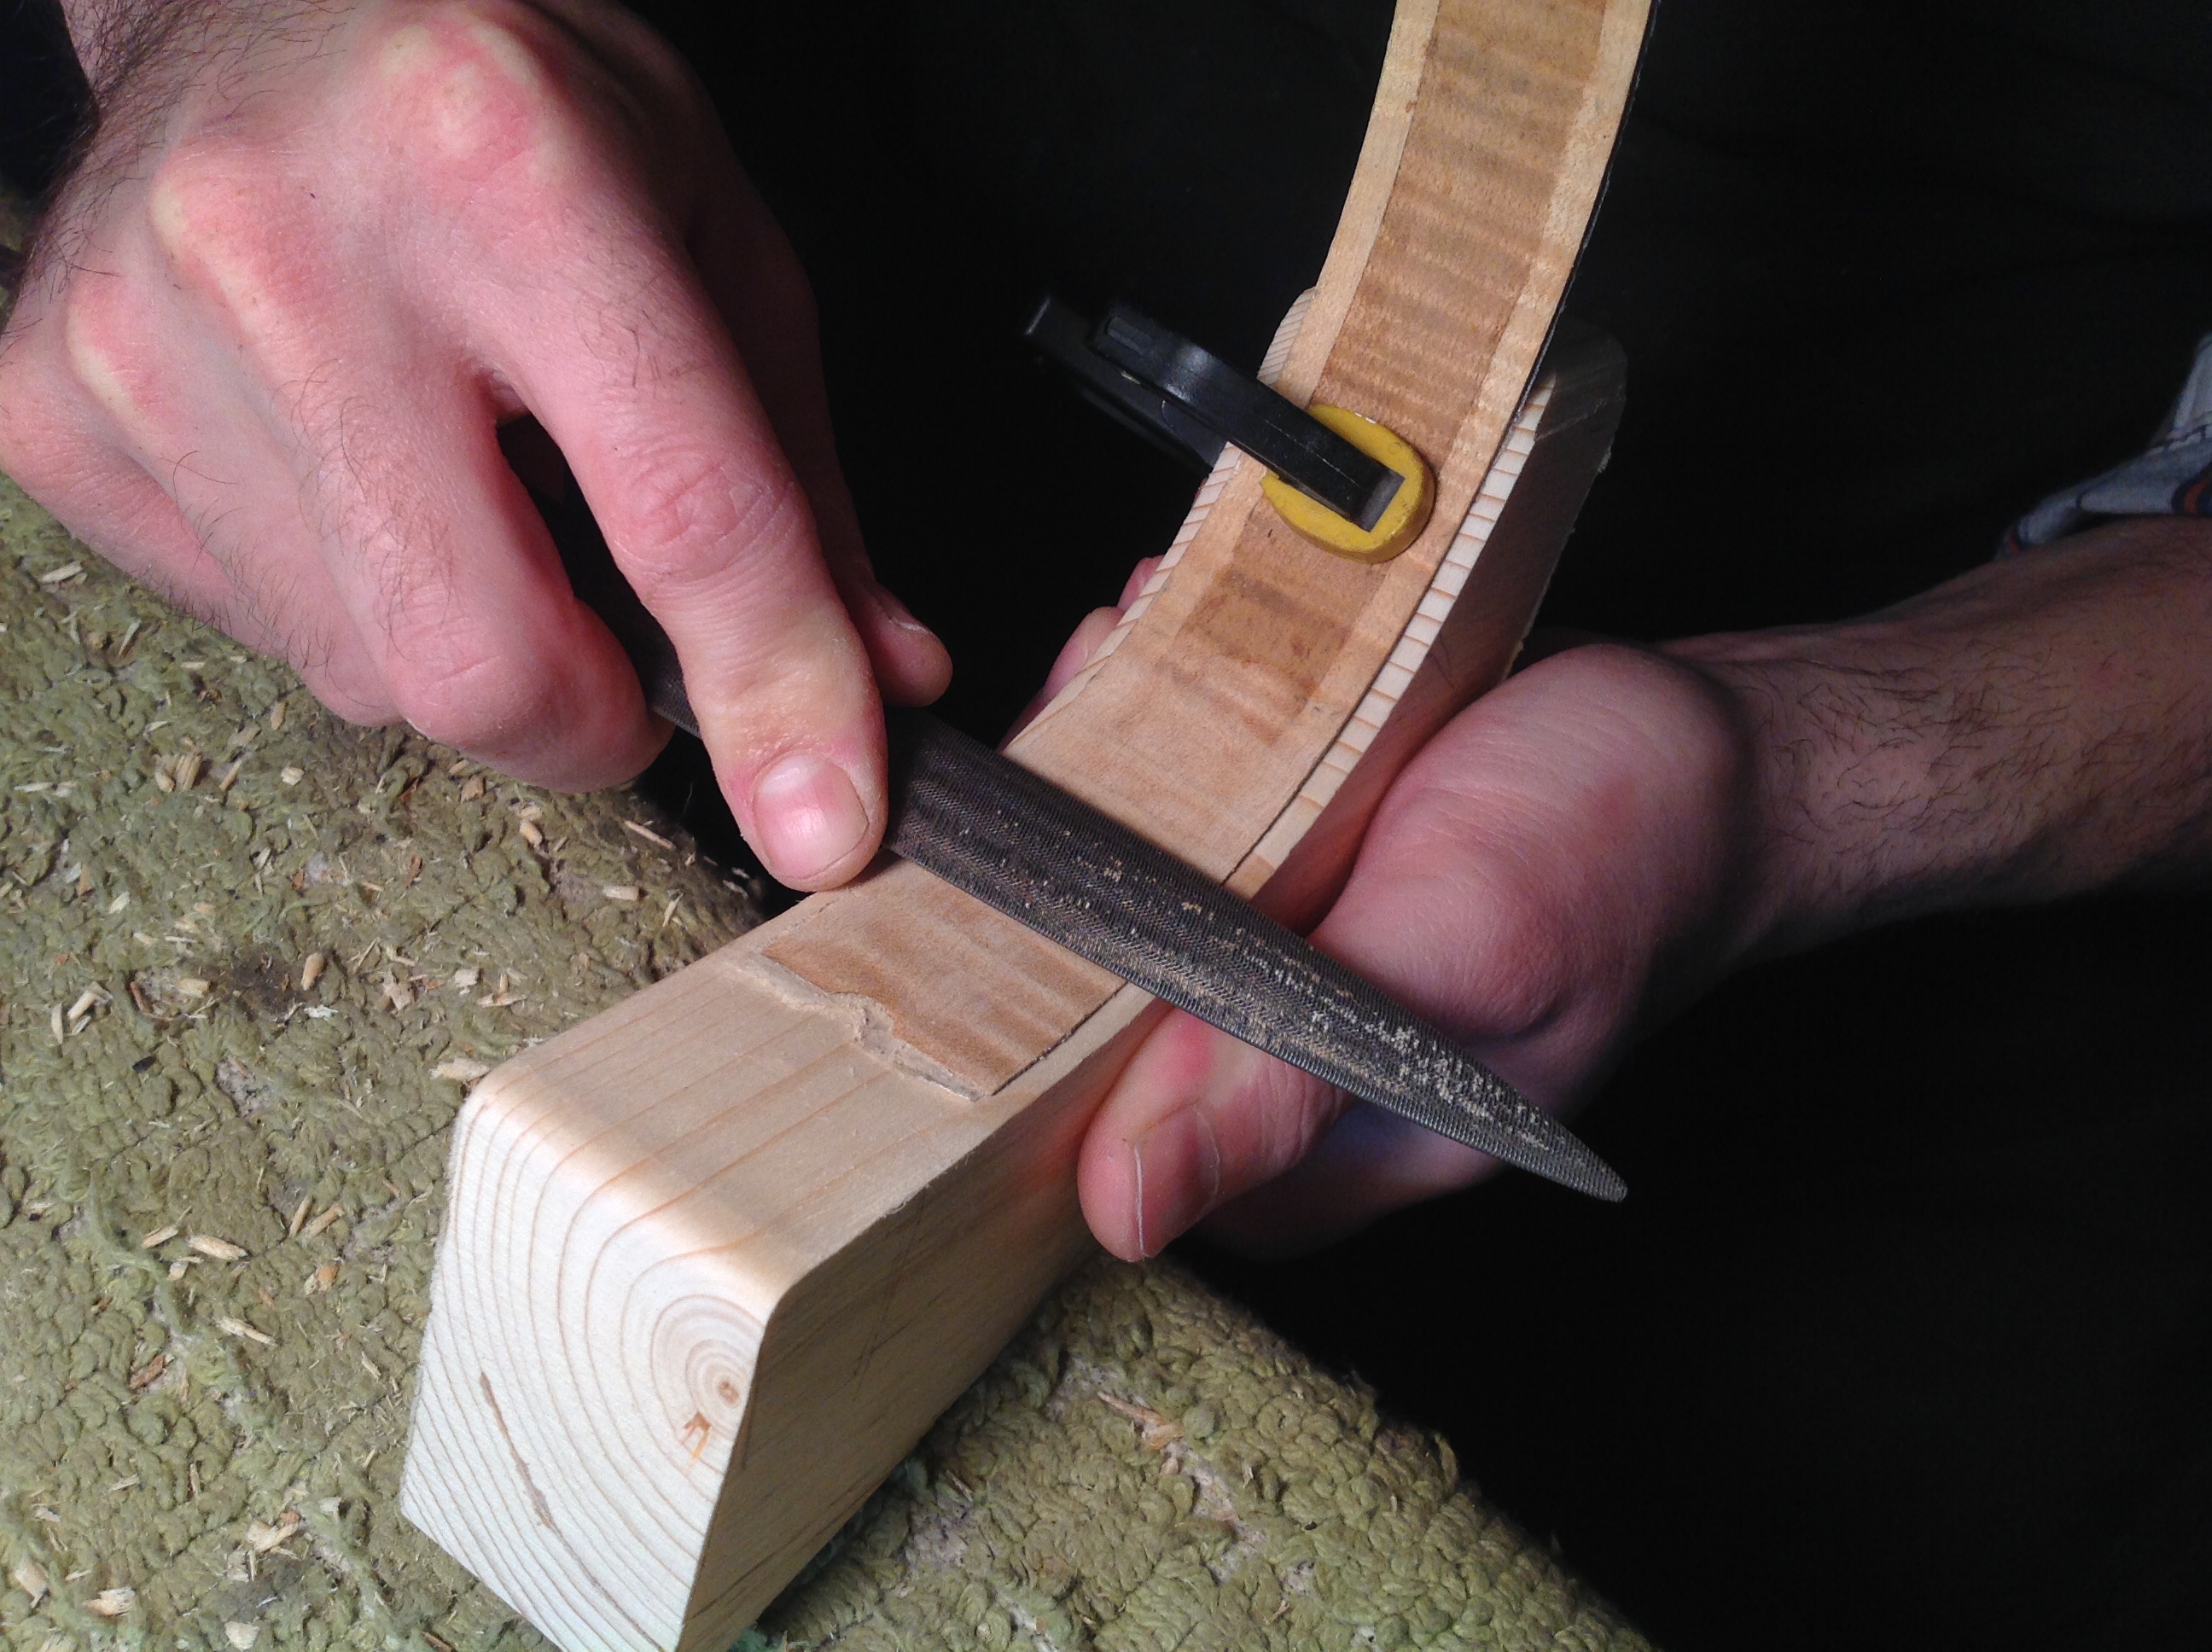
After using a finger plane I switched to a fine cut crossing file. Then I brought the last few tenths of a millimeter home with a scraper.
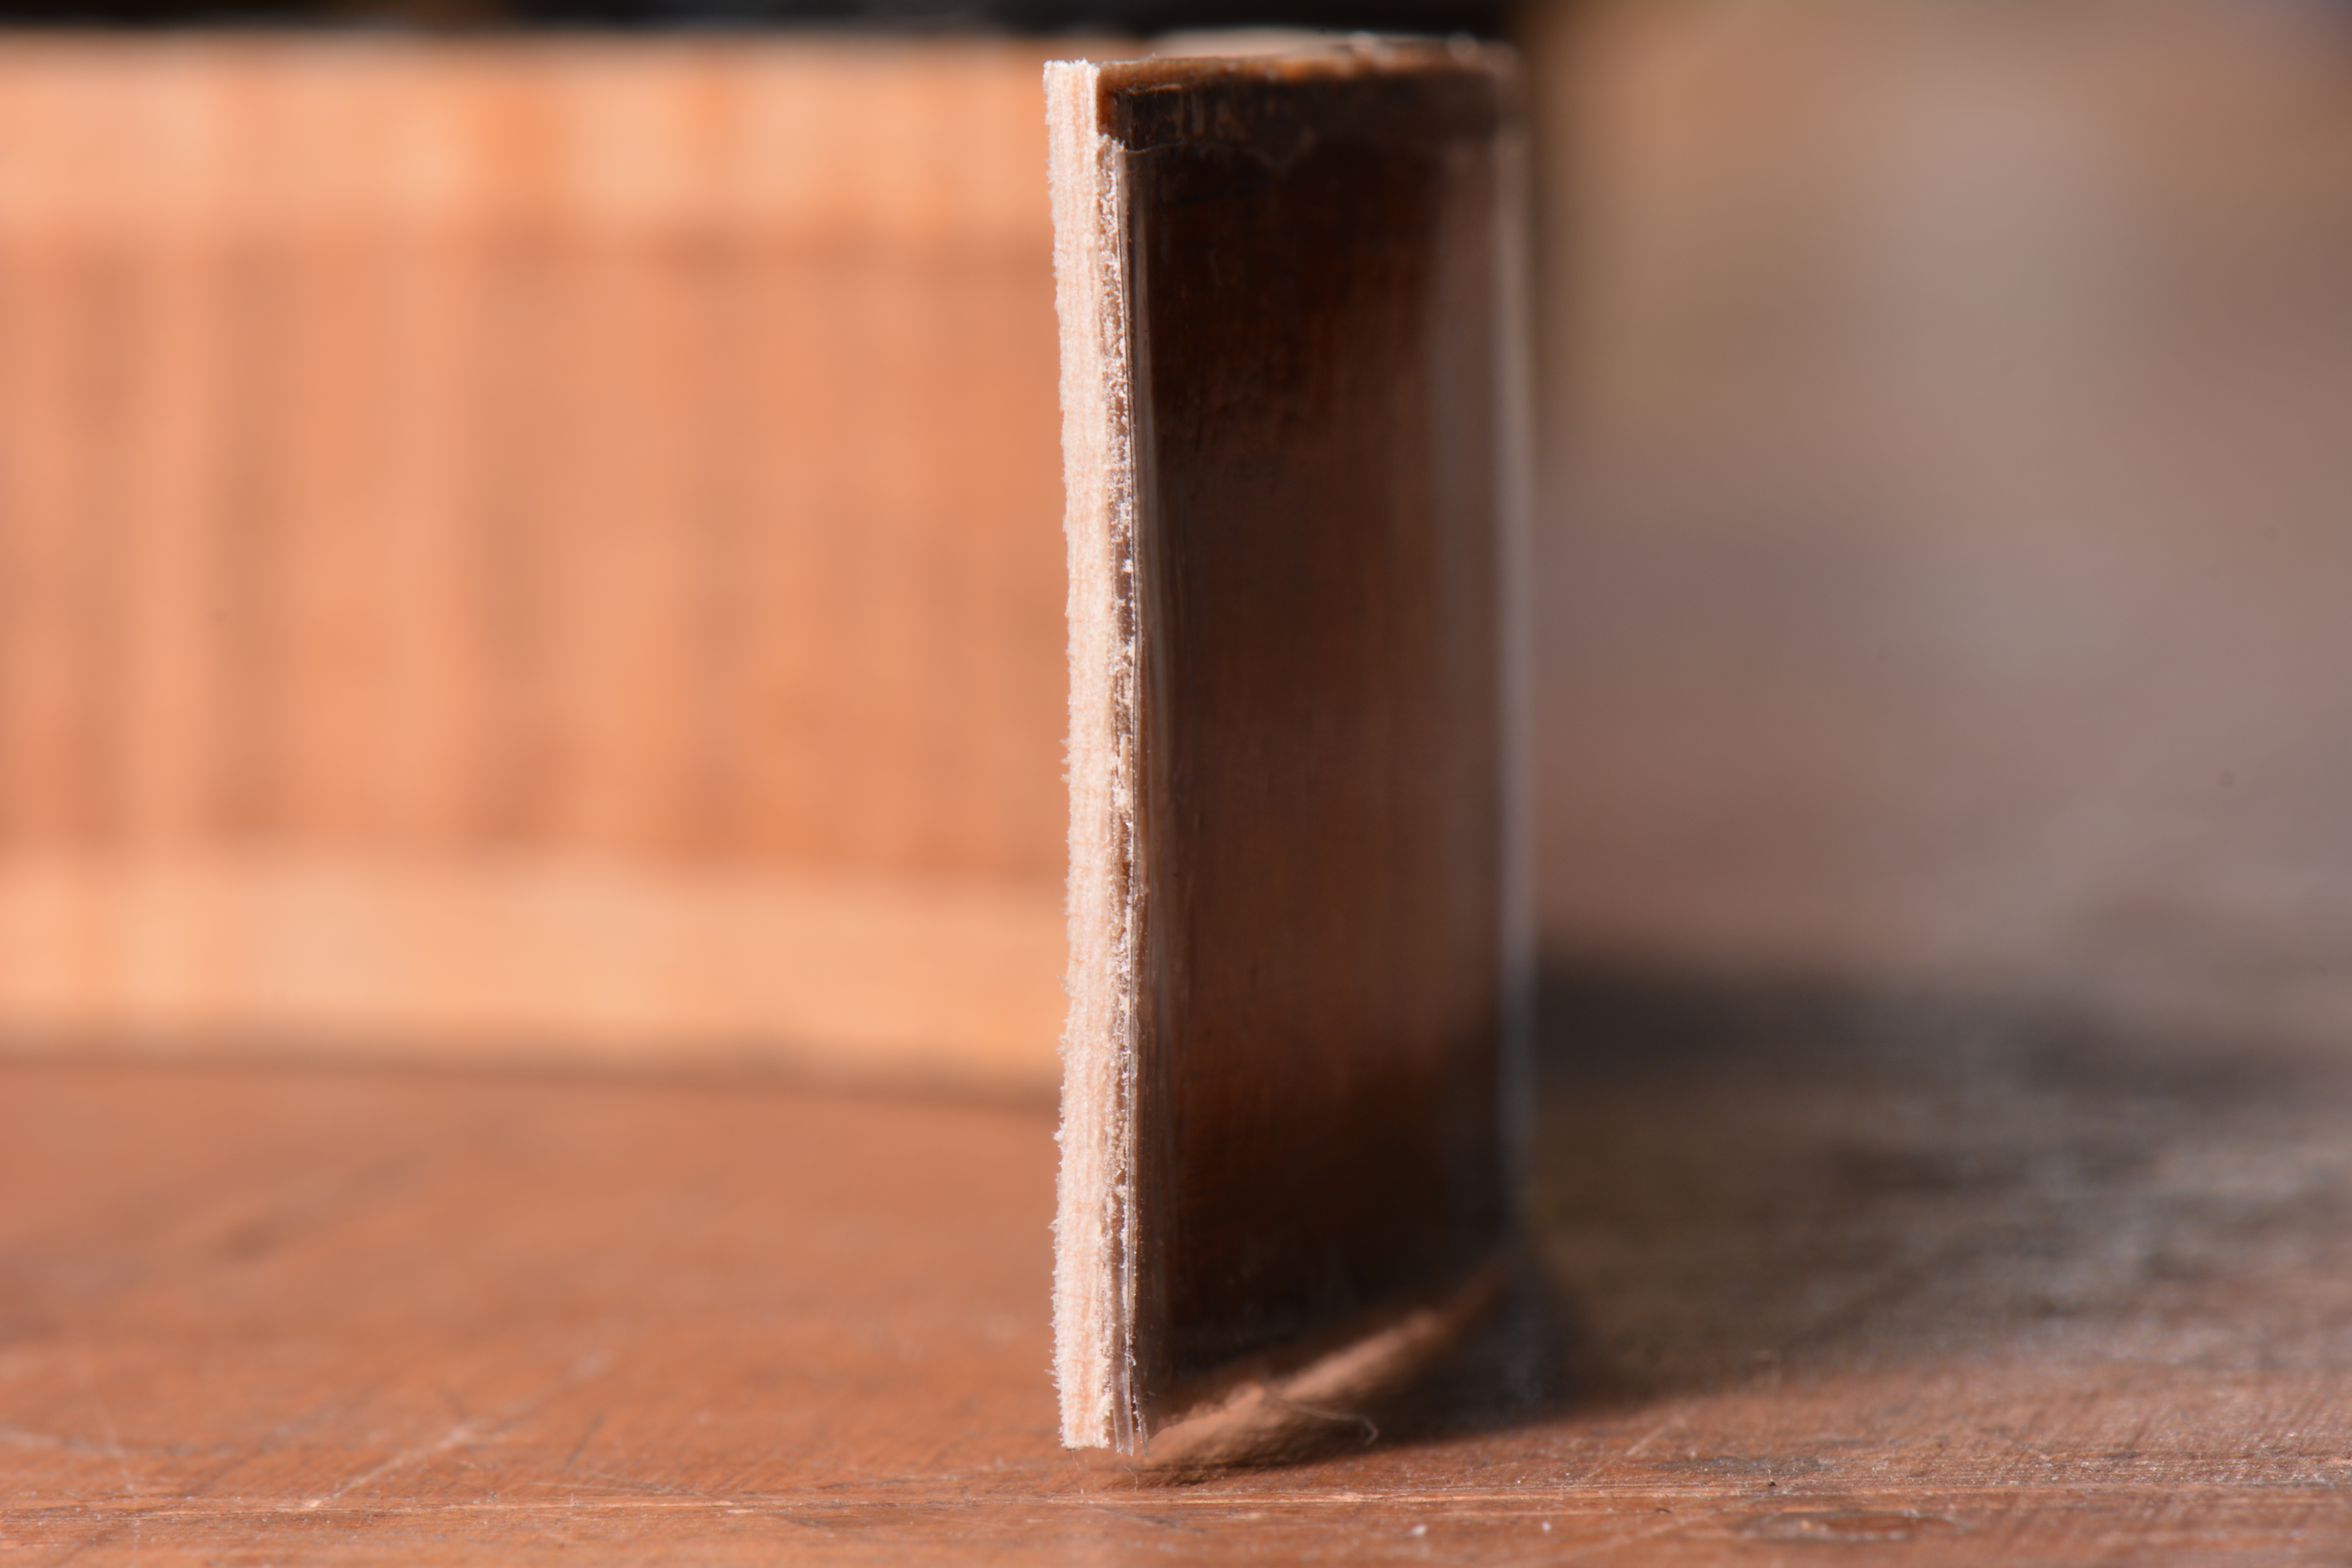
Thickness and Bend the Rib for Doubling
When selecting rib stock for the doubling I sought out wood that matched the ribs on the instrument as closely as possible.
I thicknessed the ribs using a block plane fitted with a toothed blade, leaving 0.2mm – 0.3mm over the final thickness. Then I used a scraper to remove the toothed blade marks and bring the rib stock the final thickness.
The finished thickness for the doubling is 1.3mm, which was the original thickness of the ribs before the ramp. When the doubling rib is glued to the original rib, it will leave the thickness of the doubling well over the finished number. This will leave room to graduate the rib over the varying thicknesses of the ramp. After thicknessing the rib, bend it on a bending iron in the same manner you would when making a violin. Use the Rib form as a guide for shape.
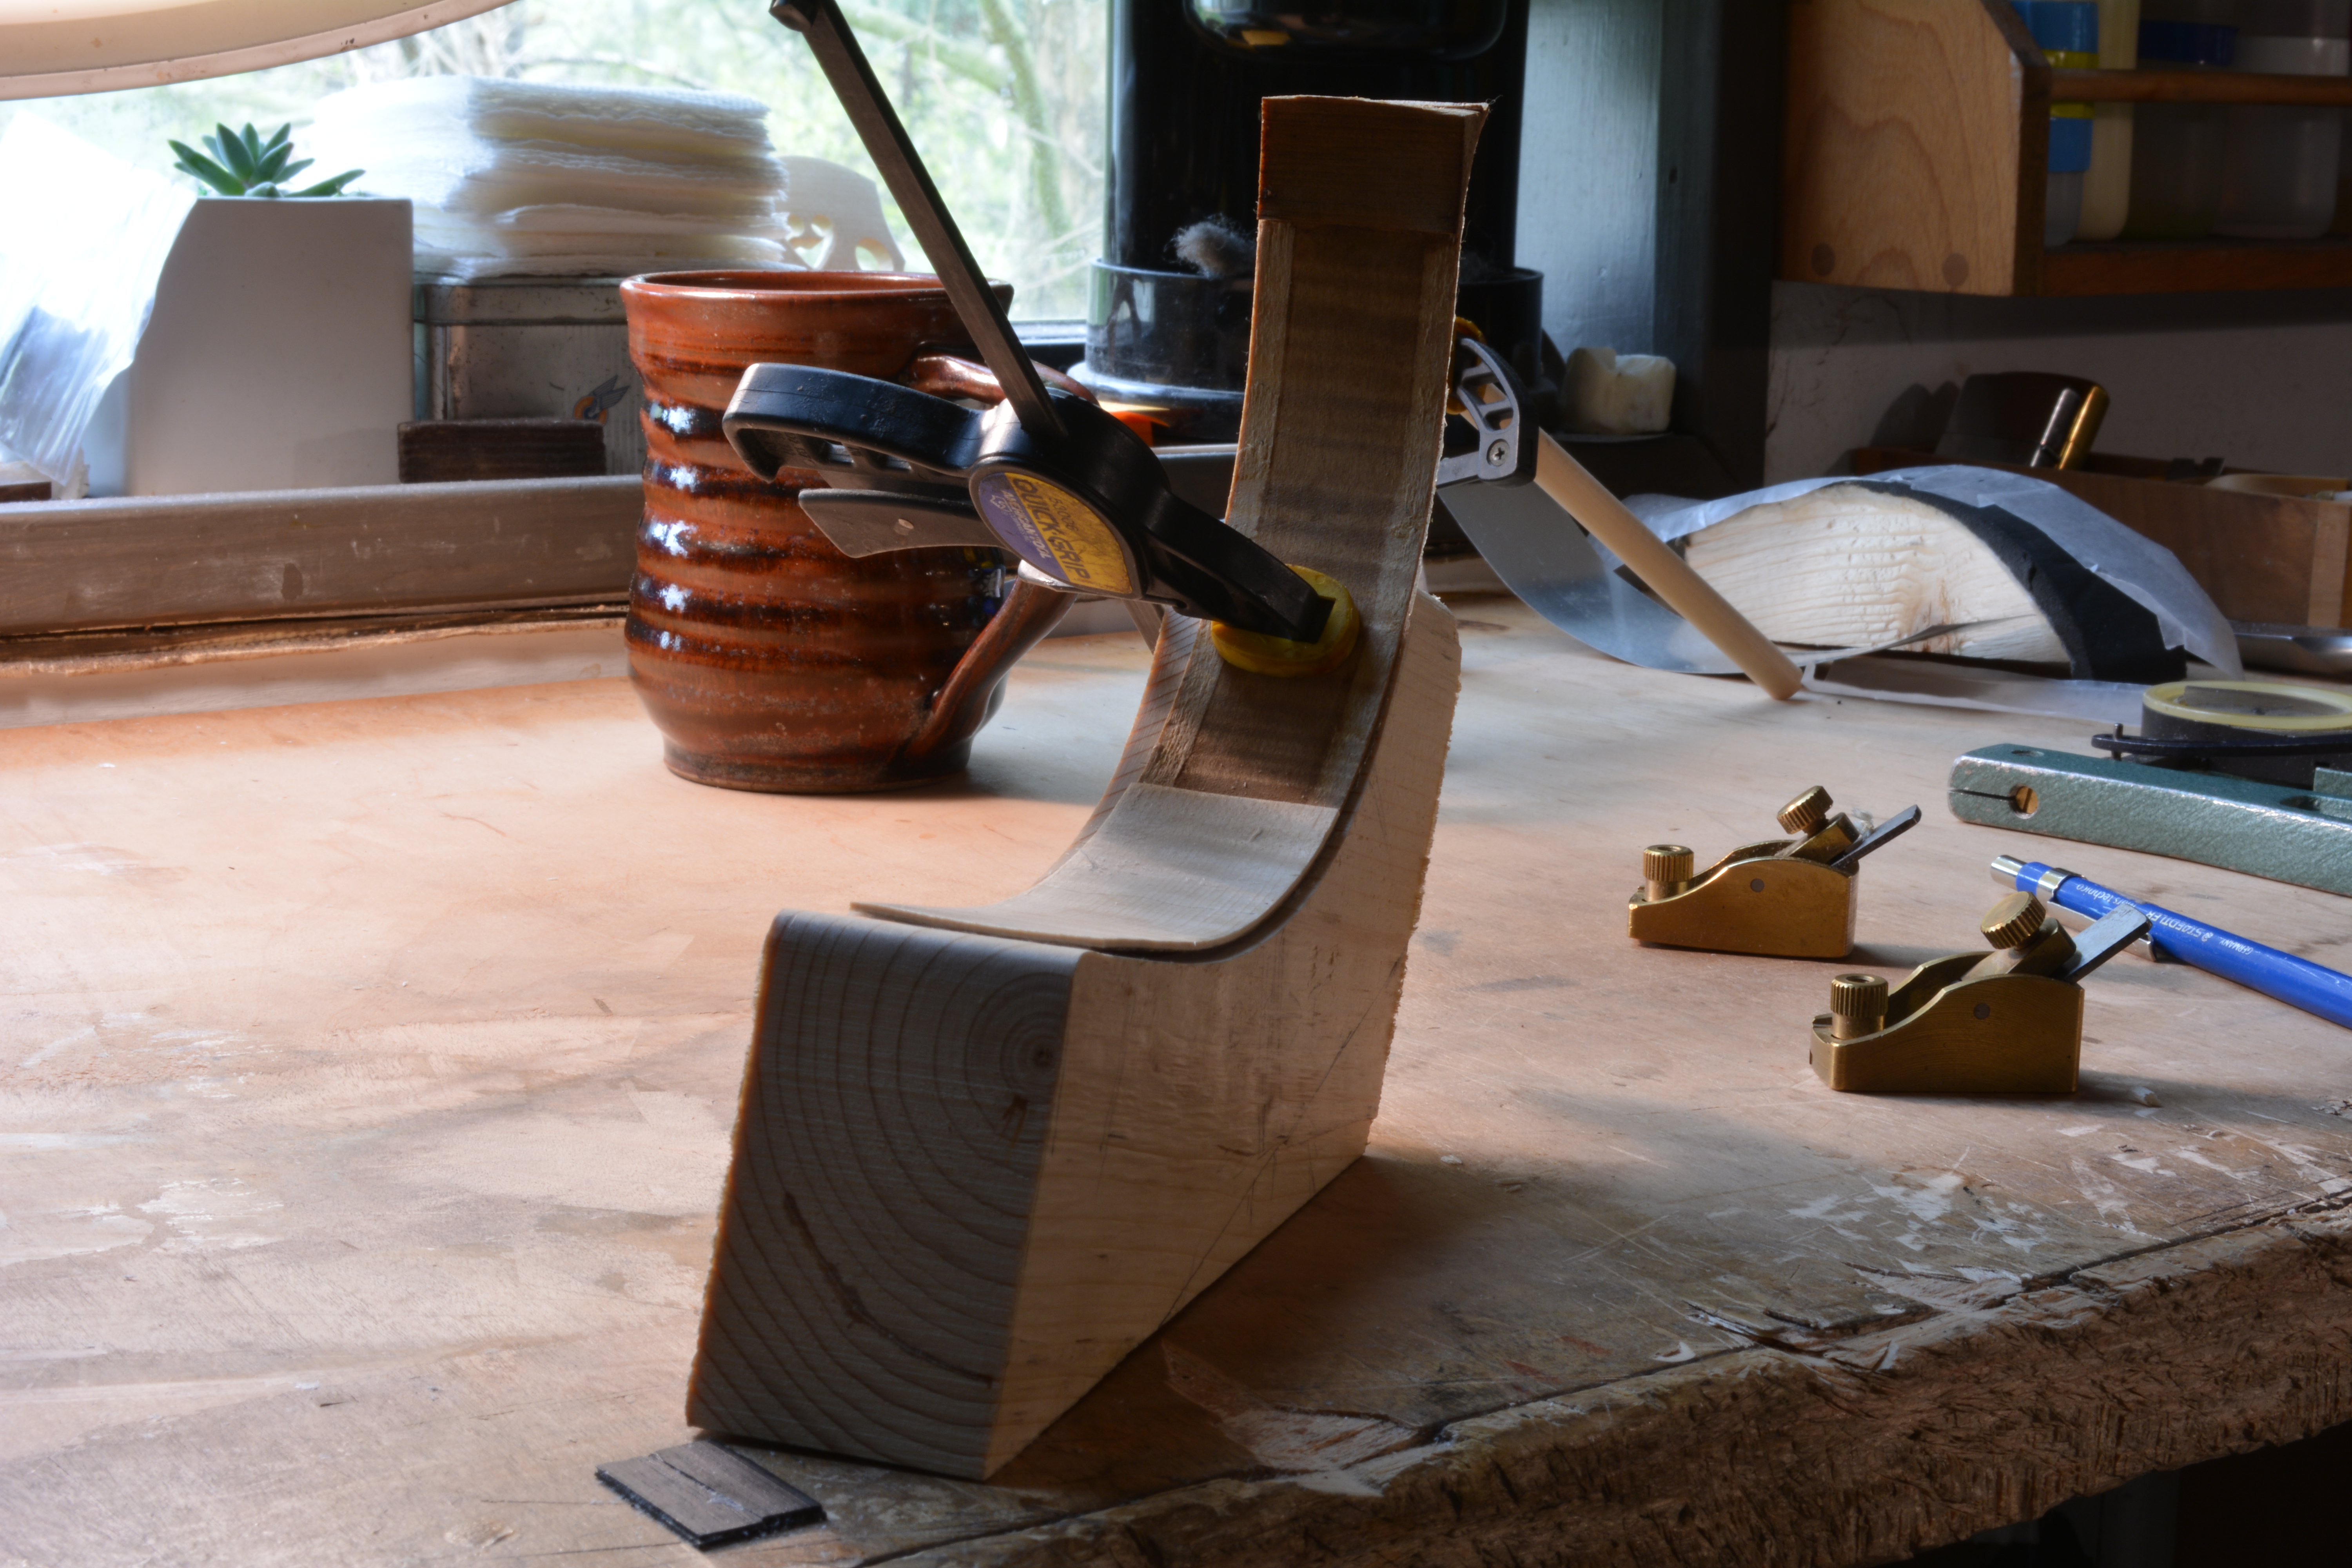
Glue Prepared Rib Doubling Material to Original Rib in Form
After the doubling material has been thicknessed and bent, it can be glued with hide glue to the original rib in the form. One again, the same method of using wax paper, and aluminum in the form is used here. This took several weeks to dry completely. There are a few tests to help you evaluate if the rib is dry or not. The first test is to touch it and see if it’s still wet. This seems painfully obvious, but if it feels slightly cold, but seems dry, it’s still wet. The second test is more subjective. After the rib seems dry to the touch, remove the rib from the form and put a straight edge on the varnish surface perpendicular to the rib grain. Take note of how hollow, round, or flat it may be. Leave the rib out of the form in a safe place, and periodically check to see if the rib has moved. If it does change, the rib material is still wet, and is rapidly drying and distorting the original rib material.
Here is the doubling glued on to the rib.
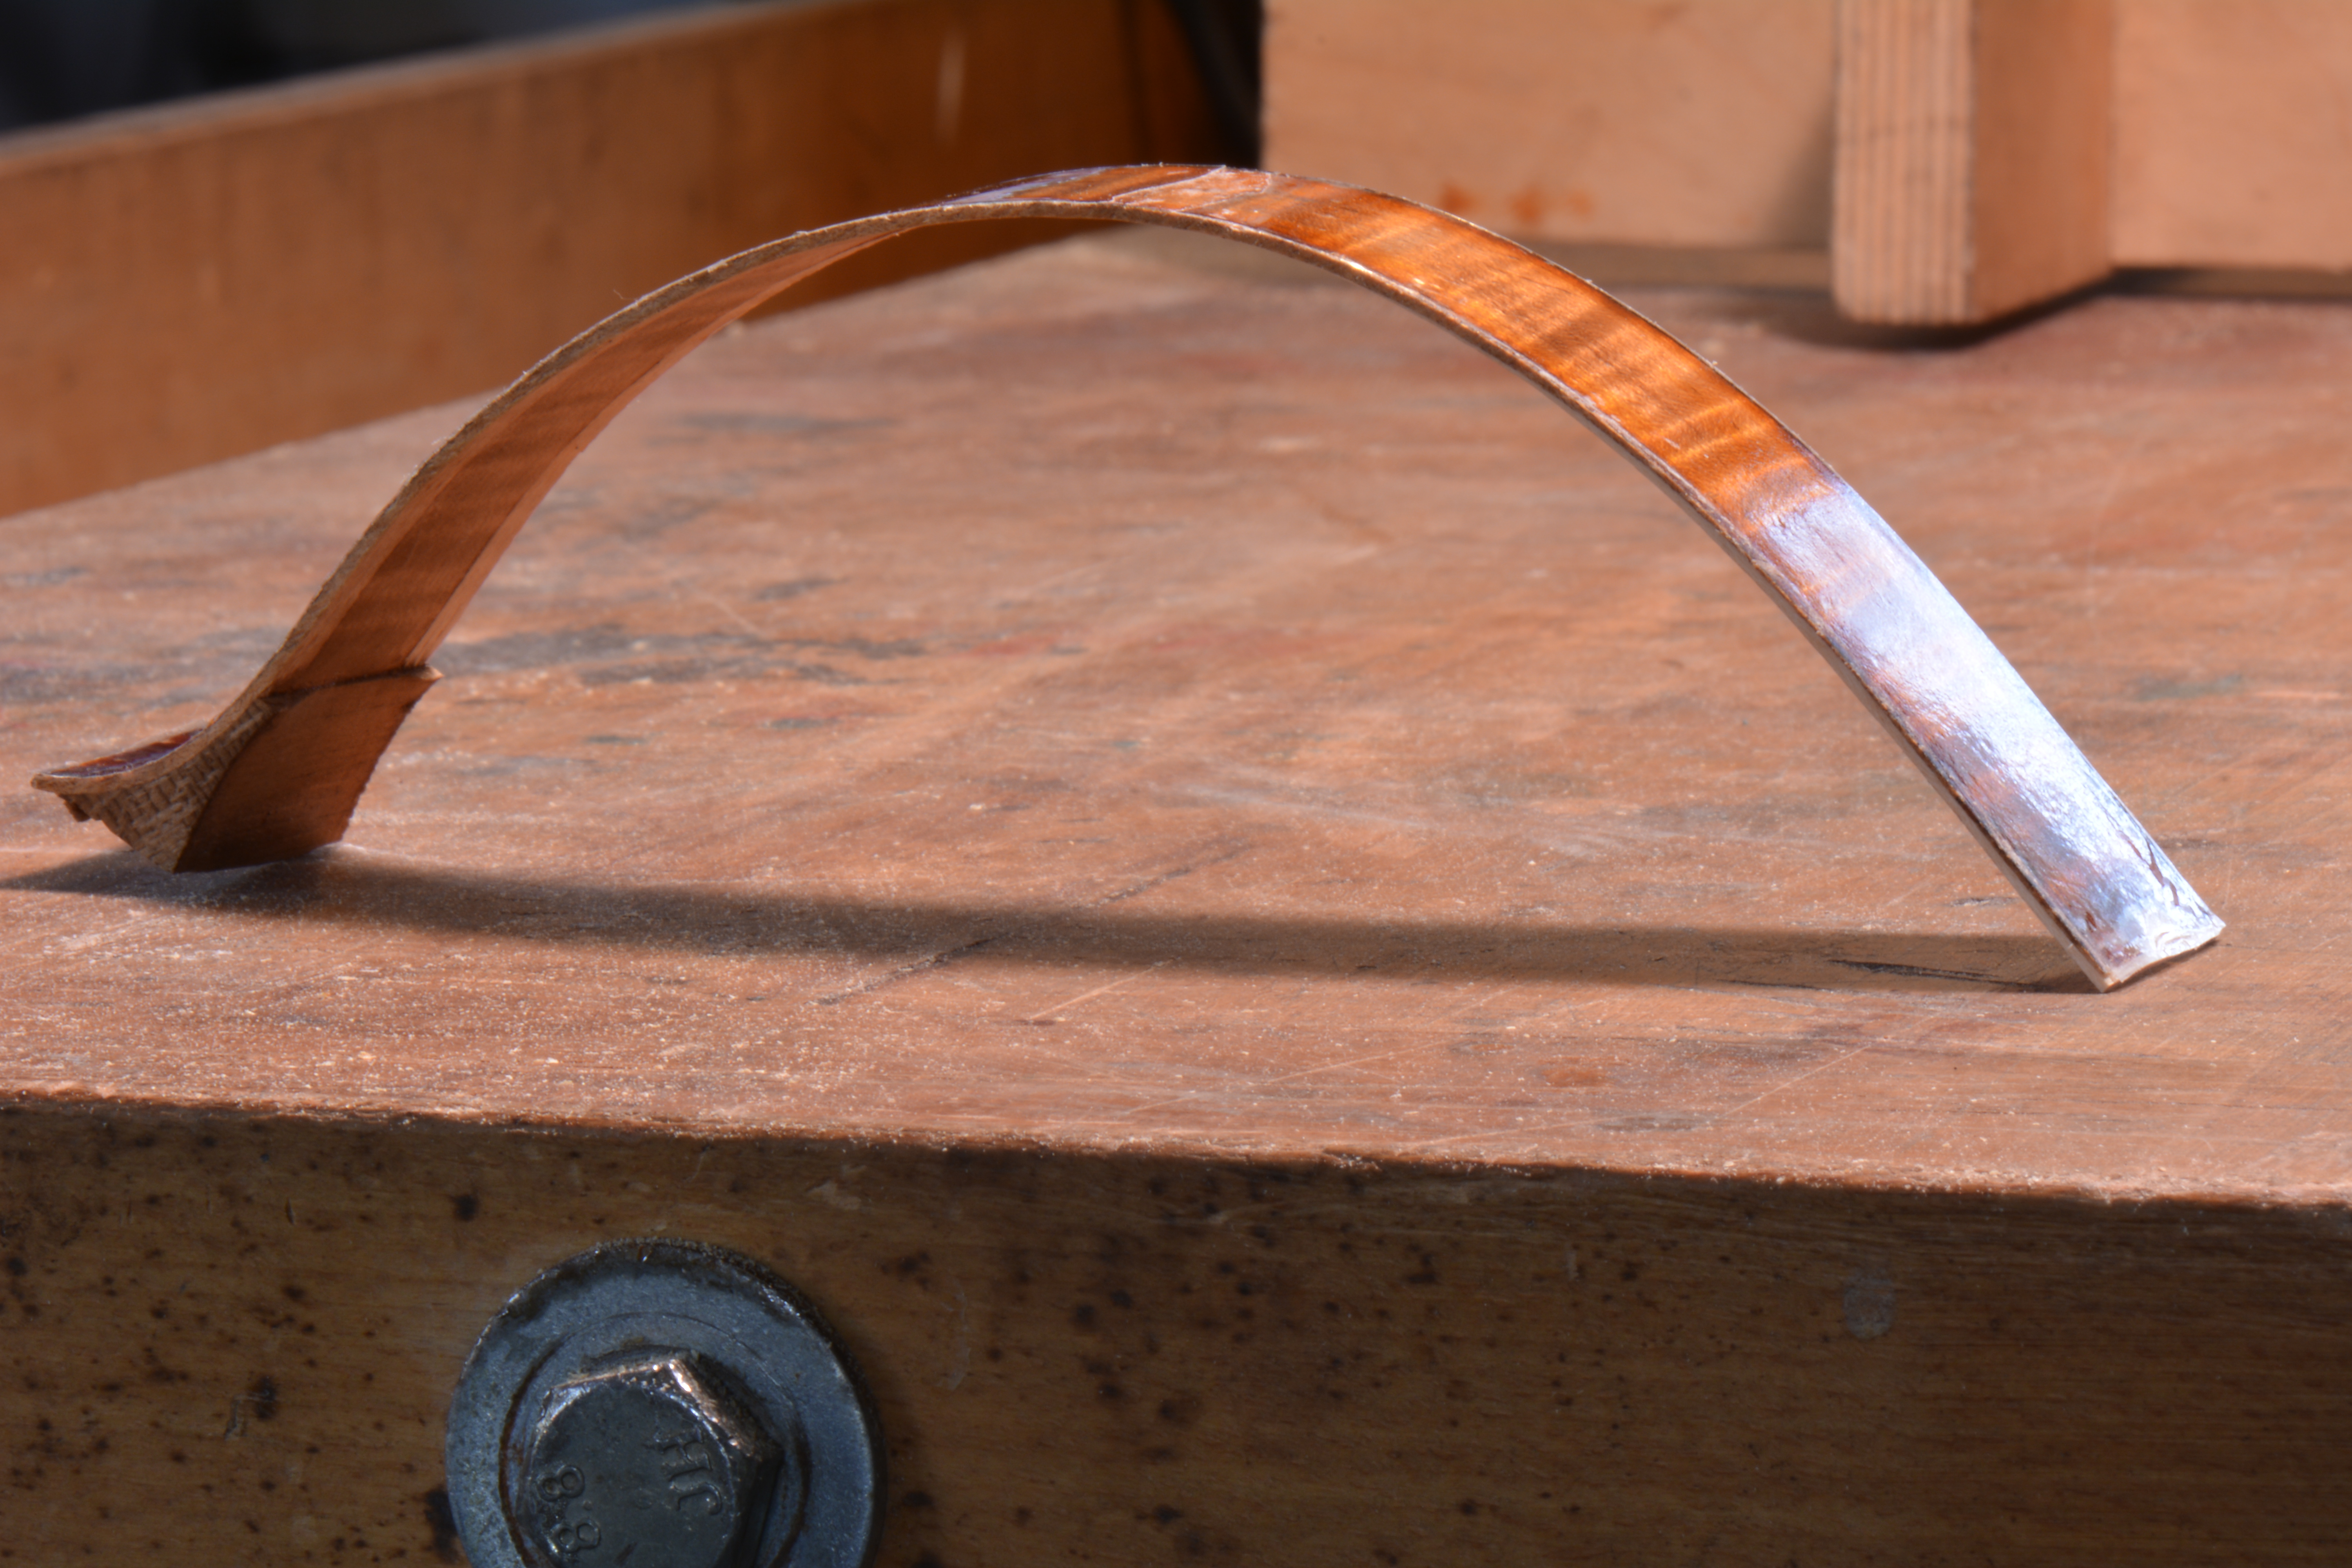
Graduate the Doubling

Once the rib is completely dry, graduate the doubling in the same manner that you did the ramp. The final number is the thickness of the original rib before the ramp. Remember to always work in the form!
Here is the rib at final thickness

Color the Rib
Before gluing the rib back onto the rest of the rib structure I colored the rib to help it blend in better with the other original material.
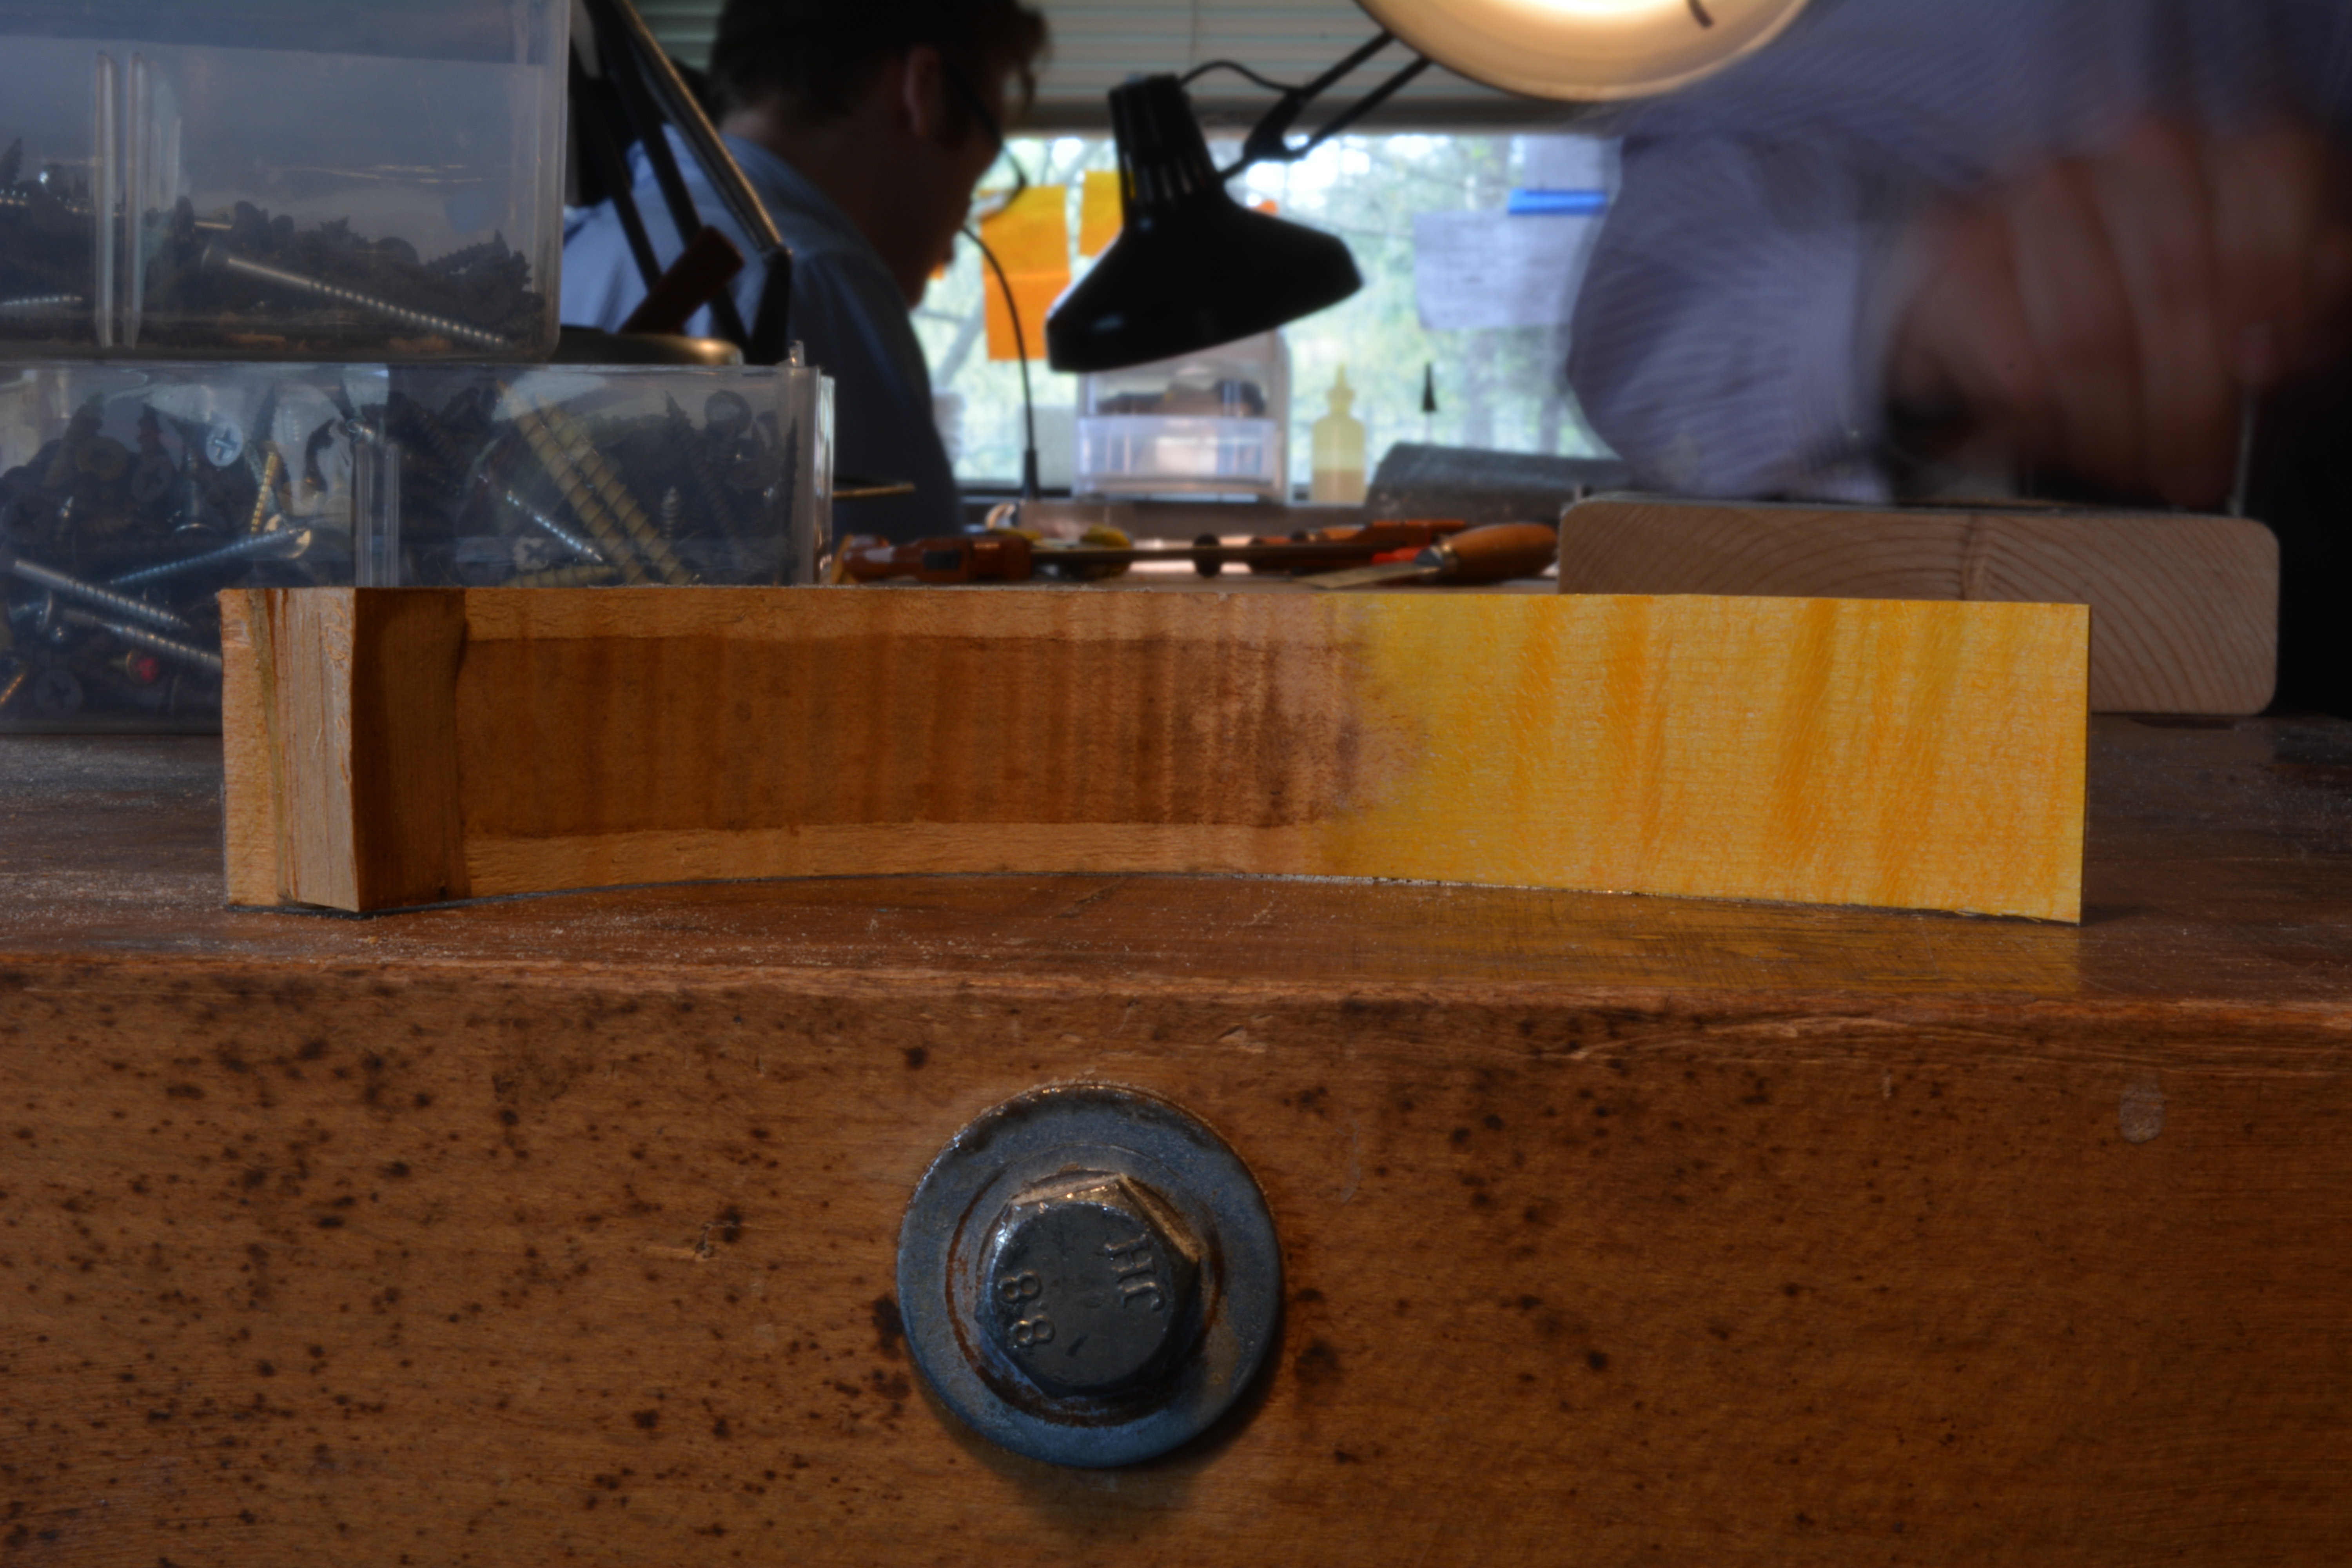
I started by treating the rib with potassium dichromate, which will initially turn the rib ninja turtle orange (cowabunga dude), but will eventually settle out and make the new wood look slightly grey. Ultra violet light also helps dichromate make this color change.
After the dichromate has died down, I used a combination of different dry pigments and Orasol dyes to get the finished color.

Here is the finished product.
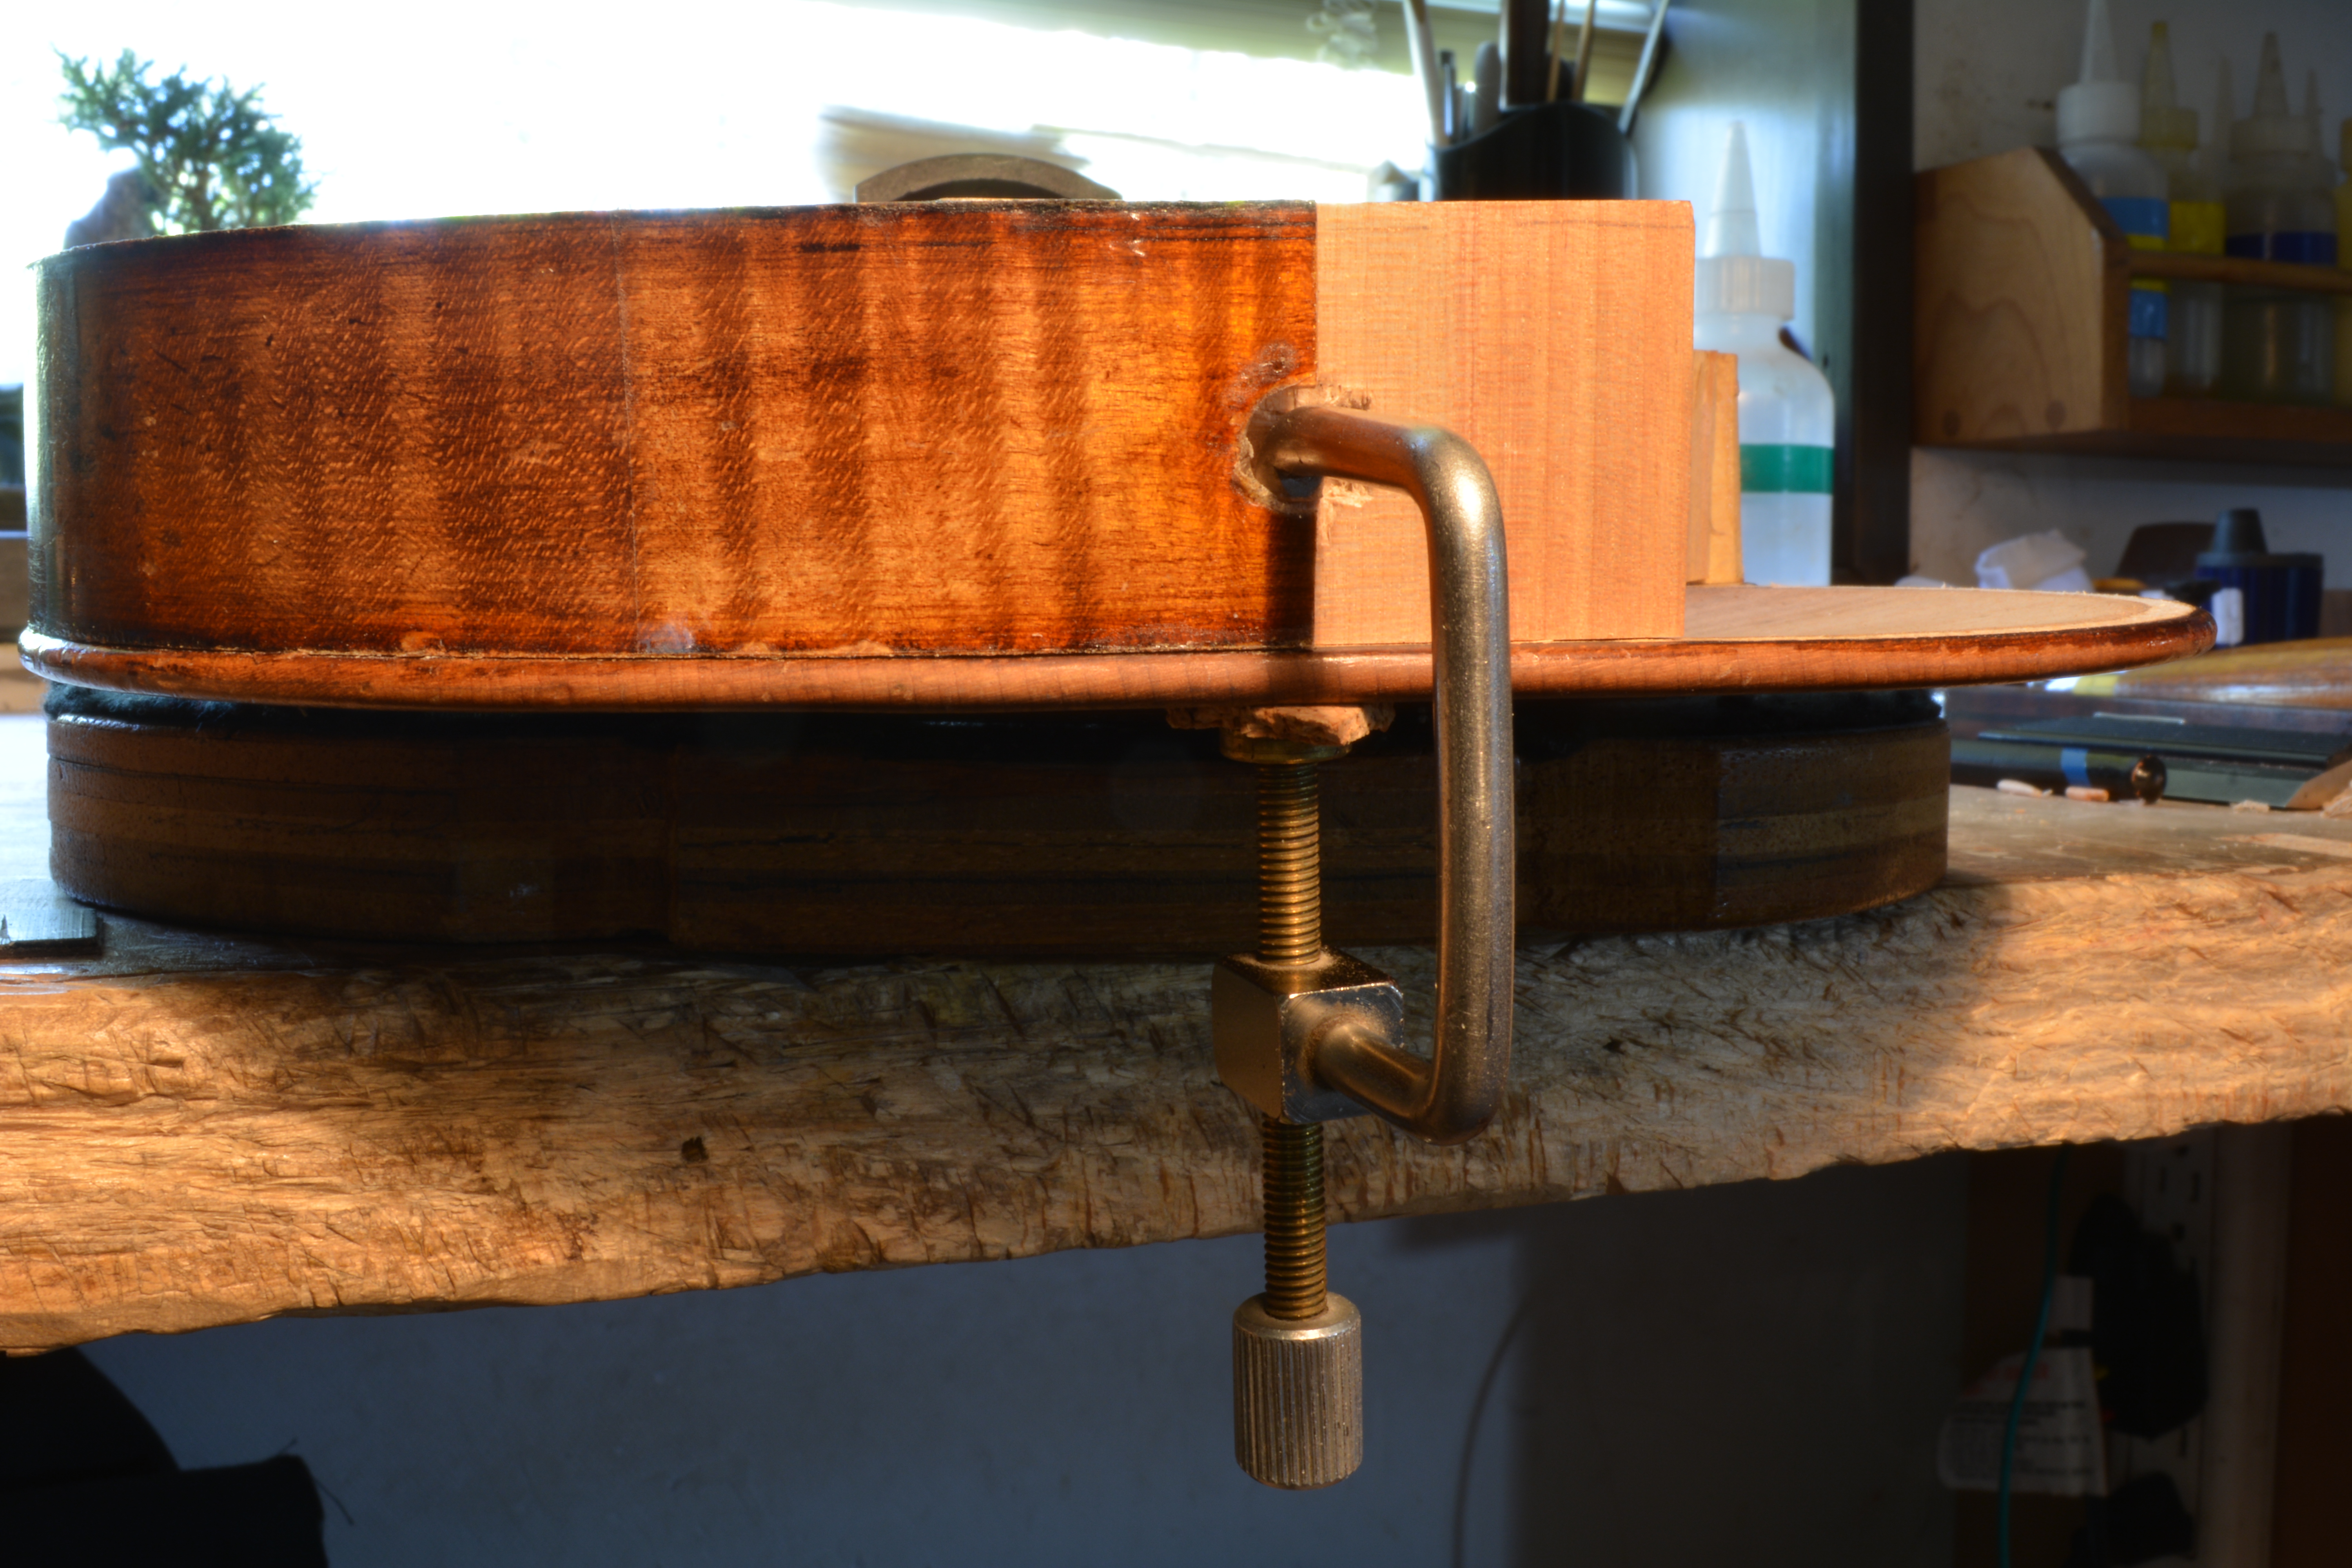
Glue On Rib
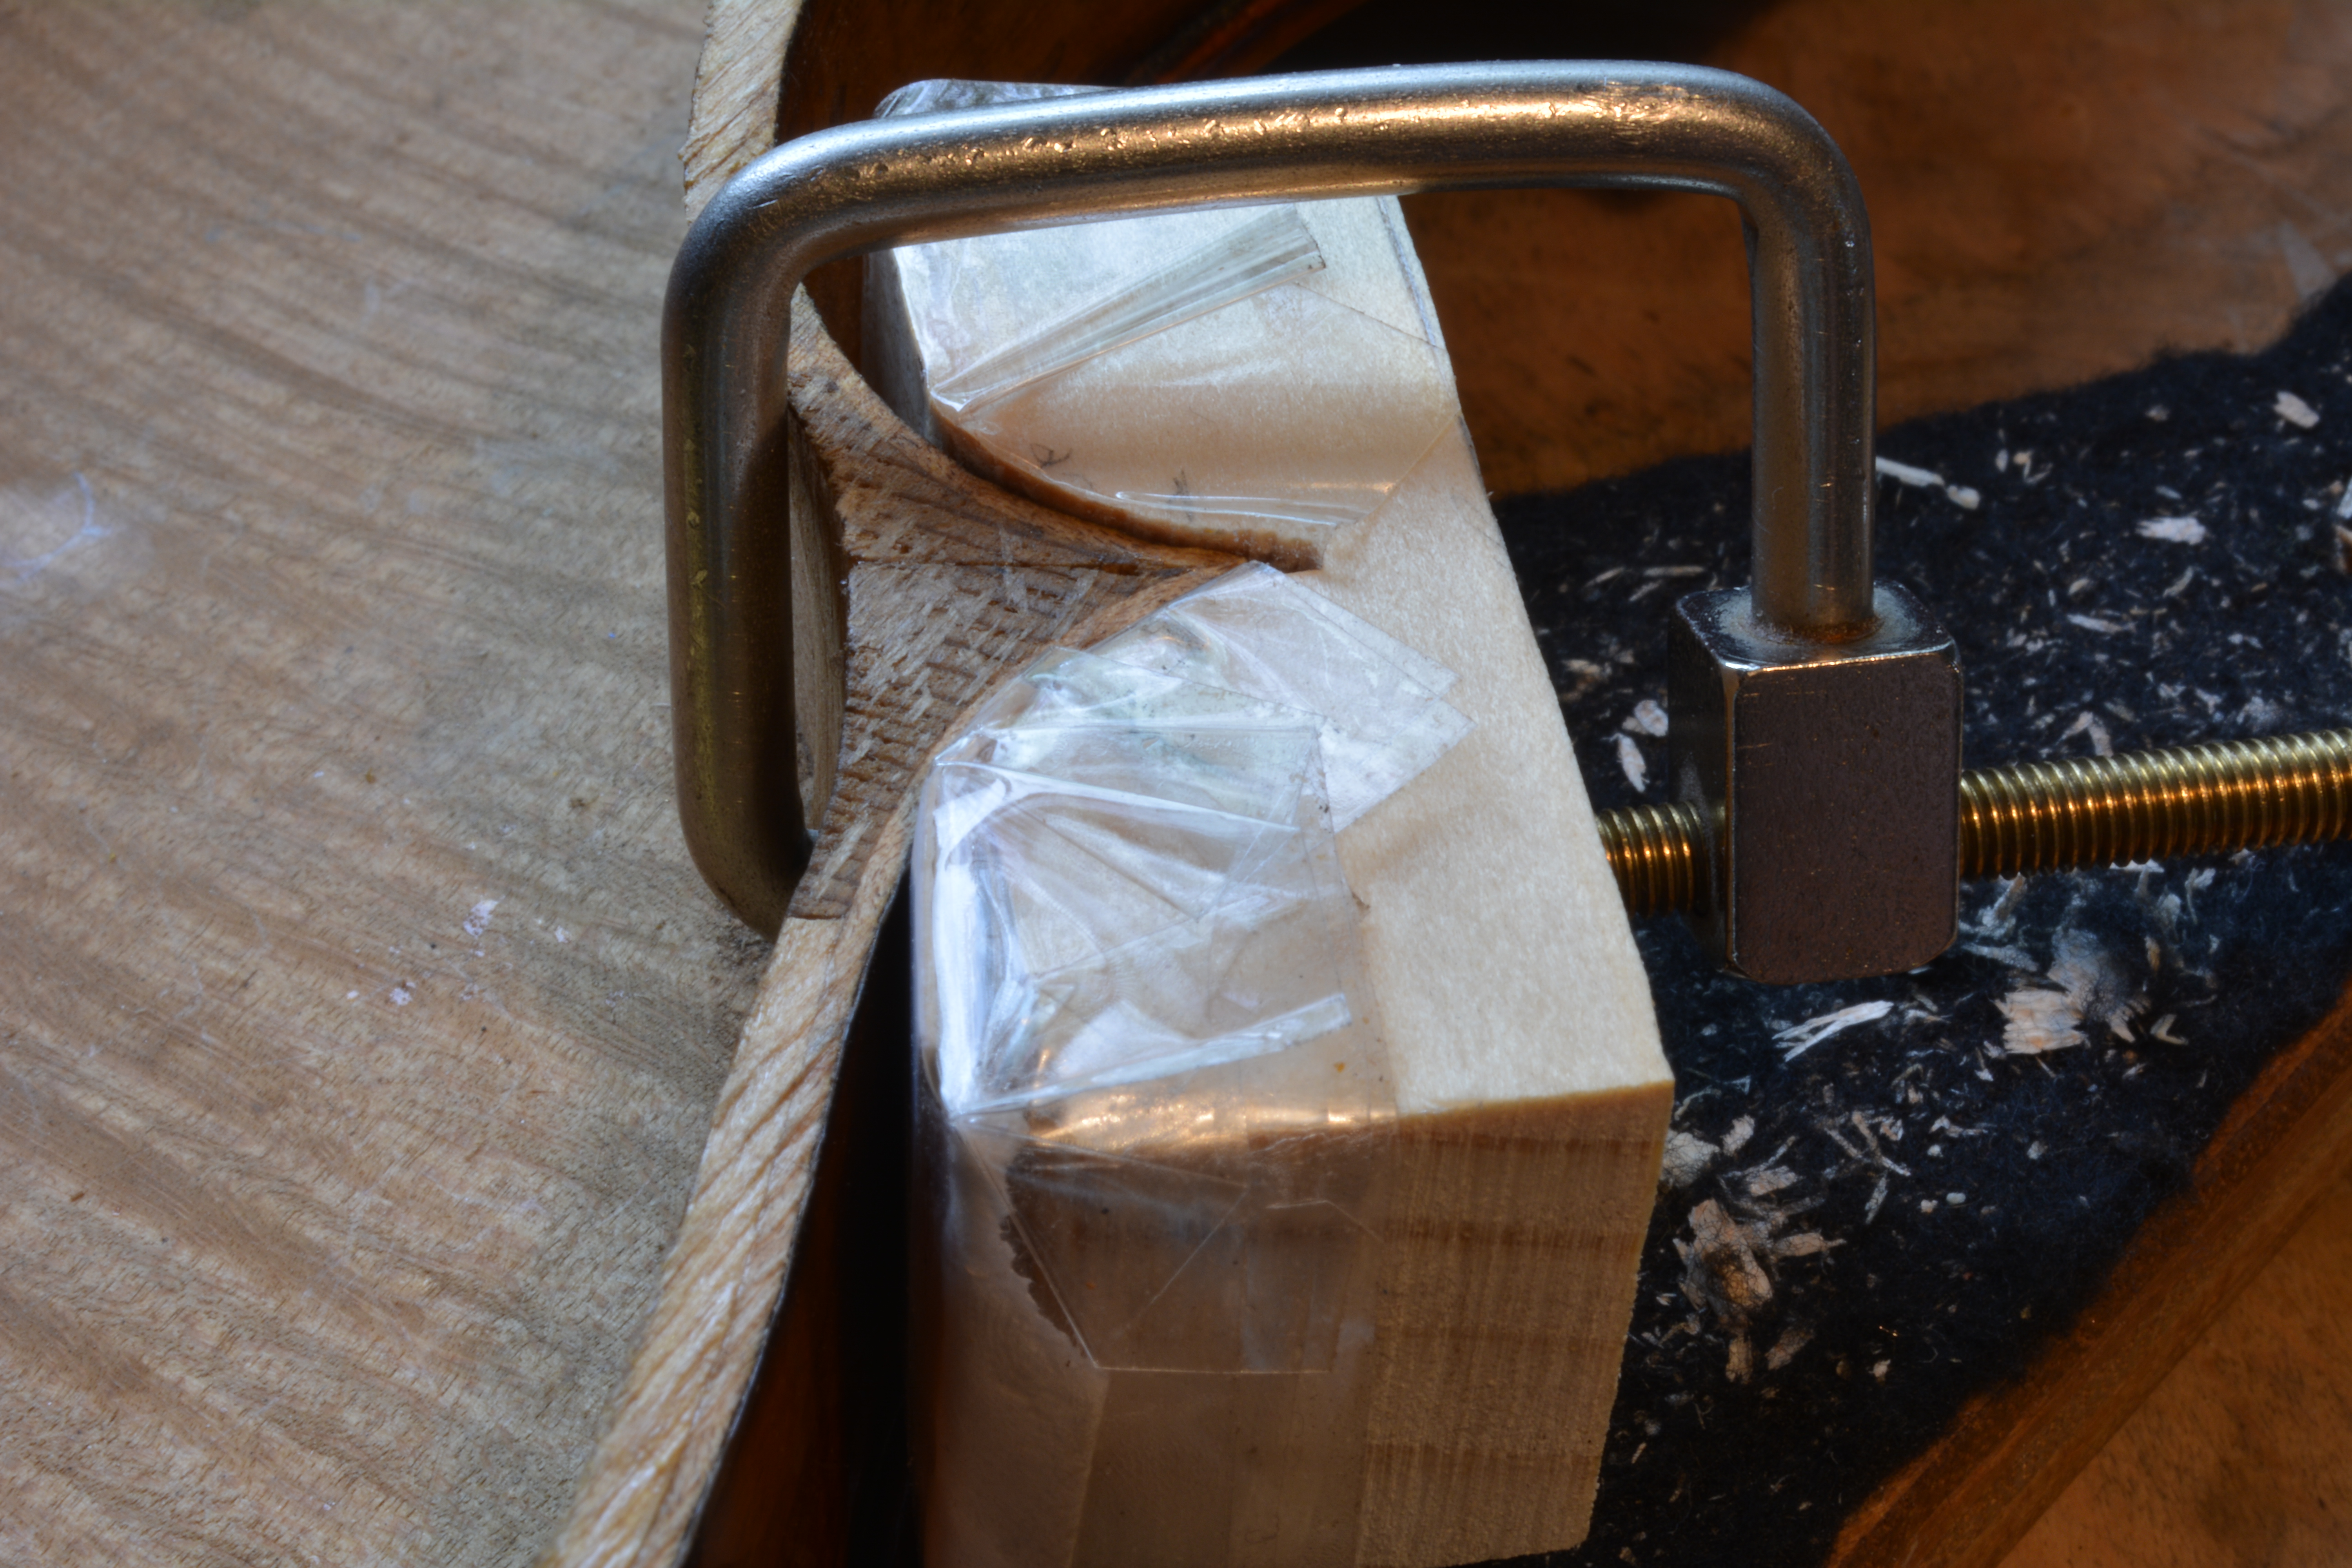
To glue the rib back on to the rib structure, make a caul that applies clamping pressure to the front of the the rib and block miter. With all of the caul pressure on this area it ensures that the rib miter will come together nicely, and the pressure on the back of the block will hold the rest of the block together.
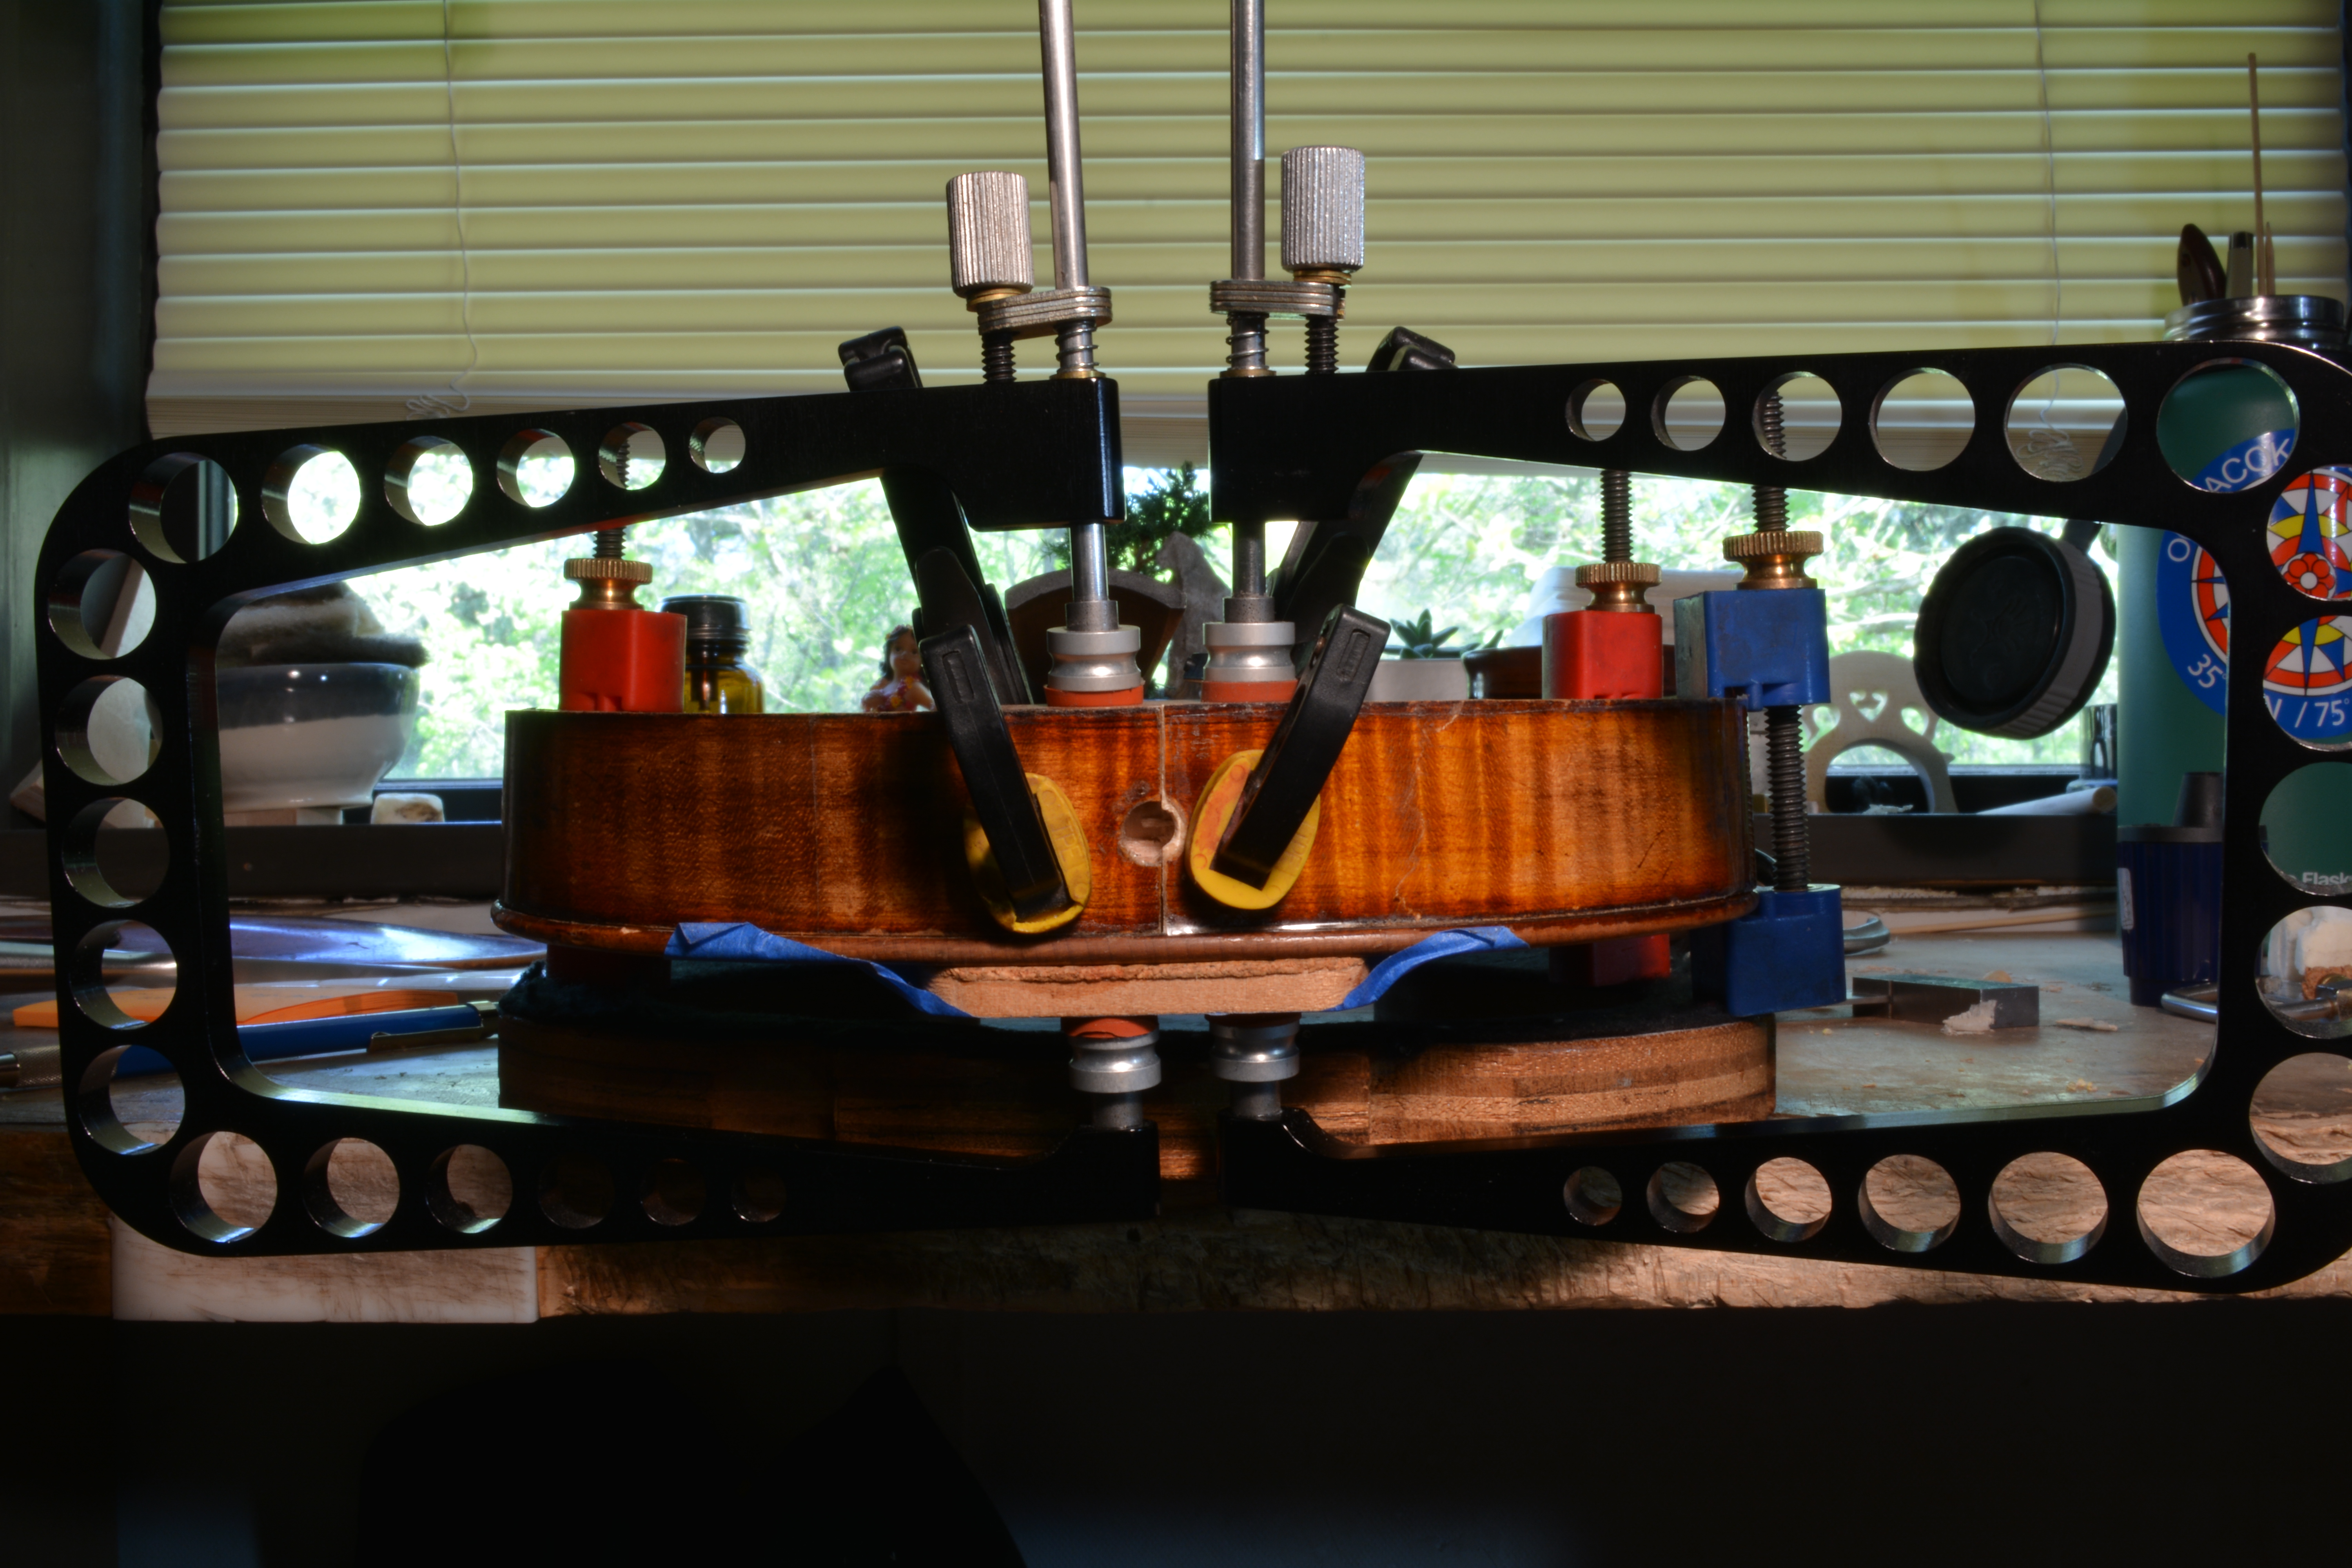
Shorten Rib
I left the doubling slightly long on the existing rib to give myself room to shorten the rib establishing the correct overhang, and ensureing that I have room to cleanly fit the rib miter. On this project I also replaced the block because it was damaged along with the top and rib.
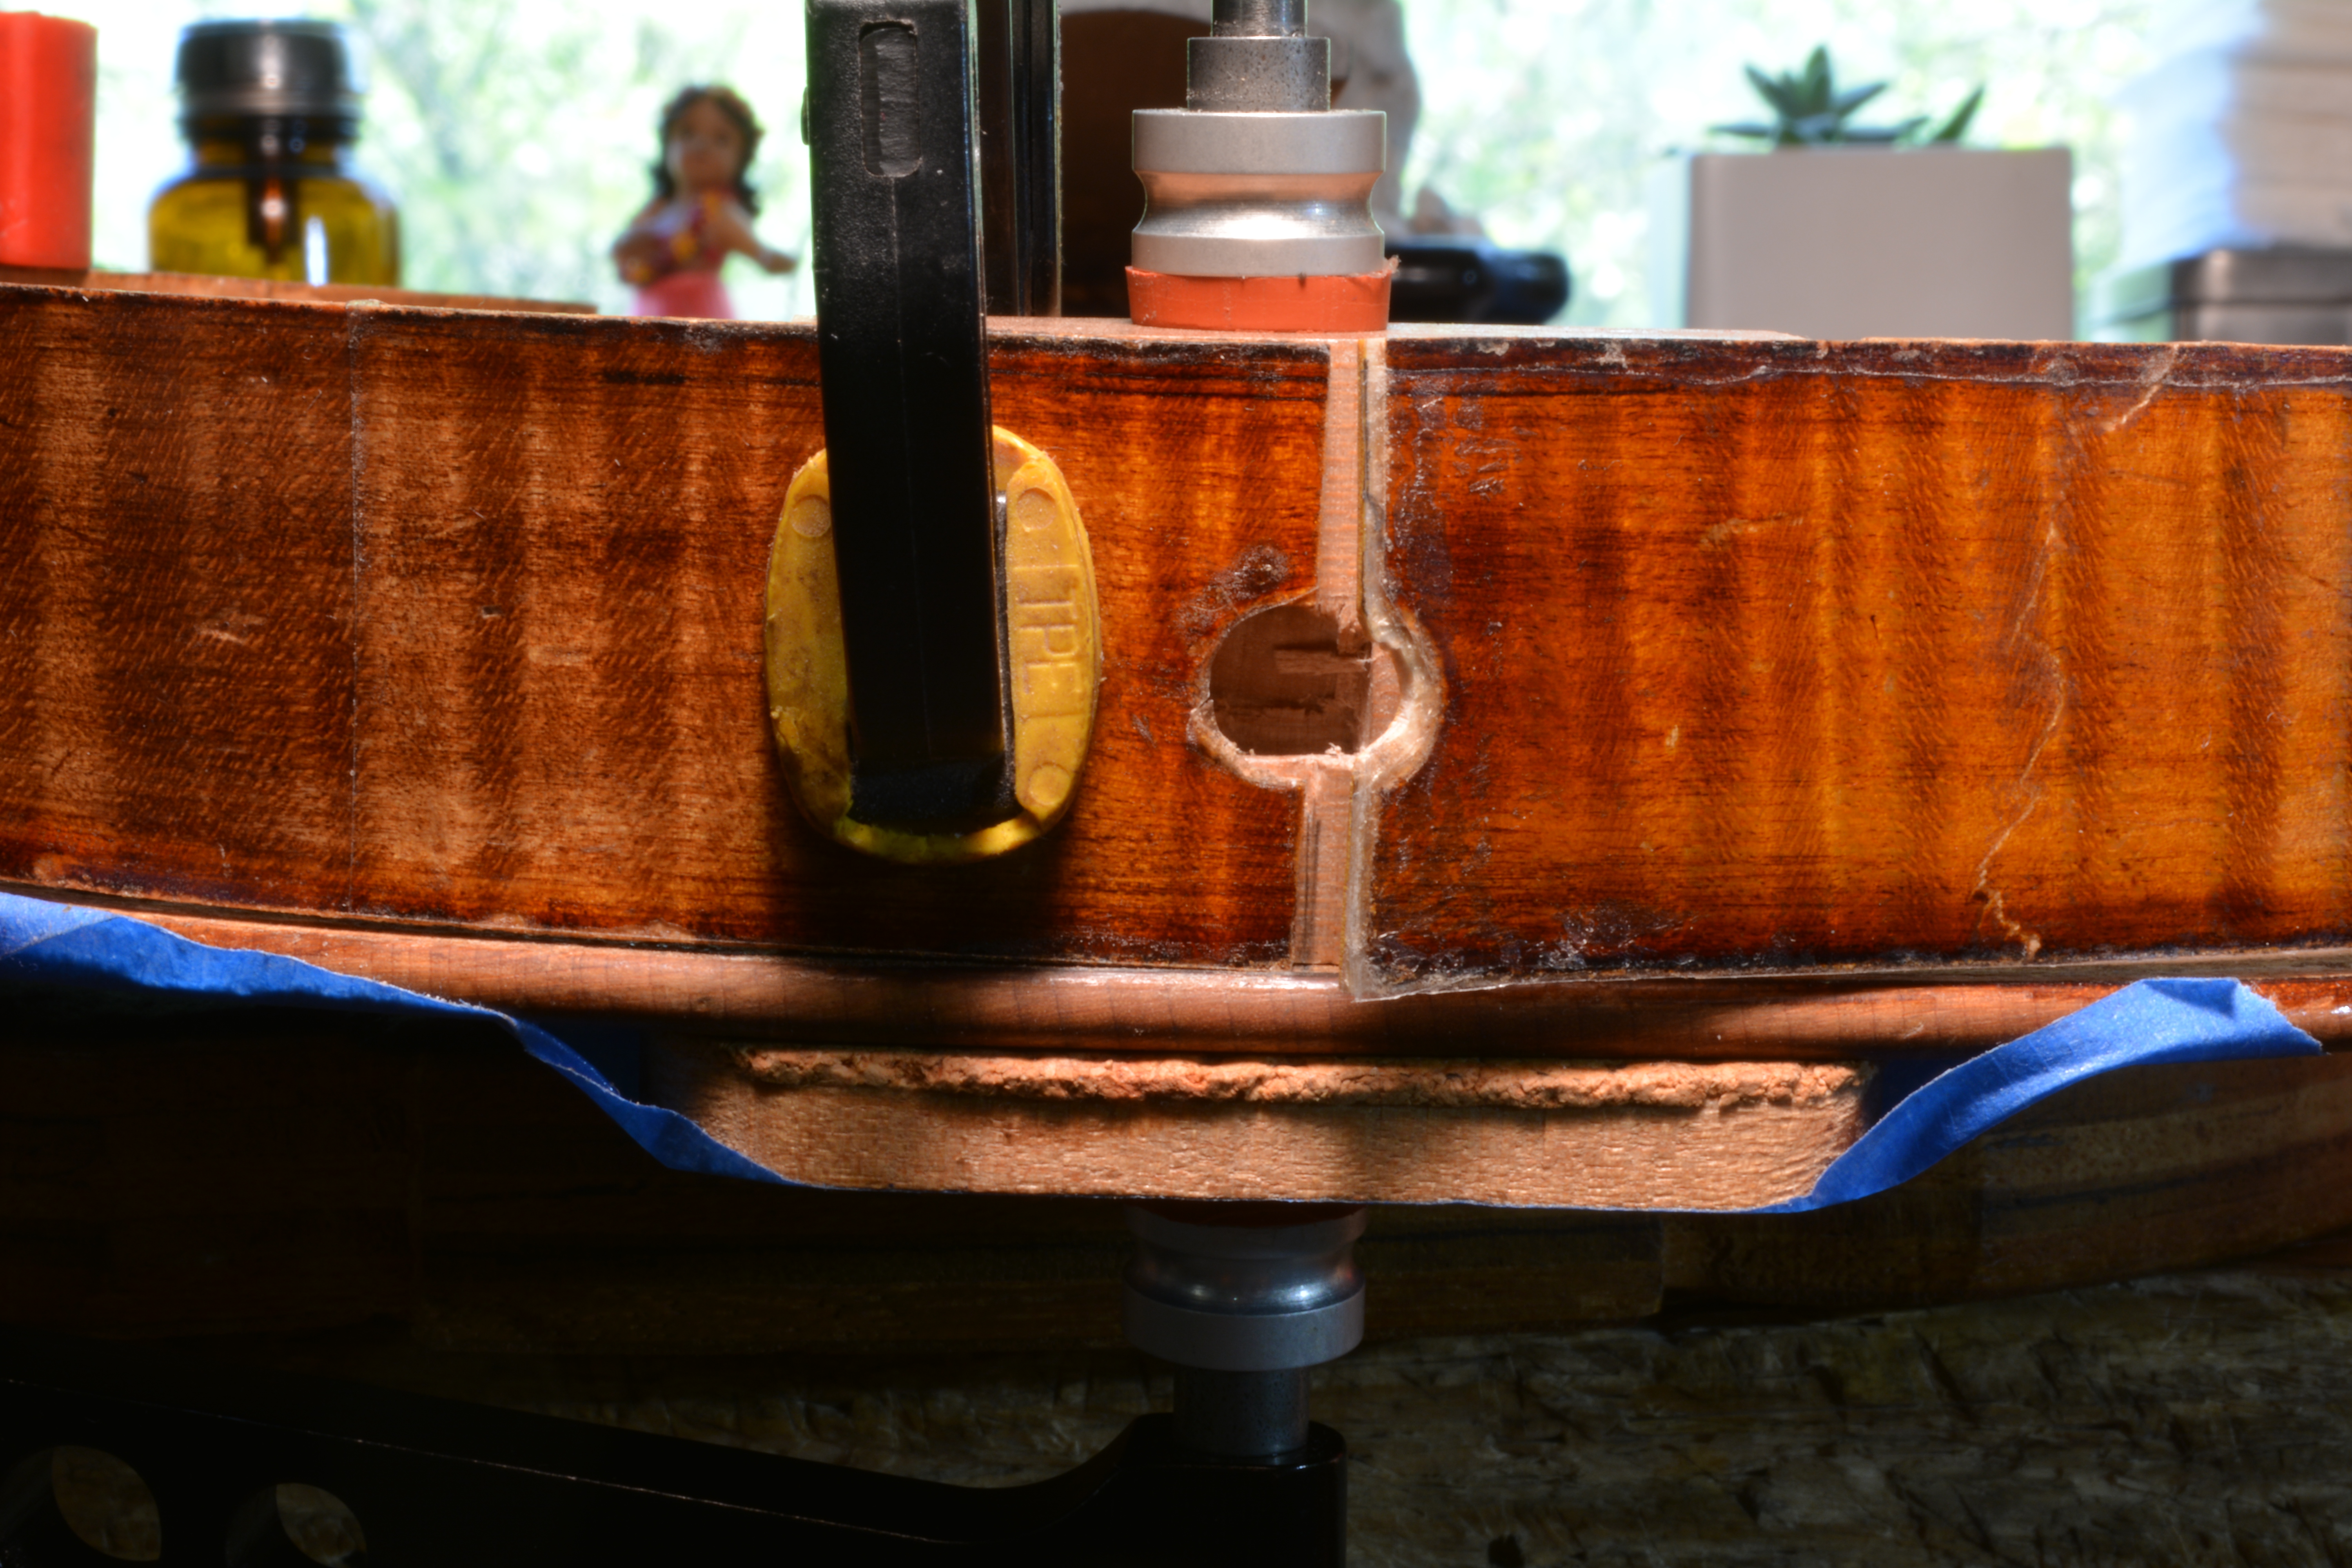
I carried out this operation with the ribs and new block clamped into place, while trimming the rib miter with a very sharp flat soled finger plane.

Retouch and Finish
There are other approaches to repairing a rib crack perpendicular to the grain, but this approach worked well in this case. It helped us hold a balance between leaving as much original varnish material as possible, while making the crack strong and durable.